Event 1
Arthur’s conception and birth
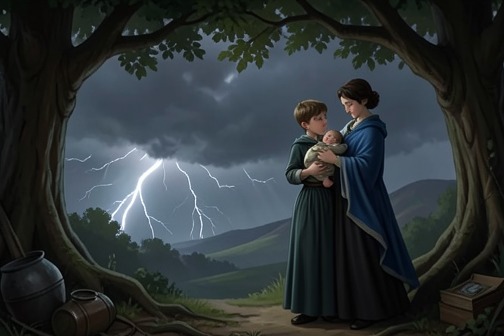
[Arthur’s conception and birth](entity:event-recall-event-arthur-s-conception-and-6ba4c57bd267) give the larger story its founding irony: the future king is born through [Uther Pendragon](entity:character-recall-character-uther-pendragon-76932b817c39)’s crime, while the secrecy surrounding his parentage helps set in motion the doom that will eventually destroy him and his fellowship. His rise is nevertheless publicly ratified as a providential claim to rule, and the narrative places that miraculous recognition beside the hidden guilt from which his story begins.
## Concealed Origins and Prophecy
The story’s account of [Arthur](entity:character-recall-character-arthur-2e33b65bbe57)’s beginnings links Uther Pendragon’s crime to the concealment of Arthur’s parentage. Arthur grows up not knowing his true origins. That ignorance later permits an illicit relationship with a woman he does not know is his sister, and from it [Mordred](entity:character-recall-character-431d80a88894) is born. The succession of consequences makes Arthur’s birth more than a dynastic beginning: the secret is the first link in a chain of guilt and catastrophe.
A prophecy names the danger that follows. Arthur is warned that God is displeased with him and that his sister will bear a child who will destroy him and the knights of his realm. The warning gives the hidden family relationship a public, fateful meaning, even though its consequences are not immediately visible. Arthur’s attempt to prevent the prophecy’s fulfillment through a cruel act fails; the foretold danger remains part of the story’s design.
## Birth and the Claim to Rule
The political crisis surrounding Uther Pendragon’s death turns Arthur’s concealed birth into a question of legitimate succession. Before dying, Uther publicly gives Arthur his blessing and declares that his son should be king after him. He charges the barons to support Arthur’s rightful claim, under pain of forfeiting that blessing. Yet the declaration does not settle the succession: after Uther’s death, the realm remains in jeopardy as powerful lords strengthen themselves and many aspire to the crown.
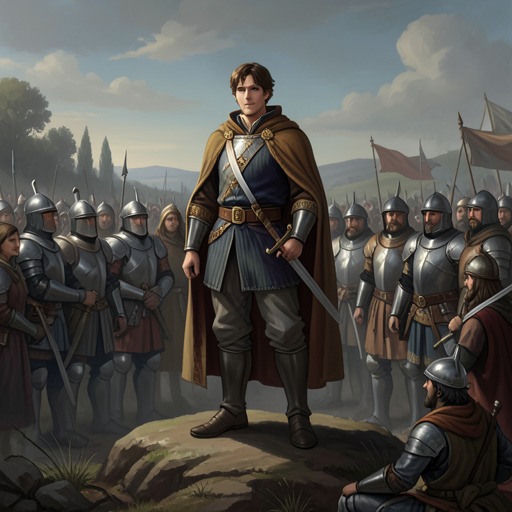
At [Merlin](entity:character-recall-character-merlin-3f8c52535684)’s counsel, the archbishop summons the lords and men of arms to [London](entity:location-recall-location-1bfd335cdd1b) at [Christmas](entity:time-recall-time-christmas-a573265d0167), where a sword set in a stone and anvil announces that whoever can draw it is [England](entity:location-recall-location-england-b153c1f368ea)’s rightful-born king. Many try and fail. At [Pentecost](entity:time-recall-time-16e2becf2ca1), Arthur alone draws the sword before the assembled lords and commoners. Their acclamation turns the test into public recognition of his kingship; Arthur forgives those who had delayed him, offers the sword at the altar, and is crowned. The episode thus establishes his authority through both Uther’s deathbed blessing and a sign accepted by the realm.
## From Recognition to Rule
Arthur’s accession carries practical obligations as well as symbolic force. He swears to rule justly, restores lands taken from their rightful holders during the disorder after Uther’s death, and appoints officers to govern and defend the kingdom. His authority is not instantly secure: he must still overcome opposition, and the narrative later describes his power extending across the north, [Scotland](entity:location-recall-location-scotland-4e112aa71aa3), and [Wales](entity:location-recall-location-6d9a7b286e78) through his own prowess and that of his knights.
The same pattern of contested sovereignty reappears in his dealings with [Rome](entity:location-recall-location-f3877a21016f). When aged ambassadors demand tribute for the emperor, Arthur refuses their claim and asserts that he owes tribute to no earthly prince. He then states that he intends to claim the empire himself. His early recognition as England’s rightful king therefore leads into a much broader exercise of sovereignty, while the story’s opening prophecy continues to shadow the achievements of his reign.
## Tragic Significance
The account frames Arthur’s life as a completed epic whose prosperity cannot erase the causes of its ending. The concealment of his parentage leads to the forbidden relationship and Mordred’s birth; a further warning connects the marriage to [Queen Guenever](entity:character-recall-character-queen-guenever-f27d6f31454b) with the later damage caused by her love for [Sir Launcelot](entity:character-recall-character-sir-launcelot-c0ea01c62d3d). These dangers remain hidden for years while Arthur and the [Round Table](entity:object-recall-object-round-table-04fef19b82fd) bring order to a realm described as anarchic and extend their renown through conquest.
The contrast is central to the event’s significance: Arthur’s kingship appears divinely confirmed, yet its beginnings carry a guilt that providential signs cannot undo. The eventual conflict with Mordred is not an unrelated interruption of a successful reign but the return of a danger rooted in the concealed family history. In this account, Arthur’s birth establishes both the possibility of political order and the tragic conditions under which that order will fail.
Event 2
五月日婴儿屠杀与莫德雷德幸存
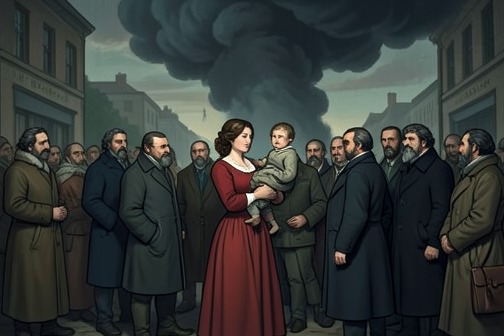
The [May](entity:time-recall-time-may-1281a8b8ee63)-day infant massacre and [Mordred](entity:character-recall-character-431d80a88894)’s survival are a tragic turning point in the account of [King Arthur](entity:character-recall-character-king-arthur-2b97864f54aa): an attempt to escape a prophecy instead places its surviving child at the center of the doom [Arthur](entity:character-recall-character-arthur-2e33b65bbe57) sought to prevent. The episode joins the secret of Arthur’s birth to the later fall of his kingdom, making the story’s apparent triumphs unfold beneath a threat that cannot be undone.
## Prophecy and Its Cause
The account traces the danger back to [Uther Pendragon](entity:character-recall-character-uther-pendragon-76932b817c39)’s crime, which leads to Arthur’s parentage being concealed from him. Unaware that the woman he loves is his sister, Arthur fathers Mordred. [Merlin](entity:character-recall-character-merlin-3f8c52535684)’s warning connects this hidden kinship to the future destruction of Arthur and the knights of his realm. The infant-removal order follows from that prophecy: Arthur tries to prevent its fulfilment, but the attempt does not erase the circumstances that gave it force.
## The May-day Order and Mordred’s Survival
The chapter heading records that all children born on [May Day](entity:time-recall-time-may-day-c9cdfdf972a4) were sent for and that Mordred was saved. The episode is thus framed not simply as an order against infants but as a failed effort to separate one prophesied child from the future foretold for him. Mordred’s survival preserves the line of consequence that the order was meant to break; the narrative does not treat the act as a successful escape from fate.
## The [Doom](entity:concept-recall-concept-530a46a89beb) Unfolds
The prophecy’s consequences remain latent while Arthur’s reign rises to extraordinary power. With the fellowship of the [Round Table](entity:object-recall-object-round-table-04fef19b82fd), he brings order to a realm described as anarchic, extends his rule across [England](entity:location-recall-location-england-b153c1f368ea), [Wales](entity:location-recall-location-6d9a7b286e78), and [Scotland](entity:location-recall-location-scotland-4e112aa71aa3), and marches to [Rome](entity:location-recall-location-f3877a21016f) to become emperor. These victories make the earlier warning seem distant, yet they do not cancel it. The later warning about the danger posed by [Queen Guenever](entity:character-recall-character-queen-guenever-f27d6f31454b)’s love for [Sir Launcelot](entity:character-recall-character-sir-launcelot-c0ea01c62d3d) supplies another seed of disaster, and the long prosperity of the kingdom gives the eventual collapse its force.
## Narrative Significance
The episode belongs to a larger pattern in which efforts to resist doom prove weaker than the chain of events already set in motion. Arthur’s order is presented as the only cruel deed of his life, but its failure leaves the prophecy intact and Mordred alive. In the book’s tragic design, the kingdom’s splendor and the fellowship of the Round Table are real achievements, not illusions; their eventual destruction is made more affecting because it comes after such success. The survival of the child turns an attempted prevention into part of the story’s causal path toward its ending.
Event 3
巴林施下悲痛一击
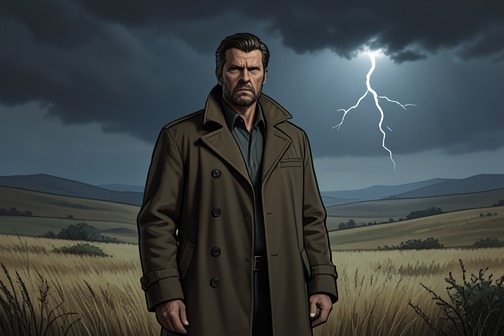
[Balin’s Dolorous Stroke](entity:action-recall-action-balin-s-dolorous-strok-66994df5aa3f) is the blow [Balin](entity:character-recall-character-balin-4b106c0600f6) delivers to [King Pellam](entity:character-recall-character-king-pellam-3f2bbc2daf06) with a spear after his sword breaks. Framed by the preceding interment of twelve kings and [Merlin](entity:character-recall-character-merlin-3f8c52535684)’s prophecy, the encounter marks a pivotal turn in Balin’s story: a fight between two men becomes the fulfillment of a foretold calamity.
## Prophecy and Context
The episode follows the burial of twelve kings, accompanied by Merlin’s prophecy that Balin would give the Dolorous Stroke. That sequence gives the later combat a weight beyond its immediate circumstances: the blow has been announced in advance and linked to the fate of rulers. The chapter heading identifies Merlin’s prophecy as part of the event’s narrative frame, while the account of the interment establishes the scale of the loss that precedes it.
## The Fight with King Pellam
Balin fights King Pellam, but his sword breaks during the combat. He takes up a spear and strikes Pellam with it; the narrative names this blow the Dolorous Stroke. The broken sword and substituted spear make the stroke a sudden reversal within the fight, while its prophetic designation turns the weapon’s use into the realization of Merlin’s warning.
## Consequences and Significance
The headings place the stroke within a sequence that begins with the burial of twelve kings and continues with Balin’s deliverance by Merlin. They establish the stroke as more than an isolated exchange of arms: it stands at the center of a foretold disaster and helps organize the surrounding episodes into a tragic sequence. The supplied account identifies the participants, the broken sword, the spear, and the prophecy, but does not specify the stroke’s physical effects on Pellam; those details cannot be stated more precisely here.
Event 4
Balin and Balan’s final combat
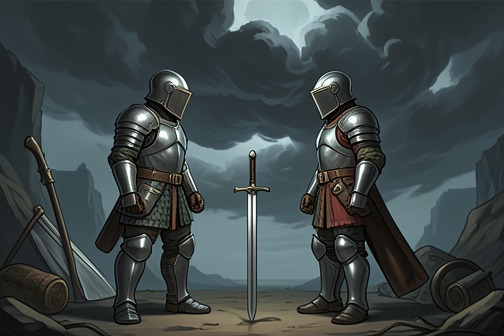
[Balin and Balan’s final combat](entity:event-recall-event-71fa4e5ed0df) is the fatal encounter between two brothers who do not know whom they face: each wounds the other, and both die. [Merlin](entity:character-recall-character-merlin-3f8c52535684) buries them together in one tomb, making their shared grave the concluding image of a conflict that turns kinship into mutual destruction through ignorance.
## The Encounter
The chapter heading introduces the event as a meeting between [Balin](entity:character-recall-character-balin-4b106c0600f6) and his brother [Balan](entity:character-recall-character-balan-abfb5ce228d0). Though bound by blood, they meet as opponents without recognizing each other. Each strikes the other, and the combat ends with both brothers mortally wounded. The account does not give further circumstances for the encounter in this brief chapter summary; its decisive fact is the fatal failure of recognition.
## Burial and the Sword
The following chapter heading moves from the brothers’ deaths to Merlin’s response: he buries both in one tomb. Their joint burial preserves their kinship at the moment when their lives have been divided by combat. The same heading also points to Balin’s sword, linking the aftermath to an object associated with Balin, though it does not specify what Merlin does with it.
## Narrative Significance
The episode brings the brothers’ story to a close through a stark reversal: men who are related as brothers become each other’s killers because neither knows the other’s identity. The paired headings make recognition’s absence and the shared burial the event’s central contrasts. Their common tomb restores a bond in death that the combat could not preserve in life, while the mention of Balin’s sword leaves the weapon as part of the aftermath.
Event 5
亚瑟征讨罗马并加冕为帝
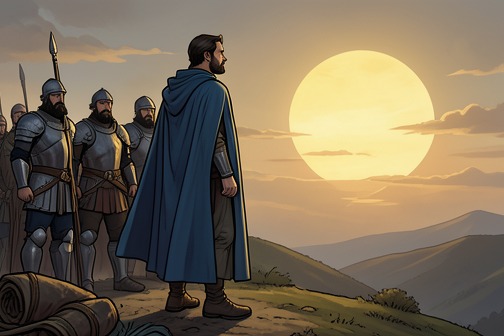
[Arthur](entity:character-recall-character-arthur-2e33b65bbe57)’s Roman campaign begins as a refusal to accept an imperial claim and ends, in the romance’s account, with his coronation in [Rome](entity:location-recall-location-f3877a21016f). By making tribute the issue on which he will not yield, Arthur turns diplomacy into war and asserts a rival title to sovereignty; the victory carries him from [Britain](entity:location-recall-location-01048caf1f48) across the Continent and places him, for a time, at the head of an empire. The editor recounts the episode as part of the legendary career of the great hero of English romance, while warning that its successive events cannot be contained within established history.
## The Roman demand and Arthur’s answer
The campaign’s political premise is made explicit when twelve elderly envoys arrive from Emperor Lucius to demand tribute for Britain. They present Rome’s claim as an inherited obligation, invoking Julius Caesar’s conquest and saying that Arthur’s predecessors had paid what was due. Lucius threatens war and punishment if Arthur refuses. Arthur first says he will consult his council, and he protects the messengers from the young knights who want to attack them: they are to be lodged and treated well while carrying Rome’s demand, despite the insult its terms imply.
The dispute is not merely over payment. When Arthur gives his answer before his assembled lords and knights, he rejects any obligation to pay tribute to an earthly ruler, Christian or heathen, and claims sovereignty over the empire through the rights of his predecessors, the former kings of Britain. He declares his intention to march on Rome and take possession. The envoys receive generous gifts and their expenses are paid; Sir [Cador](entity:character-recall-character-cador-b793b350c147) escorts them out of the country, and they sail from [Sandwich](entity:location-recall-location-e7b49b3e89a3) on their return. The contrast is pointed: Arthur denies Rome’s authority while observing the obligations of hospitality toward its representatives.
## Alliance, preparation, and departure
The kings and lords at Arthur’s court pledge military support. King Anguish of [Scotland](entity:location-recall-location-scotland-4e112aa71aa3) argues that Arthur should not submit and promises twenty thousand fighting men at his own expense; the king of Little Britain offers thirty thousand, and other allies make their own commitments. [Sir Launcelot](entity:character-recall-character-sir-launcelot-c0ea01c62d3d) and the remaining lords likewise promise forces. Arthur thanks them and orders the Roman envoys to be given his answer in public, turning the council’s shared resolve into a visible declaration of war.
The campaign also requires arrangements for governing Britain in Arthur’s absence. In the chapter sequence, the Roman demand is followed by the allies’ promises and then by Arthur’s parliament at [York](entity:location-recall-location-york-6b9d2a502b1a), where he orders how the realm is to be governed while he is away. The printed contents also mark episodes of Roman spies, battles against Lucius, Arthur’s advance into [Italy](entity:location-recall-location-125be658b0d0), and [Sir Gawaine](entity:character-recall-character-sir-gawaine-bf0b0cf3eb43)’s return with prisoners. Together these headings place the expedition within both military action and the administration needed to sustain the king’s authority at home.
## Battles and the imperial coronation
The broader account describes Arthur crossing the sea from Sandwich to Barflete in [Flanders](entity:location-recall-location-254b16a0e553), meeting the united forces of the Romans and Saracens in [Burgundy](entity:location-recall-location-b77e5ac6363d), and killing Lucius in a great battle. Among the enemy dead are Lucius’s allies, identified as the Sultan of Syria and the kings of Egypt and Ethiopia. Arthur sends their bodies to the Senate and Podestà of Rome as the only tribute he will pay. The act answers the original demand in the language of conquest: the payment Rome receives is not revenue, but the defeated rulers themselves.
After the victory, Arthur follows the route over the mountains through [Lombardy](entity:location-recall-location-eea345b7c5c5) and [Tuscany](entity:location-recall-location-5aab1681c149) to Rome. There the Pope crowns him emperor. The account says that Arthur remains in Rome for a time, establishes his lands from Rome to [France](entity:location-recall-location-france-f5cafc8a8ad4), and grants lands and realms to his servants and knights. He then returns to [England](entity:location-recall-location-england-b153c1f368ea), where the narrative presents him as devoting himself thereafter to his duties as the head of Christian knighthood. The expedition therefore concludes not with a permanent residence abroad but with an expanded imperial claim and a return to the responsibilities of his British kingship.
## Romance geography and historical limits
The editor distinguishes the campaign’s narrative force from its historical reliability: apart from a geographical point mentioned in the discussion, the geography is described as fanciful, and the succession of places asks the reader to set ordinary expectations of time aside. The sequence of Arthur’s movements across Britain, Flanders, Burgundy, Italy, and Rome belongs to the romance’s sweeping scale, not to a chronology the editor claims can be historically established.
That qualification shapes the campaign’s significance. The episode imagines Arthur answering a demand for subordination by claiming a greater sovereignty, winning allies through a public council, and carrying British power to Rome. Its imperial conclusion magnifies the reach of the hero’s authority, while the editorial warning keeps that grandeur within the world of legend rather than presenting it as verified history.
Event 6
特里斯坦与伊索德饮下爱情药水
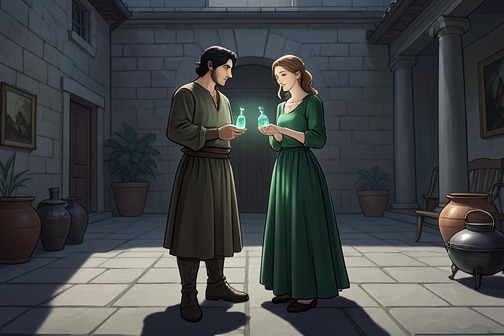
The episode of [Tristram](entity:character-recall-character-tristram-a0b006f42abd) and [Isoud](entity:character-recall-character-isoud-45c23b134f96) drinking the love potion is presented as a decisive hinge in their story: it occurs as Tristram is seeking Isoud for [King Mark](entity:character-recall-character-king-mark-7cea1086241a), and the chapter heading places the drinking immediately after that mission. The evidence establishes the event and its narrative position, but does not describe the potion’s preparation, how it was consumed, or the pair’s immediate reaction.
## Context and Sequence
The chapter heading first identifies Tristram’s task as demanding [La Beale Isoud](entity:character-recall-character-881eb87025df) for King Mark. It then names Tristram and Isoud’s drinking of the love drink as the chapter’s second linked episode. The sequence sets a royal marriage mission beside a private bond, establishing the conflict in outline without the supplied passage specifying the circumstances of the meeting or the drink.
## Narrative Significance
The heading gives the potion episode a structural role: it follows Tristram’s mission for King Mark and leads into the next chapter, which concerns Tristram and Isoud in prison and a fight connected with her beauty. These neighboring headings connect the drink to a continuing story of attachment, constraint, and conflict, although the evidence here does not state what the potion causes or explain how the imprisonment follows.
## Limits of the Evidence
The source calls the drink a love drink and confirms that both Tristram and Isoud drank it. It does not specify who supplied it, whether either person knew what it was, or what either felt afterward. Accordingly, the episode can be described as the narrative’s stated point of connection between the king’s marriage claim and the lovers’ story, but claims about its exact mechanism or immediate consequences go beyond the supplied evidence.
Event 7
Lancelot and Guinevere’s Affair and Its Consequences
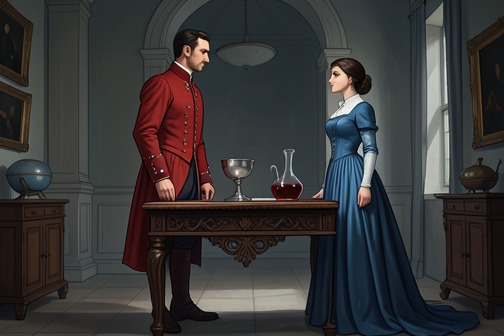
The affair between [Sir Launcelot and Queen Guenever](entity:relation-recall-relation-sir-launcelot-and-qu-4dd1e991acf3) is a concealed fault line beneath the rise and glory of [King Arthur](entity:character-recall-character-king-arthur-2b97864f54aa)’s kingdom. The account places it within a larger chain of inherited guilt and forewarning: the relationship’s tragic consequences emerge only after years in which [Arthur](entity:character-recall-character-arthur-2e33b65bbe57) and the fellowship of the [Round Table](entity:object-recall-object-round-table-04fef19b82fd) appear to have overcome disorder and established a flourishing realm.
## The Affair in the Pattern of [Doom](entity:concept-recall-concept-530a46a89beb)
The book’s critical account connects the eventual tragedy to events long predating the affair. [Uther Pendragon](entity:character-recall-character-uther-pendragon-76932b817c39)’s crime leads to Arthur’s concealed parentage; Arthur, unaware that the woman he loves is his sister, fathers [Mordred](entity:character-recall-character-431d80a88894). A prophetic warning predicts that this child will destroy Arthur and the knights of his realm. Arthur’s attempt to prevent that future through a cruel act cannot undo the consequences of the original concealment.
A further warning attaches danger to Arthur’s marriage to [Guenever](entity:character-recall-character-112dfc46734b), specifically through her guilty love for [Launcelot](entity:character-recall-character-launcelot-0b02a99ce6f7). These threats remain hidden during the long period of Arthur’s success. The affair is therefore not presented as an isolated private failing: it joins an earlier sequence of concealed kinship, compromised judgment, and foreseen disaster, while its public effects wait beneath the appearance of stability.
## Prosperity and the Round Table
With the fellowship of the Round Table, Arthur brings widespread anarchy into order. His power extends across [England](entity:location-recall-location-england-b153c1f368ea), [Wales](entity:location-recall-location-6d9a7b286e78), and [Scotland](entity:location-recall-location-scotland-4e112aa71aa3), and his march to [Rome](entity:location-recall-location-f3877a21016f) makes him emperor. The fame and honour of the king and his knights seem to rise into ever brighter forms, giving the later collapse its force: the political and chivalric achievement is real, yet it cannot erase the danger carried within the king’s marriage and Launcelot’s love for the queen.
The coming of the [Holy Grail](entity:object-recall-object-8fc3592652aa) changes the terms by which the fellowship is judged. Knights who had proved themselves in worldly chivalry now face spiritual tests, and leading figures including Launcelot and [Gawaine](entity:character-recall-character-gawaine-e52d508f7128) cannot withstand them. The Grail’s achievement belongs to the holy knights; two depart this life for a higher one, while [Sir Bors](entity:character-recall-character-sir-bors-eb41f6b6a451), forgiven and sanctified despite not being wholly spotless, returns as a link between earthly and spiritual life. This division between worldly honour and spiritual qualification makes the fellowship’s earlier confidence inadequate to the trials ahead.
## Consequences and Aftermath
The account describes the separation between good and evil disclosed through the Holy Grail as a division that cannot be repaired. Arthur and Launcelot make touching but unsuccessful efforts to avert the tragedy: Arthur tries to resist temptation, while Launcelot refuses to believe evil of his wife and his dearest friend. Their contrasting responses do not restore the order already lost. The affair’s consequences thus belong to a larger breakdown, in which personal attachment and the king’s trust cannot halt the doom gathering over the fellowship.
The ending offers a brief, subdued image of what remains after that collapse. Arthur is borne in a barge to the Holy Isle; Guenever lives as a nun at [Almesbury](entity:location-recall-location-almesbury-fac1d8a7e075), devoted to fasting, prayer, and alms; and Launcelot and his companions, formerly knights, become hermit-priests who perform bodily service. These final transformations do not reverse the damage. They replace the public world of kingship, love, and tournament with withdrawal and religious service, completing the account’s movement from worldly splendour to penitential aftermath.
## Moral and Literary Significance
The critical account argues that the tragic ending supplies a judgment on lawless love, even while acknowledging the book’s moral limitations. It contrasts the destructive consequences associated with Launcelot and Guenever’s love with the spiritual ideal represented by [Sir Galahad](entity:character-recall-character-sir-galahad-72b97de59df8) and [Sir Percivale](entity:character-recall-character-sir-percivale-ade9db96f1ec). At the same time, it maintains that Malory’s book does not clearly establish marriage as the highest and purest form of human relationship; the later Idylls of the King, by Lord Tennyson, are presented as giving that ideal a fuller and more powerful expression.
The affair consequently carries both narrative and moral weight. It is one of the concealed causes that survives the apparent triumph of Arthur’s reign, and its consequences become legible in the Grail’s division of the fellowship and the subdued religious lives of the survivors. The tragic design does not reduce the story to a single private cause: it places the relationship within a sequence of guilt, warning, prosperity, spiritual testing, and irreversible loss.
Event 8
亚瑟与莫德雷德的最终冲突及亚瑟之死
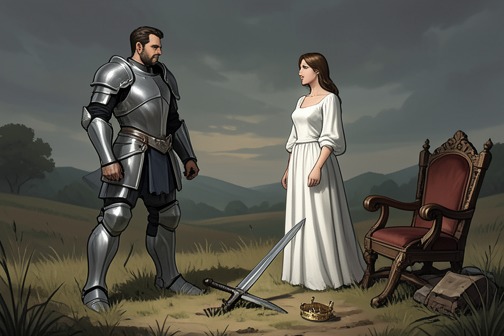
The final conflict between [Arthur](entity:character-recall-character-arthur-2e33b65bbe57) and [Mordred](entity:character-recall-character-431d80a88894) is the tragic reckoning at the end of Arthur’s reign: the rightful king who once brought divided realms under his authority cannot prevent his kingdom’s collapse when Mordred usurps the throne. The account connects this ending to a prophecy of destruction, the breakdown of the [Round Table](entity:object-recall-object-round-table-04fef19b82fd)’s fellowship, and Arthur’s departure by barge for the Holy Isle. The supplied passages establish the conflict’s place in the larger story, but do not narrate its battlefield details or explicitly describe Arthur’s death.
## A Kingdom Built on Recognition
Arthur’s kingship begins in a crisis of succession. As [Uther Pendragon](entity:character-recall-character-uther-pendragon-76932b817c39) lay dying, [Merlin](entity:character-recall-character-merlin-3f8c52535684) asked him publicly whether his son Arthur should rule after him. Uther gave Arthur both his blessing and command to claim the crown, then died. The barons’ competing claims left the realm in jeopardy, so the Archbishop of [Canterbury](entity:location-recall-location-canterbury-d9d154d6633e) summoned the lords and men of arms to [London](entity:location-recall-location-1bfd335cdd1b), where a sword set in a stone and anvil was presented as a sign of the rightful king. At [Pentecost](entity:time-recall-time-16e2becf2ca1), Arthur alone drew it. The gathered people acclaimed him, and Arthur forgave them for having delayed his recognition. He offered the sword at the altar and was crowned, swearing to rule justly.
The narrative sets this act of forgiveness and public recognition against the eventual usurpation. Arthur restored lands taken during the disorder after Uther’s death, appointed officers, and extended his authority across contested territories. The kingdom’s order was not simply inherited: it was established through recognition, justice, military strength, and the service of Arthur’s knights. The ending therefore reverses an early promise of stability. A ruler once acclaimed by rich and poor alike ultimately confronts a challenge to the crown from within his own family.
## The Prophecy and the Hidden [Doom](entity:concept-recall-concept-530a46a89beb)
The account’s interpretation of the tragedy traces its origins to concealed parentage and an incestuous relationship: Arthur does not know that the woman he loves is his sister, and their child is Mordred. A prophecy warns Arthur that this child will destroy him and the knights of his realm. Arthur tries in vain to prevent the predicted outcome through a cruel act, but the doom remains in the story’s background while his reign flourishes.
That contrast makes the final conflict more than a struggle for possession of the throne. Arthur’s victories and the apparent permanence of his fame coexist with a fate announced long before Mordred’s seizure of power. The story places the eventual catastrophe in tension with the years of prosperity and with the king’s efforts to resist the consequences of his earlier actions. The supplied account presents those efforts as unable to avert the ending, not as an alternative history that the king could finally secure.
## Mordred’s Usurpation and the Breaking of Fellowship
The table of contents identifies the opening movement of the final book as Mordred’s presumption: he takes on the role of king of [England](entity:location-recall-location-england-b153c1f368ea) and would marry [Guinevere](entity:character-recall-character-guinevere-85c90c7da1e3), his uncle’s wife. Arthur receives news of this and returns, arriving at [Dover](entity:location-recall-location-dover-bee6bc10504b), where Mordred meets him to prevent his landing. The contents then mark the death of Gawain and the appearance of his ghost to warn Arthur against fighting that day. These notices establish the conflict’s political stakes and the loss surrounding it, though they do not give the battle’s full course.
The final struggle stands against the earlier achievements of the Round Table. Arthur and its fellowship had reduced widespread disorder and extended the king’s authority across England, [Wales](entity:location-recall-location-6d9a7b286e78), and [Scotland](entity:location-recall-location-scotland-4e112aa71aa3); Arthur’s march to [Rome](entity:location-recall-location-f3877a21016f) had raised him to imperial power. Yet after the Grail quest, the fellowship’s moral division cannot be repaired. In the account’s reading, the distinction between good and evil disclosed by the quest has made reunion impossible. The conflict with Mordred thus comes after both the height of Arthur’s public authority and the irreparable fracture of the company that sustained it.
## Departure and Tragic Significance
The narrative closes its view of Arthur with an image of departure: as the sun goes down, he is aboard the barge that bears him to the Holy Isle. Alongside him in the concluding tableau are Guinevere, living at [Almesbury](entity:location-recall-location-almesbury-fac1d8a7e075) as a nun in fasting, prayer, and almsgiving, and [Launcelot](entity:character-recall-character-launcelot-0b02a99ce6f7) with his fellowship, formerly knights and now hermit-priests engaged in bodily service. The ending sets the king’s passage apart from the ordinary aftermath of a political defeat; what the account supplies is an image of departure, not a detailed report of his death.
The final book’s contents identify its subject as Arthur’s “piteous death” and then his “last departing,” while the interpretive account presents his passage to the Holy Isle as the closing image of tragedy. Arthur and Launcelot make efforts to avert disaster, but those efforts fail: Arthur tries to resist temptation, while Launcelot refuses to believe evil of his wife and dearest friend. In this framing, the final conflict is the outward culmination of a doom long foretold and a fellowship already divided. The sovereign who once made a kingdom whole cannot restore it at the end; the story leaves him departing as the Round Table’s former unity gives way to separation and penitence.
Event 9
桂妮薇儿退隐修道院并去世
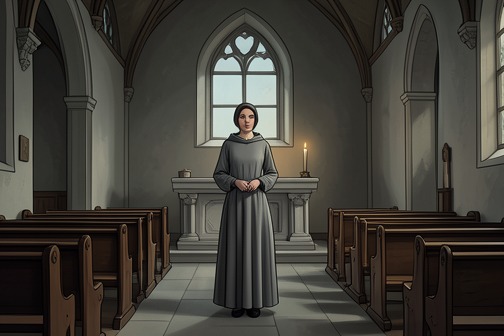
[Guinevere](entity:character-recall-character-guinevere-85c90c7da1e3)’s withdrawal to [Almesbury](entity:location-recall-location-almesbury-fac1d8a7e075) and death bring her story to a penitential close and reunite her in burial with [Arthur](entity:character-recall-character-arthur-2e33b65bbe57) at [Glastonbury](entity:location-recall-location-glastonbury-f90d3ed88e43). The book’s concluding account makes her retirement part of the larger dissolution of the [Round Table](entity:object-recall-object-round-table-04fef19b82fd): Arthur is borne away to the Holy Isle, Guinevere lives as a nun, and [Launcelot](entity:character-recall-character-launcelot-0b02a99ce6f7) turns from knighthood to religious service and remorse.
## Retirement at Almesbury
The editor describes Guinevere as a nun at Almesbury, living in fasting, prayers, and charitable works. Her withdrawal follows the collapse of the world she had shared with Arthur and the fellowship of the Round Table. The summary does not detail the circumstances of her entry into the nunnery; it emphasizes instead the disciplined religious life she leads there.
Her retirement is also the point at which Launcelot resolves to follow her example. On hearing of the events that have overtaken Arthur and the queen, he goes to Almesbury, takes leave of Guinevere, and chooses a hermit’s life. He settles at a hermitage and chapel between two cliffs, where he serves God through prayer and fasting. The separation of the former lovers thus becomes a turning point in Launcelot’s movement from worldly renown toward penance.
## Launcelot’s Penance
Launcelot and the knights who join him endure six years of penance. He then takes priestly orders and sings mass for a year. This sequence gives his retreat a sustained religious shape: it is not simply flight from the court, but a long renunciation of his former life as the foremost knight of the fellowship.
At the end of that year, a vision directs Launcelot to retrieve Guinevere’s body from Almesbury and bury her with Arthur at Glastonbury. Her death therefore occasions their final reunion, not in the courtly world that had defined their relationship, but in a shared grave beside the king. The vision makes Launcelot the agent of this burial and connects Guinevere’s death directly to his final act of service.
## Burial and Grief
After Guinevere is laid in the earth, Launcelot faints. The hermit awakens and rebukes him, warning that such grief displeases God. Launcelot answers that his sorrow is not joy in sin: he says it cannot end, and recalls her beauty and nobility, her loyalty to her king, and the sight of her body beside Arthur’s. He also recognizes his own responsibility, naming his failure, pride, and arrogance as causes of the ruin that has brought them low.
Launcelot’s response frames the burial as both mourning and reckoning. His grief is bound not only to the loss of Guinevere but to the consequences of his own conduct and to the destruction of two people he regards as peerless. He remains at the tomb, praying day and night, and wastes away there. In the account’s moral design, Guinevere’s religious retirement and death stand at the center of the last movement from worldly love and honour toward penitence, loss, and burial.
Event 10
Death and burial of Lancelot
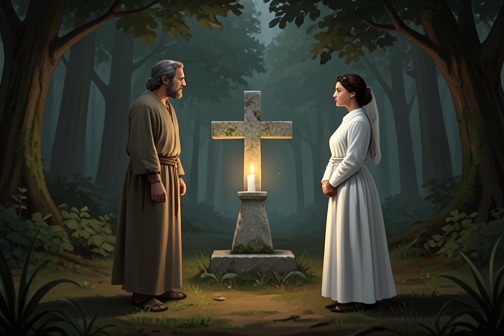
The [Death and burial of Lancelot](entity:event-recall-event-a3b9c690c29c) completes the tale of a knight whose extraordinary renown ends not in worldly triumph but in withdrawal, penitence, and grief. After learning of [Arthur](entity:character-recall-character-arthur-2e33b65bbe57)’s death and [Guinevere](entity:character-recall-character-guinevere-85c90c7da1e3)’s retirement, Lancelot follows her example into religious life. He buries the queen beside Arthur at [Glastonbury](entity:location-recall-location-glastonbury-f90d3ed88e43), then dies after wasting away in prayer; at [Joyous Gard](entity:location-recall-location-joyous-gard-c7d2751b6533), [Ector de Maris](entity:character-recall-character-ector-de-maris-ebbe170b5361)’s lament gathers the conflicting virtues and failings of Lancelot into a final reckoning.
## Withdrawal and penance
When Lancelot hears of Arthur’s death and Guinevere’s retirement to [Almesbury](entity:location-recall-location-almesbury-fac1d8a7e075), he goes there and takes leave of the queen. He then resolves to follow her example, becoming a hermit and penitent. His chosen refuge is a hermitage and chapel in a forest, situated between two cliffs, where he serves God day and night through prayer and fasting.
Lancelot’s retreat becomes a sustained discipline rather than a brief gesture of sorrow. He and the knights who follow his example endure six years of penance. Lancelot then takes priestly orders and sings mass for a year. The movement from celebrated knight to hermit and priest marks a decisive change in the terms by which his life is understood: his remaining service is no longer measured by prowess in arms, but by prayer, fasting, and [repentance](entity:concept-recall-concept-4100212400b4).
## The vision and the burial at Glastonbury
At the end of that year, a vision directs Lancelot to take Guinevere’s body from Almesbury and bury her with Arthur at Glastonbury. The errand brings him back into the history from which his withdrawal could not wholly separate him. He performs the burial, placing the queen beside the king whose death had already changed the course of his life.
After Guinevere is laid in the earth, Lancelot swoons and lies still for a long time. The hermit wakes him and rebukes him for making such a show of sorrow, but Lancelot explains that his grief is not rejoicing in sin. He says it cannot end: remembering Guinevere’s beauty and nobility, and seeing her body laid beside Arthur’s, overwhelms him. He also names his own responsibility, recalling that his fault, pride, and arrogance helped bring both of them low. The scene makes grief inseparable from recognition: Lancelot mourns the dead, but also the harm he believes his own conduct helped cause.
## Death and burial at Joyous Gard
After the burial, Lancelot wastes away, praying day and night at the tomb of Arthur and Guinevere. He eventually dies. His body is taken to his own castle of Joyous Gard for burial, returning the story to the place associated with his life as a knight even as its final scene is shaped by religious service and mourning.
Ector de Maris arrives during the funeral service. He has spent seven years seeking his brother throughout [England](entity:location-recall-location-england-b153c1f368ea), [Scotland](entity:location-recall-location-scotland-4e112aa71aa3), and [Wales](entity:location-recall-location-6d9a7b286e78). Hearing the sound of singing and weeping in the choir at Joyous Gard, he dismounts and enters; the people there recognize him, though he does not know them. Bors tells him that Lancelot lies dead. [Ector](entity:character-recall-character-ector-8f00ddc6c029) throws aside his shield, sword, and helmet, then swoons when he sees his brother’s face. His search ends not with a reunion in life but with a final encounter at the bier.
## Ector’s farewell and Lancelot’s legacy
Ector’s lament gives the funeral its fullest assessment of the dead knight. He calls Lancelot the head of Christian knights and says no earthly knight ever matched him. He remembers him as the most courteous knight to bear a shield, the truest friend to his beloved, and the truest lover a sinful man could be. He also praises Lancelot’s kindness in combat, his beauty among knights, his meekness and gentleness at table, and his sternness toward mortal foes.
The praise does not erase the story’s moral judgment. The account of [Lancelot and Guinevere](entity:relation-recall-relation-lancelot-and-guineve-8d40cfdbbc43)’s guilty love recognizes both the extraordinary constancy of their attachment and the censure it received even by medieval standards. The ending holds these truths together: Lancelot’s fame and virtues remain immense, while his own penitential grief acknowledges the consequences of his pride and love. His death is therefore both a personal loss, voiced most intensely by the brother who searched for him, and the close of a life whose worldly distinction could not cancel its need for repentance.
Event 11
卡克斯顿出版《亚瑟之死》
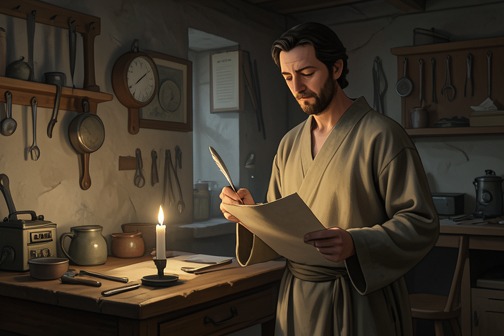
Caxton’s [1485](entity:time-recall-time-1485-adada6eeb263) [Westminster](entity:location-recall-location-westminster-797ba54e0a11) edition of Le Morte Darthur gave printed form to the work attributed to Sir Thomas Malory and became the textual point of reference against which later editions were measured. Its history is not simply one of survival: successive printers altered the text, and a nineteenth-century reprint passed later material off as Caxton’s before editors traced its sources. The edition’s authority and the effort to make it readable have therefore shaped both the book’s circulation and its textual identity.
## Origins and the 1485 edition
In his preface, Caxton presents himself as moved both by requests from gentlemen and by his own reverence for chivalric deeds. He believed the book could instruct and benefit readers of every social rank, and he appeals to the knights of [England](entity:location-recall-location-england-b153c1f368ea) in support of its value. Yet he credits Malory with supplying the copy he printed. The work’s authorship and its first printed publication are thus distinct: Malory receives the credit for the book, while Caxton stands as its first English printer and a forceful advocate for its readership.
Caxton printed the first edition at Westminster in 1485, a date recorded in its colophon. The surviving edition is a folio in black letter, with broad margins, and is described as among the finest examples of Caxton’s printing. Only two copies are known. The Osterley copy is complete; its first leaf bears the autograph “Oxford,” and its recorded ownership history runs through the Harleian Library and bookseller Osborne to Bryan Fairfax. The other, the Althorp copy, was bought in 1816 with eleven leaves missing. Mr. Whittaker supplied facsimiles from the Osterley copy to fill the gaps, but later collation identified many errors in those replacement leaves.
Like almost all Caxton’s books, the edition has no title page: its Prohem, or preface, begins at the top of the first page. That physical arrangement matters to the book’s early presentation. The reader encounters the printer’s framing words at once, while the work’s printed authority rests on a text Caxton attributes to Malory.
## Caxton as printer and publisher
Caxton’s work on Le Morte Darthur formed part of a larger career that joined trade, translation, editing, and printing. A native of Kent, he belonged to the [London Guild of Mercers](entity:organization-recall-organization-e64ddd9239b7) and spent many years at the English trading house in Bruges, known as the [English Nation](entity:organization-recall-organization-b1c057382fba) and managed in practice by the Mercers. He went there in 1441, when he was probably about twenty. By 1462 he was serving as governor of the English Nation in the Low Countries, and in 1465 Edward IV appointed him an ambassador to negotiate a renewed trade treaty with the Duke of [Burgundy](entity:location-recall-location-b77e5ac6363d).
In 1471, at Margaret’s request, Caxton completed his translation of the Recuyell of the Histories of Troye, which he had begun and then set aside. To meet friends’ demand for copies, he printed the translation. Around 1476, after thirty-five years abroad, he returned to England and introduced the printing press there. For the remaining fifteen years of his life, he continued not only as a printer but as a translator, editor, and publisher. His programme included devotional writing, poetry, history, chivalric romance, books of morals and manners, proverbs, fables, statutes, and works on civic government. The account of his career presents this broad, deliberate selection as foundational to popular English literature: Caxton supplied books that readers without access to classical languages could actually read.
His decision to print Malory’s book accordingly belongs to a publishing practice guided by both literary and public purposes. The preface’s appeal to readers “of whatever estate or degree” matches a body of work intended to extend beyond learned specialists. Caxton’s edition made the Arthurian material available in English print, while his framing of it as instructive chivalric writing urged readers to approach it as more than entertainment.
## Reprints and textual change
The first two later editions were printed by Wynkyn de Worde, Caxton’s chief workman and successor, in 1498 and 1529. Only one copy of each is known. The 1498 edition, held at Althorp, lacks some pages but preserves Caxton’s preface, repositioned after the table of contents. It includes numerous woodcuts and is not an exact reprint: spelling and occasional words differ. It also contains a passage beginning “Oh ye mighty and pompous lords” near the end of the book that is absent from Caxton’s edition and recurs in later printings. The 1529 copy, in the British Museum, lacks its title, preface, and part of the contents table.
William Copland reprinted the book in 1557 under a title describing [Arthur](entity:character-recall-character-arthur-2e33b65bbe57) as one of the Christian Worthies and celebrating the [Knights of the Round Table](entity:character-recall-character-3f167931be46). A woodcut of St. George and the [Dragon](entity:creature-recall-creature-dragon-02f141a6fc03) appears on its title page. Thomas East later issued an undated folio and quarto, probably around 1585. The last black-letter edition followed in 1634, printed by William Stansby. Its woodcut shows Arthur in the centre of the [Round Table](entity:object-recall-object-round-table-04fef19b82fd) with his knights around him. A matching omission in Stansby’s edition and East’s folio led Mr. Wright to conclude that one had been printed from the other.
The distance from Caxton widened with each successive edition. Stansby’s 1634 text remodelled the preface, divided the book into three parts, modernised spelling and vocabulary, and introduced extensive variations and additions. The editor estimated more than twenty thousand changes. Some, he suggested, may have arisen when a printer relied on memory rather than returning to the copy; others reflected an effort to replace the original’s simplicity with what an editor called a more ornate style. The edition history therefore records not only the work’s persistence but a continuing recasting of its language and shape.
## Nineteenth-century editions and the problem of authenticity
Two popular editions appeared in 1816, one in two volumes and one in three. Both modernised the text, and the account identifies them as common routes by which a generation first encountered Arthur and his knights, while judging neither to have editorial merit. In 1817, Robert Southey introduced a two-volume edition as a reprint “with scrupulous exactness” from the Caxton copy in Earl Spencer’s library. That copy, however, lacked eleven leaves, and the edition’s substitutes did not reproduce Caxton’s text faithfully.
The differences were more than cosmetic. In one passage from the last book, the reprint interpolated the “O ye myghty and pompous lordes” passage, absent from Caxton, and its first eleven lines contained thirty-five spelling and punctuation variations, along with words not found in the original. Across the seventeen pages supplied in place of missing leaves, wording and sentences also diverged. Although Southey’s editor, Mr. Upcott, elsewhere marked a small addition as absent from the original, he did not disclose that these seventeen pages were also supplied from other sources. As a result, critics quoted the interpolations as Caxton’s genuine text for fifty years.
Collation in 1867 exposed the discrepancy. Comparing Earl Spencer’s copy with Southey’s edition, the editor found that the substituted passages did not match Caxton’s text as represented by Whittaker’s facsimiles; comparison with the Osterley copy confirmed the result. A further collation showed that, apart from the opening thirty-six lines of one chapter, the passages largely came from Wynkyn de Worde’s first edition, with occasional spelling changes and small alterations. The supposed faithful reprint was thus a composite, its borrowed pieces made difficult to recognise by editorial adjustment. This episode made the distinction between Caxton’s text and later editorial reconstruction a practical, not merely bibliographical, concern.
## Readability, scholarship, and continuing authority
The 1868 edition discussed in the account set out to make Caxton’s original available to ordinary readers, especially boys, without reproducing every obstacle of early spelling. It modernised spelling, replaced a few unintelligibly obsolete words, and retained older forms where context made them comprehensible, explaining meanings in a glossary. It also omitted or replaced some material judged incompatible with modern manners, while distinguishing that editorial choice from an attempt to repair the book’s moral shortcomings. Its editor argued that the work nevertheless offered readers examples of magnanimity, courage, courtesy, reverence for women, gentleness, self-sacrifice, [chastity](entity:concept-recall-concept-5c00cc82f274), and other virtues. The omissions were described as limited and not an abridgment; the aim was to preserve Caxton’s text in a form that could be read without specialist knowledge.
The same edition used Southey’s text as its base after checking it against the Althorp and Osterley copies, but restored disputed passages from the original Caxton. Later abridgments appeared in 1862, 1868, 1871, and 1880, and Ernest Rhys published a modernised reprint of fourteen of the twenty-one books in 1886, using the version of Mr. Wright. Such editions widened access but also made the editor’s choices part of the reading experience.
Between 1889 and 1891, Dr. H. Oskar Sommer edited a three-volume scholarly edition. Its first volume reproduced the Althorp copy page for page, line for line, word for word, and letter for letter, changing only black-letter type to Roman. Because the Althorp copy included Whittaker’s facsimile leaves, Sommer’s exact reproduction also repeated their mistakes; the second volume supplied collations with the Osterley original, along with a bibliography, an index, a glossary, and an essay on the language. The third volume presented studies of Malory’s sources and made two previously inaccessible source texts available from manuscripts in the British Museum.
The publication history circles back to the authority of the 1485 edition. More than four centuries of readers, the account argues, have continued to prefer Malory’s book over older forms of Arthur’s story, while editors and scholars have returned to earlier sources to explain it. Caxton’s first printing endured not because its descendants remained unchanged, but because the work repeatedly invited both popular reading and textual scrutiny. Its successive forms reveal the tension at the heart of its afterlife: making the book accessible has extended its readership, while every modernization, substitution, or embellishment has sharpened the need to know what Caxton actually printed.
Event 12
克雷西战役
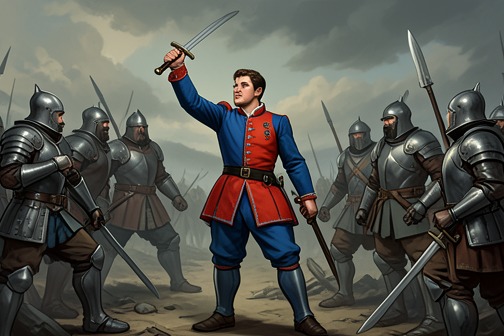
The [Battle of Crécy](entity:event-recall-event-1eddf58412c3) is recalled as a defining illustration of what it meant for a young knight to “win his spurs”: the Prince of [Wales](entity:location-recall-location-6d9a7b286e78) faced a severe test in battle while Edward III withheld assistance so that his son might earn the day’s honour. In the book’s discussion of knighthood, the episode makes martial reputation something proved under pressure, not simply granted by birth or rank.
## A Test of [Knighthood](entity:concept-recall-concept-knighthood-ab8278f54c9d)
The account introduces the battle after describing the religious rites by which an esquire entered the order of knighthood and the solemn obligations he undertook. A knight’s career, it says, still depended on proving himself. The phrase “win his spurs” names that next stage, and the battle serves as its vivid example: the prince’s status as the king’s son does not spare him the need to demonstrate his ability in the field.
## The Prince’s Division in Danger
The fighting is described as cruel and fierce. French and German forces broke through the archers of the prince’s division and engaged its men-at-arms at close quarters. A second English division came to the prince’s aid, but the pressure remained severe enough that the prince and those around him sent a messenger to Edward III, who watched from a small windmill hill. The message reported that the Earl of Warwick, the Earl of Oxford, Sir Reynold Cobham, and other men with the prince were being hard pressed, and warned that the French might grow stronger.
## Edward III’s Decision
Edward III’s first concern was whether his son was dead, wounded, or fallen. When the messenger answered that the prince was alive but badly matched and needed support, the king refused to send further help while that remained the case. He instructed the messenger to tell the prince’s party to seek no more assistance for any turn of fortune, and to let his son win his spurs. The honour of the day, he declared, should belong to the prince and the men around him, if God so willed.
The decision transformed a plea for military relief into a public test of command and courage. The king’s words greatly encouraged the prince’s companions, who regretted having sent for help. The account gives no further detail of the prince’s actions or the battle’s outcome; its emphasis falls instead on the effect of Edward III’s refusal and on the honour he deliberately left his son to earn.
## The Episode’s Significance
The passage places the prince’s trial within a broader account of the knight’s career, which it describes as dependent not only on personal effort but also on God and his lady. Crécy thus illustrates knighthood as a combination of peril, service, and reputation: the prince must face danger, while the king’s restraint allows the resulting honour to be his. The narrator reinforces this ideal by comparing the episode with the conduct of Sir Colin Halket and his men at Waterloo, who stood their ground after being told that no relief was possible. The comparison carries the account’s emphasis from one celebrated battlefield to another: courage is most legible when support is withheld and those under pressure continue to serve.
Event 13
利摩日屠杀
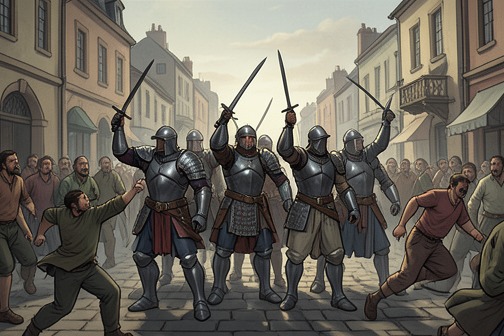
The Massacre of Limoges, as recounted in a discussion of medieval chivalry, exposes the distance between knights’ ideals of honour and their conduct in war. Froissart bitterly lamented that the Black Prince’s forces killed more than three thousand people, including men, women, and children; the episode demonstrates that the refinement associated with chivalry did not protect ordinary townspeople from violence.
## Context and Account
The account places the massacre within a broader assessment of war in the age of chivalry. Even in the period regarded as chivalry’s most refined and splendid, warfare could involve barbarity among knights themselves, and still greater cruelty when armed forces turned on people of lower rank. The Black Prince and the knights around Edward III were widely held by contemporary historians, romance writers, and later commentators to represent chivalry at its height. Froissart’s lament over Limoges complicates that reputation: the celebrated knightly world also produced devastating violence against a town’s population.
## Victims and Historical Judgment
The account identifies the dead as more than three thousand people, explicitly including men, women, and children. It offers no further circumstances of the attack, but its emphasis on the victims’ range makes the scale and indiscriminate character of the killing central to the episode’s meaning. Froissart’s condemnation gives the massacre particular weight: his admiration for the age’s leading knights does not prevent him from recording and mourning their cruelty.
## Chivalric Ideal and Its Limits
The massacre appears as evidence that chivalric conduct and cruelty could coexist. The passage argues that savage passion was often mingled with the better dispositions of celebrated knights, while distinguishing cruelty as something committed in spite of their chivalry, not because of it. That distinction preserves chivalry as a moral ideal but also reveals its limits: an ideal of honour among the powerful did not reliably restrain violence against people with less status or protection. The massacre of Limoges therefore serves as a cautionary counterpoint to accounts of knightly refinement, exposing the gulf between a code’s reputation and the suffering that warfare could inflict.
Event 14
Philippa’s plea for the burghers of Calais
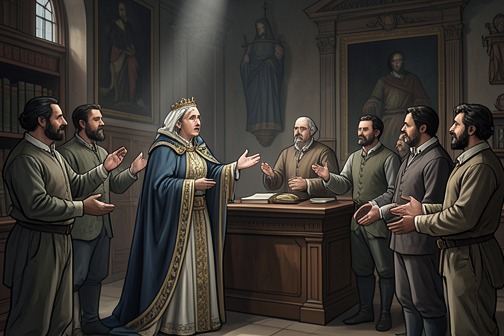
[Philippa’s plea for the burghers of Calais](entity:event-recall-event-92f8895a8703) is the turning point in an account of Edward III’s intended punishment of the town: after the remonstrance of Sir Walter of Manny failed, the queen’s appeal persuaded the king to spare the six leading burgesses. The episode makes mercy a contest within chivalric power—first urged by a celebrated knight, then secured by a queen whose authority rests on personal appeal and a claim to humane rule.
## Background and stakes
Calais had endured a long siege. The account recalls that French knights who offered to surrender declared themselves willing to suffer the pain expected of knights rather than let the poorest lad in the town fare worse than the greatest among them. Their position rejected a distinction between noble and commoner at the moment of danger: the town’s people were to share one fate.
Edward III, however, intended to treat Calais as the Black Prince had treated Limoges. The account contrasts the threatened punishment with the earlier massacre there, in which more than three thousand people—men, women, and children—were killed. The issue at Calais was whether the king’s anger over English losses would extend to the town’s inhabitants, or whether surrender and intercession could still secure their lives.
## The appeals to Edward
Sir Walter of Manny led the English knights in protesting the king’s purpose. Edward yielded to their urgency only so far as to say that he would accept the lives of the six chief burgesses. Sir Walter then argued that putting such men to death would blemish the king’s renown: they had voluntarily placed themselves in Edward’s power in order to save their community. The appeal joined mercy to reputation, asking the king not to give others cause to condemn his conduct as unworthy of a knight and gentleman. Edward turned away and ordered that the executioner be summoned, insisting that the people of Calais had caused many of his men to be slain and should therefore die in like manner.
The narrative marks Sir Walter’s failure as the moment that calls for a stronger influence. Philippa, who had crossed the sea in peril, knelt before Edward and wept as she asked him, for the love of her and in the honour of the Son of the Virgin Mary, to take mercy on the six burgesses. Her appeal makes no separate case for their guilt or innocence; it asks the king to spare them through mercy, invoking both religious honour and their personal bond. Edward stood silent for a time, then said he could not deny her request and gave the men to her to do with as she pleased.
## Aftermath and significance
The immediate consequence is clemency for the six burgesses: the king reverses the decision he had defended and entrusts their fate to Philippa. Her intercession completes, rather than simply repeats, Sir Walter’s appeal. The knight had warned that an execution would damage Edward’s honour; the queen’s supplication makes mercy the king’s answer to a request he says he cannot refuse. The account thus presents royal power as capable of being redirected by both chivalric counsel and personal petition, though only the queen’s intervention succeeds.
The episode also sits within a larger portrait of Philippa’s public presence. She had come to meet the English army when the king of Scots advanced toward Newcastle, encouraging the soldiers to do their duty and promising to remember them. After the victory, she returned and helped make arrangements with her council; later she joined Edward before Calais with ladies and damsels, including women who had come to see their relatives at the siege. The account attributes Calais’s escape from Limoges’s horrors partly to the humanizing influence of these women and partly to Philippa’s personal persuasion. That interpretation gives the plea a significance beyond the fate of six men: it presents women’s presence and advocacy as a force capable of moderating the violence of war, even while the surrounding narrative acknowledges that chivalrous society remained marked by cruelty.
Event 15
1783 Calabrian earthquakes
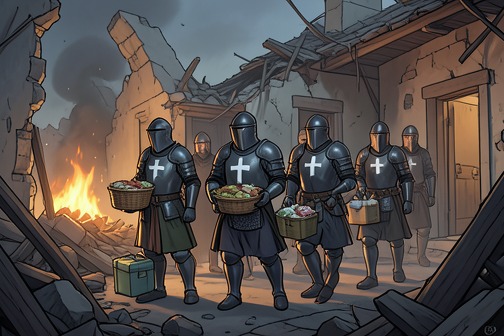
The [1783 Calabrian earthquakes](entity:event-recall-event-1783-2336ca0c61da) are recalled not through a description of the disaster itself, but through the response of the [Knights Hospitallers of St. John of Jerusalem](entity:organization-recall-organization-37a4721eec20). In the book’s account, news from Sicily prompts an order nearing its end to act according to its old vows: its members bring supplies and consolation to the wounded and dying, making this their final remembered service before the Order passes away.
## The Order’s Last Service
The author calls the Hospitallers’ response the last expiring token of the old chivalric spirit in its old forms. When news of the earthquake reaches Malta, the knights, previously characterized as feeble-minded and devoted to comfort, briefly remember their manhood, knighthood, and vows as Hospitallers. They man their galleys and set out to assist those affected.
## Aid amid the Ruins
The knights carry food, clothing, and medicines, as well as the consolations of their faith. The account places them at the bedsides of the wounded and dying among the still-tottering ruins of devastated houses. Their half-military, half-priestly clothing—armour covered by a black robe bearing a white cross—embodies the combination of armed service and religious vocation through which the author understands their response.
## A Final Act and Its Meaning
Within a few years, in the same generation, the Order has passed away for ever. The retrospective passage therefore gives the earthquake relief a double significance: it is practical aid to people in immediate need and, in the author’s judgment, a fitting final deed by which to remember the Hospitallers. The image of the knights attending the wounded and dying stands against the subsequent disappearance of the institution and preserves, for the author, a last instance of chivalry’s older spirit.
Event 16
格拉斯顿伯里发现亚瑟与桂妮薇儿遗骸的传说
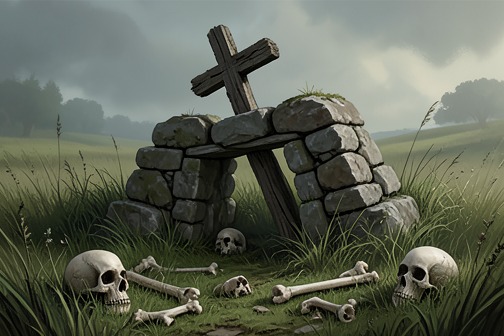
The [Glastonbury](entity:location-recall-location-glastonbury-f90d3ed88e43) discovery tradition holds that [King Arthur and Queen Guenever](entity:relation-recall-relation-king-arthur-and-quee-f97972152dd9) were buried there and that Henry II found their bodies. The later removal of their skulls as relics by Edward Longshanks and Eleanor gave the story a further history of royal veneration. The account presents these claims as legend, set against the larger uncertainty surrounding [Arthur](entity:character-recall-character-arthur-2e33b65bbe57)’s historicity and the unstable geography of his romances.
## The Reported Discovery
Glastonbury is described as the burial-place of [Joseph of Arimathea](entity:character-recall-character-joseph-of-arimathea-79b90306708c), whose body, according to the same tradition, had been sought in vain during the reign of Edward III. Against that religious and legendary background, the account says that Henry II found the bodies of Arthur and [Guenever](entity:character-recall-character-112dfc46734b) at Glastonbury. It adds that Guenever was said to have had yellow hair, a detail preserved as part of the discovery story rather than offered as independent proof of identity.
The account then follows the supposed remains beyond their discovery: Edward Longshanks and Eleanor are said to have taken the skulls as relics. The story thus links the royal couple’s legendary burial to later acts of reverence, while its wording keeps the claims within the register of reported tradition.
## Glastonbury and Arthurian Geography
The discovery story belongs to a landscape in which places associated with Arthur shift across the romance and its surrounding traditions. The editor declines to settle the question of Arthur’s actual existence and describes Malory’s historical chapters as drawing chiefly on Geoffrey of Monmouth’s *Historia Brithonum*, while also sharing material with the romances. Apart from the relatively accurate account of Arthur’s march to [Rome](entity:location-recall-location-f3877a21016f), the history and geography are presented as difficult to place within verifiable historical limits.
That uncertainty is visible in the competing identifications of [Camelot](entity:location-recall-location-camelot-352b4eac6f0e). Malory appears at one point to connect it with [Avelion](entity:location-recall-location-avelion-213a290c3958), or Glastonbury, but elsewhere identifies it with [Winchester](entity:location-recall-location-winchester-704b3b26db1f); Caxton’s preface, meanwhile, seems to locate it in [Wales](entity:location-recall-location-6d9a7b286e78), probably meaning [Caerleon](entity:location-recall-location-caerleon-5abbde33e3d3). The editor also notes that a Somerset stronghold called Camelot existed under its own name, with substantial earthworks and remains, and that local Arthurian traditions endured there. Glastonbury’s association with Arthur therefore belongs to a wider pattern in which literary geography, local memory, and claims about physical sites overlap without resolving into a single historical location.
## Legend, Memory, and Historical Caution
The account distinguishes the survival of a story from proof that its events occurred. Its assertion that Henry II found the royal bodies is explicitly introduced as something said, and the account supplies no independent verification of the discovery or of the later taking of the skulls. The tradition is evidence for the persistence of Arthurian memory around Glastonbury, not a conclusive historical record of the king’s burial.
This caution accords with the editor’s broader treatment of Malory’s narrative. Arthur’s succession, campaigns, and changing places of rule form a purposeful romance history, but the sequence cannot generally be confined to established historical geography. In that setting, the Glastonbury burial story gives the legendary king a claimed resting place and a material afterlife as relics, even as the editorial account leaves the truth of the claim open.
Event 17
Uther’s union with Igraine
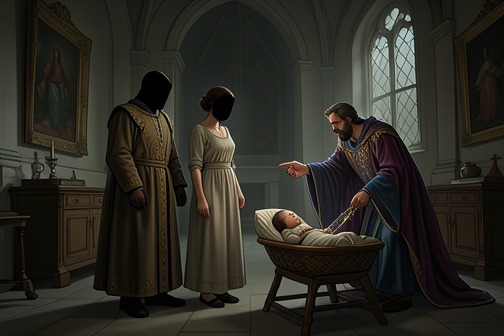
[Uther’s union with Igraine](entity:event-recall-event-uther-s-union-with-igra-1c353fb16d88) is the founding deception behind [Arthur](entity:character-recall-character-arthur-2e33b65bbe57)’s birth: with [Merlin](entity:character-recall-character-merlin-3f8c52535684)’s aid, Uther takes on the likeness of [Igraine](entity:character-recall-character-igraine-5de934015485)’s husband and enters [Tintagil](entity:location-recall-location-5185f645bc56), and Arthur is conceived before Igraine knows who has come to her. The episode joins political desire to magical disguise, then makes the child’s secret upbringing part of the bargain that follows.
## Causes and Bargain
During Uther’s war against the Duke of [Cornwall](entity:location-recall-location-cornwall-5562c2fa740e), Ulfius reports that he has found Merlin. Uther welcomes the magician and tells him of his desire. Merlin promises to bring it about, but first secures Uther’s oath on the four Evangelists: once Igraine has been won, any child born of the union must be given to Merlin to nourish as he chooses. Uther agrees, binding his private wish to a future arrangement for the child.
Merlin’s plan depends on mistaken identity. He instructs Uther to appear as the Duke, Ulfius to resemble the Duke’s knight [Sir Brastias](entity:character-recall-character-sir-brastias-6ef5fc39087c), and Merlin himself to take the likeness of Sir Jordanus, another of the Duke’s knights. Uther is warned not to ask many questions and to claim illness before going to bed. The transformation is presented as a means of entering Tintagil under cover of the Duke’s identity, not as an open courtship between Uther and Igraine.
## The Night at Tintagil
The Duke notices Uther leaving the siege of Terrabil and rides out by a postern gate to attack the king’s host. He is killed before Uther reaches Tintagil. Uther arrives at the castle more than three hours after the Duke’s death and finds Igraine there; the narrative thus places the disguised encounter after the husband has already died, though Igraine does not know this at the time.
Before daybreak, Merlin returns and tells Uther to make ready to leave. Uther kisses Igraine and departs in haste. When Igraine learns that the Duke was dead before the man who had appeared in his likeness came to her, she wonders who the visitor could have been. She mourns privately and keeps silent. The secrecy of the encounter rests on the gap between what Igraine experienced—the apparent return of her husband—and what the reader is later told about Uther’s disguise and the Duke’s death.
## Disclosure and Marriage
Within half a year, while Igraine is pregnant, Uther asks her whose child she carries. Igraine explains that on the night of her husband’s death a man resembling him in speech and appearance came to Tintagil with two knights resembling Brastias and Jordanus. She says she welcomed him as she would her husband and swears to the truth of her account.
Uther admits that he was the visitor and that he came in the likeness of the Duke on Merlin’s counsel. Igraine then rejoices at learning that Uther is the child’s father. After the Duke’s death, Uther’s barons have already urged an agreement between the king and Igraine; Uther entrusts the negotiation to Ulfius. The barons support the proposed marriage, and Uther and Igraine marry in the morning with public rejoicing. The union therefore moves from an undisclosed encounter to a recognized royal marriage, but only after the identity concealed by Merlin’s magic is made known.
## Arthur’s Birth and Secret Upbringing
Merlin reminds Uther that the child must be provided for, invoking the earlier agreement. He names [Sir Ector](entity:character-recall-character-sir-ector-1a6b9e06011a) as a trustworthy lord to raise the child and directs that [Ector](entity:character-recall-character-ector-8f00ddc6c029)’s wife nurse the king’s child in place of her own. Uther accepts the arrangement and summons Ector, who promises to care for the child and receives rewards from the king.
When Igraine gives birth, Uther orders two knights and two ladies to carry the child, wrapped in cloth of gold, to a poor man they are to meet at the castle’s postern. The child is instead delivered to Merlin, who takes him to Sir Ector. An unnamed holy man christens him Arthur, and Ector’s wife nurses him. The royal child’s birth is thus followed immediately by concealment and fosterage, fulfilling Merlin’s condition and separating Arthur’s early upbringing from the circumstances of his conception.
## Narrative and Historical Framing
The account gives the episode a consequential place in the history of Arthur’s kingship: Uther’s deception leads to Arthur’s conception, while Merlin’s intervention shapes the child’s upbringing before Arthur can know his parentage. The episode’s causal chain—desire, oath, disguise, disclosure, marriage, and secret fosterage—makes the founding of the royal line inseparable from concealment.
The book’s later editorial discussion distinguishes such legendary history from verifiable geography and chronology. It says that Malory’s historical chapters draw mainly on Geoffrey of Monmouth’s *Historia Brithonum*, while much also appears in romances, and declines to settle whether Arthur actually existed. That framing presents the story of Uther and Igraine as part of the romance’s heroic history, rather than establishing the episode as independently verified fact.
Event 18
Arthur's birth and secret upbringing
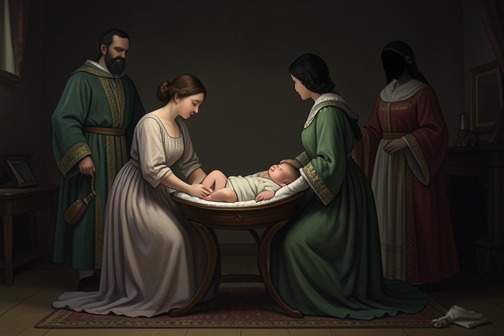
[Arthur's birth and secret upbringing](entity:event-recall-event-arthur-4c6b0c96fe2b) establish the concealed lineage behind his kingship and the foster family that shapes his first loyalties. Born to [Uther Pendragon](entity:character-recall-character-uther-pendragon-76932b817c39) and [Igraine](entity:character-recall-character-igraine-5de934015485) after Uther approached her in the likeness of her dead husband, [Arthur](entity:character-recall-character-arthur-2e33b65bbe57) is delivered into [Sir Ector](entity:character-recall-character-sir-ector-1a6b9e06011a)'s care at [Merlin](entity:character-recall-character-merlin-3f8c52535684)'s direction, raised by [Ector](entity:character-recall-character-ector-8f00ddc6c029)'s wife, and identified as king only when he alone can draw the sword from the stone.
## Birth and Secret Fostering
When Igraine is expecting a child, Uther asks whose child it is. She explains that on the night her husband died, a man resembling him in speech and appearance came to [Tintagil](entity:location-recall-location-5185f645bc56) with two knights who looked like her husband's companions. Uther confirms that he was that man and says the encounter occurred through Merlin's counsel. The revelation establishes the child's father, but the circumstances are disclosed within the family rather than made public.
Merlin then arranges for the child to be brought up away from the royal household. He recommends Sir Ector, whom he describes as a faithful lord, and asks Uther to have Ector's wife nurse the child in place of her own. At Merlin's instruction, the newborn is to be handed to him at a private postern, unchristened. Uther agrees, and the plan is carried out.
When Ector arrives, he pledges to foster the child as Uther requests. After the birth, Uther directs two knights and two ladies to carry the baby, wrapped in a cloth of gold, to the postern and give him to the first poor man they meet. The child is delivered to Merlin, who takes him to Ector; a holy man christens him Arthur, and Ector's wife nurses him herself. The change from royal birth to concealed fosterage is thus accomplished through an arranged transfer, while Arthur's identity remains unknown to the household that raises him.
## Recognition and Foster Kinship
The secret becomes clear when Arthur draws the sword from the stone. Ector kneels, and Arthur asks why his father and brother are kneeling to him. Ector explains that he is not Arthur's father or blood relative: he had been entrusted with Arthur's upbringing by the king, through Merlin. Arthur grieves at learning that Ector is not his natural father, but immediately affirms his debt to Ector and to Ector's wife, who nourished and cared for him as her own.
Ector asks Arthur, if he becomes king, to make his son [Kay](entity:character-recall-character-kay-2946c1889f8a) seneschal of the lands. Arthur promises the office to Kay for as long as the two live, and offers to do more for the man to whom he owes so much. The disclosure therefore does not dissolve the foster bond. Instead, it converts gratitude into a public commitment: Arthur's first response to recognition is to acknowledge the family that raised him and secure Kay's place in his service.
## Hidden Kinship and Political Consequences
The story also shows how Arthur's unknown parentage leaves him unaware of close kinship beyond Ector's household. When he later rides to [Carlion](entity:location-recall-location-carlion-4558a928ecc8), [Lot](entity:character-recall-character-lot-a206f4ef5bfe)'s wife of [Orkney](entity:location-recall-location-orkney-f100d579207b) arrives with her sons, including [Gawaine](entity:character-recall-character-gawaine-e52d508f7128), [Gaheris](entity:character-recall-character-e643b62e350f), [Agravaine](entity:character-recall-character-agravaine-eb42da8223f0), and [Gareth](entity:character-recall-character-e1d13addfd5f). Arthur does not know that she is his maternal sister, Igraine's daughter; she is at court for a month, and [Mordred](entity:character-recall-character-431d80a88894) is born of their union. This episode makes the consequences of concealed family identity especially grave: Arthur's ignorance of his sister's identity precedes a relationship that the narrative presents as the origin of Mordred.
The secret also frames Arthur's dealings with the wider court and realm. At the sword's repeated public trials, rival lords object that a boy of supposedly low birth should govern them, even though Arthur alone can draw it. At [Pentecost](entity:time-recall-time-16e2becf2ca1), the common people accept the sign as God's will, Arthur forgives those who had delayed him, and his coronation follows. Once king, he restores lands taken after Uther's death and appoints Kay seneschal, giving political form to the promises and obligations first disclosed in the private recognition scene.
## Later Echoes of the Fosterage
Arthur's own experience of being raised under another identity resonates in the court's treatment of Gareth. At a Pentecost feast, the [Queen of Orkney](entity:character-recall-character-queen-of-orkney-7bab60f5b3ad) confronts Arthur and her sons because Gareth had spent a year in the kitchen as a servant. Gawaine admits that he did not recognize his brother; Arthur likewise says he had not known Gareth's identity, though he regrets how Gareth was treated. Arthur recalls that Gareth had asked for food for a year and later sought an adventure and knighthood from [Sir Launcelot](entity:character-recall-character-sir-launcelot-c0ea01c62d3d), and that he had granted these requests without understanding the young man's noble birth.
The two episodes are not identical: Arthur's concealment is an arranged royal fostering, whereas Gareth's hidden status is discovered through his conduct at court. Together, however, they make recognition a recurring test of the court's judgment. Arthur's own history gives particular weight to the distance between apparent rank and hidden lineage, while his promise to Ector and Kay shows that birth does not erase the claims created by care and loyalty.
Event 19
Uther Pendragon's death and succession crisis
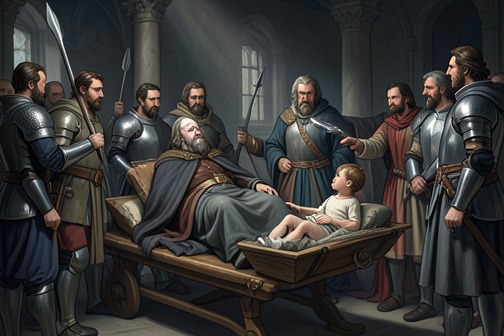
[Uther Pendragon](entity:character-recall-character-uther-pendragon-76932b817c39)'s death creates a succession crisis in which powerful lords compete for the crown, while [Merlin](entity:character-recall-character-merlin-3f8c52535684) works to establish [Arthur](entity:character-recall-character-arthur-2e33b65bbe57)'s claim through both public declaration and a test presented as divine judgment. Arthur's repeated success in drawing the sword from the stone culminates in his coronation, but the later resistance of rival kings and the Roman demand for tribute show that securing kingship does not end the struggle over authority.
## Uther's Final Declaration and the Vacancy
After Uther had been ill for two years, enemies rose against him and attacked his forces. Merlin urged the king to go into the field despite his condition, saying that victory depended on his presence. Uther was carried in a horse-litter with a great host, and at St. Albans his men defeated the northern force. [Sir Ulfius](entity:character-recall-character-sir-ulfius-abbcaac8b1fd) and [Sir Brastias](entity:character-recall-character-sir-brastias-6ef5fc39087c) distinguished themselves in the fighting; the king returned to [London](entity:location-recall-location-1bfd335cdd1b), but his illness soon worsened.
For three days and nights Uther could not speak. When the barons gathered before him with Merlin, Merlin asked whether Arthur should succeed him as king. Uther turned toward them and publicly gave Arthur his blessing, charging him to claim the crown righteously and honorably. He then died. His declaration supplies a direct dynastic claim, but it does not immediately settle the succession: after his burial, powerful lords strengthened themselves, and many expected to become king.
## Merlin's Test of Rightful Rule
To address the uncertainty, Merlin advised the Archbishop of [Canterbury](entity:location-recall-location-canterbury-d9d154d6633e) to summon the realm's lords and men-at-arms to London at [Christmas](entity:time-recall-time-christmas-a573265d0167). The gathering was called to pray for a sign that would identify the rightful king. After matins and the first mass, a stone appeared in the churchyard opposite the high altar. A sword stood point-down in an anvil set in the stone, with a golden inscription declaring that whoever drew it was rightful king of all [England](entity:location-recall-location-england-b153c1f368ea).
The assembled lords could not move the sword. The archbishop ordered ten knights to guard it and allowed others to try, while a tournament on [New Year's Day](entity:time-recall-time-new-year-s-day-7ce8a477fcc4) helped keep the lords and commons together. The test therefore made political recognition depend not only on Uther's word but on a public sign that no rival could reproduce. Arthur's eventual success would be witnessed by both the great and the common people.
## Arthur Draws the Sword and Is Crowned
At first, Arthur drew the sword when [Sir Ector](entity:character-recall-character-sir-ector-1a6b9e06011a) asked him to try after [Sir Kay](entity:character-recall-character-sir-kay-b93c82975d98) had failed. Sir Ector then revealed that he was not Arthur's birth father: he had been entrusted with Arthur's upbringing, and his wife had nursed him. Arthur grieved at learning that Sir Ector was not his father, but affirmed his debt to the household that had raised him. In return for Sir Ector's care, he promised to honor his foster-father's request that Sir Kay become seneschal.
The lords did not accept the first demonstration as final. At [Twelfth Day](entity:time-recall-time-twelfth-day-fbbf09f1c375), other claimants failed to draw the sword, but their anger at the prospect of being governed by a boy led them to postpone the decision until [Candlemas](entity:time-recall-time-candlemas-0f707536d9d8). Arthur drew it again then, and again the lords delayed judgment, this time until [Easter](entity:time-recall-time-easter-4ee721615d13). At [Pentecost](entity:time-recall-time-16e2becf2ca1), after no one else could succeed, Arthur drew the sword before the lords and commons. The people declared that they would have him as king and would no longer delay; they knelt and asked his pardon for having kept him waiting. Arthur forgave them, offered the sword on the altar, was made a knight, and was crowned. He swore to rule truly and uphold justice for the rest of his life.
## Repairing the Realm and Facing Opposition
The new king's first work included restoring lands taken from their rightful owners during the disorder after Uther's death. He appointed Sir Kay seneschal of England, Sir Baudwin of [Britain](entity:location-recall-location-01048caf1f48) constable, Sir Ulfius chamberlain, and Sir Brastias warden of the north from the Trent onward, where Arthur's enemies were concentrated. The account says that within a few years Arthur won the north, [Scotland](entity:location-recall-location-scotland-4e112aa71aa3), and the territories under their obedience; he also overcame the parts of [Wales](entity:location-recall-location-6d9a7b286e78) that resisted him. His claim, confirmed by the sword and the people's acclamation, was thus followed by the exercise of authority through restitution, appointments, and conquest.
Resistance nevertheless continued. Six kings gathered five others into an alliance against Arthur, swearing not to abandon one another until they had destroyed him. Their force was described as fifty thousand mounted men-at-arms and ten thousand on foot. The scale of this coalition shows the limit of a single public test: Arthur's right to rule may be presented as divinely confirmed, yet rival rulers still contest it through armies and oaths of mutual support.
A later Roman embassy renewed the question of sovereignty in another form. Twelve aged ambassadors, carrying olive branches, demanded Britain's tribute for the emperor, citing [Rome](entity:location-recall-location-f3877a21016f)'s former authority and threatening war. Arthur protected the envoys from young knights who wanted to attack them, gave them hospitality, and answered only after consulting his lords. He rejected the tribute demand and asserted a claim to imperial sovereignty on the basis of his predecessors; his allies promised military support. The episode extends the succession crisis beyond the crown itself: Arthur's authority must be defended against both domestic rivals and an external empire claiming the right to command him.
Event 20
贝德格雷恩森林之战
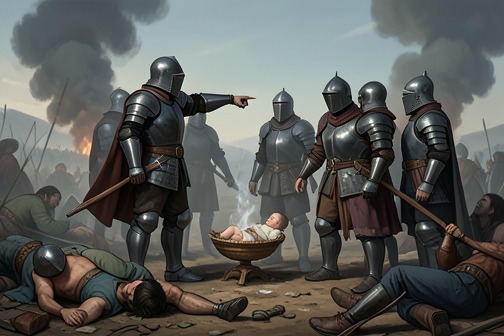
[The Battle of Bedegraine](entity:action-recall-action-the-battle-of-bedegrai-0980b1c3b2d4) is an early test of [Arthur](entity:character-recall-character-arthur-2e33b65bbe57)’s kingship: an alliance of eleven rulers gathers to destroy him, and the ensuing battle pits their much larger host against Arthur’s forces and the allied kings Ban and Bors. [Merlin](entity:character-recall-character-merlin-3f8c52535684) shapes the campaign through intelligence, destruction of the enemy’s route, and a concealed reserve. The fighting is fierce and costly, but it ends not with the alliance’s defeat but with Merlin’s warning that Arthur must withdraw. A further threat—the Saracens invading the allied kings’ lands—turns the battlefield’s unfinished outcome into a temporary reprieve for Arthur.
## Causes and Forces
The northern host arises from the six kings’ resentment at the rebuke they had suffered at [Carlion](entity:location-recall-location-carlion-4558a928ecc8). They bring five other rulers into their cause and swear not to abandon one another until Arthur is destroyed. The alliance’s promised forces amount to fifty thousand men-at-arms on horseback and ten thousand on foot. [King Lot](entity:character-recall-character-king-lot-9b2d273655ec), father of [Gawaine](entity:character-recall-character-gawaine-e52d508f7128), and [King Uriens](entity:character-recall-character-king-uriens-fceb3b0edcbd), father of [Uwaine](entity:character-recall-character-uwaine-6468cffc7b73), are among its members; the other named kings include Brandegoris, Clariance, the [King with the Hundred Knights](entity:character-recall-character-king-with-the-hundr-225bebe60e00), Idres, Agwisance, Nentres, and Carados. The account presents the oath as the political bond that turns individual grievance into a coordinated invasion.
The allied kings move toward Bedegraine, where Arthur’s castle is held by his men. Three kings arrive there and find a well-provisioned fellowship, but the besieging force does not remain concentrated around the castle: the eleven kings advance against Arthur, leaving only a small number to maintain the siege. The conflict thus has two linked stakes—the security of Arthur’s stronghold and the survival of his kingship against a coalition committed to his destruction.
## Intelligence and the Opening Attack
Merlin’s counsel gives Arthur advance knowledge of the enemy’s route. Scouts meet the northern force’s scouts and learn its direction; on the advice of Ban and Bors, Arthur’s side burns and destroys the country ahead of the approaching army. The narrative also reports a dream by the King with the Hundred Knights: a great wind knocks down castles and towns, then a flood carries them away. Those who hear it take the vision as a warning of major battle, placing an omen beside the practical work of reconnaissance.
At midnight, Arthur’s forces attack the enemy while it is lodged in its pavilions. Arthur, Ban, and Bors strike so fiercely that the tents are thrown down, yet the eleven kings rally and secure a field. Ten thousand men are killed by the following morning. Merlin then proposes a trap: Ban and Bors, with ten thousand men, are to remain concealed in a wood until Arthur’s smaller visible force has engaged the enemy for a long time. At daylight, Arthur’s men are to present themselves at the passage so that the northern host, seeing fewer opponents, will be encouraged to press forward. The plan makes the enemy’s confidence part of the stratagem.
## The Battle and Its Turning Points
The next morning the two armies face one another at the passage. Ulfius and Brastias lead three thousand men into the fighting. Ulfius continues on foot after his horse is killed, while Brastias knocks the Duke of Cambenet from his horse; Clariance meets Brastias in turn, and both fall. [Kay](entity:character-recall-character-kay-2946c1889f8a) arrives with six companions. As knights are unhorsed, Kay helps Griflet back into the fight by taking a horse from [King Nentres](entity:character-recall-character-king-nentres-57447b4691a4), and he also strikes down King Lot. The account gives these incidents as examples of the battle’s shifting fortunes, where individual interventions briefly alter who can continue fighting.
The struggle remains unresolved, and the coalition changes its arrangement. [Lot](entity:character-recall-character-lot-a206f4ef5bfe) proposes that five kings take fifteen thousand men aside while the other six keep Arthur occupied with twelve thousand; the detached force is to return once the first group has fought for some time. Meanwhile, Ban and Bors’s concealed force emerges. Lionses and Phariance meet Idres and his men, and the fighting leaves those two knights in danger before Bors arrives with his fellowship. The narrative emphasizes how the reserve changes the pressure of the battle, but does not claim that its arrival immediately settles the contest.
Arthur’s own intervention intensifies the combat: he rides across the field and kills twenty knights, wounds Lot, and helps drive the opposing kings from the ground with Kay and Griflet. Ulfius, Brastias, and [Ector](entity:character-recall-character-ector-8f00ddc6c029) also engage the enemy kings. Later, forty named knights ride forward together against the eleven kings and their men. Arthur, Ban, and Bors join the press, and the fighting drives the opposing force back across a small river. These episodes portray the battle as a sequence of attacks, counterattacks, and regroupings rather than a single decisive charge.
## Withdrawal and Aftermath
Merlin stops the battle before Arthur can pursue a total victory. He tells Arthur that of sixty thousand men, only fifteen thousand remain alive, and warns that continuing would risk a reversal of fortune: the eleven kings cannot be overthrown at that moment, and they may grow stronger if Arthur persists. Ban and Bors agree with Merlin’s assessment. His intervention changes the meaning of the battlefield success; the immediate task is no longer to destroy the coalition but to preserve Arthur’s force and reward its service.
Merlin predicts that the eleven kings will not dare Arthur for three years and explains that they have another danger to face: more than forty thousand Saracens have landed in their lands, are burning and killing, and have besieged [Wandesborow Castle](entity:location-recall-location-wandesborow-castle-55af4b1b46f1). He directs Arthur to have the goods taken in the battle searched and given to Ban and Bors, so that they can reward their knights. Arthur accepts the plan, and the two kings distribute the goods among their followers. The account therefore closes on a deliberately limited result: the coalition survives, Arthur’s army withdraws after immense losses, and the invasion of the kings’ own territories supplies the interval Merlin foretells.
## Political and Narrative Significance
The battle makes kingship depend on more than personal prowess. Arthur fights directly, but the campaign also turns on scouts, counsel, reserves, and the cooperation of Ban and Bors. Merlin’s advice first shapes how the enemy is approached and then restrains Arthur at the moment when continued fighting might squander the gains. The contrast between Arthur’s drive in combat and Merlin’s insistence on withdrawal presents strategic restraint as essential to rule.
Bedegraine is not a clean resolution of rebellion. The eleven kings’ oath remains a threat, and the battlefield does not produce their surrender; the Saracen invasion redirects their attention instead. The episode’s sequence—coalition, intelligence, ambush, renewed fighting, and withdrawal—makes victory provisional. It establishes Arthur’s capacity to withstand a larger alliance while showing that the stability of his rule remains contingent on counsel and on dangers beyond the immediate conflict.
Event 21
Arthur Rescues Cameliard
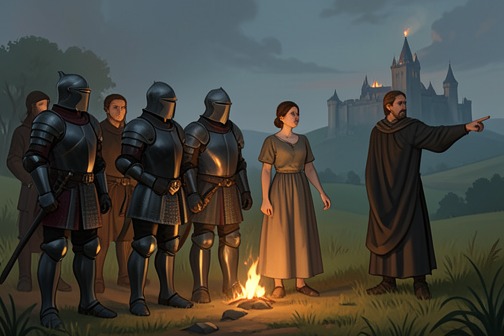
[Arthur](entity:character-recall-character-arthur-2e33b65bbe57)’s relief of [Cameliard](entity:location-recall-location-cameliard-be83cd285c39) is both a decisive act of aid to [King Leodegrance](entity:character-recall-character-king-leodegrance-933bca34609c) and the occasion of Arthur’s first sight of [Guenever](entity:character-recall-character-112dfc46734b), whom he would later marry. The rescue joins battlefield victory to dynastic and military alliances: [King Ban](entity:character-recall-character-king-ban-70615110b555) and [King Bors](entity:character-recall-character-king-bors-5567127b563b) fight beside Arthur, then return to their own threatened lands with a promise of mutual support.
## Causes and participants
[King Rience](entity:character-recall-character-king-rience-21139000288c) of [North Wales](entity:location-recall-location-3df16a26c9ed) had made war on King Leodegrance of Cameliard. Arthur loved Leodegrance and hated Rience, who had long opposed him. In response, Arthur set out with King Ban, King Bors, and their fellowship to relieve Cameliard.
The wider setting was unsettled. Ban and Bors had lands threatened by [King Claudas](entity:character-recall-character-king-claudas-5f9dc514d95a), and [Merlin](entity:character-recall-character-merlin-3f8c52535684) warned that Arthur would soon have need of them. Their expedition therefore brought together personal loyalty, resistance to Rience, and an alliance among rulers facing separate conflicts.
## The relief of Cameliard
Arthur, Ban, and Bors reached Cameliard within six days with a force of twenty thousand. They rescued Leodegrance, killed ten thousand of Rience’s men, and put Rience to flight. Leodegrance thanked the three kings for avenging him on his enemies and gave them a warm welcome.
During the visit, Arthur first saw Guenever, Leodegrance’s daughter, and loved her thereafter. The narration looks ahead to their marriage, making the rescue not only a military turning point but also the beginning of the attachment that would shape Arthur’s household.
## Alliance and prophecy
After the victory, Ban and Bors prepared to return home because Claudas was causing great destruction in their lands. Arthur offered to go with them, but they refused: they judged that he still had much to do in his own country. They said they would use the goods received through his generosity to recruit good knights and resist Claudas, and promised to come to Arthur’s aid if he needed them; if they needed him, they would send for him without delay.
Merlin then made the exchange of aid prophetic. He said Ban and Bors would not need to return to war in that way, but that Arthur would come to their aid within a year or two. He also foretold that the eleven kings would all die in a single day through the prowess of [Balin](entity:character-recall-character-balin-4b106c0600f6) and [Balan](entity:character-recall-character-balan-abfb5ce228d0). The rescue thus closes with reciprocal promises and a forecast that links later conflicts to the alliances formed in the aftermath of Cameliard’s deliverance.
Event 22
Arthur's Attempt to Kill the May-born Infants
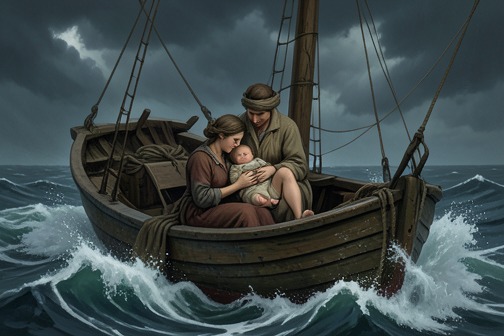
[Arthur](entity:character-recall-character-arthur-2e33b65bbe57)’s Attempt to Kill the [May](entity:time-recall-time-may-1281a8b8ee63)-born Infants is a royal response to [Merlin](entity:character-recall-character-merlin-3f8c52535684)’s warning that a child born on [May Day](entity:time-recall-time-may-day-c9cdfdf972a4) would destroy him. Arthur orders the children gathered and sent away by ship; most perish when the vessel is wrecked, but [Mordred](entity:character-recall-character-431d80a88894) survives. The episode exposes the human cost of trying to escape a foretold ending and establishes the child who will later claim Arthur’s kingdom as the survivor of the king’s own attempt to avert that fate.
## Prophecy and the King’s Order
The episode is introduced as the story of how the children born on May Day were sent for and how Mordred was saved. Its stated cause is Merlin’s prediction to Arthur: the person who would destroy the king would be born on that day. In response, Arthur commands that the May-born children of lords and ladies be brought to him, under penalty of death. The danger is presented as a prophecy, while the measure taken against it is an order imposed on families throughout the realm.
## The Ship and Mordred’s Survival
Many sons of lords are found and delivered to the king. Among them is Mordred, sent by [King Lot](entity:character-recall-character-king-lot-9b2d273655ec)’s wife. Arthur has the children put aboard a ship at sea; some are only four weeks old, and some younger. The ship is driven to a castle, where it is wrecked. Most of the children are lost, but Mordred is cast ashore and found by a good man, who raises him until he is fourteen. The man then brings him to court, where his story is taken up later in the narrative.
The outcome reverses the intention of the order: the children are exposed to danger in the hope of preventing the foretold destroyer’s rise, yet Mordred survives while the others do not. His survival is not presented as the result of a royal plan; it comes through the wreck, his rescue, and his upbringing away from Arthur’s immediate care.
## Political Cost and Foreshadowing
The loss angers many lords and barons, who blame Merlin more than Arthur. Their displeasure does not immediately become open resistance: the account says they keep silent through a mixture of fear and affection. The act therefore leaves a political grievance beneath the outward quiet of the realm, showing that the king’s response to prophecy reaches beyond the children themselves and strains relations with their families.
The episode’s irony rests on the difference between the threat Arthur tries to forestall and the consequence his order actually produces. Mordred, the child singled out by the prophecy, survives the mass sending and eventually reaches Arthur’s court. Later, he presumes to rule [England](entity:location-recall-location-england-b153c1f368ea) and seeks to marry the queen, his uncle’s wife, setting the prophecy’s warning against the king’s own household and kingdom. The account does not say that Arthur’s order causes Mordred’s later actions; instead, the survival of the child gives the earlier attempt its grim retrospective significance.
Event 23
Balin Draws the Cursed Sword
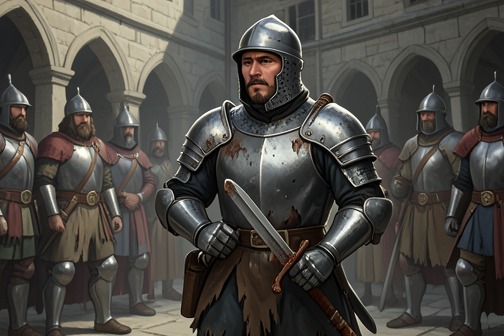
[Balin Draws the Cursed Sword](entity:event-recall-event-balin-762ea0e19fd6) is the episode in which [Balin](entity:character-recall-character-balin-4b106c0600f6), a poorly dressed knight recently released from [King Arthur](entity:character-recall-character-king-arthur-2b97864f54aa)’s prison, draws a sword that no other knight can free from its scabbard. The test publicly recognizes his worth, yet the sword’s bearer warns that it will cause him to kill his dearest friend and bring about his destruction. Balin accepts the risk, keeps the weapon, and departs from [Arthur](entity:character-recall-character-arthur-2e33b65bbe57)’s court. The scene makes a token of knightly virtue an instrument of anticipated tragedy.
## The test at Arthur’s court
The episode begins with a damsel sent by the great lady of [Avelion](entity:location-recall-location-avelion-213a290c3958), who arrives at Arthur’s gathering wearing a sword she cannot remove. She explains that only a knight of exceptional prowess and deeds, free of [treachery](entity:concept-recall-concept-22ce6e5d8b9f) and treason, can draw it. The test is not simply a contest of strength: the damsel describes the successful knight as one whose conduct and lineage meet a demanding standard of worth. She has already taken the sword to King Ryons and his knights, but none has succeeded.
Arthur is at [Camelot](entity:location-recall-location-camelot-352b4eac6f0e) with his baronage after news that Ryons of [North Wales](entity:location-recall-location-3df16a26c9ed) has invaded his lands, burning and killing his loyal subjects. He summons the lords and knights to council and holds a tournament; the sword’s arrival turns this public gathering into a test of character as well as arms. Arthur tries first, not claiming to be the best knight, but intending to encourage the others to make the attempt. He pulls eagerly at the sword, but it does not move. He then invites the assembled knights of the [Round Table](entity:object-recall-object-round-table-04fef19b82fd) to try in turn. None can draw it, and the damsel laments that she had believed Arthur’s court contained the best knights, free of treachery.
## Balin’s success
Balin is at court under unusual circumstances. He has spent more than half a year as a prisoner for killing a knight who was Arthur’s cousin, and the barons have secured his release. Though known as a capable man, he is poor and poorly dressed. When the others attempt the test, he keeps back rather than pressing forward. His confidence, however, is not diminished by his appearance: he believes himself capable of succeeding as well as any knight there.
As the damsel prepares to leave, Balin asks permission to try. She doubts that he can succeed because of his poor clothing and apparent lack of standing. Balin answers that worth, good qualities, good deeds, courage, and honor are not proved by clothing; a worthy knight may remain unknown to the people around him. The damsel accepts his argument and lets him make the attempt. Balin takes hold of the sword by its girdle and sheath and draws it out easily. The contrast is immediate: Arthur and the leading knights have failed despite their rank and reputation, while the poorly dressed, recently imprisoned knight succeeds without apparent effort.
The assembled court marvels at Balin’s success, and some knights resent him. The damsel, by contrast, declares him an exceptionally worthy knight, free of treason, treachery, and villainy, and predicts that he will accomplish many marvels. The scene therefore gives Balin public recognition while also exposing the court’s readiness to judge him by outward appearance. His deed overturns that judgment, at least for the moment.
## The warning and the choice to keep the sword
The damsel asks Balin to return the sword. He refuses, saying he will keep it unless it is taken from him by force. She warns him that the weapon will make him slay the best friend he has and the man he loves most in the world; she adds that the sword will be his destruction. Her warning changes the meaning of the test. Drawing the sword has established Balin’s worth in the eyes of the court, but it has also attached a future of intimate loss to the very object that seemed to confirm his exceptional standing.
Balin hears the warning and says that he will accept whatever adventure God ordains, but he still refuses to surrender the weapon. The damsel says she wanted the sword for his benefit, not her own, and leaves sorrowing that he will not believe it will destroy him. The account does not describe a change of mind or an attempt by Balin to test her prediction; his answer is a direct acceptance of the risk as he understands it. The sword remains his, while its foretold consequence remains unresolved within this episode.
## Departure and narrative significance
After the damsel leaves, Balin sends for his horse and armor and prepares to depart. Arthur asks him not to leave so quickly and admits that he had previously been misinformed about him. He offers to advance Balin within the fellowship and make amends for the unkindness he has shown. Balin thanks the king for his generosity but says he must leave at that time, asking for Arthur’s continuing favor. Arthur is sorry to see him go and asks him not to remain away long, promising that Balin will be welcome to him and his barons.
Balin’s departure sets the recognition produced by the test against his separation from the court: Arthur now values him, yet cannot persuade him to stay. The episode also complicates the idea that a public test can securely identify virtue. The sword responds to Balin, and the damsel names him worthy, but the same object carries a prophecy of destruction. His choice to keep it makes the warning, rather than the triumph alone, the scene’s decisive conclusion. The event establishes a tragic tension between honor demonstrated in the present and a future loss that Balin cannot yet see fulfilled.
Event 24
Balin Kills the Lady of the Lake
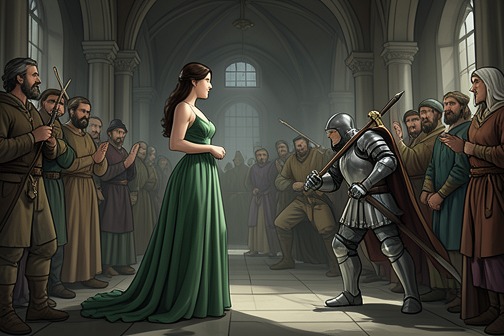
[Balin Kills the Lady of the Lake](entity:event-recall-event-balin-b1056bdc445c) is the violent collision of private vengeance with [King Arthur](entity:character-recall-character-king-arthur-2b97864f54aa)’s public obligations. When the [Lady of the Lake](entity:character-recall-character-lady-of-the-lake-afb8b77d3497) demands the head of the knight who won [Excalibur](entity:object-recall-object-excalibur-a2b72b99cb6d) or the maiden who brought it, [Arthur](entity:character-recall-character-arthur-2e33b65bbe57) refuses to grant either. [Balin](entity:character-recall-character-balin-4b106c0600f6) recognizes the visitor as the woman he has sought for three years because she caused his mother’s death, and kills her in the king’s presence. Arthur’s refusal to sanction the killing, his appeal to safe conduct, and his banishment of Balin make the episode a decisive test of hospitality, justice, and loyalty at court.
## The demand at court
The encounter follows the winning of the sword and the Lady of the Lake’s arrival at Arthur’s court. She reminds Arthur that he had promised her a gift when she gave him the sword. Arthur acknowledges the promise but says that he has forgotten the sword’s name. She identifies it as Excalibur, explaining its meaning as “Cut-steel,” and asks for the head of the knight who won it or of the maiden who brought it. She says that the knight killed her brother, whom she describes as a good and true knight, while the maiden had caused her father’s death.
Arthur declines to fulfil this demand. He says that he cannot surrender either head with honour and invites the Lady to ask for something else, promising to grant it if it lies within his power. She refuses to make another request. The exchange leaves Arthur’s promise acknowledged but bounded: his obligation to the visitor cannot, in his judgment, override his duty toward those now under his protection.
## Balin’s recognition and act
As Balin prepares to depart, he sees the Lady and recognizes her as the person who had caused his mother’s death. The accompanying account says he had sought her for three years. When he learns that she has asked Arthur for his head, he goes straight to her and kills her with his sword before the king. His act is personal retaliation, carried out openly inside the court rather than through Arthur’s promised gift.
Balin tells Arthur that the Lady was, in his view, false and destructive to good knights through enchantment and sorcery, and that her [treachery](entity:concept-recall-concept-22ce6e5d8b9f) had caused his mother to be burned. Those accusations explain the grievance that drives him, but they do not alter Arthur’s judgment of the immediate breach. The king answers that whatever cause Balin had, he should have spared her in Arthur’s presence. The episode holds the two claims apart: Balin’s account of an older wrong and Arthur’s insistence that the visitor was owed protection while at his court.
## Safe conduct and banishment
Arthur rebukes Balin for shaming both him and the court. The Lady, he insists, was someone to whom he was beholden and who had come under his safe conduct. He declares that he will never forgive the trespass and orders Balin to leave the court without delay. The killing therefore changes Balin’s standing: a grievance he regards as settled becomes, in Arthur’s eyes, an offence against the king’s authority and hospitality.
Balin takes the Lady’s head with him to his lodging, where he meets his squire, who is sorry that Balin has displeased Arthur. Balin entrusts the head to the squire and asks him to carry it to his friends, tell them how he has fared, and inform his friends in [Northumberland](entity:location-recall-location-northumberland-1d87d0a03a77) that his chief foe is dead. He also says that he is out of prison and recounts the adventure of obtaining the sword. The squire answers that Balin is greatly to blame for offending Arthur; Balin acknowledges the king’s displeasure but says he will hurry to meet King Ryons and either destroy him or die trying. He hopes that winning against Ryons will restore Arthur’s favour, and names Arthur’s court as the place where the squire should meet him again.
## Aftermath and narrative significance
Balin and his squire part, while Arthur and the court grieve over the Lady’s death and feel shame at what has happened. Arthur has her buried richly. The contrast is sharp: Balin regards the death as the end of a long personal pursuit, whereas the court receives it as a breach that cannot be repaired by his explanation or his future service. His hope that success against King Ryons will regain the king’s goodwill remains a stated intention, not an outcome established in this episode.
The scene also makes the sword’s history inseparable from a conflict of obligations. The Lady’s reminder connects Excalibur to Arthur’s earlier promise; her demand then forces him to weigh that promise against protection owed at court. Balin’s intervention prevents the demand from being settled on her terms, but does not restore order: it leaves a dead visitor, a grieving court, and a knight sent away. The decisive issue is not whether Balin’s grievance is sincere, but whether private vengeance can be enacted within the king’s presence without violating the protection he has undertaken to provide.
Event 25
Arthur's Battles with Nero and Lot, and the Deaths of Twelve Kings
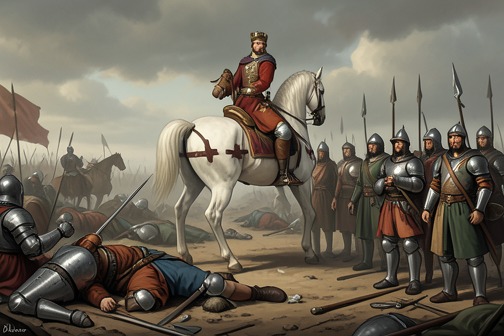
[Arthur's Battles with Nero and Lot, and the Deaths of Twelve Kings](entity:event-recall-event-arthur-nero-lot-62a66f083ab8), is an early test of [King Arthur](entity:character-recall-character-king-arthur-2b97864f54aa)’s rule in which military victory depends not only on the strength of his army but also on [Merlin](entity:character-recall-character-merlin-3f8c52535684)’s intervention and the unexpected aid of [Balin](entity:character-recall-character-balin-4b106c0600f6) and [Balan](entity:character-recall-character-balan-abfb5ce228d0). Nero is defeated while [Lot](entity:character-recall-character-lot-a206f4ef5bfe) has been held back; when Lot finally enters the fighting, [Arthur](entity:character-recall-character-arthur-2e33b65bbe57)’s side prevails again, but [King Lot](entity:character-recall-character-king-lot-9b2d273655ec) is killed by [Pellinore](entity:character-recall-character-pellinore-edfd409e1ed7) and twelve kings die. The campaign establishes Arthur’s authority at a high human and political cost, while Lot’s death creates a grievance that later becomes a family vendetta.
## Causes and Forces
The battle takes place amid opposition to Arthur’s kingship. The account identifies Nero, the brother of King Ryons, as the leader of a large force assembled against Arthur. The preceding political conflict also includes King Lot, who is not simply an outside enemy: he had formerly been one of Arthur’s knights and had married Arthur’s sister. The narrator connects Lot’s resistance to a wrong Arthur had done him, placing an unresolved breach of kinship and allegiance behind the military confrontation.
Arthur prepares his host in ten divisions, while Nero fields ten divisions and a force described as larger than Arthur’s. The encounter unfolds before [Terrabil Castle](entity:location-recall-location-terrabil-castle-132d2cbff132). Merlin’s role shapes the order in which the armies meet: he keeps Lot occupied with a prophecy while Nero and his men are engaged. The delay is consequential, not incidental. Merlin knows that if Lot joins the first battle, Arthur and his people may be destroyed, and he would rather see Lot die than Arthur.
## Nero’s Defeat
During the fighting against Nero, Arthur’s knights receive notable support from Balin, the knight with two swords, and his brother Balan. Their prowess astonishes those who see them, and Arthur regards them as the best knights he has ever witnessed. Their arrival strengthens Arthur’s side at a critical point in the battle, while Merlin’s delay prevents Lot’s substantial force from joining Nero in time.
A messenger eventually reaches Lot with news that Nero and his army have been destroyed. Lot recognizes that his absence has cost his allies dearly: he says that many worthy men have died through his default and that, had the kings fought together, no host could have matched them. He also understands that Merlin’s prophecy has served to deceive and detain him. The first victory therefore carries a clear reversal: the combined force Lot imagined as overwhelming has been divided, and Nero has fallen before Lot can bring his army to the field.
## The Battle with Lot and His Death
After Nero’s defeat, Lot’s remaining forces face the choice of negotiating or attacking. One knight urges Lot to strike because Arthur’s men are weary while Lot’s are fresh. Lot instead says that he wishes every knight to do his part as he will do his own, and the armies advance. Their spears are shattered in the charge, and Arthur’s forces, assisted again by Balin and Balan, put Lot’s army to the worse.
Lot remains in the forefront and sustains his army through his own actions, meeting the knights who oppose him. His courage does not spare him. Pellinore, identified at this point as the knight with the strange beast, aims a powerful blow at Lot, misses him, and strikes his horse’s neck. When Lot falls with the horse, Pellinore delivers the blow that kills him. The account marks Lot’s death as a great loss despite his opposition to Arthur: he is described as a worthy knight, and his earlier service at Arthur’s court and marriage into Arthur’s family complicate the victory. His army flees after his death, and many others are killed in the rout.
## The Dead and the Consequences
Twelve kings on Lot’s side, including those associated with Nero’s force, are reported slain in the battle. They are buried at the church of Saint Stephen’s in [Camelot](entity:location-recall-location-camelot-352b4eac6f0e); the other dead knights and people are buried in a great rock. These burial details give the victory a public aftermath: the conflict is not only an exchange of battlefield fortunes but also a collective loss commemorated within Arthur’s realm.
Lot’s death continues to shape the story long after the battle. Pellinore is held responsible for killing him, and [Sir Gawaine](entity:character-recall-character-sir-gawaine-bf0b0cf3eb43) later avenges his father by killing Pellinore in the tenth year after [Gawaine](entity:character-recall-character-gawaine-e52d508f7128) is made a knight. The battle thus converts a political and military conflict into an inherited family obligation. Arthur’s victory over Lot settles the immediate contest, but it does not erase the costs of the earlier wrong or the consequences of Lot’s death.
## Narrative and Political Significance
The episode presents kingship as both a claim to rule and a capacity to survive challenges from powerful rival rulers. Arthur’s army begins at a numerical disadvantage against Nero, while Merlin’s intervention changes the timing of the confrontation and helps keep Lot from joining the opening engagement. The victory is therefore attributed not to strength alone but to coordinated action, counsel, and the particular skill of the knights who enter the fighting.
Yet the outcome resists a simple celebration of triumph. Lot is both an enemy in the field and a former member of Arthur’s court, linked to him by marriage; his death is treated as grievous, and its repercussions pass into the next generation. The battle secures Arthur’s position for the moment, but the revenge that follows shows how military settlement can preserve rather than resolve political and familial conflict.
Event 26
Balin Deals the Dolorous Stroke to Pellam
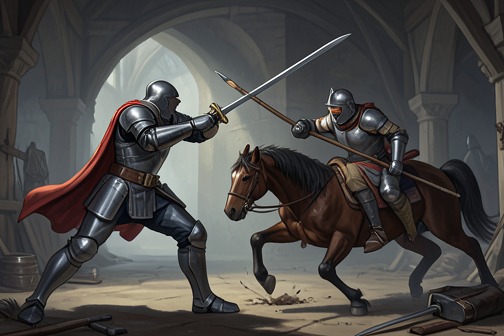
## The Feast and the Grievance
[Balin Deals the Dolorous Stroke to Pellam](entity:event-recall-event-balin-pellam-5eb61258a73b) begins with a grievance brought to a feast. [Balin](entity:character-recall-character-balin-4b106c0600f6) and his companions have been staying with a wealthy host whose son cannot recover unless the host obtains blood from the knight who wounded him. That knight is Garlon, brother of [King Pellam](entity:character-recall-character-king-pellam-3f2bbc2daf06), who can travel unseen. Balin recognizes him as an enemy who has also harmed two of his own knights, and agrees to help the host find him.
The host explains that Pellam has called a great feast, open to knights accompanied by a wife or beloved. Balin arrives with a lady, while his host, lacking a companion, is refused entry. Once inside, Balin asks where Garlon is and identifies him by his black face. He weighs the danger of attacking Garlon in the crowded court against the chance that he may never meet him again. Garlon notices Balin watching, strikes him across the face with the back of his hand, and orders him to attend to his meal. Balin answers the insult by killing him, then uses Garlon’s truncheon to strike him again and tells the host that he can now take blood for his son.
## The Broken Sword and the Spear
The feast’s grievance turns abruptly into a larger disaster. The assembled knights rise against Balin for killing Garlon, and King Pellam himself confronts him, declaring that he will die for his brother’s death. Pellam insists on fighting Balin personally, out of regard for his brother. Balin interposes his sword against Pellam’s blow, but the blade breaks, leaving him without a weapon. He runs from chamber to chamber as Pellam pursues, searching unsuccessfully for another means of defense.
In a richly furnished chamber, Balin finds a bed covered with cloth of gold, a person lying upon it, a table of pure gold supported by four silver pillars, and an unusually wrought spear resting on the table. He seizes the spear and strikes Pellam with it. The blow brings down the roof and walls of the castle; Balin falls too, unable to move, and the ruined building lies over both men for three days. The title’s Dolorous Stroke names not a controlled victory but an act whose force exceeds the immediate quarrel and leaves its agent trapped in the destruction it unleashes.
## Revelation and the Wound’s Long Aftermath
[Merlin](entity:character-recall-character-merlin-3f8c52535684) finds Balin beneath the fallen castle, lifts him out, and provides a sound horse, for Balin’s own has died. Balin asks for his lady, but Merlin points out that she too lies dead. The scene closes the immediate possibility of undoing the catastrophe: the feast’s quarrel has cost lives, and Balin must leave the place without the companion who had traveled with him.
Merlin also reveals why the spear’s blow reached far beyond an ordinary contest between knights. The spear was the one with which Longius pierced [Jesus Christ](entity:character-recall-character-jesus-christ-1861cf215964), and the blood of Christ had been brought to [Britain](entity:location-recall-location-01048caf1f48) by [Joseph of Arimathea](entity:character-recall-character-joseph-of-arimathea-79b90306708c) and kept in that place. King Pellam, a kinsman of Joseph, was left gravely wounded and remained so for many years, until [Galahad](entity:character-recall-character-galahad-e8a04503b5e9) healed him during the quest for the [Sangreal](entity:object-recall-object-sangreal-c287525e0d7a). The spear, the sacred blood, Pellam’s lineage, and the later healing connect Balin’s sudden violence to a religious history extending beyond his own lifetime; the wound is not resolved by the immediate rescue but persists until a later quest.
After separating from Merlin, Balin rides through the surrounding lands and sees people dead on every side. Survivors name him as the cause of the devastation and say that three countries have been destroyed by the stroke he dealt Pellam. They warn that vengeance will eventually fall upon him. Balin is glad when he passes out of those lands, but the landscape has already turned his act into a public consequence: the damage is measured not only in his own danger or Pellam’s suffering, but in the ruin of whole countries.
## The Stroke as a Turning Point
The episode begins with Balin seeking Garlon’s blood to help a wounded boy, and with a personal grievance against a knight who had harmed two of Balin’s companions. At the feast, Garlon’s insult and Balin’s killing of him make that grievance fatal. Pellam then takes up the conflict on behalf of his brother; Balin’s sword breaks, and his search for a weapon ends with the sacred spear. The sequence turns a stated intention to obtain blood for healing into a blow that wounds Pellam, destroys the castle, kills Balin’s lady, and devastates three countries.
That reversal gives the episode its force within the larger narrative. Balin does not set out to attack Pellam or to devastate the realm; the destruction follows from a chain of retaliations and from the weapon he takes up when disarmed. Yet the story does not treat the result as incidental: Merlin names the spear’s sacred provenance, the inhabitants identify the scale of the harm, and the eventual healing of Pellam belongs to Galahad’s later Sangreal quest. The Dolorous Stroke thus marks a point where a knight’s immediate action becomes a wound in the land and a burden carried forward into the book’s sacred history.
## The Stroke as a Turning Point
The episode begins with Balin seeking Garlon’s blood to help a wounded boy, while also carrying a grievance against a knight who has harmed two of his own companions. Garlon’s public insult makes the encounter fatal; Pellam then takes up the conflict for his brother. When Balin’s sword breaks, his search for another weapon ends with the sacred spear. The sequence turns a proposed remedy into a blow that gravely wounds Pellam, brings down the castle, kills Balin’s lady, and devastates three countries.
That reversal gives the episode its force within the larger narrative. Balin does not set out to attack Pellam or devastate the realm; the destruction follows a chain of retaliation and his seizure of the spear when disarmed. Yet the consequences are not incidental: Merlin reveals the weapon’s sacred history, survivors name the scale of the damage, and Pellam’s eventual healing belongs to Galahad’s later quest for the Sangreal. The Dolorous Stroke marks the moment when a knight’s response to an immediate conflict becomes a wound in the land, one carried forward into the book’s sacred history.
Event 27
Balin and Balan's Fatal Duel
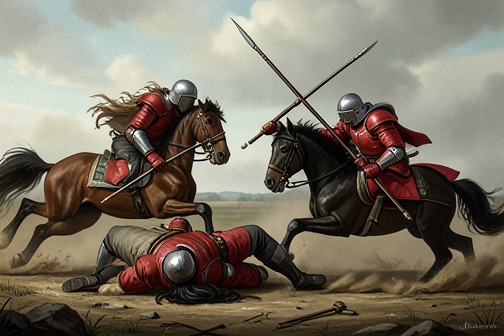
[Balin and Balan's Fatal Duel](entity:event-recall-event-balin-balan-085f4a5c0576) turns a failure of recognition into a catastrophe between brothers. Each mistakes the other for an enemy because [Balin](entity:character-recall-character-balin-4b106c0600f6) has exchanged his familiar shield; by the time they learn the truth, both are dying. Their shared tomb preserves the fact of their kinship and mutual destruction, while [Merlin](entity:character-recall-character-merlin-3f8c52535684)’s account connects Balin’s death to the sword’s later history and to a prophecy concerning [Sir Launcelot](entity:character-recall-character-sir-launcelot-c0ea01c62d3d), [Galahad](entity:character-recall-character-galahad-e8a04503b5e9), and [Sir Gawaine](entity:character-recall-character-sir-gawaine-bf0b0cf3eb43).
## Background and the fatal misrecognition
Balin arrives at the island already committed to accepting whatever adventure awaits him, despite being warned that the unfamiliar shield he has taken places him in danger. The shield matters because it conceals the identity by which others might know him. A knight in red, riding out from a castle, recognizes Balin’s two swords and suspects that he is facing his brother, but the unknown shield persuades him otherwise. The same disguise that prevents recognition by the other knight thus also prevents the brothers from recognizing one another.
The encounter is not a planned family quarrel. The brothers charge one another with their spears, and the force of their meeting knocks both horse and rider down. Balin is additionally weakened by travel and the fall of his horse; [Balan](entity:character-recall-character-balan-abfb5ce228d0) rises first and attacks. Once Balin gets up, each fights the other as an apparent opponent, with neither understanding that the man before him is his brother.
## The duel and recognition
The fight continues through repeated pauses and renewed attacks. The narrative emphasizes the brothers’ persistence and the escalating cost of their mistaken contest: each receives seven great wounds, and they continue until their strength fails. Balin sees the castle towers filled with ladies, but the spectacle does not interrupt the struggle or disclose the truth. At last Balan withdraws and lies down, and Balin asks what knight has matched him so completely.
Balan answers that he is Balan, brother to the good knight Balin. Recognition arrives only after the duel has become fatal. Balin collapses in a swoon; when he wakes, he identifies Balan as the brother who has killed him, and Balan understands that he too has killed Balin. Balan explains that he had noticed the two swords but judged the unfamiliar shield proof that the opponent was someone else. Balin blames the knight who induced him to leave his own shield, calling the act an unhappy one and connecting it to the brothers’ destruction.
Their exchange also reveals that the island has already held Balan against his will. He says that he killed the knight who kept the island and had since been unable to leave; Balin, he believes, would likewise have been unable to depart had he survived the encounter. The island’s customs and the shield’s deception together leave the brothers trapped in a contest they did not understand until it was too late.
## The brothers’ last request and burial
The lady of the tower arrives with four knights, six ladies, and six yeomen, and hears the brothers lament their discovery. Balan asks that they be buried together where the battle took place. Their wish gives the ending its defining image: those born of one womb will lie in one grave. The lady agrees to arrange a rich burial, and Balan asks for a priest so that they may receive the sacrament. She sends for one, and the brothers receive the rites.
Balan dies first. Balin survives until midnight, and they are buried together. The lady arranges an inscription for Balan, but does not know Balin’s name. The incompleteness of this first memorial is corrected the next morning, when Merlin comes and has Balin’s name written in gold on the tomb, identifying him as Balin le Savage, the knight of the two swords and the one who struck the Dolorous Stroke. The joined burial therefore records both the brothers’ shared fate and Balin’s distinct place in the larger history.
## Merlin’s account and the sword’s afterlife
Merlin makes the duel more than a closed tragedy by attaching future significance to Balin’s sword. He changes its pommel and tests whether a nearby knight can handle it; the knight cannot. Merlin explains that only the world’s best knight will be able to handle the sword: either Sir Launcelot or his son Galahad. He further foretells that Sir Launcelot will use it to kill the man he loves best, Sir Gawaine. Merlin has this prediction written on the pommel, preserving the weapon’s connection to the brothers’ deaths as a warning of a later conflict.
Merlin also orders an iron-and-steel bridge made to the island, so narrow that only a truly good knight, without [treachery](entity:concept-recall-concept-22ce6e5d8b9f) or villainy, can cross it. He leaves the scabbard on the near side for Galahad to find. Through Merlin’s arrangements, the sword is set in an upright marble stone, which floats on the water and eventually drifts downstream to [Camelot](entity:location-recall-location-camelot-352b4eac6f0e), identified in the narrative as [Winchester](entity:location-recall-location-winchester-704b3b26db1f). On [Whitsunday](entity:time-recall-time-whitsunday-48c879e8cd9c), Galahad arrives with [King Arthur](entity:character-recall-character-king-arthur-2b97864f54aa), brings the scabbard, and draws the sword from the stone, as recounted in the book of the [Sangreal](entity:object-recall-object-sangreal-c287525e0d7a).
When Merlin later tells King Arthur about the Dolorous Stroke inflicted on [King Pellam](entity:character-recall-character-king-pellam-3f2bbc2daf06), the brothers’ extraordinary battle, and their burial in one tomb, [Arthur](entity:character-recall-character-arthur-2e33b65bbe57) calls their fate the greatest pity he has heard of and says he knows no two knights their equal. The duel thus closes the tale of Balin and Balan while sending its consequences forward: a mistaken shield ends two lives, a shared grave makes their kinship memorable, and the surviving sword carries the story into the later history of the [Round Table](entity:object-recall-object-round-table-04fef19b82fd).
Event 28
Arthur Marries Guenever and Welcomes the Knights of the Round Table
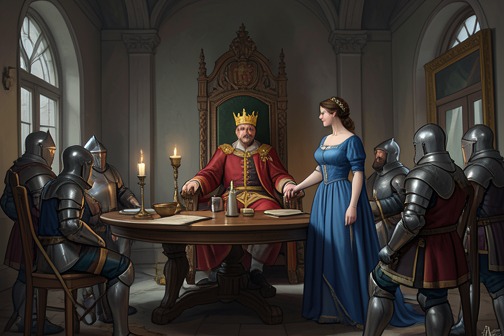
[Arthur Marries Guenever and Welcomes the Knights of the Round Table](entity:event-recall-event-guenever-c72df9d5bfff) unites the king’s marriage to the formation of his central chivalric fellowship. [Guenever](entity:character-recall-character-112dfc46734b) arrives from [Cameliard](entity:location-recall-location-cameliard-be83cd285c39) with her father’s gift of the [Round Table](entity:object-recall-object-round-table-04fef19b82fd) and one hundred knights; [Arthur](entity:character-recall-character-arthur-2e33b65bbe57) welcomes her, orders the marriage and coronation, and seats twenty-eight knights in the Table’s named places. The episode turns affection and dynastic alliance into public ceremony, while the later oath of the knights sets limits on the violence through which Arthur’s rule is maintained.
## Marriage and Political Alliance
Arthur’s choice of Guenever comes amid continuing challenges to his kingship. Although [Merlin](entity:character-recall-character-merlin-3f8c52535684) has made public that Arthur is the son of [Uther Pendragon](entity:character-recall-character-uther-pendragon-76932b817c39), many barons had not known his parentage, and kings and lords have made war against him. Arthur seeks Merlin’s counsel about taking a wife and declares that he loves Guenever, daughter of [King Leodegrance](entity:character-recall-character-king-leodegrance-933bca34609c) of Cameliard. His attachment is personal, but the match also binds him to a powerful ally and to the Round Table, which Leodegrance says Uther had once given him.
Merlin warns Arthur indirectly that the marriage will bring sorrow: [Sir Launcelot](entity:character-recall-character-sir-launcelot-c0ea01c62d3d) will love Guenever, and she will love him in return. Arthur does not turn from the marriage. The warning places a shadow over the alliance at its beginning, making the wedding both a consolidation of the present order and a moment whose future danger has already been disclosed.
## The Gift from Cameliard
Leodegrance receives Merlin’s request for Guenever’s hand as welcome news, honoring Arthur as a king of prowess and nobility. He offers land, but recognizes that Arthur already has enough; instead, he chooses a gift of greater political and institutional value. He sends the Round Table, originally received from Uther Pendragon, together with one hundred knights. The Table is intended for a company of one hundred and fifty, but Leodegrance explains that he lacks the remaining fifty because so many knights have been killed in his time.
Leodegrance entrusts Guenever, the Table, and the knights to Merlin. They travel toward [London](entity:location-recall-location-1bfd335cdd1b) with considerable ceremony, by both water and land. The wedding’s political substance is therefore visible before the marriage itself: Guenever arrives not alone but accompanied by a gift that links Arthur’s reign to Uther’s and supplies a fellowship of armed nobles to his court.
## Wedding and the Round Table’s Seats
Arthur rejoices at Guenever’s arrival and at the gift. He says that the lady is welcome because he has loved her long, and that the knights and Round Table please him more than great riches. He orders the marriage and coronation to be prepared with the greatest honor that can be devised. The narrative places the king’s affection beside his public responsibilities: marriage, coronation, and the reception of the fellowship form one coordinated act of royal establishment.
Arthur asks Merlin to find fifty knights of the greatest prowess and honor in the land. Merlin can identify only twenty-eight. The bishop of [Canterbury](entity:location-recall-location-canterbury-d9d154d6633e) blesses their seats with ceremony and devotion, and the twenty-eight knights take their places. After they rise and perform homage to Arthur, Merlin finds golden letters in every seat naming the knight who had sat there; two seats remain vacant. The ordered places make the Table a visible institution, but the empty seats mark the fellowship as incomplete even at its ceremonial beginning.
## Oaths, Duties, and the Fellowship’s Ideal
The marriage narrative’s institutional consequences extend beyond the wedding day. After the quests associated with the white hart, the brachet, and the abducted lady have been completed, Arthur establishes the obligations of the Table’s knights. He gives lands to those who lack sufficient means and commands them not to commit outrage or murder, to flee treason, and not to be cruel. They must show mercy to anyone who asks for it, with the loss of the king’s favor and lordship as the penalty for violating these standards.
Arthur also requires the knights to succor ladies, damsels, and gentlewomen, on pain of death, and forbids them to undertake battles for wrongful causes, whether for legal claims or worldly goods. Both young and old knights of the Table swear to these rules, and the oath is renewed every year at the high feast of [Pentecost](entity:time-recall-time-16e2becf2ca1). The Round Table is thus more than Leodegrance’s gift or a set of honored seats: it is a sworn community whose members are bound to restraint, mercy, and service. Its ideal stands in tension with the wars and private contests surrounding Arthur’s reign, while Merlin’s warning about Guenever and Sir Launcelot foreshadows a personal conflict that the fellowship’s public code cannot prevent.
Event 29
The White Hart Episode at Arthur's Wedding Feast
[The White Hart Episode at Arthur's Wedding Feast](entity:event-recall-event-67ed6c566e4f) interrupts the wedding of [King Arthur](entity:character-recall-character-king-arthur-2b97864f54aa) and [Guenever](entity:character-recall-character-112dfc46734b) with three marvels that become obligations of the court: a white hart pursued by hounds, the theft of the brachet that wounds it, and the forcible removal of a lady. King Arthur assigns the resulting quests to [Gawaine](entity:character-recall-character-gawaine-e52d508f7128), Tor, and [Pellinore](entity:character-recall-character-pellinore-edfd409e1ed7). Gawaine's pursuit gives the episode its moral center: his refusal to show mercy leads to a lady's accidental death, public disgrace, and a binding oath to defend women and spare those who seek mercy.
## The Wedding and the Three Adventures
King Arthur and Guenever are solemnly married at [Camelot](entity:location-recall-location-camelot-352b4eac6f0e), in the church of Saint Stephen's. At the feast that follows, [Merlin](entity:character-recall-character-merlin-3f8c52535684) tells the [Knights of the Round Table](entity:character-recall-character-3f167931be46) to remain seated because a strange adventure is about to appear. A white hart runs into the hall, followed by a white brachet and thirty couple of black hounds. As the hart passes the [Round Table](entity:object-recall-object-round-table-04fef19b82fd), the brachet bites its haunch and pulls away a piece. The hart leaps and knocks over a knight at the board's side; that knight takes up the brachet, leaves the hall, mounts his horse, and rides away with it.
A lady then arrives on a white palfrey, asking King Arthur to prevent the brachet's removal because it is hers. Before the king acts, another armed knight carries her off by force as she cries out. King Arthur is pleased when the commotion ends, but Merlin warns that the adventures cannot simply be dismissed: leaving them unresolved would dishonour the feast and its host. The wedding celebration thus becomes the starting point for three duties of restitution, each assigned to a different knight.
At Merlin's direction, Gawaine must recover the hart; Tor must pursue the knight who took the brachet and either recover it or defeat him; Pellinore must pursue the abducted lady and her captor. The assignments give the marvels a practical consequence: the king's court must answer each disturbance rather than treat it as spectacle. Gawaine receives the first request, and the narrative follows his quest before turning to the others.
## Gawaine's Pursuit and the Lady's Death
Gawaine rides after the hart with [Gaheris](entity:character-recall-character-e643b62e350f), his brother, and the pursuit leads to a castle. There Gawaine and Gaheris kill the hart. Its keeper comes from a chamber and kills two of the greyhounds before driving away the others. He explains that his sovereign lady had given him the hart and vows that its death will be dearly answered. Gawaine challenges him over the dogs, saying that they had only followed their nature and that the knight should have taken his anger out on him instead. The keeper answers that he has avenged himself on the hounds and will do the same to Gawaine.
They fight until Gawaine defeats the keeper. When the man yields and asks for mercy, Gawaine refuses, intending to kill him for the dogs. The keeper's lady rushes out from a chamber and falls between the two men; Gawaine's blow kills her by misadventure. Gaheris immediately condemns the deed and the refusal of mercy, telling Gawaine that a knight without mercy is without honour. The keeper, now grieving for the woman he loved, rejects Gawaine's belated offer to spare him. Gawaine nevertheless orders him to go to King Arthur and tell what happened. The knight identifies himself as Ablamor of the Marsh.
The consequences continue at the castle. Four armed knights attack Gawaine and Gaheris, accusing Gawaine of shaming his knighthood by refusing mercy and killing a lady. Gawaine is wounded in the arm and the brothers face death before four ladies intercede. At the ladies' request, their attackers spare their lives but take them prisoner. The episode thus reverses the position of the pursuer: Gawaine, who had claimed authority over life and death, must depend on others to show him the mercy he denied.
## Recognition, Public Shame, and the Oath
The next morning one of the ladies challenges Gawaine over his conduct. When she learns that he is King Arthur's nephew, Gawaine identifies himself as the son of [King Lot](entity:character-recall-character-king-lot-9b2d273655ec) of [Orkney](entity:location-recall-location-orkney-f100d579207b) and the son of [Arthur](entity:character-recall-character-arthur-2e33b65bbe57)'s sister. She tells the four knights who their prisoner is, and they release him under a condition meant to make his deed visible: he must carry the dead lady with him, her head hanging about his neck and her body laid before him on his horse's mane. They also give him the hart's head because its recovery was his assigned quest.
At Camelot, Merlin asks King Arthur to require Gawaine to recount his adventures truthfully, including his refusal of mercy and the lady's death. King Arthur and Guenever are greatly displeased with him. The queen arranges a judgment by a group of ladies, who impose a lifelong penance: Gawaine must support women and fight for their causes, remain courteous, and never refuse mercy to anyone who asks for it. Sworn on the four Evangelists, he must never oppose a lady or gentlewoman unless he is fighting for one lady against another's champion. What began as an assigned quest therefore changes into a permanent rule governing his conduct.
## The Episode's Place in the Court's Code
The white hart adventure belongs to a wider effort to make the Round Table's ideals enforceable obligations rather than ceremonial language. After the wedding quests are completed, King Arthur establishes rules for his knights: they must not commit outrage or murder, must flee treason, must not act cruelly, and must grant mercy to those who ask it, on pain of losing the king's favour and lordship. They must also succour ladies, damsels, and gentlewomen on pain of death, and avoid taking up wrongful causes for law or worldly goods. The knights swear to these requirements, old and young alike, and renew their oaths each year at the feast of [Pentecost](entity:time-recall-time-16e2becf2ca1).
Gawaine's particular oath gives personal form to that larger code. Its occasion is not an abstract lesson but a sequence of choices: he kills the hart to fulfil his quest, fights its keeper after the keeper avenges the hounds, refuses a defeated opponent's plea, and unintentionally kills the woman who intervenes. The court's judgment does not erase the death; instead, it makes the failure a continuing responsibility. The episode links royal celebration to public accountability, showing how the Round Table's honour depends not only on prowess but also on restraint, mercy, and aid to women.
Event 30
The Death of Elaine and Sir Miles on Pellinore’s Quest
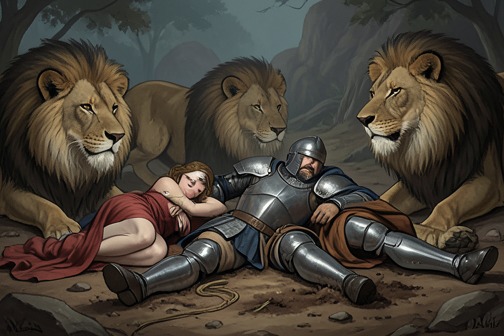
[The Death of Elaine and Sir Miles on Pellinore’s Quest](entity:event-recall-event-the-death-of-elaine-and-670f45406016) is a tragedy of help withheld and knowledge arriving too late. While pursuing his quest, [King Pellinore](entity:character-recall-character-king-pellinore-3c458d75379d) refuses to pause for a wounded knight and the lady with him; when he returns, both have died. Only afterward does he discover that the dead knight was Sir Miles, who was to marry Elaine, [Pellinore](entity:character-recall-character-pellinore-edfd409e1ed7)’s own daughter. The revelation binds his failure to a future punishment: the friend he trusts most will leave him when he is in greatest distress.
## The Interrupted Encounter
Pellinore’s attention is fixed on his quest when he encounters the wounded knight and the lady. He does not stay to help them, later admitting that he was so absorbed in the pursuit that he would not wait. The episode makes the choice itself decisive: the couple’s peril is present, but Pellinore passes on, and his return cannot undo that decision.
When he comes back, the knight and the lady have been killed by lions or other wild beasts, with only the lady’s head remaining. Pellinore grieves and says that he might have saved her life had he stayed. A lady advises him to take the knight’s body to an hermitage for burial and carry the dead woman’s head to [King Arthur](entity:character-recall-character-king-arthur-2b97864f54aa). Pellinore bears the knight on his shoulders to the hermitage and entrusts the body to the hermit, asking that services be said for the dead man’s soul.
## Recognition and Explanation
At [Camelot](entity:location-recall-location-camelot-352b4eac6f0e), Pellinore swears on the Four Evangelists to tell the truth about his quest. [Queen Guenever](entity:character-recall-character-queen-guenever-f27d6f31454b) reproaches him for failing to save the lady. He acknowledges that he was too intent on the pursuit to stop and says that he will regret it for the rest of his life. His remorse precedes the explanation that gives the deaths their full personal meaning.
[Merlin](entity:character-recall-character-merlin-3f8c52535684) reveals that the lady was Elaine, Pellinore’s daughter, and that the knight was Sir Miles, a good young knight who was coming to King Arthur’s court and was to marry her. Sir Miles had been killed by Loraine le Savage, described as a false and cowardly knight. In grief, Elaine killed herself with Sir Miles’s sword. Pellinore’s quest had therefore carried him past not strangers but his own daughter and her intended husband; the truth comes only after there is no possibility of rescuing either of them.
## Penance and Prophecy
Merlin tells Pellinore that he should deeply regret his failure to help Elaine and Sir Miles. He further foretells that Pellinore’s best friend will fail him at the moment of his greatest distress, and identifies this abandonment as penance ordained for the deed. Pellinore accepts the possibility that the prediction will come to pass, while observing that God may yet undo destiny.
The episode gives the deaths a consequence beyond grief: Pellinore’s refusal to pause becomes a moral debt projected into his own future. The warning is not simply that loss follows loss, but that the man who did not remain to aid others will himself be left without the help he most expects. The quest’s forward momentum thus acquires a sharp counterweight: pursuit can become culpable when it eclipses an immediate need for aid.
## Place in the Chivalric Narrative
After the quests of the white hart, the brachet, and the lady have been completed, King Arthur establishes the obligations of the [Knights of the Round Table](entity:character-recall-character-3f167931be46). Knights are charged not to commit outrage or murder, to flee treason, to show mercy to those who ask it, and to succour ladies, damsels, and gentlewomen on pain of death. They are also forbidden to fight in a wrongful quarrel for law or worldly goods, and swear these obligations at the high feast of [Pentecost](entity:time-recall-time-16e2becf2ca1) each year.
Set beside these obligations, Pellinore’s episode gives the duty to succour women a personal and painful measure. His remorse cannot restore Elaine or Sir Miles, and the prophecy makes the cost of his failure recur in the story as a threatened loss of support. The tragedy is therefore both a family revelation and an illustration of the code’s stakes: a knight’s pursuit does not excuse him from the person who needs help along the way.
Event 31
Nimue’s Enchantment of Merlin
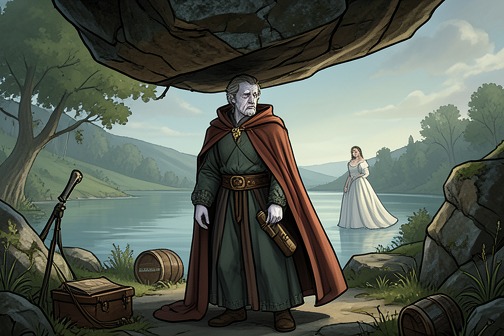
[Nimue’s Enchantment of Merlin](entity:event-recall-event-nimue-s-enchantment-of-b518b90d9629) turns the great prophet’s knowledge against him: captivated by [Nimue](entity:character-recall-character-nimue-ff0b672503ec), he teaches her the arts she wants to learn, yet cannot escape the enchantment by which she shuts him beneath a stone. The episode makes [Merlin](entity:character-recall-character-merlin-3f8c52535684)’s foreknowledge of his own fate a grim contrast to his helplessness when that fate arrives.
## Attachment and Foreknowledge
After the quests associated with [Sir Gawaine](entity:character-recall-character-sir-gawaine-bf0b0cf3eb43), [Sir Tor](entity:character-recall-character-sir-tor-0a4084725d5c), and [King Pellinore](entity:character-recall-character-king-pellinore-3c458d75379d), Merlin becomes infatuated with Nimue, one of the damsels of the lake. He insists on remaining with her, while she repeatedly treats him kindly until she has learned everything she desires from him. His attachment becomes so strong that he cannot bear to be away from her.
Merlin tells [King Arthur](entity:character-recall-character-king-arthur-2b97864f54aa) that he will not endure much longer and will be buried alive, despite all his craft. He also warns [Arthur](entity:character-recall-character-arthur-2e33b65bbe57) to guard his sword and scabbard: a woman whom Arthur trusts most will steal them. The prophecy joins Merlin’s personal end to a danger awaiting the king, but foreknowledge does not give Merlin power to prevent either outcome.
## Nimue’s Bargain and the Journey
Arthur urges Merlin to use his abilities to forestall the disaster he has predicted. Merlin refuses, saying it cannot be done, and leaves the king. Nimue then departs, and Merlin follows her wherever she goes. At times he tries to take her away secretly by his enchantments; she makes him swear that, if he wants her favor, he will never use enchantment against her. He swears, accepting a condition that limits the very power he might otherwise turn against her.
The pair cross the sea to [Benwick](entity:location-recall-location-benwick-a525eaffc9df), where [King Ban](entity:character-recall-character-king-ban-70615110b555) is at war with [King Claudas](entity:character-recall-character-king-claudas-5f9dc514d95a). Merlin speaks with Ban’s wife, Elaine, and sees her young son, [Launcelot](entity:character-recall-character-launcelot-0b02a99ce6f7). He foretells that the child will avenge Elaine against Claudas within twenty years and become a knight of exceptional renown. Merlin identifies [Galahad](entity:character-recall-character-galahad-e8a04503b5e9) as Launcelot’s first name, and Elaine confirms that he had been given that name before being christened Launcelot. This journey shows Merlin continuing to act as prophet even as his own future closes in.
## The Rock and Merlin’s Entrapment
As they travel on, Merlin continues to seek Nimue’s love, while she is weary of him and afraid of him because he is said to be the son of a devil. She wishes to be free of him but cannot simply put him away. The narrative thus sets her fear and desire for release against Merlin’s persistent pursuit and his earlier attempts to use enchantment to carry her off.
At a rock, Merlin shows Nimue a marvel made by enchantment and extending beneath a great stone. She uses her skill to draw him under the stone so that he can reveal the marvel to her, then works her enchantment there: Merlin cannot get out, for all his craft. Nimue departs and leaves him trapped. The scene fulfills the fate Merlin announced to Arthur, while reversing the apparent balance between the two: the master of enchantments becomes the captive of another’s art.
## Narrative Significance
The episode binds prophecy, desire, and consequence into a single reversal. Merlin can foretell his death and warn Arthur about the theft of the sword and scabbard, yet his knowledge does not protect him from his own attachment or Nimue’s enchantment. His oath not to use enchantment against her, made in the hope of gaining her favor, also complicates his dependence on the powers that have defined him.
The story presents the entombment as a definite magical event rather than an unexplained disappearance: Nimue deliberately makes Merlin enter the space beneath the stone and ensures he cannot emerge. His ending therefore marks a transfer of power, from the prophet who has long advised kings to the woman who has learned his arts and leaves him behind. The narrative records his confinement; it does not describe a later rescue.
Event 32
The Battle of the Five Kings
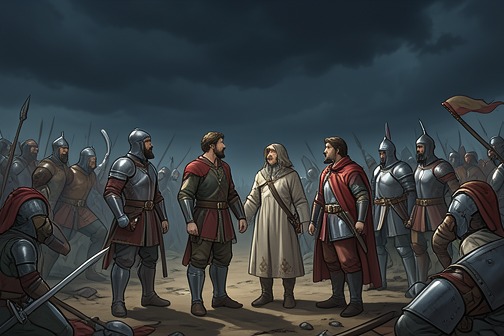
[The Battle of the Five Kings](entity:event-recall-event-the-battle-of-the-five-e1e8f094e65e) begins as a defense of [Arthur](entity:character-recall-character-arthur-2e33b65bbe57)’s people against an invasion and turns on a sudden encounter beside the [Humber](entity:location-recall-location-humber-7bcb1d8f7631). Though the king’s force is surprised in its pavilions and driven toward a dangerous crossing, Arthur and three companions meet the five enemy kings directly. Their deaths break the invaders’ resolve; the ensuing victory is followed by thanksgiving, the foundation of the Abbey of La Beale Adventure, and a plan to restore the [Round Table](entity:object-recall-object-round-table-04fef19b82fd)’s losses. The episode presents kingship as a duty of protection, while making fellowship and battlefield initiative decisive to the survival of Arthur’s cause.
## Causes and Stakes
After a great feast at [Camelot](entity:location-recall-location-camelot-352b4eac6f0e), Arthur returns to [Cardoile](entity:location-recall-location-cardoile-726ce3bea8d7) and learns that five kings have entered his land with a large host. They have burned and destroyed cities and castles as they advanced. Arthur laments that he has had scarcely a month’s rest since his coronation, but refuses to let that exhaustion delay action: he declares that he will meet the invaders in the field rather than allow his liege people to be destroyed through his failure to respond. He sends for [King Pellinore](entity:character-recall-character-king-pellinore-3c458d75379d) to gather whatever force he can quickly raise, writes to absent barons, and sets out with the company already at hand. [Queen Guenever](entity:character-recall-character-queen-guenever-f27d6f31454b) travels with him; Arthur says her presence will make him more courageous, while insisting that he will not knowingly leave her exposed to danger.
A brother of one of the invading kings warns the five leaders that Arthur has the flower of chivalry with him, as his earlier victory over eleven kings has shown. The longer they wait, he argues, the stronger Arthur will become, so they should attack before dawn while the king is accompanied by relatively few people. The attackers accept this counsel and come through [North Wales](entity:location-recall-location-3df16a26c9ed) under cover of night. Their plan exploits the vulnerability of a camp at rest, and the invasion’s immediate stake becomes the safety of Arthur, [Guenever](entity:character-recall-character-112dfc46734b), and the company caught unprepared.
## The Night Attack and the Encounter at the Humber
Arthur is unarmed and resting with Guenever when the attack begins. [Sir Kay](entity:character-recall-character-sir-kay-b93c82975d98), [Sir Gawaine](entity:character-recall-character-sir-gawaine-bf0b0cf3eb43), and [Sir Griflet](entity:character-recall-character-sir-griflet-fdaf3a21a7c4) are nearby; at first, [Gawaine](entity:character-recall-character-gawaine-e52d508f7128) and Griflet see no need to arm themselves. The noise of the assault and cries of treason quickly expose the danger. A wounded knight reaches Arthur with the news that the host has been overwhelmed and many of his people killed. Arthur, Guenever, and the three knights mount and ride toward the Humber, but the water is too rough for them to risk crossing.
With the five kings approaching on horseback and carrying spears, [Kay](entity:character-recall-character-kay-2946c1889f8a) proposes that the four companions face them. Gawaine and Griflet point out the imbalance: four against five. Kay nevertheless promises to undertake two of the kings, leaving the other three to Arthur and his companions. The encounter converts a desperate retreat into a direct contest. Their decision is not to force a dangerous crossing or wait for reinforcements, but to meet the leaders who have come within reach.
## The Five Kings Are Slain
Kay charges first and kills one king. Gawaine rides against another and kills him; Arthur strikes a third with his spear, and Griflet brings down the fourth. Kay then fulfils his promise by defeating the remaining king. Arthur praises Kay for keeping his word and says he will honor him for it throughout his life. The compact between the four men is thus answered by action: Kay takes responsibility for two opponents, while the other three each face one.
Guenever is placed in a barge to cross the Humber. Before departing, she praises Kay’s deeds and says that she will make his fame known among women. Her praise gives the battlefield achievement a public witness as well as a military consequence: the king’s small surviving company has not only escaped immediate capture but struck down the five leaders of the invasion. Arthur and the three knights then ride into the forest, expecting to find survivors from their scattered force.
## Victory, Loss, and Aftermath
Arthur finds most of his people and tells them that the five kings are dead. He urges the company to hold together until daylight, reasoning that once the enemy discovers its leaders have fallen, grief will weaken its ability to act. Events bear out his assessment. When the invaders find the kings dead, their host loses cohesion; Arthur returns to the fight with only a few people, and the ensuing battle leaves nearly no enemy alive. The account gives the dead as thirty thousand. The scale of that defeat contrasts with the narrow group at the Humber who first turned the battle by killing the leaders.
Arthur kneels and gives thanks to God when the fighting is over. He sends for Guenever, who arrives and rejoices at the victory. King Pellinore subsequently arrives with a large host, but the decisive fighting has already ended. A count of Arthur’s losses finds just over two hundred of his people dead, including eight knights of the Round Table in their pavilions. The figures place the triumph alongside its cost: the invading army has been destroyed, but the fellowship has lost eight of its members before [Pellinore](entity:character-recall-character-pellinore-edfd409e1ed7)’s reinforcements can join them.
## Memorial and Restoration of the Fellowship
Arthur orders a fair abbey to be raised and endowed on the site of the battle, naming it the Abbey of La Beale Adventure. The foundation gives the place a lasting religious and commemorative purpose after the violence has ended. The episode does not leave the victory as a tally alone: the king marks the field with an institution and returns to the work of rebuilding the fellowship that fought there.
At Camelot, Arthur asks Pellinore to advise him on choosing eight replacements for the eight fallen Round Table knights. Pellinore recommends a balance of four older and four younger knights, presenting renewal as a matter of judgment and composition, not simply filling vacancies. Thus the aftermath links the battle’s losses to the organization of Arthur’s court. The five kings’ deaths secure the immediate defense of the realm, while the abbey and the planned replacements address memory and continuity.
Event 33
The Battle Between Arthur and Accolon
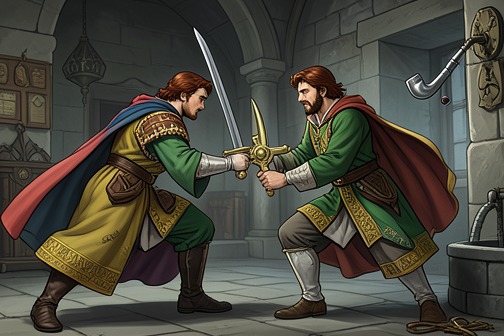
[The Battle Between Arthur and Accolon](entity:event-recall-event-the-battle-between-arth-5101f1557ce6) is a trial by combat secretly engineered by [Morgan le Fay](entity:character-recall-character-morgan-le-fay-5476b1a672cb) to kill her brother, [King Arthur](entity:character-recall-character-king-arthur-2b97864f54aa), and advance [Accolon](entity:character-recall-character-accolon-536d72c83458) as a rival ruler. Its decisive reversal comes when [Arthur](entity:character-recall-character-arthur-2e33b65bbe57), fighting with a false sword against his own [Excalibur](entity:object-recall-object-excalibur-a2b72b99cb6d), is rescued by the [Lady of the Lake](entity:character-recall-character-lady-of-the-lake-afb8b77d3497); victory exposes the conspiracy and brings Accolon’s ambition, Morgan’s betrayal, and Arthur’s vulnerability into the open.
## Causes and Deception
The plot takes shape around an existing judicial contest. Arthur has agreed to fight for [Sir Damas](entity:character-recall-character-sir-damas-0564355302e1), whose brother [Sir Ontzlake](entity:character-recall-character-sir-ontzlake-1fdf986c315d) is injured and cannot take the field. Accolon, who is staying with Ontzlake, volunteers to fight in his place. His apparent offer to serve another knight conceals the larger design: Morgan le Fay has sent him Excalibur and its scabbard so that he can kill Arthur in combat.
Accolon awakens beside a deep well, close to falling in. A silver pipe sends water upward into a marble basin, and he recognizes the place as part of the enchantment that has brought him there. A dwarf arrives from Morgan with instructions for the coming fight, including her demand that Accolon show no mercy. The message makes clear that this is not an ordinary trial by combat: Morgan has supplied the weapon and directed the intended killing in advance.
The deception is reciprocal but not equal. As the combat approaches, a damsel sent by Morgan gives Arthur a sword and scabbard that resemble his own, claiming they are a gift from his sister. Arthur accepts the supposed token of affection, not knowing that the weapons are counterfeit and fragile. Accolon, by contrast, knows Morgan’s purpose and holds Arthur’s genuine sword. The combat begins with one knight unaware that the terms have been rigged and the other equipped for the assassination.
## The Combat and Reversal
After Arthur hears mass, the two knights meet in a field before local spectators and twelve chosen men charged with overseeing the encounter. They charge on horseback and are both thrown down, then continue on foot. Arthur’s borrowed weapon fails to wound as his own sword ordinarily would, while Accolon’s blows draw blood. The mismatch gradually reveals itself through the course of the fight: Arthur recognizes that his weapon is not the true Excalibur, while the spectators see him endure despite his disadvantage.
The Lady of the Lake, who had earlier imprisoned [Merlin](entity:character-recall-character-merlin-3f8c52535684) beneath a stone, comes to the field because she knows Morgan’s plan and wishes to save Arthur. When Arthur’s sword breaks at the crosspiece, Accolon urges him to surrender. Arthur refuses, insisting that he has pledged to fight to the utmost and would rather die with honour than live in shame. He continues to defend himself without a working sword, keeping his ground even as the encounter seems to turn decisively against him.
At the Lady of the Lake’s enchantment, Excalibur falls from Accolon’s hand. Arthur retrieves it, recognizes his own weapon, and removes the scabbard from Accolon before casting it away. The reversal restores the balance that Morgan’s deception had destroyed. Arthur then overcomes Accolon, but the defeated knight does not simply yield: he says he had promised to fight to the end and will not surrender by speaking the words. His conduct preserves a narrow sense of fidelity to his pledge even as the battle has revealed his participation in treason.
## Confession and Consequences
Arthur initially does not know his opponent’s identity. After Accolon names the court he belongs to, Arthur reveals that he is the king. Accolon then confesses that Excalibur had been in his keeping for much of a year and that Morgan sent it to him the previous day for the purpose of killing her brother. He says Morgan loved him and intended, if Arthur were removed and [King Uriens](entity:character-recall-character-king-uriens-fceb3b0edcbd) killed, to make Accolon king and herself queen. The fight therefore uncovers not only the immediate plot but its political destination: Morgan meant to transform a murder into a change of rule.
Arthur distinguishes Accolon’s admission from innocence. He grants that Accolon did not recognize him during the combat, and says this mitigates his blame; nevertheless, Accolon had agreed to take Arthur’s life. Arthur also expresses particular grievance at Morgan’s betrayal, explaining that he had honoured and trusted her more than his other kin, and even more than his wife. The conspiracy is thus a personal breach of trust as well as an assault on kingship.
The spectators kneel and ask Arthur for mercy. He grants it, then uses his authority to settle the dispute between [Damas and Ontzlake](entity:relation-recall-relation-a5dbfabdb64a) and address the prisoners Damas has kept. Damas must surrender the manor to Ontzlake under terms requiring an annual palfrey, release the twenty imprisoned knights with equipment acceptable to them, and cease distressing knights who ride on their adventures. Ontzlake, praised for his conduct, is invited to join Arthur’s court. The battle’s resolution consequently reaches beyond its two combatants: Arthur turns the occasion into a judgment on local power, captivity, and service.
[Arthur and Accolon](entity:relation-recall-relation-00de81044ae8) are both wounded, and Arthur seeks a place to rest at an abbey three miles away. Accolon dies there four days later from the blood he has lost, while Arthur recovers. Arthur sends Accolon’s body to [Camelot](entity:location-recall-location-camelot-352b4eac6f0e) on a horse-bier accompanied by six knights, with a message for Morgan that he is returning her a present and has recovered Excalibur and its scabbard. The ending makes the returned sword material proof that her attempt failed, even as the loss of Accolon gives the conspiracy a fatal consequence.
## Narrative Significance
The scene turns a familiar institution of knightly justice into a vehicle for concealed political violence. Arthur’s combat is ostensibly a formal contest fought on behalf of Ontzlake, but Morgan’s advance distribution of the weapons makes it an arranged assassination. The public witnesses first see a knight endure against an apparent advantage; the audience learns why only when the sword changes hands and Accolon confesses. The structure makes recognition itself part of the outcome: the contest ends not merely with a victor, but with the identity of the conspiracy and the intended succession disclosed.
The episode also tests the difference between outward authority and the means that sustain it. Arthur is king, yet for much of the fight he is deprived of the weapon that signifies and serves his power. His refusal to surrender preserves his honour while leaving him physically vulnerable; the Lady of the Lake’s intervention restores the instrument that the plot has stolen. The final recovery of Excalibur settles the contest, but it does not restore the lost trust between Arthur and Morgan. The king’s victory exposes a fracture within his own family and court, and leaves the threat of further reckoning with his sister in view.
Event 34
Uwaine Foils Morgan le Fay’s Attempt to Kill Uriens
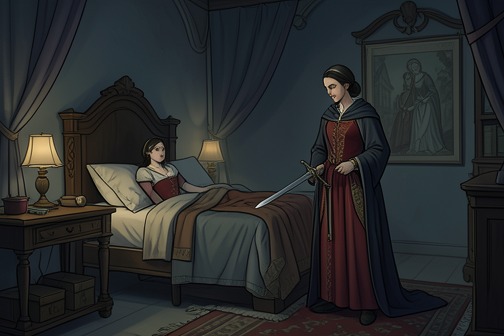
[Uwaine Foils Morgan le Fay’s Attempt to Kill Uriens](entity:event-recall-event-uwaine-foils-morgan-le-d077601e3980) is an episode in which [Uwaine](entity:character-recall-character-uwaine-6468cffc7b73) stops his mother, [Morgan le Fay](entity:character-recall-character-morgan-le-fay-5476b1a672cb), from murdering his sleeping father, [King Uriens](entity:character-recall-character-king-uriens-fceb3b0edcbd). A maid loyal to Morgan alerts Uwaine before Morgan can act; he intervenes at the bedside, confronts her, and grants forgiveness only after she promises to desist. The scene makes kinship both the setting of the danger and the means by which it is halted.
## The Plot and Its Warning
The account begins while Morgan believes [King Arthur](entity:character-recall-character-king-arthur-2b97864f54aa) is dead. She sees King Uriens asleep in bed and tells a maid who serves her that she has never had a better opportunity to kill him. When the maid warns that Morgan could not escape the consequences, Morgan dismisses the concern and orders her to fetch the king’s sword.
## Uwaine Intervenes
The maid does not simply carry out the order: she goes to another chamber, where Uwaine is asleep, wakes him, and tells him that his mother intends to kill his father. Uwaine lets her continue to Morgan with the sword, saying that he will handle the situation. The narrative thus gives him foreknowledge rather than making his intervention accidental; the warning creates an opportunity to prevent the attack before it is carried out.
Morgan takes the sword, approaches the bed, and raises it to strike. Uwaine leaps toward her and catches her by the hand. He condemns the act and says that, were she not his mother, he would strike off her head with the sword. His words register the gravity of the threat while making the family bond the one restraint he expressly acknowledges.
## Kinship, [Mercy](entity:concept-recall-concept-8a56d86ef182), and the Outcome
Morgan responds by pleading with her son to have mercy. She says she was tempted by a devil, asks him to preserve her honor and keep the deed undisclosed, and promises not to act this way again. Uwaine agrees to forgive her on the condition that she never again undertakes such deeds; Morgan gives him that assurance. The scene therefore ends not with punishment or public exposure but with a private promise between son and mother.
The episode turns on competing loyalties inside one household: Morgan targets her husband, while their son protects his father and then grants his mother a chance to repent. Uwaine’s mercy is conditional, not a denial of the attempted murder’s seriousness. The closing assurance supplies the scene’s resolution, while Morgan’s request for secrecy leaves the threatened family order dependent on her promise and Uwaine’s discretion.
Event 35
Morgan le Fay’s Theft of Excalibur’s Scabbard
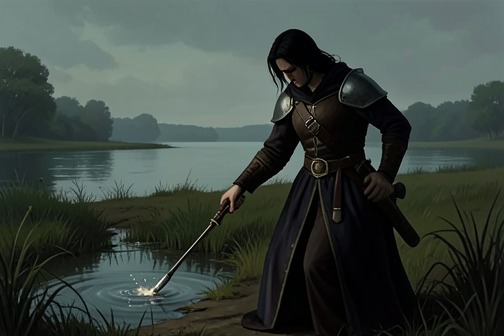
[Morgan le Fay’s Theft of Excalibur’s Scabbard](entity:event-recall-event-morgan-le-fay-s-theft-o-95e77c9ad2b6) is a pursuit episode in which Morgan, grieving the death of [Accolon](entity:character-recall-character-accolon-536d72c83458) and fearing [Arthur](entity:character-recall-character-arthur-2e33b65bbe57)’s return, takes the protective scabbard from her sleeping brother. When Arthur follows, she casts the precious object into a lake and escapes recognition through enchantment; he returns without recovering it. The episode converts Morgan’s private loss into a lasting material consequence for Arthur: the scabbard is gone, while the sword remains in his hand.
## Background and Motive
The episode begins with news reaching Morgan that Accolon has died and that Arthur has recovered his sword. She is overwhelmed by sorrow, but conceals it rather than letting it show. She expects that when Arthur arrives, her own life will be in danger. The account establishes the immediate circumstances of the theft: the death of Accolon, Arthur’s recovery of the weapon, and Morgan’s fear of what her brother may do.
Rather than wait for Arthur, Morgan asks [Queen Guenever](entity:character-recall-character-queen-guenever-f27d6f31454b) for leave to ride into the country, claiming that urgent news will not let her tarry. [Guenever](entity:character-recall-character-112dfc46734b) suggests she wait until the king comes home, but permits her to depart when she insists. Morgan leaves before daybreak and rides through the day and much of the night, reaching the abbey where Arthur is resting by noon. Her request to Guenever creates the opening for a covert visit, while the urgency of her journey carries the threat forward before Arthur knows she is near.
## The Theft at the Abbey
At the abbey, Morgan learns that Arthur has had little rest for three nights and is asleep in bed. She orders the nuns not to wake him until she does, and they do not disobey her. She goes directly to his chamber and finds him asleep with [Excalibur](entity:object-recall-object-excalibur-a2b72b99cb6d), naked, in his right hand. The arrangement defeats her first aim: she cannot take the sword without waking him, and she believes that if she wakes him she will be killed.
Morgan therefore takes the scabbard instead, concealing it beneath her mantle, and rides away. Arthur wakes, notices its absence, and asks who has entered his chamber. The nuns identify his sister and explain that she has gone with the scabbard. His rebuke of their failure to guard him is met with their explanation that they dared not disobey her command. The theft succeeds not through a struggle over the sword but through the difference between the weapon Arthur holds and the valuable object Morgan can remove without disturbing him.
## Pursuit and Enchanted Escape
Arthur immediately orders that the best available horse be brought and tells [Sir Ontzlake](entity:character-recall-character-sir-ontzlake-1fdf986c315d) to arm himself in haste. The two ride after Morgan. At a cross they question a cowherd, who reports that a lady with forty horses passed that way and rode toward the forest. The report gives Arthur a direction to follow, and soon he sees Morgan ahead of him.
Morgan rides faster through the forest and reaches a plain beside a lake. Realizing that she cannot escape on horseback, she throws the scabbard into the deepest water, where its weight of gold and precious stones carries it down. She then rides into a valley of great stones. As Arthur and Ontzlake close in, she uses enchantment to transform herself, her horse, and her men into the likeness of a great marble stone. Arthur cannot distinguish his sister and her company from one another or identify them among the stones. He interprets the turn of events as divine vengeance and regrets the misadventure, but the scabbard is nowhere to be found.
## Outcome and Narrative Significance
After Arthur rides back to the abbey, Morgan and her companions return to their former shapes and depart wherever they choose. The pursuit ends without capture, reconciliation, or recovery of the stolen object. The scabbard’s disappearance is the decisive consequence: Morgan cannot take Excalibur from Arthur, but she removes its sheath from his possession and makes sure he cannot retrieve it.
The episode binds personal conflict to an object with a conspicuous material presence. The scabbard is heavy with gold and precious stones, yet its value does not protect it from being lost beneath the lake; its concealment becomes the means by which Morgan escapes. The account presents Arthur’s failure to recognize the enchanted stone as the final reversal of the chase: he reaches the place where Morgan has hidden herself, but cannot see her there. The theft thus ends not with a victory in combat, but with an unresolved loss that sends Arthur back to the abbey without the scabbard.
Event 36
Morgan le Fay’s Poisoned Mantle Plot
[Morgan le Fay’s Poisoned Mantle Plot](entity:event-recall-event-morgan-le-fay-s-poisone-ded7994a783e) turns a lavish gift into evidence of attempted murder. After [Morgan le Fay](entity:character-recall-character-morgan-le-fay-5476b1a672cb)’s earlier [treachery](entity:concept-recall-concept-22ce6e5d8b9f) has come to light, she sends [King Arthur](entity:character-recall-character-king-arthur-2b97864f54aa) a jeweled mantle under the appearance of apology and reconciliation. [The Damsel of the Lake](entity:character-recall-character-the-damsel-of-the-l-dc612bff774a) warns [Arthur](entity:character-recall-character-arthur-2e33b65bbe57) not to wear it; he tests the messenger instead, and her death reveals the danger. The episode brings Morgan le Fay’s threat into the open while deepening suspicion and division at court.
## Background: Treachery and a Gift
The mantle arrives after Arthur has returned to court from a series of strange adventures and Manassen has reported what happened in connection with Morgan le Fay. Her deception has stirred anger among the knights, several of whom wish to see her punished. Arthur himself declares his intention to take vengeance if he lives. The danger, then, is not introduced as an isolated mystery: the court already knows Morgan le Fay has acted against him, and the gift arrives in that unsettled aftermath.
The next morning a damsel sent by Morgan le Fay presents a mantle of extraordinary richness, set so densely with precious stones that Arthur has never seen its like. She says her sender wishes him to accept it and will make amends for whatever offense he names. The beauty and value of the object give the offer the appearance of generosity, but the timing makes its professed purpose—reconciliation—uncertain.
## The Warning and the Test
The Damsel of the Lake asks to speak to Arthur privately and advises him not to put on the mantle or let any of his knights wear it. She tells him to require the bearer to try it on first. Arthur follows that counsel rather than accepting the gift at face value, and orders Morgan le Fay’s messenger to wear the garment herself.
The damsel objects that a king’s garment is not fitting for her. Arthur insists that it must be put on her before it comes near him or anyone else at court. As soon as the mantle is placed on her, she falls dead. The test converts suspicion into proof within the scene: the offered gift is dangerous, and the messenger who brought it suffers the consequence intended for its recipient.
## Exposure and Consequences at Court
Arthur is more angry after the messenger’s death than he was before. He addresses [King Uriens](entity:character-recall-character-king-uriens-fceb3b0edcbd), Morgan le Fay’s husband, and says that his wife is continually seeking to betray him. He distinguishes Uriens from the accusation, noting that [Accolon](entity:character-recall-character-accolon-536d72c83458) had confessed Morgan le Fay would have destroyed Uriens as well as Arthur. But Arthur suspects Uriens’s son, [Sir Uwaine](entity:character-recall-character-sir-uwaine-42c6462a7fa0), of being involved and orders him to leave court.
[Sir Gawaine](entity:character-recall-character-sir-gawaine-bf0b0cf3eb43) responds by declaring that if his cousin is banished, he will leave too. The two knights depart together. Their departure makes the poisoned gift’s consequences reach beyond the failed attack: the affair produces a new rupture within Arthur’s court, even as Arthur’s suspicion does not extend equally to every member of Morgan le Fay’s family.
## Significance
The episode hinges on a contrast between appearance and intention. A gift presented as a means of making amends is instead a concealed threat; the mantle’s precious stones cannot make it safe. The Damsel of the Lake’s warning allows Arthur to turn the danger back upon the messenger, but this does not restore trust. The plot exposes Morgan le Fay’s continued hostility and shows how an attempted private betrayal can unsettle the wider court, driving Sir Uwaine and Sir Gawaine away from Arthur.
Event 37
Gawaine and Uwaine’s Encounter with Marhaus
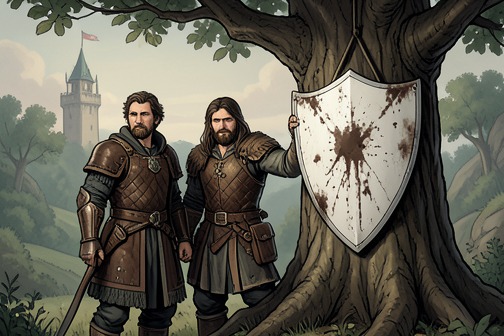
[Gawaine](entity:character-recall-character-gawaine-e52d508f7128) and [Uwaine](entity:character-recall-character-uwaine-6468cffc7b73)’s encounter with Marhaus turns a challenge over a defiled shield into a revealing test of strength and judgment. Both knights are defeated by the Irish king’s son, but the meeting ends not in lasting hostility: Marhaus explains the grievance behind his reputation, and he and Gawaine swear to love one another as brothers.
## The Dishonoured Shield
Gawaine and Uwaine meet twelve damsels beside a tower, where they see a white shield hanging from a tree. As the women pass it, they spit on it or throw dirt at it. Asked why they treat the shield this way, they say it belongs to Marhaus, a powerful knight who hates all ladies and gentlewomen. The explanation makes the shield a public sign of grievance: the women do not merely describe Marhaus as hostile but mark his property with contempt.
Gawaine challenges their account without accepting their treatment of the shield as a proper response. He argues that it is unbecoming for a good knight to despise all women, while allowing that Marhaus may have reasons for his conduct and may love women elsewhere. Uwaine recognizes the name and confirms that Marhaus has proved himself exceptionally strong at tournaments, where no one could withstand him. Their exchange places the coming fight between competing judgments: the damsels’ accusation, Uwaine’s respect for Marhaus’s prowess, and Gawaine’s insistence that a knight’s conduct toward women matters.
## Marhaus Arrives and the Fight Begins
When Marhaus rides toward the tower, the twelve damsels flee inside in alarm, some stumbling along the way. Two knights stationed there challenge him in turn. Marhaus defeats both, first breaking one knight’s neck and the horse’s back, then striking down the second knight and his horse. The episode establishes his formidable force before either visitor takes up the challenge.
After seeing that his shield has been defiled, Marhaus says he is partly avenged for the affront. He nevertheless chooses to wear that white shield in place of his own, explaining that he will do so for the love of the lady who gave it to him. The gesture complicates the report that he hates women: the shield is both the object of the damsels’ insult and a token connected to a woman he values. Marhaus then asks Gawaine and Uwaine what they are doing there. They say they have come from [King Arthur](entity:character-recall-character-king-arthur-2b97864f54aa)’s court in search of adventures, and Marhaus offers to undertake whatever adventure they ask of him.
Uwaine privately cautions Gawaine that Marhaus is an exceptionally good knight and says he would rather neither of them were matched against him. Gawaine believes it would be shameful not to test such a knight, however strong. Uwaine volunteers to face Marhaus first, reasoning that he is the weaker of the two and Gawaine can avenge him if he falls. The decision makes the encounter a measure of their courage as well as Marhaus’s skill.
## Defeat and Reversal
Uwaine and Marhaus charge one another. Uwaine’s spear breaks against Marhaus’s shield, and Marhaus strikes him down with his horse, wounding him in the side. Marhaus then turns to Gawaine. Their lances meet with force: Gawaine’s spear breaks, while Marhaus’s holds, and Gawaine is thrown from his horse. He rises and draws his sword, but asks Marhaus to dismount, refusing to continue the contest with one knight on foot and the other on horseback. Marhaus accepts, commending the courtesy of the request, and ties his horse to a tree before resuming the fight on equal footing.
On foot, the two exchange blows until their shields break apart and both their helmets and armour are damaged; each is wounded. The balance shifts as the day advances. From after nine o’clock until noon, Gawaine grows stronger, his might increasing threefold. Marhaus observes the change with wonder. After noon, however, Gawaine’s strength wanes, while Marhaus grows stronger. The contest therefore gives Gawaine a temporary advantage without overturning its result: his power is tied to the hours, and Marhaus outlasts that rise and decline.
As Gawaine weakens toward evening, Marhaus recognizes his exceptional ability and proposes that they stop, saying their quarrel is not great and it would be a pity to injure him further. Gawaine agrees that Marhaus has spoken as he himself should have done. They remove their helmets, kiss, and swear to love one another as brothers. Defeat thus becomes the occasion for recognition: Marhaus’s restraint and Gawaine’s acceptance of his judgment end a fight that neither needs to carry to a fatal conclusion.
## The Charge of Hating Women
Riding toward Marhaus’s home, Gawaine asks why so valiant a knight supposedly loves no ladies or damsels. Marhaus rejects the accusation as a false name given to him by the damsels at the tower and others like them. He says that some women are sorceresses and enchantresses who can make even a knight of great bodily prowess into a coward in order to gain the advantage over him; that, he explains, is the principal reason he hates them. He distinguishes those women from good ladies and gentlewomen, to whom he says a knight owes his service. The conversation revises the initial report: Marhaus’s opposition is not presented as a rejection of all women, but as a grievance against enchantment and its use against knights.
The text also places the encounter within Gawaine’s wider record of contests, noting that six knights, including Marhaus, have had the better of him. The list makes the defeat part of a pattern rather than an isolated humiliation, while Marhaus’s conduct here helps distinguish strength from mere domination. He wins, but he also accepts a fairer footing, stops when Gawaine is failing, and treats his opponent as a brother.
## Hospitality and Further Adventure
Marhaus invites Gawaine to lodge with him, and Uwaine accompanies them. At Marhaus’s priory, ladies and damsels tend the wounds of all three knights. When Marhaus learns that the visitors are sons of King Arthur’s sister, he gives them the best welcome he can. They remain there for seven nights while recovering, turning an encounter that began with an accusation and a duel into a relationship sustained by hospitality.
When they depart, Marhaus insists on accompanying them through the forest. They ride for about seven days before finding another adventure, eventually reaching the Forest of Arroy, described as a country of strange adventures. The journey carries the reconciliation beyond the place of combat: Marhaus does not simply make peace with Gawaine and Uwaine but rides onward with them as their companion.
Event 38
Pelleas and Ettard
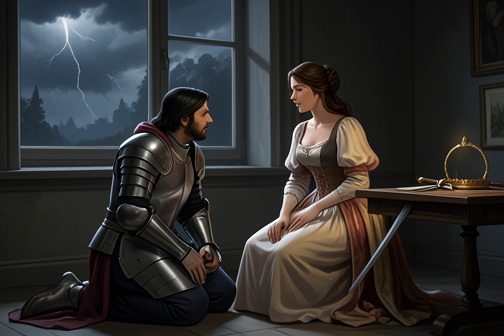
[Pelleas and Ettard](entity:event-recall-event-pelleas-and-ettard-529930fe5b44) is an episode of devoted love undone by [Sir Gawaine](entity:character-recall-character-sir-gawaine-bf0b0cf3eb43)’s betrayal and reshaped by [Nimue](entity:character-recall-character-nimue-ff0b672503ec)’s enchantment. [Sir Pelleas](entity:character-recall-character-sir-pelleas-36e20bf735cb) wins renown in a three-day tournament, yet submits repeatedly to humiliation for the chance to see [Ettard](entity:character-recall-character-ettard-87f05fdffbc8). [Gawaine](entity:character-recall-character-gawaine-e52d508f7128) pledges to help him win her, then takes his place at her castle and betrays that trust. The episode’s reversals culminate in [Pelleas](entity:character-recall-character-3aae19afb8de)’s rejection of Ettard after Nimue makes her love him, and in his departure with Nimue.
## Pelleas’s devotion and Ettard’s scorn
Sir Pelleas is a lord of the Isles, and the episode first presents him through the mismatch between his public prowess and private submission. At a three-day tournament attended by five hundred knights, he defeats every opponent he meets, striking down twenty knights each day. He receives the prize, a fine sword and a gold circlet intended for the fairest lady, and gives the circlet to Ettard, publicly declaring her fairest.
Pelleas chooses Ettard as his sovereign lady and resolves to love no other. She scorns him and says she will never love him, even if he dies for her. He nevertheless follows her into her country, lodging near her castle and hoping that persistence will win her regard. Each week she sends knights to fight him. Although he can defeat them, he allows himself to be taken prisoner because captivity brings him into Ettard’s presence. Her men subject him to repeated humiliation, including tying him to a horse, while she refuses to let him stay or even eat and drink before turning him away. His service to her thus becomes not a courtly triumph but an ordeal he willingly prolongs.
## Gawaine’s promise and betrayal
Sir Gawaine hears Pelleas’s story after learning that the knight renowned for defeating ten opponents had willingly allowed himself to be captured. Pelleas explains that he endures the indignities because he hopes to see Ettard and cannot reach her otherwise. Gawaine, who identifies himself as a knight of [King Arthur](entity:character-recall-character-king-arthur-2b97864f54aa)’s court and [King Lot](entity:character-recall-character-king-lot-9b2d273655ec)’s son, pities him and pledges his word to help him win her love.
To carry out his plan, Gawaine borrows Pelleas’s horse and armor and rides to Ettard’s castle, claiming that he has killed Pelleas. Ettard welcomes him, admits that she hated Pelleas and is glad to be rid of him, and promises to help Gawaine win the love of the lady he says he desires. Gawaine then reveals that the lady is Ettard herself. Bound by her promise, she yields to him. The deception grants Gawaine immediate access to the woman Pelleas loves, but it violates the pledge of fidelity he made to Pelleas.
## The sword at the pavilions
The betrayal unfolds in [May](entity:time-recall-time-may-1281a8b8ee63). Ettard and Gawaine spend two days and two nights together in a pavilion outside the castle, while her attendants and knights sleep in separate tents. Pelleas, who has not slept since Gawaine left, comes looking for him on the third morning. He finds the other pavilions occupied, then discovers Gawaine asleep with Ettard.
Pelleas rides away in grief, turns back more than once, and considers killing the pair. Even in the extremity of his anguish, he refuses to kill Gawaine while he sleeps, reasoning that such an act would dishonor knighthood. Instead, he lays his unsheathed sword across both their throats and leaves. The gesture makes the danger unmistakable while preserving Pelleas’s chosen limit: he will not answer [treachery](entity:concept-recall-concept-22ce6e5d8b9f) with the dishonorable killing of sleeping people.
Believing his hope destroyed, Pelleas returns to his own camp, gives his possessions to his followers, and says he intends to take to his bed and never rise again. He asks that, after his death, they take his heart and carry it to Ettard between two silver dishes, telling her that he saw her with Gawaine. The scene turns his devotion inward, from pursuit of the beloved to a plan for a final message of grief.
## Nimue’s intervention and the reversal of love
When Gawaine and Ettard wake, the sword across their throats exposes the lie. Ettard recognizes Pelleas’s weapon and confronts Gawaine: he had told her he killed Pelleas, while Pelleas had spared their lives. She calls the deception a betrayal and warns that their conduct will bring shame upon them. Gawaine readies himself and leaves for the forest.
Nimue learns from one of Pelleas’s knights that Pelleas has been betrayed and intends to die in bed. She goes to him, uses enchantment to put him to sleep, and then brings Ettard to see him. Nimue condemns Ettard’s treatment of such a knight and enchants her so that she loves the man she had hated. Ettard is bewildered by the sudden change, but Pelleas wakes and rejects her, now saying that he hates her more than any woman alive. The attempted repair does not restore his former devotion: the enchantment changes Ettard’s feeling, not his judgment of what she has done.
## Departure and ending
Nimue invites Pelleas to leave the country with her and promises that he will love a lady who loves him. He agrees, explaining that Ettard has brought him shame and that his love has become hatred. He arms himself, gathers his men and belongings, and departs with Nimue. The account states that Ettard dies of sorrow, while Nimue rejoices Pelleas and remains with him for the rest of their lives.
The ending makes the episode’s reversals decisive rather than restorative. Pelleas’s patience cannot secure Ettard’s love; Gawaine’s promise becomes the means of betraying him; and Nimue’s magic gives Ettard the love she once refused only after Pelleas has ceased to want it. The outcome separates the former lovers and gives Pelleas a new companion, but it cannot undo the betrayal or save Ettard.
Event 39
Marhaus and the Duke of the South Marches
[Sir Marhaus](entity:character-recall-character-sir-marhaus-1bd99ec8e2d9) and the Duke of the South Marches meet in a compulsory combat born of the duke’s grievance against [King Arthur](entity:character-recall-character-king-arthur-2b97864f54aa)’s court. The duke blames [Sir Gawaine](entity:character-recall-character-sir-gawaine-bf0b0cf3eb43) for the deaths of his seven sons and has sworn revenge on any knight of the court who comes within his reach. Marhaus, an Irish knight of the [Round Table](entity:object-recall-object-round-table-04fef19b82fd), accepts the challenge; by defeating the duke and his six remaining sons, he converts a personal feud into a pledge of political submission to [Arthur](entity:character-recall-character-arthur-2e33b65bbe57).
## The Duke’s Vow and the Encounter
Marhaus is travelling south with a damsel when night overtakes them in a deep forest. A man at a courtelage offers to take them to a place where they can find lodging, but does not explain the condition attached to that hospitality. At the castle, the duke receives Marhaus and asks his name, origin, and allegiance. Marhaus identifies himself as a knight of King Arthur and a member of the Round Table, born in [Ireland](entity:location-recall-location-ireland-3247a2c8bcbe). The duke replies that he resents Arthur and his fellowship and warns that he and his six sons will meet Marhaus the next morning.
The cause is not an immediate quarrel between the two men. The duke says that Sir Gawaine slew his seven sons in an encounter, and that he consequently vowed no knight of Arthur’s court would lodge with him or pass where he could confront him without facing revenge. The duke is identified as the Duke of the South Marches, a longstanding enemy of Arthur and his knights. His decision to make lodging conditional on combat turns the castle’s hospitality into an instrument of private retaliation.
## The Combat
The next morning, the duke and his six sons meet Marhaus mounted and armed, each carrying a spear. The duke and two of his sons break their spears against Marhaus, who holds his own spear up and does not strike them. The remaining four sons then approach in pairs; their spears, too, break without Marhaus touching them. The sequence makes the imbalance plain before the fight’s decisive action: the duke’s party expends its first attacks, while Marhaus remains unhurt and in control of his response.
Marhaus then rides at the duke and knocks him and his horse to the ground. He deals with the sons in turn, dismounts, and demands the duke’s surrender, threatening to kill him if he refuses. When some of the sons recover and would renew the attack, Marhaus warns the duke to restrain them or face the full force of the fight. Seeing that he cannot escape defeat, the duke orders his sons to yield. They kneel and offer the pommels of their swords, and Marhaus accepts their submission.
## Submission and Political Consequences
The surrender ends in more than a temporary victory. By common agreement, the duke and his sons promise that they will no longer be enemies of King Arthur. They also undertake to come at the following [Whitsuntide](entity:time-recall-time-whitsuntide-305bea093840) and place themselves in the king’s grace. Their pledge gives Arthur a route to bring a hostile household back into his political order without the account describing a further battle or the duke’s death.
The episode’s resolution contrasts the duke’s vow of vengeance with the public allegiance secured after combat. The dispute began in retaliation for Sir Gawaine’s killing of the duke’s seven sons, but the immediate opponent is Sir Marhaus, who acts as a knight of Arthur’s court. The duke’s defeat therefore answers the personal challenge while also compelling a change in the family’s declared relation to the king. The promised appearance at Whitsuntide leaves that reconciliation to be completed through submission to Arthur’s authority.
## Marhaus’s Wider Circuit of Deeds
The encounter forms one episode in Marhaus’s travels with the damsel, not an isolated appearance. After the duke and his sons yield, the damsel takes Marhaus within two days to a tournament called by Lady de Vawse. There he wins a gold circlet valued at a thousand besants and gains renown, having brought down forty knights at different times. The narrative thus places the settlement of a political feud beside a public tournament victory: in both settings Marhaus’s success earns recognition, though the outcomes differ, with the duke’s pledge serving Arthur’s realm and the circlet rewarding prowess.
Within the same travelling sequence, Marhaus later reaches the lands of Earl Fergus, where he is asked to confront the giant Taulurd, who has been destroying the earl’s lands. That later adventure extends the pattern of Marhaus answering local threats, but it is distinct from the South Marches encounter: the duke’s conflict arises from a vow against Arthur’s knights, and its outcome is the former enemies’ promise to seek the king’s grace.
Event 40
Marhaus Slays the Giant Taulurd
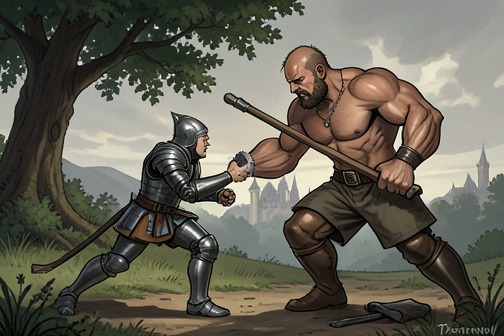
[Sir Marhaus](entity:character-recall-character-sir-marhaus-1bd99ec8e2d9) Slays the Giant Taulurd is an episode in which Sir Marhaus answers Earl Fergus’s appeal against a giant who has made the earl afraid to travel through his own lands. Marhaus defeats Taulurd on foot, frees the captives in the giant’s castle, and refuses a grant of land from Fergus. The victory combines practical rescue with a striking refusal of reward.
## The earl’s appeal
After Sir Marhaus has defeated the Duke of the South Marches and his sons, he is brought by his damsel to Earl Fergus’s lands. Fergus, a young man newly come into his inheritance, explains that the giant Taulurd is destroying his lands and that he dares neither ride nor go about freely. Taulurd’s size determines the terms of the encounter: Fergus says no horse can carry him, so Marhaus resolves to fight on foot.
## The encounter with Taulurd
The next morning, one of Fergus’s men leads Marhaus to the giant. Taulurd sits beneath a holly tree, with iron clubs and gisarms around him. Marhaus advances behind his shield, but Taulurd’s first blow splits it in two, leaving the knight in danger against a formidable opponent.
Marhaus strikes back by cutting off Taulurd’s right arm above the elbow. The giant flees into water too deep for Marhaus to follow. Rather than abandon the pursuit, Marhaus has Fergus’s man bring stones and throws them at Taulurd until the giant falls into the water and dies. The fight’s conclusion depends not only on strength but on adapting to the terrain once the giant escapes beyond the reach of a direct attack.
## Rescue and reward
Marhaus goes to Taulurd’s castle and releases twenty-four ladies and twelve knights from imprisonment. He also finds great riches there, enough that he is never poor for the rest of his life. The episode therefore gives the defeat consequences beyond the removal of a threat: the castle’s captives are freed, and Marhaus’s fortunes change.
Fergus thanks Marhaus and offers him half of his lands. Marhaus refuses to take any of them. After remaining with Fergus for nearly half a year while recovering from the bruising he suffered in the fight, he takes his leave. The narrative places his refusal alongside the material wealth he has already secured at the castle: he accepts the lasting riches of the adventure but not the earl’s proposed transfer of territory.
## Place in Marhaus’s adventures
The episode belongs to a sequence of deeds that establish Marhaus’s prowess and public renown. Before reaching Fergus, he forces the Duke of the South Marches and his sons to yield and promise to enter [King Arthur](entity:character-recall-character-king-arthur-2b97864f54aa)’s grace. After leaving Fergus, he encounters [Sir Gawaine](entity:character-recall-character-sir-gawaine-bf0b0cf3eb43), [Sir Uwaine](entity:character-recall-character-sir-uwaine-42c6462a7fa0), and four knights of King Arthur’s court, whom he strikes down and wounds with a single spear. The rescue of Fergus’s lands thus stands within a broader pattern of challenges, victories, and encounters with [Arthur](entity:character-recall-character-arthur-2e33b65bbe57)’s knights, while its release of captives and refusal of an offered estate distinguish it from a victory pursued solely for advancement.
Event 41
Uwaine’s Battle for the Lady of the Rock
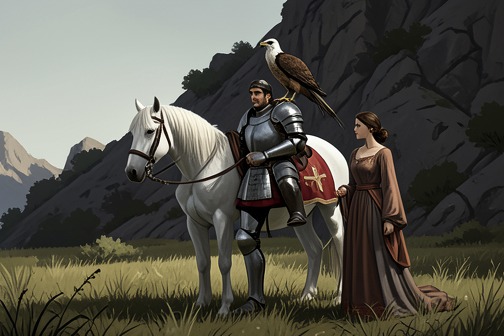
[Uwaine’s Battle for the Lady of the Rock](entity:event-recall-event-uwaine-s-battle-for-the-b2a09a26c573) tests the obligations of knighthood against the power of wrongful seizure. Traveling with an elderly damsel, [Uwaine](entity:character-recall-character-uwaine-6468cffc7b73) reaches the Lady of the Rock’s territory, hears that two brothers have dispossessed her, and offers first to settle the matter fairly. When they refuse, he fights them under an agreed condition against [treachery](entity:concept-recall-concept-22ce6e5d8b9f). His victory restores the lady’s lands, while the surviving brother is directed into [King Arthur](entity:character-recall-character-king-arthur-2b97864f54aa)’s service.
## The Lady’s Appeal and Uwaine’s Pledge
Uwaine arrives in the region with a damsel described as sixty years old, who has guided him through a series of adventures. At a tournament near the Welsh Marches, he strikes down thirty knights and receives the prize: a gerfalcon and a white horse trapped with cloth of gold. The damsel then brings him to the courteous Lady of the Rock, whose lands have been taken by two brothers known as the perilous knights: Sir Edward of the Red Castle and Sir Hue of the Red Castle.
The lady explains that the brothers have disinherited her from a barony through extortion. Uwaine identifies their conduct as contrary to the order and oath of knighthood. As one of King Arthur’s knights, he says he will first approach them fairly; if they will not yield, he will fight in defence of her right. The offer makes the episode more than a display of prowess: Uwaine presents force as a recourse after an attempt at redress, and grounds his intervention in the lady’s claim to her land.
## Failed Negotiation and Terms of Combat
The brothers are summoned to speak with the lady, but arrive with a hundred horsemen. Seeing this show of force, she will not let Uwaine go out to meet them, even under assurances of safety or fair speech. Instead, he addresses them from a tower. They refuse to be persuaded and insist on keeping what they have taken.
Uwaine then challenges one of the brothers to fight, but they propose that both fight him, one after the other. They promise that if he defeats them, the lady will recover her lands. He accepts and sets the next day for the encounter. The parties also expressly agree that neither side will use treachery. That condition frames the contest as a regulated trial of arms, although the physical risk remains real: the two brothers’ combined challenge places Uwaine at a disadvantage, and the lady fears for him.
## The Battle and Its Reversal
After being warmly entertained at the castle, Uwaine rises early, hears mass, breaks his fast, and rides to the plain outside the gates, where the brothers are waiting. They charge together. Both break their spears against him; Uwaine knocks Edward from his horse, then unhorses Hue. The brothers recover, draw their swords, and call on him to dismount and continue the fight on foot.
Uwaine does so, placing his shield before him and drawing his sword. The three fight for five hours. The brothers wound Uwaine severely enough that the Lady of the Rock believes he may die, but he continues until he strikes Edward on the helmet and his sword cuts down to the collarbone. Hue’s courage fails at Edward’s fall. Uwaine presses after him, but Hue kneels and yields. Uwaine accepts his sword and takes him by the hand, bringing him back into the castle rather than killing him.
## Restitution and Aftermath
The Lady of the Rock rejoices at the outcome, while Hue mourns his brother. The lady is restored to all her lands, fulfilling the condition on which the brothers had agreed to fight. Hue is ordered to attend King Arthur’s court at the next feast of [Pentecost](entity:time-recall-time-16e2becf2ca1), connecting the local settlement to the wider royal fellowship and placing the surviving opponent under the king’s authority.
Uwaine remains with the lady for nearly half a year while recovering from his wounds. The stay delays his journey to the appointed meeting-place, where he, [Sir Gawaine](entity:character-recall-character-sir-gawaine-bf0b0cf3eb43), and [Sir Marhaus](entity:character-recall-character-sir-marhaus-1bd99ec8e2d9) had promised to meet at a crossroads. The episode thus leaves both a political and a personal consequence: a dispossessed landholder regains her inheritance, while the victor’s recovery alters the timing of a separate commitment.
## [Knighthood](entity:concept-recall-concept-knighthood-ab8278f54c9d), Justice, and [Mercy](entity:concept-recall-concept-8a56d86ef182)
The episode turns on the difference between possession and right. Edward and Hue claim the lands they have taken, but Uwaine treats the lady’s complaint as a cause that merits both negotiation and, if necessary, armed defence. Their refusal makes combat the means by which the dispute is resolved; the agreed terms give the contest an appearance of order, but the resolution still depends on one knight’s physical victory.
The ending also distinguishes justice from vengeance. Uwaine kills Edward in the battle, yet accepts Hue’s surrender and takes him by the hand. The lady’s lands are restored, and Hue is directed to the royal court rather than executed. In that outcome, martial success serves restitution, while mercy limits the consequences of defeat and draws the local conflict back into King Arthur’s political order.
Event 42
Arthur’s Refusal of Roman Tribute
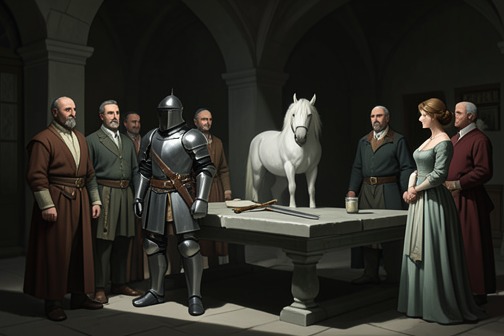
[Arthur’s Refusal of Roman Tribute](entity:event-recall-event-arthur-s-refusal-of-rom-e2c0a61cebec) is the moment when a Roman demand for [Britain](entity:location-recall-location-01048caf1f48)’s submission becomes [Arthur](entity:character-recall-character-arthur-2e33b65bbe57)’s own claim to sovereignty over the empire. Faced with an ultimatum from Emperor Lucius, Arthur protects the ambassadors, consults his lords, rejects tribute, and declares his intention to march on [Rome](entity:location-recall-location-f3877a21016f); the exchange makes diplomacy the prelude to war and frames his answer as a contest over who has the right to command.
## The Roman Demand and Arthur’s Restraint
After a long war, Arthur has rested and holds a royal feast with his allies, including kings, princes, and [Knights of the Round Table](entity:character-recall-character-3f167931be46). Twelve elderly ambassadors enter his hall carrying olive branches as a sign of their diplomatic mission. They address him from the emperor Lucius, described as dictator or procurator of Rome’s public weal, and require him to recognize Lucius as his lord and send the tribute claimed for Britain.
The ambassadors ground their demand in a Roman account of prior rule: Julius Caesar conquered Britain, they say, and Arthur’s father and predecessors paid tribute to the empire. They warn that refusing the command will bring a powerful war against Arthur and his lands, intended as a lasting example to other rulers who deny Rome its dues. Their appeal thus combines a claim of inherited obligation with a threat of force.
Some of Arthur’s younger knights would attack the messengers, regarding the demand as an insult to the assembled court. Arthur forbids them, on pain of death, to speak against or harm the ambassadors. He orders that they be housed and provided for generously, stressing that their unwelcome message does not cancel the honor owed to their station. The restraint is part of the political encounter: Arthur refuses Rome’s authority without abandoning the conduct he considers due to envoys.
## Council and Counterclaim
Arthur does not answer the ultimatum impulsively. He calls his lords and Knights of the Round Table to council and asks their advice. [Sir Cador of Cornwall](entity:character-recall-character-sir-cador-of-cornwa-7f2cd3471742) welcomes the prospect of war as a chance for the company to win honor, but Arthur distinguishes that appetite for battle from the grounds of his decision: the demand itself grievously offends him, and he will not pay tribute to Rome.
He supports his refusal with a counter-history of sovereignty. Belinus and Brennius, kings of Britain, held the empire in their hands for many days; [Constantine](entity:character-recall-character-constantine-fc56b501aa73), son of Queen Helen, is another precedent he invokes. Arthur argues that these examples show Britain owes Rome no tribute and that, as their descendant, he has a right to claim the imperial title. The ambassadors’ assertion that Britain is a Roman possession is answered with a rival account in which Britain’s rulers have themselves possessed imperial authority.
## The Alliance and Declaration
The assembled rulers respond with promises of military aid. King Anguish of [Scotland](entity:location-recall-location-scotland-4e112aa71aa3) argues that Arthur is without equal in Christendom in knighthood and dignity, recalls the extortions imposed on their elders under Roman rule, and pledges twenty thousand fighting men at his own expense. The king of Little Britain promises thirty thousand. The lord of West [Wales](entity:location-recall-location-6d9a7b286e78), [Sir Uwaine](entity:character-recall-character-sir-uwaine-42c6462a7fa0), Sir Ider, and their cousins also promise thirty thousand; [Sir Launcelot](entity:character-recall-character-sir-launcelot-c0ea01c62d3d) and the other knights undertake to bring forces according to their ability. Arthur thanks them for their readiness, making the council’s support the practical foundation of his answer.
Arthur then summons the ambassadors before the assembled lords and knights and gives them a formal reply. He denies owing tribute to Rome or to any earthly prince, Christian or heathen, and declares that he intends to possess the empire by the right of his predecessors. He announces his settled intention to lead an army to Rome and subdue those who resist. His answer reverses the original demand: instead of acknowledging Lucius as sovereign, Arthur demands that Lucius and the people of Rome do homage to him as emperor and governor.
The declaration is accompanied by an orderly and ceremonious departure. Arthur commands his treasurer to give the ambassadors substantial gifts and pay their expenses, and assigns Sir [Cador](entity:character-recall-character-cador-b793b350c147) to escort them out of the land. They take ship at [Sandwich](entity:location-recall-location-e7b49b3e89a3) and travel by way of [Flanders](entity:location-recall-location-254b16a0e553), [Almaine](entity:location-recall-location-5de8f8240e02), the mountains, and [Italy](entity:location-recall-location-125be658b0d0) to report to Lucius. The care shown to them does not soften the substance of the message; it sets a sharp contrast between courteous treatment of envoys and uncompromising refusal of the authority they represent.
## Political Meaning and Consequences
The event makes the conflict more than a dispute over revenue. Rome invokes conquest, precedent, and imperial statutes to establish a chain of obligation; Arthur invokes earlier British rulers to contest that chain and place his own title above the Roman demand. Tribute becomes the outward sign of a larger question: whether Britain is a subject realm or a power entitled to claim the empire.
The episode also distinguishes legitimate authority, as the narrative presents it, from mere capacity for violence. Arthur’s followers are ready to strike the ambassadors, but the king restrains them and maintains hospitality even as he prepares for war. His political conduct joins firmness in the claim to sovereignty with a rule of protection toward messengers; the council, pledges, answer, gifts, and escort together turn that stance into public policy.
The answer carries the encounter directly toward military confrontation. On receiving the report, Lucius is angered and initially expects to cross the mountains into [France](entity:location-recall-location-france-f5cafc8a8ad4) before [Easter](entity:time-recall-time-easter-4ee721615d13), drawing on allies from regions subject to Rome. Yet the senators who have seen Arthur’s court warn that he is not the ruler they expected to find: they describe his power and fellowship as formidable and advise Lucius to guard the mountain passes. The ambassadors’ journey therefore conveys both the formal refusal and an unsettling account of the strength behind it. The diplomatic exchange has opened the Roman campaign, while leaving its outcome to the battles that follow.
Event 43
Arthur’s Slaying of the Giant at Mont Saint-Michel
[Arthur](entity:character-recall-character-arthur-2e33b65bbe57)’s slaying of the giant at Mont Saint-Michel tests kingship not through tribute or ceremony but through immediate responsibility for people beyond the royal camp. Told that a tyrant has terrorized the country, destroyed its children, and abducted the Duchess of Brittany, Arthur leaves his army with only [Sir Kay](entity:character-recall-character-sir-kay-b93c82975d98) and [Sir Bedivere](entity:character-recall-character-sir-bedivere-18c089fc04bc) and goes to confront the danger himself. The victory ends the giant’s violence, brings public recognition of the rescue, and is marked by Arthur’s direction that a church be built on the mount in honour of Saint Michael.
## Causes and Background
During Arthur’s campaign in [France](entity:location-recall-location-france-f5cafc8a8ad4), a local husbandman brings him news of a giant in the country of [Constantine](entity:character-recall-character-constantine-fc56b501aa73), beside Brittany. The giant has spent seven years killing, murdering, and devouring people; the common people’s children have all been destroyed. More recently, he seized the Duchess of Brittany as she travelled with her train and carried her to his lodging on a mountain. More than five hundred people followed her but could not rescue her, and the husbandman fears that she has been killed.
The danger is also a matter of kinship and obligation: the duchess is the wife of Sir Howell, whom the husbandman describes as close to Arthur in blood. He appeals to Arthur as a rightful king to pity the lady and avenge the people. Arthur answers that he would have given up his best realm to have been near enough to rescue her. The episode makes the king’s duty concrete: a report of harm to his subjects and kin draws him away from the larger military enterprise and toward a particular endangered community.
## The Expedition to the Mount
After hearing the account, Arthur returns to his tent and secretly summons Sir Kay and Sir Bedivere. He orders them to prepare horses and armour for the three of them, then sets out after evensong on what he calls a pilgrimage to Saint Michael’s mount. At the foot of the hill, he tells his companions to wait while he climbs alone. The movement away from the army and upward toward the giant’s mountain gives the encounter its shape: Arthur deliberately separates himself from the protection of his larger force before he knows what awaits him.
On the mount he finds a widow beside a newly made grave, lamenting the duchess. She warns him that a devil is nearby and claims that even fifty knights like him could not resist it. The widow says the giant has defeated fifteen kings and describes a garment embroidered with their beards, which they had sent in the hope of winning mercy for their people. Her account enlarges the danger from a local outrage into a pattern of terror that has humbled rulers and failed to protect their subjects. Arthur nonetheless continues, saying he will carry out his message despite her warning.
## The Fight and the Giant’s Death
Arthur finds the giant at supper by a great fire. The scene confirms the widow’s account of a threat to the vulnerable: three maidens tend spits bearing twelve young children, and the giant is consuming part of a human body. Arthur responds by condemning the murders of the children and the duchess and challenging the giant to rise and fight. The rescue is therefore not a contest undertaken for reputation alone; the victims’ deaths and the duchess’s fate are the explicit cause of the confrontation.
The giant strikes Arthur and knocks his helmet to the ground. Arthur answers with a blow that brings the giant down, but the fight continues at close quarters: the giant throws aside his club and seizes Arthur, while the three maidens kneel and pray to Christ for Arthur’s help. The struggle rolls down the hill toward the seashore, with Arthur striking the giant with his dagger. When they reach the place where Sir Kay and Sir Bedivere have been waiting, the two knights release Arthur from the giant’s grasp. Arthur then commands Sir Kay to cut off the giant’s head and carry it to Sir Howell as proof that his enemy has been slain.
## Aftermath and Royal Judgment
Arthur orders the head displayed on a spear at a barbican so that the people can see it. He also sends Sir Kay and Sir Bedivere back up the mountain to retrieve his shield, sword, and the giant’s iron club. The treasure there is available in abundance, but Arthur asks for only the giant’s garment and club; he tells the knights to take the rest. When the people come to thank him, he redirects their gratitude to God and orders the goods divided among them. The ending turns victory into a public remedy: the threat is dead, its defeat is made visible, and its wealth is assigned to those among whom the giant had terrorized.
Arthur also directs Sir Howell to arrange for a church to be built on the same hill in honour of Saint Michael. The command gives the site a new purpose after the violence that had occupied it. The giant’s lodging and the grave beside which the widow mourned are followed, in the episode’s close, by a proposed place of worship. The narrative thus joins armed protection to religious dedication without suggesting that the church itself restores those already lost.
## Place in the Campaign
The episode places Arthur’s personal intervention between military movements in the French campaign. The morning after the victory, he moves with his army into [Champagne](entity:location-recall-location-db1a21fc7d37) and pitches his tents in a valley. While he is dining, messengers report that the emperor has entered France, devastated much of the country, and caused slaughter and the burning of towns and boroughs. Their news immediately returns the narrative to the larger war, contrasting the resolved local danger on the mount with the advancing imperial threat.
The encounter also frames royal force as answerable to the needs of particular people. Arthur goes with two companions rather than an army, accepts the widow’s warning without abandoning the rescue, and limits his own share of the recovered treasure. The giant has ruled through fear and made other kings’ concessions useless; Arthur’s response instead brings the danger to an end, directs its spoils toward the people, and dedicates the mount to Saint Michael. The episode’s significance lies in this sequence of listening, acting, and distributing the consequences of victory.
Event 44
The Roman Ambush of Gawaine’s Embassy
[The Roman Ambush of Gawaine’s Embassy](entity:event-recall-event-the-roman-ambush-of-gaw-b7a97a1939c1) begins as a diplomatic mission and becomes the first day of fighting between [King Arthur](entity:character-recall-character-king-arthur-2b97864f54aa)’s Britons and Emperor Lucius’s Romans. Its movement from warning to violence is swift: [Sir Gawaine](entity:character-recall-character-sir-gawaine-bf0b0cf3eb43) and [Sir Bors](entity:character-recall-character-sir-bors-eb41f6b6a451) deliver [Arthur](entity:character-recall-character-arthur-2e33b65bbe57)’s demand that the emperor leave his land, but Lucius answers with a declaration of conquest. The encounter introduces the campaign not as an abstract dispute over tribute, but as a test of sovereignty fought out through messengers, armed escorts, rescue, and retaliation.
## Causes and Background
Lucius has entered [France](entity:location-recall-location-france-f5cafc8a8ad4) and caused widespread destruction, burning towns and killing people. Word of this reaches Arthur as his army advances into [Champagne](entity:location-recall-location-db1a21fc7d37); the report warns that the local population will have to yield their lives and goods unless he comes quickly. Arthur responds by summoning Sir Gawaine, Sir Bors, [Sir Lionel](entity:character-recall-character-cc33a893fb46), and [Sir Bedivere](entity:character-recall-character-sir-bedivere-18c089fc04bc) and instructing them to go directly to Lucius. They are to demand that he leave Arthur’s land, or prepare for battle, and to tell him not to oppress the poor.
The mission takes place against a larger contest over political authority. Earlier, Lucius’s twelve aged ambassadors had demanded that Arthur acknowledge the emperor as his lord and pay tribute, claiming that [Britain](entity:location-recall-location-01048caf1f48)’s rulers had owed such payments to [Rome](entity:location-recall-location-f3877a21016f). Arthur rejected the claim and asserted sovereignty for himself, declaring his intention to march on Rome and claim the empire. The embassy to Lucius thus carries a direct warning from a king who has refused Roman overlordship and whose army is already moving against the emperor’s forces.
## The Embassy and Its Reversal
The four knights ride to a green wood, where they see a meadow beside a river filled with brightly colored silk pavilions. Lucius’s pavilion stands in the center beneath a displayed eagle. Sir Gawaine and Sir Bors approach to deliver the message while Sir Lionel and Sir Bedivere remain hidden in an ambush nearby. The scene’s arrangement gives the embassy both its diplomatic form and its military precaution: the two speakers face the emperor, while their companions wait out of sight.
Lucius rejects the demand and declares that he will subdue Arthur and all his lands. A Roman knight named Sir Gainus, Lucius’s close kinsman, then mocks the Britons as boastful. Sir Gawaine, angered by the insult, kills him and rides away with Sir Bors. The exchange has crossed from formal negotiation into open combat: the Roman refusal is followed by an insult, and the insult by an act that makes peaceful departure impossible.
## The Pursuit and Rescue
Roman forces pursue the departing knights on horseback and on foot, following them across open ground toward the wood where Sir Lionel and Sir Bedivere are waiting. Sir Bors turns to meet a pursuing knight and kills him with a spear. When Caliburn, one of the strongest men of [Pavia](entity:location-recall-location-e5251c4250ca), strikes down many of Arthur’s knights, Sir Bors confronts and kills him as well. Sir Feldenak then seeks revenge on Sir Gawaine for the death of Sir Gainus; Sir Gawaine sees the attack and strikes him down before rejoining his companions.
The hidden party joins the fighting and drives the Romans back toward their tents. Roman reinforcements arrive, however, and the battle begins again. In the renewed clash, Sir Bors and Sir Berel are taken prisoner. Sir Gawaine refuses to leave them behind: accompanied by Sir Idrus, he pursues their captors, rescues Sir Bors, and sees Sir Idrus rescue Sir Berel. The rescue restores two knights to the British party, but the encounter remains dangerous, and Sir Gawaine sends to Arthur for aid, reporting that he is badly hurt and urging the king to hurry.
## Outcome and Significance
Arthur assembles his army, but before he can set out, the prisoners have returned. Sir Gawaine and his companions have held the field and forced the Romans to flee; the British party comes back with no knight of worship lost, although Sir Gawaine is seriously hurt. Arthur has his wounds tended and gives him comfort. The account closes the day’s fighting with a striking contrast between the initial ambush and its final result: a mission meant to carry a warning has become a battle, yet the British knights emerge with their captured companions recovered and the field in their possession.
The episode establishes the Roman campaign’s stakes through a compact sequence of political challenge and reciprocal force. Arthur’s command to protect the poor gives the mission a protective purpose alongside its assertion of sovereignty. The Romans’ pursuit makes the envoys’ danger immediate; the British rescue of prisoners and return to the field make solidarity among the knights part of the encounter’s outcome. More than ten thousand Romans are reported slain, and Arthur’s host celebrates that night. On the following morning, Arthur sends the prisoners to [Paris](entity:location-recall-location-657453741ed3) under the guard of [Sir Launcelot](entity:character-recall-character-sir-launcelot-c0ea01c62d3d), many knights, and Sir [Cador](entity:character-recall-character-cador-b793b350c147), carrying the consequences of the first day’s battle forward into the campaign.
Event 45
The Battle of Sessoyne
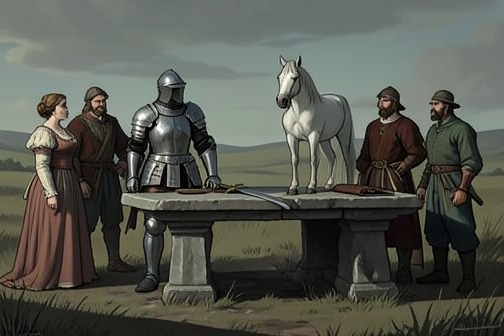
[The Battle of Sessoyne](entity:event-recall-event-the-battle-of-sessoyne-10eee66cdb88) is the decisive encounter between [King Arthur](entity:character-recall-character-king-arthur-2b97864f54aa) and the Roman emperor Lucius in the campaign that began with [Rome](entity:location-recall-location-f3877a21016f)’s demand for tribute from [Britain](entity:location-recall-location-01048caf1f48). [Arthur](entity:character-recall-character-arthur-2e33b65bbe57)’s victory ends with Lucius dead, the Roman army in flight, and the emperor’s own body sent toward Rome as an answer to the demand. The battle joins personal combat to imperial politics: Arthur refuses to recognize Rome’s authority, then makes the outcome of war speak for that refusal.
## Causes and Background
The conflict begins when Rome’s ambassadors require Arthur to acknowledge Lucius as his overlord and pay the tribute said to be due from Britain. They invoke Julius Caesar’s conquest and Roman decrees, and threaten a punitive war if Arthur refuses. Arthur does not harm the envoys, despite young knights’ anger at their message; he orders that they be protected and given proper lodging, and says he will consult his council before answering. The dispute is therefore framed not simply as a battlefield quarrel but as a contest over who may claim sovereignty and demand payment.
Before the decisive battle, Arthur’s forces have already won a field against the Romans and brought prisoners to [Paris](entity:location-recall-location-657453741ed3). A senator who escaped reports the defeat to Lucius, warning him to withdraw and arguing that Arthur’s knights have proved overwhelmingly effective. Lucius rejects the warning as cowardly speech and sends King Leomie ahead with an army, intending to follow. Arthur receives private warning of the movement and sends his people to Sessoyne, taking towns and castles from the Romans as he prepares to confront the emperor.
## Armies and Course of the Battle
Arthur arranges his forces in separate divisions so that the Romans cannot escape. He assigns Sir [Cador](entity:character-recall-character-cador-b793b350c147) to the rear guard and places [Sir Launcelot](entity:character-recall-character-sir-launcelot-c0ea01c62d3d), [Sir Bors](entity:character-recall-character-sir-bors-eb41f6b6a451), [Sir Kay](entity:character-recall-character-sir-kay-b93c82975d98), and [Sir Marhaus](entity:character-recall-character-sir-marhaus-1bd99ec8e2d9) among the knights attending his own person. When Lucius enters the valley of Sessoyne, Arthur’s displayed banner and surrounding forces leave the emperor facing the choice to fight or surrender. Lucius urges the Romans to defend Rome’s claim to rule the world, and the armies meet in a prolonged battle in which the advantage shifts between the sides.
Arthur fights among his men, using [Excalibur](entity:object-recall-object-excalibur-a2b72b99cb6d) where the Romans press hardest and rescuing his people. He also kills the giant Galapas, who is fighting on the Roman side. [Sir Gawaine](entity:character-recall-character-sir-gawaine-bf0b0cf3eb43) distinguishes himself by killing three admirals, and the [Knights of the Round Table](entity:character-recall-character-3f167931be46) fight throughout the engagement. The narrative says that the many individual feats would require a whole volume to recount, but focuses its climactic action on the two rulers.
Lucius and Arthur meet in combat. Lucius wounds Arthur in the face; Arthur answers with Excalibur and kills the emperor. Once Lucius’s death is known, the Romans flee, and Arthur’s forces pursue them. The account reports more than a hundred thousand Romans slain, then shifts from the victory itself to the king’s orders for care and burial.
## The Dead and Arthur’s Message to Rome
Arthur has the dead from his own company buried according to their rank, and orders surgeons to treat the wounded without stinting on medicines. He also attends to the high-ranking dead on the Roman side. Beside Lucius, the account names the Sultan of Syria, the King of Egypt, the King of Ethiopia, seventeen other kings, and sixty Roman senators. Arthur orders their bodies embalmed, wrapped in many layers of cloth, and placed in lead coffins; their shields, arms, and banners are set with them so that their origins can be recognized.
Three senators survive. Arthur sends them back to Rome with the dead and a message for the Roman authorities: he will come to Rome himself, and the bodies are to stand as the tribute Rome demanded. He declares that Britain, [Ireland](entity:location-recall-location-ireland-3247a2c8bcbe), and [Almaine](entity:location-recall-location-5de8f8240e02) owe Rome no other tribute, and commands the senators to tell the city’s officials and council not to demand further tribute or tax from his lands. The defeated embassy becomes a carefully staged reply: the dead are delivered as the payment, while Arthur rejects Rome’s continuing claim.
The senators carry Lucius alone in a cart covered with the imperial arms; the kings’ bodies follow in a chariot, with the senators’ bodies after them. In Rome, they recount the defeat and urge that no further war be made against Arthur, whose strength and the prowess of the Knights of the Round Table, they say, no earthly prince can match. The narrative then turns to Arthur’s advance into Almaine and [Italy](entity:location-recall-location-125be658b0d0), making Sessoyne a victory that opens the next stage of his campaign rather than ending it.
## Significance
Sessoyne brings the tribute dispute to a sharp reversal: the emperor who came to enforce Rome’s authority is killed, and his body is sent home as Arthur’s answer. The result depends both on the organized strength of Arthur’s host and on the king’s own encounter with Lucius. The battle thus makes political authority visible through action: Rome’s demand is met not with payment or submission but with defeat, burial, and a message carried by the very dead whose empire had claimed dominion over Arthur’s lands.
Event 46
Gawaine’s Battle with Priamus
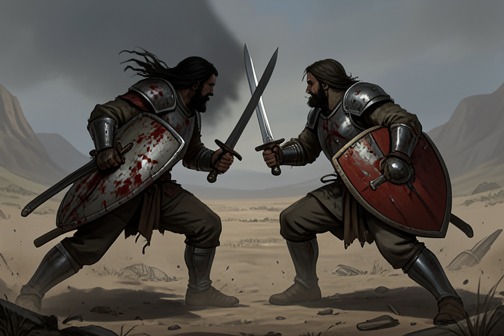
[Gawaine](entity:character-recall-character-gawaine-e52d508f7128)’s battle with [Priamus](entity:character-recall-character-priamus-274784e9c63f) changes the meaning of a military encounter: what begins as a contest between two wounded opponents becomes a pact of aid, conversion, and fellowship. Gawaine’s promise to help Priamus become Christian binds the two men before they face a much larger force; their return to [King Arthur](entity:character-recall-character-king-arthur-2b97864f54aa) brings that personal alliance into the king’s court, where Priamus is baptized and received among the [Round Table](entity:object-recall-object-round-table-04fef19b82fd)’s knights.
## The Duel and Its Turning Point
The fight is presented as a hard-fought encounter between two capable warriors. They charge with spears, pierce one another’s shields, and then draw swords. Gawaine uses [Galatine](entity:object-recall-object-f5a822c5e2b7) to strike through Priamus’s shield and mail, while Priamus lands a blow that leaves Gawaine bleeding. The combat has established neither man as an easy victor: each has proved the other’s strength, and each is now vulnerable.
Priamus tells Gawaine that the wound will not stop bleeding by ordinary means, but offers to staunch it if Gawaine will help him receive baptism and believe in God. Gawaine accepts. The bargain makes the immediate stakes more than victory or capture: Gawaine’s survival depends on accepting Priamus’s request, and Priamus’s conversion is made the condition of the aid he can provide. Gawaine also asks who Priamus is and what brought him there, turning the pause in combat into an exchange of identities and purposes.
## Priamus’s Identity and the New Alliance
Priamus identifies himself as the son of a great prince, descended, he says, from Alexander and Hector, with Joshua and Maccabeus among his lineage. He claims inheritance of Alexandria, Africa, and the outlying isles. He had entered the war with seven score knights, but after fighting Gawaine he is ready to accept the Christian faith. His account presents him as a prince of formidable ancestry and standing, not merely a defeated opponent seeking escape.
Gawaine initially conceals his rank, saying that he was brought up in King Arthur’s guardrobe, tending the king’s armor and equipment, and that only the previous Yule had he been made a yeoman and given a horse, armor, and a hundred pounds. He then reveals that he is [Sir Gawaine](entity:character-recall-character-sir-gawaine-bf0b0cf3eb43), a Knight of the Round Table whom King Arthur himself dubbed a duke. Priamus says he is more pleased by this truth than he would have been by receiving a province and [Paris](entity:location-recall-location-657453741ed3). The revelation changes the terms of their encounter: Priamus’s respect rests not simply on Gawaine’s fighting, but on the identity and honor represented by the king’s knight.
Priamus warns that a duke of [Lorraine](entity:location-recall-location-d933193ae4b6), lords of [Lombardy](entity:location-recall-location-eea345b7c5c5), and Saracens from the south are nearby, with an army numbering sixty thousand. Gawaine’s company, by contrast, is no more than seven hundred. Before the larger engagement, Priamus uses a phial containing the four waters that came out of Paradise and balm to tend both men’s wounds; within an hour, they are described as whole again. The shared recovery enables the former opponents to face the approaching danger together.
## The Battle and Gawaine’s Decision
Priamus counsels withdrawal, stressing the size of the enemy force and the danger to their small company. Gawaine rejects retreat as shameful and argues that they should arm and meet the attackers, trusting that they can prevail. He also insists that Sir Florence should remain at his post rather than be abandoned. When Priamus urges him to assist the hard-pressed fighters, Gawaine first holds back, judging that they can manage their opponents; he moves when reinforcements arrive from the woods in much greater numbers.
The fighting begins when Sir Florence and Sir Floridas take a hundred knights forward to drive out a herd of beasts. Seven hundred men-at-arms follow. Sir Ferant of [Spain](entity:location-recall-location-0fe76f866976) challenges Florence, who kills him in their encounter, and the opposing force surges into battle. Florence and his hundred hold their position. When an earl and the duke of the Germans arrive with many thousands, Gawaine rallies his knights and leads them into the expanding fight. The Round Table knights help force the enemy to recoil and flee, though the battle remains costly. A giant named Jubance enters the combat and kills Sir Gherard of [Wales](entity:location-recall-location-6d9a7b286e78); Sir Priamus joins the fighting under his pennon and kills the Marquis of Moises land.
The victory does not erase the loss. Sir Chestelaine, a child and ward of Gawaine, is killed, and his death is avenged. The narrative records sorrow for him alongside the report of victory, making the result both a military success and a personal bereavement for Gawaine’s company. After the battle, Sir Florence and Gawaine secure their people, take cattle, gold, silver, and other treasure, and return to King Arthur with prisoners and an account of what they have accomplished.
## Baptism, Reward, and Political Consequence
When Gawaine presents Priamus to King Arthur, he explains that Priamus matched him in combat and submitted to God and to Gawaine in order to become Christian. Gawaine asks the king to have him baptized, praising him as an exceptionally noble and capable knight. [Arthur](entity:character-recall-character-arthur-2e33b65bbe57) has Priamus baptized under his own name, makes him a duke, and admits him to the Round Table. The alliance formed through combat is thus confirmed by the king as a new place within the fellowship.
The episode places conversion beside the work of war and rulership. Priamus’s change of faith is not the end of his participation in the campaign: after his baptism, he is recognized by Arthur and joined to the company that has fought alongside him. The encounter therefore moves from individual contest, through mutual aid and collective danger, to public recognition. Gawaine’s courage matters not only because it helps secure victory, but because his conduct makes possible the reconciliation and incorporation of a former enemy as an ally and fellow knight.
Event 47
Arthur’s Conquest of Rome and Imperial Coronation
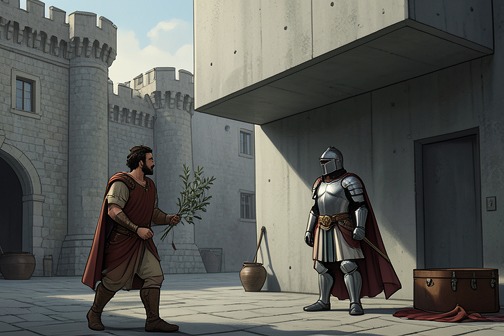
[Arthur’s Conquest of Rome and Imperial Coronation](entity:event-recall-event-arthur-s-conquest-of-ro-0d9b777af950) is the culmination of [Arthur](entity:character-recall-character-arthur-2e33b65bbe57)’s campaign against the Roman demand for tribute and a dramatic enlargement of his claimed sovereignty. The narrative turns a dispute over whether [Britain](entity:location-recall-location-01048caf1f48) owes obedience to [Rome](entity:location-recall-location-f3877a21016f) into a campaign that ends with Arthur crowned emperor by the Pope. Its account of victory is also an account of rule: Arthur answers Roman authority with a rival claim, wins submission by arms, and then presents himself as a ruler responsible for justice, restraint, and the distribution of rewards.
## The Roman demand and Arthur’s answer
The immediate conflict begins when twelve aged Roman ambassadors arrive at Arthur’s court bearing olive branches. They speak for Emperor Lucius, demand Britain’s tribute, and invoke Julius Caesar’s conquest and the precedent of earlier payments. The demand is framed as a command of imperial authority, backed by a threat of war and punishment if Arthur refuses. Some young knights at court want to attack the envoys, but Arthur forbids anyone to insult or harm them, orders that they be properly lodged and supplied, and reserves his answer for consultation with his council.
Arthur’s refusal goes beyond rejecting the payment. He declares that he owes no tribute to Lucius or any earthly prince, Christian or heathen, and claims the sovereignty of the empire by the right of his predecessors, the former kings of Britain. He tells the ambassadors that he will march on Rome to take possession and subdue those who resist. Before they depart, he has the treasurer give them generous gifts and pay their expenses, and appoints Sir [Cador](entity:character-recall-character-cador-b793b350c147) to escort them from the country. The contrast is deliberate: Arthur rejects Rome’s authority while observing the obligations of hospitality toward its messengers.
The alliance assembled for the campaign gives Arthur’s claim a collective political foundation. King Anguish of [Scotland](entity:location-recall-location-scotland-4e112aa71aa3) urges him not to submit and offers twenty thousand fighting men at his own expense, recalling the exactions imposed on earlier generations under Roman rule. The king of Little Britain promises thirty thousand, and other lords and knights pledge forces according to their means. With this support behind him, Arthur gives the ambassadors his formal answer in the presence of his lords: he will neither acknowledge Roman overlordship nor pay tribute, but intends to claim the empire. He again provides for the envoys’ departure, including their passage from [Sandwich](entity:location-recall-location-e7b49b3e89a3) and their journey through [Flanders](entity:location-recall-location-254b16a0e553), [Almaine](entity:location-recall-location-5de8f8240e02), the mountains, and [Italy](entity:location-recall-location-125be658b0d0) to Lucius.
## Victory over Lucius
The campaign reaches its decisive military turn when Arthur’s forces defeat the Roman host. Arthur fights where the Romans are thickest, wielding [Excalibur](entity:object-recall-object-excalibur-a2b72b99cb6d) and rescuing his people; [Sir Gawaine](entity:character-recall-character-sir-gawaine-bf0b0cf3eb43) and the other [Knights of the Round Table](entity:character-recall-character-3f167931be46) also distinguish themselves. Lucius and Arthur meet in combat, and after Lucius wounds Arthur, Arthur strikes him down with Excalibur. The emperor’s death sends the Roman army into flight, and Arthur’s forces pursue it. The narrative reports more than one hundred thousand Roman dead, then turns from the scale of victory to Arthur’s treatment of those who served him: he orders his own dead buried according to their rank and directs surgeons to tend the wounded without stinting on remedies.
Arthur also makes the defeat into a message for Rome. Among the dead are Lucius, the Sultan of Syria, the kings of Egypt and Ethiopia, seventeen other kings, and sixty Roman senators. Arthur has the bodies embalmed, wrapped in many layers of cloth, placed in lead chests, and identified by their shields, arms, and banners. He sends three surviving senators with the remains to the Roman authorities, bearing letters and instructions to report the defeat. The bodies are presented as the tribute Rome had demanded; Arthur warns that he will bring further payment in person if Rome remains unsatisfied. The senators advise Rome not to renew the war against a conqueror whose power, and whose fellowship of knights, they regard as beyond that of any earthly prince.
## From military occupation to imperial rule
After the victory, Arthur’s host proceeds through [Lorraine](entity:location-recall-location-d933193ae4b6), [Brabant](entity:location-recall-location-47b7b41ee728), Flanders, Almaine, [Lombardy](entity:location-recall-location-eea345b7c5c5), and [Tuscany](entity:location-recall-location-5aab1681c149). A Tuscan city refuses to submit and is besieged; Arthur’s forces assault it, but when the duchess and Countess Clarisin plead that an assault will kill the innocent, Arthur halts the attack and puts the duke’s fate under his judgment. The duke’s eldest son surrenders the keys. Arthur sends the duke to [Dover](entity:location-recall-location-dover-bee6bc10504b) as a lifelong prisoner and assigns revenues for the duchess and her children, while appointing lords to govern the conquered lands and establish laws there. The episode joins military coercion to the distribution of protection and authority, though the duke’s permanent captivity also marks the severity of Arthur’s settlement.
At Urbine, Arthur’s advance guard wins the city and raises his banner on its walls. Arthur responds by ordering that no one under his command mistreat any lady, wife, or maid, and, on entering the city, comforts those in distress and appoints a captain from his own country. [Milan](entity:location-recall-location-617379caf4c2) then sends large sums and submits, offering homage and fealty for its lands and promising an annual million in gold for Arthur’s lifetime. Arthur continues through Tuscany, taking towns and castles; those that refuse obedience are laid waste. The narrative thus sets negotiated submission and protection alongside conquest by force, showing the different terms by which Arthur extends his rule.
The remaining senators and leading cardinals eventually come to Arthur to seek peace. They ask for six weeks to gather the Romans and prepare to crown him emperor with the customary anointing. Arthur accepts their proposal, stipulating that the coronation will be at [Christmas](entity:time-recall-time-christmas-a573265d0167) and that he may hold his [Round Table](entity:object-recall-object-round-table-04fef19b82fd) with his knights as he chooses. At the appointed time, he enters Rome and is crowned by the Pope with the full ceremonial splendor the romance describes. He stays there for a time, establishes his lands from Rome to [France](entity:location-recall-location-france-f5cafc8a8ad4), and grants lands and realms to his servants and knights according to their deserts. He makes dukes and earls and enriches his followers, with the narrative emphasizing that neither rich nor poor has cause to complain. Sir [Priamus](entity:character-recall-character-priamus-274784e9c63f), who had become a Christian after his encounter with [Gawaine](entity:character-recall-character-gawaine-e52d508f7128), receives the duchy of Lorraine and pledges lifelong service.
## Return and significance
Once the conquest is declared complete, Arthur’s lords and knights ask to return home to their wives and rest after their long absence. They say that the war and its honors are finished; Arthur agrees that it is unwise to tempt God and orders preparations for the return to [England](entity:location-recall-location-england-b153c1f368ea). Before setting out, he forbids his men, on pain of death, to rob or seize provisions or other goods along the way: they must pay for what they take. Having made conquest the basis of a new imperial settlement, he insists that the homeward march itself observe an enforceable rule of conduct.
Arthur crosses the sea and lands at Sandwich, where [Queen Guenever](entity:character-recall-character-queen-guenever-f27d6f31454b) meets him. The people receive him nobly in each city and borough, presenting gifts in welcome. The return closes the campaign by bringing the emperor back into the relationships and public recognition of his British realm. In the book’s structure, the Roman campaign concludes the account of Arthur’s conquest of Lucius and is followed by the sixth book, devoted to [Sir Launcelot du Lake](entity:character-recall-character-sir-launcelot-du-la-390bf6228175). The episode’s decisive reversal is political as well as military: Rome’s demand that Arthur acknowledge its supremacy ends with Rome’s representatives carrying home the bodies of its defeated leaders, its senators seeking peace, and its Pope crowning Arthur emperor.
Event 48
Morgan’s Capture of Launcelot
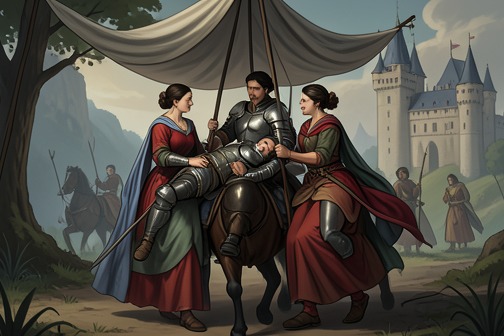
[Morgan’s Capture of Launcelot](entity:event-recall-event-morgan-s-capture-of-lau-f4a1a30c514c) is an episode of enchantment, captivity, and refusal: [Morgan le Fay](entity:character-recall-character-morgan-le-fay-5476b1a672cb) and three queens take the sleeping [Launcelot](entity:character-recall-character-launcelot-0b02a99ce6f7) to a castle and demand that he choose one of them as his love. He rejects their demand, declaring his fidelity to [Queen Guenever](entity:character-recall-character-queen-guenever-f27d6f31454b); his release comes through a damsel who secures his promise to help her father, [King Bagdemagus](entity:character-recall-character-king-bagdemagus-59849e5479e4), at a tournament.
## The Capture
Around noon, four queens of high rank pass beneath a green silk cloth held aloft on spears to shield them from the sun. They ride white mules, accompanied by four knights. A horse’s loud neigh draws their attention to Launcelot, asleep in full armor under an apple tree. Recognizing him, the queens quarrel over who will claim his love.
Morgan ends their dispute by proposing enchantment rather than consent: she will keep Launcelot asleep for six hours, take him to her castle, and let him choose among the queens once he is securely in their power. The queens lay him on his shield and carry him on horseback between two knights to Castle Chariot. There he is placed in a cold chamber. The details of the capture establish the imbalance at the heart of the episode: Launcelot is transported while unconscious, and the choice offered to him is framed by imprisonment and a threat of death.
## The Demand and Launcelot’s Refusal
That evening, after the enchantment has worn off, a damsel brings Launcelot supper. He says he cannot explain how he came to the castle except by enchantment. She tells him that if he is the knight he is reputed to be, she will explain more the next morning. He spends the night without comfort or company.
The following morning, the four queens identify their captive as Launcelot du Lake, son of [King Ban](entity:character-recall-character-king-ban-70615110b555), and acknowledge his reputation as the noblest knight living. They say that only one lady can have his love, Queen Guenever, and claim he will lose her forever. Morgan names herself queen of [Gore](entity:location-recall-location-gore-b6ce2dde700e) and identifies the others as the queens of [Northgalis](entity:location-recall-location-northgalis-aaee6aef58cf), Eastland, and the Out Isles. They demand that Launcelot choose one of them, threatening that otherwise he must die in their prison.
Launcelot answers that he would rather die there with honor than take any of them as his love against his will. He calls the queens false enchantresses and insists that, if free, he would defend [Guenever](entity:character-recall-character-112dfc46734b)’s faithfulness to her lord. When they ask whether this is truly his answer, he confirms that he refuses them. The choice turns the episode from a contest among the queens into a test of Launcelot’s constancy: captivity does not make him assent, and the threat does not displace his declared loyalty.
## The Damsel’s Bargain and Escape
At noon, the damsel returns with Launcelot’s dinner and finds him distressed. She offers to help him escape without shame or dishonor, provided he gives her a promise. Launcelot agrees, saying he fears the queens’ sorcery; she confirms that they have destroyed many good knights and desired him because of his renown and worth.
The damsel’s request is specific. Her father, King Bagdemagus, has arranged a tournament against the king of Northgalis. At the previous Tuesday’s tournament, three knights of [King Arthur](entity:character-recall-character-king-arthur-2b97864f54aa)’s court defeated her father, and she asks Launcelot to fight for him the following Tuesday. Launcelot asks who her father is before committing himself. Once she names Bagdemagus, whom he knows as a noble king and good knight, he pledges to serve both father and daughter. The bargain links the private danger of his imprisonment to a public obligation in the tournament: his release is secured through a promise to enter another conflict.
The next morning, the damsel finds Launcelot ready, takes him through twelve locks, and brings him to his armor, horse, shield, and spear. Once armed, he rides out, promising not to fail her. He spends the day in a great forest without finding a highway. At night he sees a pavilion of red sendal in a valley, chooses to lodge there, ties up his horse, removes his armor, and falls asleep in a bed. The escape therefore ends the queens’ immediate control but carries Launcelot onward into a new adventure rather than directly back to court.
## Narrative Significance
The episode pairs supernatural force with a sharply defined limit: enchantment can put Launcelot in the queens’ power, but it cannot secure his willing love. His refusal is expressed as a choice of honor and fidelity over survival on the queens’ terms. The damsel’s intervention then converts escape into obligation, preserving Launcelot’s role as an errant knight whose commitments lead from one encounter to the next.
The chapter also uses reputation as both the cause of danger and the means by which help is won. The queens know Launcelot as an exceptionally worthy knight and seek him for that renown; the damsel likewise invokes his fame, then obtains his promise by appealing to his knowledge of Bagdemagus’s character. The episode thus moves from involuntary capture to a freely accepted pledge, while leaving the tournament against the king of Northgalis as the next test of that pledge.
Event 49
Launcelot’s Victory at Bagdemagus’s Tournament
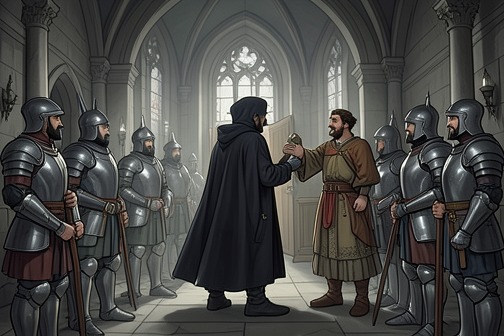
[Launcelot’s Victory at Bagdemagus’s Tournament](entity:event-recall-event-launcelot-s-victory-at-e4c38190c31f) is an episode of rescue, hospitality, and disguised intervention: after [King Bagdemagus](entity:character-recall-character-king-bagdemagus-59849e5479e4)’s daughter helps him escape imprisonment, [Launcelot](entity:character-recall-character-launcelot-0b02a99ce6f7) promises to aid her father, then enters a tournament incognito and overwhelms the opposing party. His victory secures the prize for Bagdemagus while allowing Launcelot to depart afterward in search of his missing brother, [Sir Lionel](entity:character-recall-character-cc33a893fb46).
## The Debt of Hospitality
Launcelot arrives at an abbey where Bagdemagus’s daughter recognizes him and quickly arranges for his horse to be taken to the stable and for him to be lodged in a chamber. She sends him a long gown, welcomes him warmly, and summons her father, who rides from twelve miles away with a company of knights. When Bagdemagus reaches the abbey, he embraces Launcelot; the welcome turns the rescued knight into a guest and then an ally.
Launcelot tells Bagdemagus that he was betrayed and imprisoned, and that Sir Lionel has gone away while Launcelot was unaware of it. He promises to serve the king’s daughter and all her kindred for as long as he lives. Bagdemagus asks for his help at the tournament on the following Tuesday. Launcelot agrees because he has already promised the daughter his service. The tournament is therefore not an unrelated display of arms: it is the occasion on which he makes good a pledge created by her aid and hospitality.
## The Plan and the Four White Shields
Launcelot learns that Bagdemagus’s opponents are the King of [Northgalis](entity:location-recall-location-northgalis-aaee6aef58cf) and three knights of [Arthur](entity:character-recall-character-arthur-2e33b65bbe57)’s court: [Sir Mador](entity:character-recall-character-sir-mador-8cbb68335e67) de la Porte, [Sir Mordred](entity:character-recall-character-sir-mordred-f7abe8fecb31), and Sir Gahalatine. Bagdemagus says that he and his knights could not withstand these three. Launcelot answers with a plan that combines tactical surprise with concealment. He asks Bagdemagus to provide three trusted knights, all carrying white shields; Launcelot will use one too, with no painting or device to identify him.
The four are to emerge from a small wood in the middle of the opposing parties and strike at the enemy’s front. The plain white shields make them a coordinated group without disclosing Launcelot’s identity. Bagdemagus sends the three knights, and on Tuesday they lodge in a small, leafy wood beside the tournament field. Scaffolds and viewing places have been prepared for the lords and ladies who will watch and award the prize. The setting makes the action both combat and public contest, but Launcelot enters it from concealment rather than as a named champion.
## The Tournament Turns
The King of Northgalis enters with 180 armed men, while Bagdemagus brings 80. The opening encounter is costly: twelve of Bagdemagus’s party and six of the opposing party are killed at the first meeting, and Bagdemagus’s men are driven back. The numerical imbalance and the early setback establish the danger Launcelot’s intervention must reverse.
Launcelot rides into the thickest press and knocks down five knights with a single spear. Four are described as suffering severe falls. He then brings down the King of Northgalis, who breaks his thigh in the fall. Mador challenges Launcelot and is unhorsed, dislocating his shoulder. [Mordred](entity:character-recall-character-431d80a88894) takes his turn, breaks a spear against Launcelot, and is thrown over his horse’s tail; his helmet is driven into the earth, and he lies unconscious for a long time.
Gahalatine then meets Launcelot with a spear. Both weapons break, and they continue with swords. Launcelot strikes Gahalatine’s helmet; Gahalatine’s horse runs away with him, and he falls. The sequence removes, one after another, the three knights Bagdemagus had identified as the chief danger. Launcelot’s intervention changes the contest from Bagdemagus’s retreat to the opposing party’s refusal to continue.
## The Prize and the Parting
Launcelot takes another great spear and brings down sixteen knights, some with their horses and some without them. With a further spear he knocks down twelve more. The account says most of these knights did not recover well afterward. The King of Northgalis’s party then refuses to joust further, and the prize is awarded to Bagdemagus. Launcelot’s concealed presence has not merely improved the defense; it has determined the result of the tournament.
Afterward, Launcelot rides with Bagdemagus to the king’s castle, where both Bagdemagus and his daughter give him a warm reception and offer substantial gifts. He does not remain to accept a lasting place in their household. The next morning he takes his leave, explaining that he will seek Sir Lionel, who had left while Launcelot slept. He tells Bagdemagus’s daughter to call on his service if she ever needs it, renewing the promise that had brought him into the tournament. The episode ends with reward and gratitude, but also with Launcelot returning to the unsettled search for his brother.
## Narrative Significance
The scene binds prowess to obligation. Launcelot’s force determines the tournament’s outcome, but the narrative gives that force a social cause: the king’s daughter secured his release, Bagdemagus welcomed him, and Launcelot answers their kindness through promised service. His success is made publicly consequential by the prize, yet his identity remains concealed behind the unmarked white shield; the triumph belongs to the side he serves even as the decisive knight’s name is withheld from the contest’s visible proceedings.
The closing departure keeps the victory from becoming a final settlement. Bagdemagus’s party has won, the daughter has received the service Launcelot pledged, and generous gifts are offered; nevertheless, Launcelot’s attention turns to Sir Lionel. The tournament is thus both a completed act of repayment and a passage back into the knight’s continuing adventures.
Event 50
Launcelot’s Slaying of Turquine and Liberation of the Prisoners
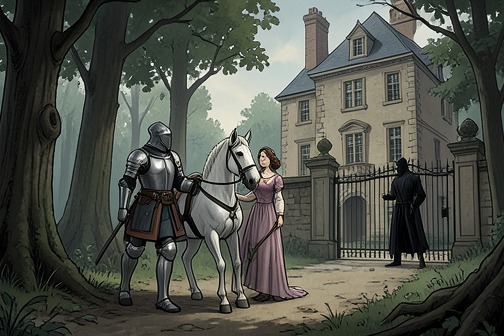
[Launcelot](entity:character-recall-character-launcelot-0b02a99ce6f7)’s slaying of [Sir Turquine](entity:character-recall-character-sir-turquine-fd0140ec7fa0) frees sixty-four imprisoned knights and ends a feud rooted in Turquine’s hatred of Launcelot. The rescue begins when a damsel leads Launcelot to the captor’s manor, but the encounter becomes a test of identity and allegiance: Turquine offers friendship and the captives’ release to an opponent who will name himself, then rejects peace when Launcelot proves to be the knight he has sworn to kill. After Turquine’s defeat, Launcelot makes [Sir Gaheris](entity:character-recall-character-bef64136a8ef) responsible for releasing the prisoners and rides on with the damsel, keeping his promise to help her and other distressed women.
## The damsel’s request and Turquine’s captives
A damsel riding a white palfrey encounters Launcelot in a forest and offers to lead him to a formidable knight, provided he identifies himself. Launcelot gives his name, and she names the knight as Sir Turquine. He has sixty-four knights of [Arthur](entity:character-recall-character-arthur-2e33b65bbe57)’s court in his prison, captured by his own prowess. The damsel also asks Launcelot to help her and other women whom she says are daily distressed by a false knight. Launcelot agrees to fulfill her request if she takes him to Turquine, joining the immediate rescue to a promise of further service.
The damsel leads him to a ford and a tree where a basin hangs. Launcelot strikes the basin with the butt of his spear until its bottom falls out, then rides alongside the manor. He sees Turquine approaching with a bound, wounded knight laid across a horse. Recognizing the captive as Sir Gaheris, brother of [Sir Gawaine](entity:character-recall-character-sir-gawaine-bf0b0cf3eb43) and a fellow of the [Round Table](entity:object-recall-object-round-table-04fef19b82fd), Launcelot announces that he will rescue him. He also suspects that two of his own brothers are prisoners there, and says he intends to free all the captives if Turquine cannot defend them. The rescue therefore begins not as an abstract challenge but with a recognizable fellow knight being carried away in captivity.
## The offer of peace and the disclosed feud
Before fighting, Launcelot tells Turquine to put the wounded [Gaheris](entity:character-recall-character-e643b62e350f) down and let him rest. Launcelot challenges Turquine over the shame he has inflicted on knights of the Round Table. Turquine, in turn, declares that if Launcelot belongs to the fellowship, he defies both him and all its members. The confrontation is thus framed as more than a contest between two strong knights: it pits Turquine’s hostility toward the Round Table against Launcelot’s stated duty to defend its members.
Their first charge ends with both horses collapsing beneath them. They continue on foot, exchanging blows until both are wounded and exhausted. After fighting for more than two hours, they pause, leaning on their swords. Turquine praises his opponent’s size and endurance and says that, if he is not the man Turquine hates above all others, he will make peace, release all sixty-four prisoners, and become his companion. The offer makes the cost of disclosure immediate: friendship and freedom for the captives are conditionally available, but only if the opponent is not Launcelot.
Asked to identify the hated knight, Turquine explains that Launcelot killed his brother, [Sir Carados](entity:character-recall-character-cf0a1b959c4b), at the Dolorous Tower. He says that he has killed a hundred good knights and maimed as many more for Launcelot’s sake, and that sixty-four captives remain in his prison. This account reveals the motive behind the mass imprisonment and makes clear that the proposed reconciliation excludes the very person Turquine has pursued. Launcelot answers that his identity might have brought peace had he been someone else, but now reveals that he is Launcelot, son of [King Ban](entity:character-recall-character-king-ban-70615110b555) of [Benwick](entity:location-recall-location-benwick-a525eaffc9df) and a knight of the Round Table. Turquine welcomes the disclosure as a reason they will not part until one is dead, and the personal feud resumes.
## Turquine’s defeat and the prison opened
After the renewed fight, Turquine grows faint and lowers his shield. Launcelot seizes the opening, pulls him down by his helmet, removes his helm, and kills him. The defeat resolves the conflict that had stood between the prisoners and their freedom; rather than claiming Turquine’s offer of fellowship, Launcelot ends the feud on its terms and turns immediately to the practical work of rescue.
Launcelot tells the damsel he is ready to accompany her, but has no horse. She offers Gaheris’s horse, and Launcelot asks Gaheris to lend it. Gaheris agrees, saying Launcelot has saved both him and his horse and calling him the best knight in the world. When Gaheris asks his name, Launcelot identifies himself and explains that he owed help to Gaheris for Arthur’s sake and especially because Gaheris is Sir Gawaine’s brother. He points out that the manor contains many Round Table knights, their shields visible outside, including those of [Sir Kay](entity:character-recall-character-sir-kay-b93c82975d98), [Sir Marhaus](entity:character-recall-character-sir-marhaus-1bd99ec8e2d9), and Launcelot’s brothers [Sir Ector de Maris](entity:character-recall-character-3847e8e21d1c) and [Sir Lionel](entity:character-recall-character-cc33a893fb46).
The horse makes it possible for Launcelot to keep moving, but his obligation to the damsel determines what he does next. He asks Gaheris to greet the prisoners, tell them to take what they find, and have his brothers wait for him at court. He expects to be there by the feast of [Pentecost](entity:time-recall-time-16e2becf2ca1), but says that he must now ride with the damsel to fulfill his promise. The rescue is therefore not a conclusion to his journey: even after freeing his companion and defeating Turquine, Launcelot leaves the newly opened manor to continue the service he pledged.
## Gaheris and the captives’ return to freedom
Gaheris goes into the manor and throws the porter to the ground, taking the keys and opening the prison door. The captives release one another from their bonds. They initially thank Gaheris, believing that he had been wounded in the encounter. He corrects them: Launcelot, not Gaheris, defeated Turquine, and Gaheris witnessed the victory. He also passes on Launcelot’s greeting and request that they hurry to court; Sir Ector de Maris and Sir Lionel are asked to wait there for their brother.
Launcelot’s brothers refuse to wait and set out to find him, as does Sir Kay. The freed knights retrieve their own armour, horses, and other belongings from the manor. A forester then arrives with four horses laden with venison. Sir Kay remarks that the group has not had a good meal in many days, and the venison is roasted, baked, and boiled for supper. Some knights stay at the manor overnight, while Sir Lionel, Sir Ector de Maris, and Sir Kay ride after Launcelot. The account thus carries the rescue through its aftermath: captivity gives way to recovered equipment, food, and the renewed movement of the knights toward court and toward Launcelot.
## Rescue, fellowship, and obligation
The event links individual prowess to the duties of fellowship. Launcelot acts when he recognizes Gaheris, and he explicitly connects his intervention to service owed to Arthur and to Gaheris’s kinship with Sir Gawaine. His victory releases the broader company, but the captives’ freedom depends on the sequence of actions after the duel: Gaheris receives the horse, enters the manor, takes the keys, and opens the prison so the knights can free one another.
The episode also sets rival forms of loyalty against each other. Turquine offers Launcelot peace and companionship only on the condition that he is not the man Turquine hates; once Launcelot names himself, vengeance overrides the offer and the captives remain at the center of the danger. Launcelot, by contrast, makes his name the basis of accountability and follows the victory by honoring a different commitment: he leaves with the damsel because he has promised to help her. The rescued knights’ return to their equipment and their pursuit of Launcelot extend that contrast from the duel into the ending, where release restores movement and fellowship without bringing the companions immediately back together.
Event 51
Launcelot’s Slaying of Peris de Forest Savage
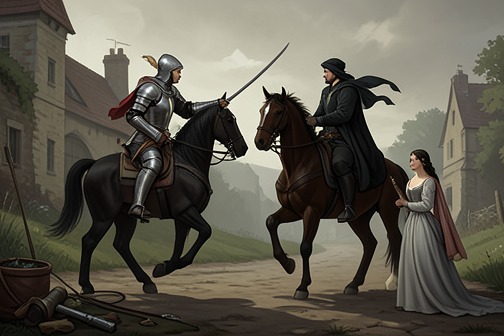
[Launcelot’s Slaying of Peris de Forest Savage](entity:event-recall-event-launcelot-s-slaying-of-64b484c10cd4) centers on [Launcelot](entity:character-recall-character-launcelot-0b02a99ce6f7)’s rescue of a damsel from a knight who robs and mistreats women. When the damsel identifies the danger on their road, Launcelot uses her account to judge Peris’s conduct against the obligations of knighthood, then intervenes when Peris attacks her. The episode ends not with the rescue alone, but with the damsel’s praise and a discussion of Launcelot’s decision to remain unmarried and refuse casual relationships.
## The Damsel’s Warning and Launcelot’s Response
Riding with the damsel along a highway, Launcelot hears that a knight in the vicinity preys on ladies and gentlewomen, robbing or ill-using them. He treats this conduct as a violation of the knight’s oath and says it brings shame on knighthood. Rather than simply proceeding past the danger, he arranges to follow in cover while the damsel rides ahead, ready to come to her aid if the knight troubles her.
Peris appears on horseback with his page and forces the damsel from her horse. Her cry brings Launcelot out from cover. He confronts Peris over his treatment of women, but Peris makes no reply and rides at him with his sword drawn. Launcelot casts aside his spear, draws his sword, and kills him with a single blow. The decisive action follows the danger Launcelot had anticipated: the damsel’s account identifies the threat, and his intervention prevents Peris from continuing his attack on her.
## Peris’s Place in the Pattern of Predatory Knights
The damsel names the dead knight as Sir Peris de Forest Savage and explains that, like Turquine, he had made a practice of attacking and distressing others. The comparison distinguishes their targets: Turquine watched to destroy knights, while Peris preyed on ladies, damsels, and gentlewomen. His violence is presented not as an isolated quarrel but as a recurring abuse of the status and power attached to knighthood.
Launcelot’s response makes that abuse the episode’s central standard of judgment. He calls Peris false and a traitor to knighthood, then enforces the ideal he invokes by rescuing the damsel and defeating her attacker. The scene thus places a knight’s title under scrutiny: possessing the rank does not make Peris honorable when his actions violate the order’s obligations.
## Praise and Launcelot’s Answer on Love
After Peris is dead, the damsel thanks Launcelot for his service and prays for his protection. She calls him the most courteous and meekest knight toward ladies and gentlewomen, praise that directly contrasts his conduct with Peris’s. She then asks why a knight without a wife does not love a maiden or gentlewoman. She has heard no report that he loves any woman, while rumor claims that he loves [Queen Guenever](entity:character-recall-character-queen-guenever-f27d6f31454b) and that enchantment has prevented him from loving anyone else.
Launcelot does not confirm the rumor. He says he cannot prevent people from speaking as they please, but explains that he does not intend to marry: marriage would require him to share a bed with his wife and leave arms, tournaments, battles, and adventures. He also rejects taking pleasure with paramours, giving fear of God as his reason. He argues that adulterous or wanton knights will not prosper in war: they may be overcome by a lesser knight or, through misfortune and their own wrongdoing, kill better men. The account therefore sets his defense of women in the road scene beside a stated religious and martial discipline in his private conduct.
## Narrative Significance
The episode moves from threatened violence to a conversation about the obligations of knighthood. Launcelot’s rescue gives practical force to the damsel’s warning: the knight who abuses women is not protected by his title, and the champion who intervenes is praised for courtesy as well as prowess. The comparison with Turquine extends the incident beyond a single encounter, placing Peris within a broader pattern of knights who use their strength to prey on others.
The damsel’s questions also complicate the praise. Her admiration for Launcelot’s courtesy becomes an occasion to examine what he gives up by remaining unmarried and why he rejects sexual relationships outside marriage. His answer joins religious fear to the conduct and fortunes of knights in battle, making restraint part of the same moral order that condemns Peris’s abuse. The episode consequently presents chivalry as more than combat skill: it is tested in the use of force, the protection owed to women, and the discipline expected of the knight himself.
Event 52
Launcelot’s Rescue of the Captive Women at Tintagil
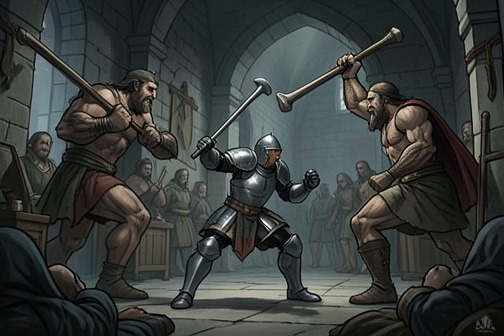
[Launcelot’s Rescue of the Captive Women at Tintagil](entity:event-recall-event-launcelot-s-rescue-of-t-cf2d8b5ebcae) is a rescue episode in which [Sir Launcelot du Lake](entity:character-recall-character-sir-launcelot-du-la-390bf6228175) defeats two giants and frees sixty noblewomen and damsels held captive in [Tintagil Castle](entity:location-recall-location-tintagil-castle-96ffff52cf29). Their release reverses years of imprisonment, while the women’s account links the castle to [Igraine](entity:character-recall-character-igraine-5de934015485), [Uther Pendragon](entity:character-recall-character-uther-pendragon-76932b817c39), and [Arthur](entity:character-recall-character-arthur-2e33b65bbe57)’s birth.## The Castle and Its CaptivesTintagil is described as a castle formerly owned by a duke who had married Igraine. After the duke’s death, Uther Pendragon married her and fathered Arthur. When [Sir Launcelot](entity:character-recall-character-sir-launcelot-c0ea01c62d3d) reaches the castle, its inhabitants are living under the giants’ control; the captive women explain that they have been imprisoned there for seven years and made to work silk for their food. Their shared captivity makes the rescue a collective deliverance, not simply a victory over two opponents.## The Fight and the ReleaseTwo giants confront Sir Launcelot in the castle court. Both are armed except for their heads and carry clubs. Sir Launcelot uses his shield to turn aside one giant’s blow, then defeats him with his sword. The other flees, but Sir Launcelot pursues and defeats him as well. The fight clears the way into the hall, where sixty women and damsels kneel and give thanks for their deliverance.## Recognition and RewardThe women ask their rescuer’s name so that they can tell their families who freed them. He identifies himself as Sir Launcelot du Lake, and they say that, as they had believed, no other knight could have overcome the giants. Their recognition turns the victory into public testimony of his renown. Sir Launcelot tells them to inform their friends of what happened, offers them the castle’s treasure as recompense for their suffering, and says that its rightful lord should receive the castle.## SignificanceThe episode joins a familiar adventure pattern—captives, formidable guardians, and a rescuing knight—to a specific act of restitution. The women’s release ends a seven-year captivity, while Sir Launcelot’s decision about the treasure distinguishes reward for their hardship from the rightful owner’s claim to the castle. Their account also gives [Tintagil](entity:location-recall-location-5185f645bc56) a dynastic association: it is the place connected with Igraine and Uther Pendragon, and thus with Arthur’s birth.
Event 53
Launcelot’s Rescue of Kay from Three Knights
[Sir Launcelot](entity:character-recall-character-sir-launcelot-c0ea01c62d3d)’s rescue of [Sir Kay](entity:character-recall-character-sir-kay-b93c82975d98) turns an ambush into an act of fellowship, then extends that protection through disguise: after defeating three attackers, [Launcelot](entity:character-recall-character-launcelot-0b02a99ce6f7) makes them surrender under [Kay](entity:character-recall-character-kay-2946c1889f8a)’s name and leaves Kay with his own armor and horse. The episode presents prowess not simply as victory in combat but as the ability to protect another knight’s standing and safety.
## The encounter at the lodging
After riding through unfamiliar country, Launcelot came by night to a court where an old gentlewoman gave him and his horse lodging. He was put to bed in a room above the gate. Later, a rider arrived in haste, pursued by three knights. From the window, Launcelot recognized the danger of the unequal fight and identified the lone knight as Kay, an old companion. He judged that to watch Kay be killed without intervening would make him answerable for the death.
## Intervention and surrender
Launcelot armed himself and climbed down from the window by a sheet to reach the four knights. He called on the attackers to turn from Kay and face him instead. They did so, and Kay prepared to assist; Launcelot refused his help, asking him to stand aside. Within six strokes, Launcelot had struck all three attackers down. They acknowledged his unmatched strength and offered to yield to him.
Launcelot would not accept their surrender on his own terms. Since they had pursued Kay and might have overcome him, Launcelot required them to yield to Kay instead. When they objected that Kay was the weaker party, Launcelot made the choice plain: they could accept the condition or die. To preserve their lives, they agreed to appear at [King Arthur](entity:character-recall-character-king-arthur-2b97864f54aa)’s court on the next [Whitsunday](entity:time-recall-time-whitsunday-48c879e8cd9c), place themselves in [Queen Guenever](entity:character-recall-character-queen-guenever-f27d6f31454b)’s mercy as her prisoners, and say that Kay had sent them. Each swore to do so upon his sword. Launcelot thus converted his victory into a public submission that would credit Kay, while placing the prisoners under the queen’s authority.
## Kay recognizes his rescuer
After the attackers departed, Launcelot and Kay returned inside. Kay recognized Launcelot and knelt to thank him, saying that Launcelot had twice saved him from death. Launcelot answered that he had done only what he ought. Their exchange frames the rescue as an obligation within a continuing friendship, not a favor for which Kay must repay him.
They ate and slept in the same bed. At dawn, Launcelot left Kay sleeping, took Kay’s armor and shield, and rode away on Kay’s horse. He did not announce the plan before departing. When Kay woke and saw that his equipment was gone, he understood the purpose: knights would be bold against a man they believed to be Kay, while the borrowed armor and shield would allow Kay to ride in peace.
## Disguise as protection
The disguise makes the rescue consequential beyond the roadside encounter. Launcelot has already taken the attackers’ surrender in Kay’s name; by wearing Kay’s harness, he also gives Kay a means of avoiding challenges that might otherwise endanger him. Kay, in turn, recognizes that the same appearance will mislead other knights into underestimating the rider they meet. The episode’s reversal is deliberate: Launcelot’s concealed identity makes Kay safer, even as it exposes Launcelot to being mistaken for him.
The story connects this scene with the account of Beaumains, later known as [Sir Gareth](entity:character-recall-character-sir-gareth-eef7b23b7912), whose requested adventure included being made a knight by Launcelot. Those episodes establish Launcelot as a figure whose knightly standing is expressed through aid and recognition as well as arms. In Kay’s rescue, he protects a companion first from immediate danger, then from the further risks of the road, without claiming the surrender or the credit for himself.
Event 54
Launcelot’s Disguised Defeat of Arthur’s Knights
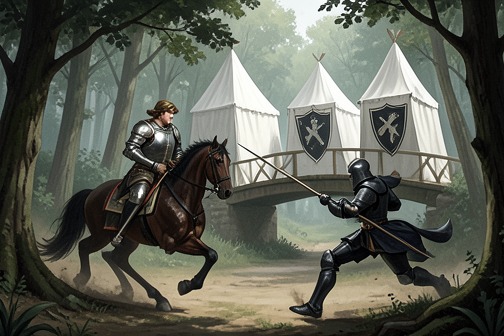
[Launcelot’s Disguised Defeat of Arthur’s Knights](entity:event-recall-event-launcelot-s-disguised-d-6f15e0e48e66) is an episode in which [Launcelot](entity:character-recall-character-launcelot-0b02a99ce6f7) rides in [Sir Kay](entity:character-recall-character-sir-kay-b93c82975d98)’s armor and is repeatedly mistaken for the knight whose equipment he wears. He defeats three brothers who challenge him and then unhorses four knights of [Arthur](entity:character-recall-character-arthur-2e33b65bbe57)’s court, but does not kill his defeated opponents. Disguise drives the encounters, while Launcelot’s recognition of individual knights—and his restraint toward them—gives the victories their distinctive character.
## The disguise and its first test
Launcelot has ridden through a great forest into a low country of rivers and meadows when he comes to a long bridge. Three pavilions stand there, with white shields hung outside and squires at their doors. He passes without speaking. The knights stationed there take him for Sir Kay and interpret his silence as pride; Sir Gaunter arms himself, mounts, and rides after him to challenge him.
The mistake is tested in a direct joust. Launcelot turns to meet Gaunter, and their spears break against each other’s force; Launcelot’s blow brings Gaunter and his horse down. Gaunter’s brothers, Sir Gilmere and Sir Raynold, conclude that the victor cannot be [Kay](entity:character-recall-character-kay-2946c1889f8a), whom they judge smaller. They suspect instead that the unknown knight has killed Kay and taken his horse and armor, but ride after him to rescue Gaunter.
## The three brothers yield
Gilmere attacks first and is struck down. Raynold then confronts Launcelot, acknowledging that he would rather avoid fighting such a powerful opponent but feels bound to join his brothers. Their spears shatter, and they continue with swords. When Gaunter recovers, he joins the struggle; Launcelot knocks down Raynold and then the other two brothers.
Launcelot stops short of killing them. He recognizes Raynold as a knight who was made by his own hand and says he would be reluctant to slay him. Raynold accepts the offer to yield, on behalf of himself and his brothers, if they can learn the victor’s name. Launcelot does not give it. Instead, he orders them to present themselves to [Queen Guenever](entity:character-recall-character-queen-guenever-f27d6f31454b) on [Whitsunday](entity:time-recall-time-whitsunday-48c879e8cd9c) as prisoners and say that Sir Kay sent them. The brothers swear to do so, and help one another as best they can as Launcelot rides on.
## Four knights of Arthur’s court
In a forest glade beneath an oak, Launcelot encounters four knights from Arthur’s court: Sir Sagramour le Desirous, [Sir Ector de Maris](entity:character-recall-character-3847e8e21d1c), [Sir Gawaine](entity:character-recall-character-sir-gawaine-bf0b0cf3eb43), and [Sir Uwaine](entity:character-recall-character-sir-uwaine-42c6462a7fa0). Seeing Kay’s arms, they also take him for Kay. Sagramour makes the first challenge and is knocked down with his horse. [Ector](entity:character-recall-character-ector-8f00ddc6c029) follows and is struck through shield and shoulder, bringing horse and rider to the ground.
[Uwaine](entity:character-recall-character-uwaine-6468cffc7b73) recognizes that the stranger is exceptionally strong and fears that he has killed Kay, but nevertheless rides against him. Launcelot knows Uwaine and strikes him hard enough to leave him bewildered. [Gawaine](entity:character-recall-character-gawaine-e52d508f7128) is the last to engage. The two knights meet with full force; Gawaine’s spear breaks, and Launcelot’s charge overturns Gawaine’s horse. Launcelot then rides onward rather than continuing the fight.
## Recognition and restraint
After the encounter, the four defeated knights regroup and remark that one spear has felled them all. Gawaine recognizes the rider from his manner of riding and judges that he must be Launcelot, although the armor had led them to expect Kay. The recognition comes only after the contest: outward appearance first misdirects the knights, while familiarity with a person’s bearing corrects the mistake.
The episode gives Launcelot’s victories a measured conclusion. He leaves the four court knights alive and does not pursue them after proving his strength. In the earlier encounter, his personal recognition of Raynold likewise turns a potentially fatal fight into a surrender. The contrast between the opponents’ repeated misidentification and Launcelot’s knowledge of whom he faces makes recognition, not merely victory, the episode’s recurring hinge.
## Place in Launcelot’s adventures
The chapter heading identifies the action as Launcelot riding disguised in Kay’s harness and striking down a knight; the following chapter proceeds to another adventure, as he follows a brachet into a castle. The disguise episode is thus one encounter in a continuing sequence of Launcelot’s travels, built from successive challenges on the road rather than from a single formal tournament.
Its outcomes also distinguish reputation from identity. The brothers and the court knights infer who they face from armor, then revise that judgment after witnessing the rider’s strength or recognizing his manner. Launcelot’s victories establish his prowess, but his decision to spare defeated opponents and his specific instruction to the brothers determine what those victories mean within the courtly world: the contests end in submission and a promised appearance before the queen, not in the destruction of fellow knights.
Event 55
Lancelot at the Chapel Perilous
[Lancelot at the Chapel Perilous](entity:event-recall-event-lancelot-at-the-chapel-4ad023f72771) combines a test of courage and fidelity with a striking reversal: objects taken from a dead knight in an uncanny chapel become instruments for healing Sir Meliot. [Sir Launcelot](entity:character-recall-character-sir-launcelot-c0ea01c62d3d) passes through armed guardians, rejects a sorceress who confesses to having constructed the peril for his sake, and leaves with the sword and a piece of cloth. Their power is demonstrated when he uses them to restore Meliot, then sends the knight toward [King Arthur](entity:character-recall-character-king-arthur-2b97864f54aa)’s court and the approaching feast of [Pentecost](entity:time-recall-time-16e2becf2ca1).
## The Chapel and Its Guardians
Sir Launcelot reaches the [Chapel Perilous](entity:location-recall-location-chapel-perilous-5ecc9b8b91dc), dismounts, and ties his horse at a small gate. In the churchyard he sees rich shields turned upside down, some of them familiar from knights he has seen carry them. Beside him stands a group of thirty exceptionally tall knights, all in black armor, with shields and drawn swords. They grin and bare their teeth at him. He is afraid, raises his shield, and prepares for battle, but when he tries to pass, the figures scatter to either side and make a way for him. Their threatening display gives way to passage rather than combat, and [Launcelot](entity:character-recall-character-launcelot-0b02a99ce6f7) enters the chapel.
Inside, the only light comes from a dim lamp. Launcelot sees a corpse covered with silk, cuts away a piece of its covering, and feels the ground move beneath him. A sword lies beside the dead knight; he takes it and hurries out. The movement underfoot and the sudden acquisition of the sword mark the threshold crossing as dangerous, but the episode does not explain the disturbance further. Outside, the black-armored knights speak in grim voices and order him to put the sword down, threatening his life if he refuses. Launcelot keeps it and passes through them.
## The Sorceress’s Revelation
Beyond the churchyard, a fair damsel meets Launcelot and urges him to leave the sword, warning that otherwise he will never see [Queen Guenever](entity:character-recall-character-queen-guenever-f27d6f31454b) again. He refuses. When she asks him to kiss her, he rejects the request; she says that the kiss would have cost him his life, but that his refusal has defeated her purpose. Her disclosures expose the episode’s hidden design: she made the chapel for Launcelot and [Sir Gawaine](entity:character-recall-character-sir-gawaine-bf0b0cf3eb43), had once held [Gawaine](entity:character-recall-character-gawaine-e52d508f7128) in her power, and has loved Launcelot for seven years, though she knows that no woman can have his love while Queen Guenever does.
The woman identifies herself as [Hellawes](entity:character-recall-character-hellawes-aa4beb4b9709), the sorceress and lady of [Castle Nigramous](entity:location-recall-location-castle-nigramous-7aa043c37a55). She says that, unable to possess Launcelot’s love, she had intended to preserve his dead body and keep it with her. The threat therefore shifts from the visible guardians to the woman behind the ordeal: the chapel’s dangers were arranged around her desire to control Launcelot, whether living or dead. He answers that she has spoken well, invokes God’s protection from her arts, and departs with his horse rather than yielding to either her plea or her enchantment.
## From Ordeal to Healing
After Launcelot leaves, Hellawes grieves so intensely that she dies within fourteen days. Her death closes the threat posed by the sorceress, but the episode’s principal consequence unfolds elsewhere. Launcelot soon meets the sister of Sir Meliot, who claps her hands and weeps for joy at seeing him. She leads him to a nearby castle, where Meliot lies pale from loss of blood. Recognizing Launcelot, he kneels and calls on him for help.
Launcelot touches Meliot’s wounds with the sword taken from beside Sir Gilbert’s corpse, then wipes them with part of the bloody cloth in which Gilbert had been wrapped. Meliot is immediately restored to health. The same objects that he acquired by entering a frightening, guarded place thus serve a merciful purpose: the episode carries the sword and cloth out of the chapel’s atmosphere of death and turns them toward the rescue of a living knight. Its resolution rests not in a battle with the guardians, but in Launcelot’s use of the acquired relics to heal.
## Return to the Court
The recovery brings joy between Launcelot and Meliot. The next morning, Launcelot takes his leave and tells Meliot to hurry to King Arthur’s court, where he will find Launcelot at the feast of Pentecost, which is drawing near. Their parting gives the adventure a clear destination: after passing the chapel’s private test, Launcelot points his rescued companion back toward the fellowship of the court and its seasonal gathering.
The story’s structure turns on linked contrasts. The chapel holds a dead knight and confronts Launcelot with threats, while the cloth and sword taken from it enable a wounded knight to live. Hellawes’s elaborate effort to bind Launcelot to her ends in her own death, whereas his refusal to be detained leads directly to Meliot’s recovery. The episode makes courage inseparable from fidelity and practical mercy: Launcelot withstands danger and temptation, then puts what he has gained to the service of another knight.
Event 56
Pedivere’s Wife-Murder and Penance
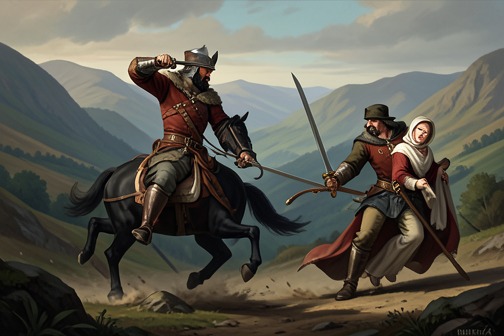
[Pedivere’s Wife-Murder and Penance](entity:event-recall-event-312428a60a80) is a story of failed protection transformed into public judgment and religious penance. [Sir Launcelot](entity:character-recall-character-sir-launcelot-c0ea01c62d3d) interrupts [Pedivere](entity:character-recall-character-pedivere-d4c4f02918d1) as he pursues his wife, but, after accepting the knight’s apparent submission, turns away at a feigned distraction. Pedivere then kills her. [Launcelot](entity:character-recall-character-launcelot-0b02a99ce6f7) cannot undo that failure: he makes Pedivere bear the dead woman to [Queen Guenever](entity:character-recall-character-queen-guenever-f27d6f31454b), whose sentence sends him to [Rome](entity:location-recall-location-f3877a21016f) to seek the Pope’s penance. Pedivere ultimately becomes a hermit.
## The Pursuit and Launcelot’s Intervention
Riding through a valley, Sir Launcelot sees Pedivere chasing his wife with a naked sword. She calls for help, and Launcelot rides between them, rebuking Pedivere and insisting that he will fight rather than allow the killing. Pedivere says his wife has betrayed him; she denies wrongdoing, explaining that his jealousy concerns her affection for her cousin. She appeals to Launcelot’s reputation and asks him to protect her, while Pedivere says he will submit to Launcelot’s judgment.
Launcelot proceeds with the pair beside him, apparently having secured the woman’s safety. Pedivere then points out armed men approaching behind them. When Launcelot turns to look, Pedivere uses the moment to kill his wife. The reversal makes Launcelot’s trust in the apparent truce the opening for the crime, and he immediately condemns Pedivere for having brought shame upon him as her protector.
## Judgment and Public Penance
Launcelot dismounts and draws his sword, but Pedivere falls to the ground and begs for mercy rather than rising to fight. Launcelot refuses to let the plea end the matter: he offers to fight unarmoured, but Pedivere will not accept. Launcelot instead orders him to take the woman’s body and carry it on his back until he reaches Queen Guenever. Pedivere gives his word on Launcelot’s sword and identifies himself by name.
At [Winchester](entity:location-recall-location-winchester-704b3b26db1f), Pedivere tells the queen the truth. Queen Guenever calls the killing a horrible and shameful deed and a rebuke to Launcelot, whose reputation, she observes, is not known in every country. She imposes a further penance: Pedivere must carry the dead woman on horseback to the Pope in Rome, never spend two nights in the same place, and never go to bed without the body lying with him. The punishment turns the crime into a continuing public burden rather than a single encounter with Launcelot’s authority.
## Rome and the Hermit’s Life
According to the account’s reference to the French book, the Pope orders Pedivere to return to Queen Guenever, and the woman is buried in Rome by papal command. The narrative then marks a change in Pedivere’s life: after this penance, he becomes a good man, a holy man, and a hermit. It gives no further detail about his years as a hermit, but presents that vocation as the outcome of the path from murder, through imposed penance, to religious reformation.
## Narrative Significance
The episode tests the protection that knightly reputation is meant to provide. Launcelot responds to the wife’s appeal and prevents an immediate attack, yet Pedivere exploits the brief moment in which the rescuer looks away. Launcelot’s shame at having been deceived leads him to require a visible act of accountability; Queen Guenever extends that judgment into a penitential journey with obligations imposed by both royal and papal authority.
The story also distinguishes a plea for mercy from release from consequence. Pedivere asks Launcelot to spare him, but is made to carry the evidence of his crime and submit to further penance. The ending does not dwell on the killing: it emphasizes instead the woman’s burial and Pedivere’s later religious life, presenting [repentance](entity:concept-recall-concept-4100212400b4) as a change marked by the consequences he must bear.
Event 57
Gareth’s Humiliation at Arthur’s Court and Knighting
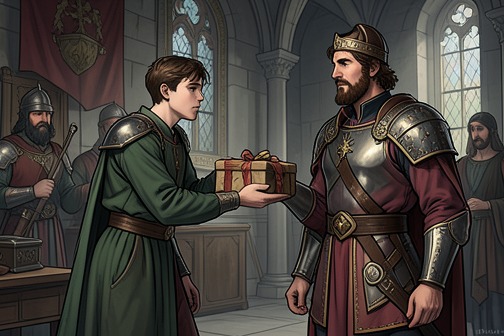
[Gareth](entity:character-recall-character-e1d13addfd5f)’s humiliation at [Arthur](entity:character-recall-character-arthur-2e33b65bbe57)’s court is the concealed beginning of his knighthood: treated as an obscure kitchen servant and mocked as Beaumains, he accepts a year of menial service before claiming a damsel’s adventure and choosing [Launcelot](entity:character-recall-character-launcelot-0b02a99ce6f7) to dub him knight. His endurance and eventual revelation that he is [Gawaine](entity:character-recall-character-gawaine-e52d508f7128)’s brother expose the gap between appearance and lineage, while his conduct begins to establish a reputation that the court’s first judgments had denied him.
## The [Pentecost](entity:time-recall-time-16e2becf2ca1) arrival and the three gifts
At Kink-Kenadon, where Arthur holds the Pentecost feast, the king maintains a custom of postponing his meal until he has heard or seen a marvel. Gawaine notices three mounted men and a dwarf shortly before noon and tells Arthur that a strange adventure is at hand. The visitors bring in a notably handsome young man who appears unable to stand without leaning on their shoulders. Once he reaches the dais, however, he straightens and addresses the king and the [Round Table fellowship](entity:concept-recall-concept-round-table-fellowshi-17ff9f38b2ba), asking for three gifts that he says will be reasonable and cause Arthur little loss.
The young man first requests enough food and drink for a year, reserving his other two requests until the next Pentecost feast. Arthur agrees, reading in his appearance the promise of a person born to honor, though the youth gives no name. This interval is not merely a delay before the adventure: it establishes the court’s opportunity to misread him and gives his quiet endurance a full year to contradict the judgment made at his arrival.
## Beaumains in the kitchen
Arthur entrusts the youth’s provision to [Kay](entity:character-recall-character-kay-2946c1889f8a), who dismisses him as low-born and says that, had he been a gentleman, he would have asked for a horse and armor rather than food. Kay names him Beaumains, meaning Fair-hands, and assigns him to the kitchen, where he predicts the youth will grow fat on rich broth. Instead of receiving the treatment due a guest Arthur had told the household to support, Beaumains is seated among the boys and lads and sleeps where the kitchen workers sleep.
Launcelot and Gawaine object to Kay’s mockery. Launcelot warns that Kay has previously given a young knight a derisive name and misjudged him; he and Gawaine both offer Beaumains better lodging and food. Beaumains refuses their offers, choosing to remain where Kay has placed him. Gawaine’s kindness is partly explained by a kinship he does not yet recognize: Beaumains is nearer to him in blood than he knows. Launcelot’s generosity, by contrast, is presented as courtesy. During the year both knights give Beaumains money and clothes, while he remains meek and mild, causes no offense, and watches knightly jousts and contests whenever he can. The narrative places these acts of patience alongside Kay’s contempt, making the kitchen a prolonged test of how the court treats a person whose standing it cannot yet see.
## Claiming the damsel’s adventure
When the next feast arrives, Beaumains comes before Arthur and reminds him that he has completed the year of service and is entitled to ask for the two gifts still owed. His first request is the adventure brought by a damsel who seeks a knight to fight for a lady; Arthur grants it. His second is that Launcelot make him a knight, and that Launcelot ride after him and perform the ceremony when asked. The damsel objects that she is being assigned a kitchen page, and departs in anger. Her response repeats Kay’s assumption that Beaumains’ place at court defines his capacity.
The equipment that follows complicates that assumption. Beaumains’ horse and armor arrive with the dwarf, furnished in rich fashion, to the astonishment of the court. Armed, he appears a striking figure, takes leave of Arthur, Gawaine, and Launcelot, and sets out after the damsel. The contrast between his year in the kitchen and his sudden departure in full equipment does not erase the humiliation; it marks the point at which he claims the opportunity to prove himself through action.
## Launcelot’s test and the name revealed
Before receiving knighthood, Beaumains meets Launcelot in combat. Launcelot later tells him that he had to exert himself to avoid being overcome dishonorably, and assures him that he need not fear any earthly knight. Beaumains asks whether he can ever stand as a proven knight; Launcelot answers that he can, if he continues as he has begun. The encounter thus supplies the proof that his request for recognition is not based only on appearance or hidden descent.
Launcelot requires him to disclose his name and parentage before conferring the order. Beaumains agrees only after Launcelot promises not to reveal the information until it becomes openly known. He identifies himself as Gareth, brother of Gawaine through both father and mother. Launcelot is glad to learn that the young man he had judged promising is of noble birth, and recognizes that Gareth came to court neither simply for food nor for drink. He then dubs him knight. The name Beaumains, imposed by Kay as a joke, gives way to Gareth’s true identity at the moment the courtly status he sought is formally granted.
## Humiliation overturned, adventure begun
After the ceremony Gareth asks Launcelot to let him depart. Launcelot returns to Kay, who must be carried home on his shield; Gawaine and Launcelot condemn Kay for rebuking a young man whose birth and purpose he did not know. The episode’s reversal is therefore public as well as personal: the steward who reduced Gareth to a kitchen nickname is left disgraced, while Gareth leaves as a knight made by Launcelot.
Gareth catches up with the damsel, who continues to call him Beaumains and deride his kitchen clothes and service. She insists that he is not the knight she wants and tells him to turn back. He refuses to abandon the undertaking he accepted before Arthur, declaring that he will complete the adventure or die in the attempt. His first intervening deed follows immediately: when a man reports that six thieves have bound his lord, Gareth rides to the place, defeats the attackers, and frees the captive. He declines the rescued knight’s offer of a reward, explaining that he has just been made a knight by Launcelot and must follow the damsel. The episode closes not with the completion of her adventure but with Gareth’s first demonstrated service, linking his new title to action rather than to lineage alone.
Event 58
Gareth Rescues Lyonesse
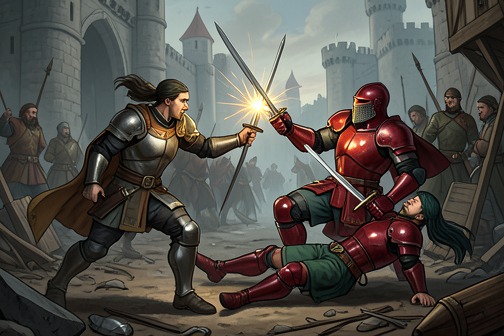
[Gareth Rescues Lyonesse](entity:event-recall-event-0bd5408e643a) is the culmination of [Gareth](entity:character-recall-character-e1d13addfd5f)’s Beaumains adventure, in which the kitchen servant mocked as a low-born fool proves himself through a chain of increasingly difficult combats. At the siege of Lyonesse’s castle, he defeats the Red Knight of the Red Launds, whose cruelty has brought shameful deaths upon earlier rescuers. Gareth’s victory ends the siege, but its significance lies equally in what follows: he refuses simply to kill his defeated opponent, instead requiring him to submit to Lyonesse, repair the damage, and ask [Launcelot](entity:character-recall-character-launcelot-0b02a99ce6f7) and [Gawaine](entity:character-recall-character-gawaine-e52d508f7128) for mercy.
## The Road to the Siege
Gareth undertakes the adventure after accepting a petition to aid a lady, and insists on carrying it through despite [Linet](entity:character-recall-character-linet-c7e3085b4ddd)’s repeated insults. She calls him a kitchen knave and attributes his earlier successes to mishap rather than prowess. Gareth does not abandon the task. He maintains that he has promised [King Arthur](entity:character-recall-character-king-arthur-2b97864f54aa) to achieve it and will finish the adventure or die trying. Her contempt therefore becomes a persistent test of his resolve, while the promise to [Arthur](entity:character-recall-character-arthur-2e33b65bbe57) supplies the duty that keeps him on the road.
The journey offers evidence of his ability before the decisive encounter. At a river passage guarded by two knights, Gareth rides into the water and fights both. One falls and drowns; Gareth then defeats the other in combat. Linet rejects the victory as accidental, but Gareth answers that he trusts in God to serve any opponent he meets and will continue after her lady. The episode establishes the pattern that will govern the siege: his actions prove his worth while his companion refuses to acknowledge it.
The challengers along the route also reveal the scale of the opposition. Gareth fights the Red Knight’s brothers, and at the encounter with [Sir Persant of Inde](entity:character-recall-character-sir-persant-of-inde-da96b37c67f2) the two combatants fight for more than two hours, their horses falling and their armour badly damaged. Gareth finally brings Persant down, but grants his life when Linet asks him to do so. Persant recognizes Gareth as the knight who overcame his brothers, and explains that the Red Knight has besieged Lyonesse for nearly two years. Though he could have taken her earlier, he has prolonged the siege in hopes of drawing Launcelot, [Tristram](entity:character-recall-character-tristram-a0b006f42abd), [Lamorak](entity:character-recall-character-lamorak-9d86b1c9a151), or Gawaine into combat. Linet is identified as Lyonesse’s sister, and Persant offers to make Gareth a knight; Gareth replies that Launcelot has already knighted him.
## The Siege and Its Challenge
When Gareth and Linet reach the besieged castle, the violence of the Red Knight’s rule is made visible in the fate of the would-be rescuers. Near forty knights hang from trees, still bearing their rich arms. Linet explains that they came to rescue Lyonesse and were put to this shameful death after losing to the besieger. Gareth rejects such customs as a disgrace to knighthood and says he would rather die openly in battle than suffer a dishonourable death.
The siege is fortified and crowded: its castle has double ditches and walls, lords are encamped nearby, and ships lie beside the sea. Near a sycamore hangs a great horn made of elephant bone. The Red Knight has placed it there so that any errant knight must sound it and thereby summon him to battle. The horn turns the approach to the siege into a formal challenge. Gareth accepts it, meeting the besieger on the ground where the previous rescuers have failed.
The Red Knight is reported to possess seven men’s strength, which increases until noon. He has also waited for celebrated opponents, especially Launcelot and Gawaine. Against this anticipated contest, Gareth arrives under the name Beaumains, still carrying the apparent identity that has invited Linet’s scorn. At the siege, however, the danger is no longer merely the question of his reputation: Lyonesse’s freedom and the treatment of future challengers are at stake.
## Gareth Overcomes the Red Knight
The fight continues from morning until evening, with a pause when both knights are exhausted. They return to combat after resting, and the Red Knight’s skill forces Gareth to learn from his opponent’s tactics. During one exchange, the Red Knight knocks Gareth’s sword from his hand and brings him down. Linet calls out that Lyonesse is watching and weeping; Gareth rises, recovers his sword, and renews the fight. The reversal makes his persistence, rather than effortless superiority, central to the victory.
Gareth eventually strikes the sword from his opponent’s hand and brings him down. As he prepares to kill him, the Red Knight yields and asks for mercy. Gareth recalls the knights who were hanged and says that their deaths make it difficult for him to spare the man responsible. The defeated knight explains that a lady he loved had blamed Launcelot or Gawaine for her brother’s death. At her request, he had sworn by his knighthood to fight daily until he met one of them and to put every knight he overcame to a villainous death. He says this was the cause of his attacks on Arthur’s knights, and that his strength increased until noon.
The explanation does not undo the harm, but it changes the terms on which Gareth judges the captive. The Red Knight says he acted at a lady’s request; Gareth accordingly shows greater willingness to spare him, without treating that service as an excuse that cancels the victims’ deaths. His decision holds together two demands: the wrong must be answered, yet defeat need not end in execution.
## Pardon, Restitution, and Recognition
Earls, barons, and knights kneel and ask Gareth to spare the Red Knight. They propose that he take homage and fealty instead, pointing out that killing the man would not undo his misdeeds. Gareth agrees to spare him on conditions. The Red Knight must go to Lyonesse and submit himself to her mercy; if she forgives him, he must make amends for the harm done to her and her lands. He must also go to Arthur’s court and ask Launcelot and Gawaine for mercy for the hostility he has shown them.
The agreement gives distinct parties a place in the settlement. The Red Knight makes homage and fealty to Gareth, and the assembled lords do likewise. Linet then tends the wounds of both combatants. They remain in their tents for ten days, during which the Red Knight’s people provide for Gareth. The defeated knight subsequently places himself in Lyonesse’s grace, and she receives him under sufficient surety; the harms she can claim are restored. He then goes to Arthur’s court and openly puts himself in the mercy of Launcelot and Gawaine, recounting how he was overcome and describing the battles from beginning to end.
At court, Arthur and Gawaine wonder what noble blood Gareth must come from, given the quality of his strength and prowess. Launcelot confirms that Gareth is of noble lineage and explains that he had known who Gareth was when he made him a knight, but had promised not to disclose his identity until Gareth permitted it or it became publicly known. The adventure thus turns the hidden identity into public recognition: the young man whom Linet persisted in calling a kitchen servant is acknowledged as a noble knight, and the opponents he has defeated confirm his reputation through the account of the battles.
## Resolution and Significance
Gareth’s victory rescues Lyonesse from the siege, while the terms he imposes address both the wrong to her and the Red Knight’s hostility toward Arthur’s knights. The conclusion is not a simple reversal of violence: the besieger must answer for his conduct before Lyonesse and make amends, but mercy remains possible after submission and restitution. Gareth’s authority is expressed through a settlement witnessed by nobles and bound by homage, surety, and obligations to those harmed.
The episode completes the adventure’s movement from mockery to recognition. Gareth persists despite Linet’s derision, withstands the Red Knight’s tactical skill, and prevails in an exhausting combat whose outcome remains uncertain until late in the day. Yet his final proof of worth is not victory alone. He turns the defeated knight’s request for mercy into a process of accountability and reconciliation, and the disclosure of his lineage at court confirms what his deeds have established. The rescue therefore joins the tests of knightly prowess, reputation, mercy, and redress in a single conclusion.
Event 59
Gareth Reveals His Identity at the Castle Perilous Tournament
At the tournament at [Dame Liones](entity:character-recall-character-dame-liones-652d309466c1)’s castle, [Gareth](entity:character-recall-character-e1d13addfd5f) of [Orkney](entity:location-recall-location-orkney-f100d579207b) enters the lists under disguise and overwhelms a field crowded with the leading knights and rulers of [Arthur](entity:character-recall-character-arthur-2e33b65bbe57)’s company. His changing colours conceal his identity until he removes the ring that sustains the disguise; once heralds announce who he is, he escapes the press rather than remain on display. The episode makes recognition the tournament’s decisive turn: Gareth’s prowess is already public, but his name and lineage are disclosed only when concealment fails.
## The tournament and its preparations
Arthur sends for Dame Liones, whose castle is the setting for the tournament. She answers the summons and arranges provisions and lodging for the many guests arriving by land and water. Arthur comes with a large company of kings, princes, and [Round Table](entity:object-recall-object-round-table-04fef19b82fd) knights, and [Queen Guenever](entity:character-recall-character-queen-guenever-f27d6f31454b) and the [Queen of Orkney](entity:character-recall-character-queen-of-orkney-7bab60f5b3ad) are among those present. The scale of the gathering makes Gareth’s anonymity consequential: he is not jousting before strangers alone, but before the court and his own family.
Gareth asks Dame Liones, the Red Knight of the Red Launds, Sir Persant, and [Sir Gringamore](entity:character-recall-character-sir-gringamore-f10aca73aaf7) not to reveal his name or treat him as anything more than an ordinary knight. He wants to remain unknown from the beginning of the tournament to its end. Dame Liones lends him a ring, asking that it be returned after the event. Its power alters the apparent colour of whatever is green, red, blue, or white, turning each into another colour; it also keeps its wearer from losing blood. Gareth values it especially because its changes will disguise him. Sir Gringamore supplies a strong bay horse, dependable armour, and a sword once won by his father from a heathen tyrant. The concealment thus depends on both enchantment and equipment, while Gareth’s request gives the disguise a clear personal purpose.
## Gareth’s victories and [Launcelot](entity:character-recall-character-launcelot-0b02a99ce6f7)’s restraint
The tournament opens on the feast of the Assumption after mass and matins. Its early encounters establish the range of the contest: [Sir Palamides](entity:character-recall-character-sir-palamides-07dff0dd5cb8) and [Gawaine](entity:character-recall-character-gawaine-e52d508f7128) both fall from their horses, and Safere and Segwarides defeat [Agravaine](entity:character-recall-character-agravaine-eb42da8223f0) and [Gaheris](entity:character-recall-character-e643b62e350f). Gareth’s victories then become the spectacle around which the field turns. He and the Red Knight meet Bors and Bleoberis; their spears break and their horses go down, but Gareth continues, unseating Bleoberis and then Galihodin and Galihud. He also bears down Dinadan, La Cote Male Taile, Sagramore, and Dodinas with a single spear.
The ring makes Gareth’s appearance change from course to course, so neither kings nor knights can readily recognize him. He unhorses the kings of [Ireland](entity:location-recall-location-ireland-3247a2c8bcbe), [Scotland](entity:location-recall-location-scotland-4e112aa71aa3), and [Gore](entity:location-recall-location-gore-b6ce2dde700e), as well as Bagdemagus, while Bagdemagus’s son Meliaganus breaks a spear against him. Galahault, the noble prince, challenges the many-coloured knight; Gareth strikes him hard enough that his companions must recover him. The results make the disguise conspicuous even as it prevents identification: the crowd can see one knight repeatedly prevail, but cannot settle who he is.
Arthur notices Gareth’s achievement and asks Launcelot to meet him in the lists. Launcelot declines, reasoning that the unknown knight has already laboured greatly and should not be deprived of the honour he has earned. He also allows that the knight may have a personal cause in the contest and may be especially beloved by Dame Liones. His decision gives the episode an important contrast: the tournament’s order invites one champion to test another, but Launcelot treats recognition of another knight’s effort as a reason to hold back.
## The ring comes off and the name is revealed
Gareth later enters the fighting without striking Launcelot, who takes this as a sign that the knight may be Gareth. [Tristram](entity:character-recall-character-tristram-a0b006f42abd), still unsure who the stranger is, asks about the many-coloured competitor. He learns that the knight was called Beaumains at Arthur’s court, is Gareth of Orkney, is Gawaine’s brother, and was knighted by Launcelot. Tristram judges him a good knight and a promising one, and he joins Ironside and Persant in going to Gareth’s aid. This recognition by informed witnesses begins to close the distance between the disguised figure and the identity concealed beneath his colours.
During a pause, Gareth’s dwarf asks for the ring while Gareth drinks. Gareth leaves it with him, and the dwarf is pleased because he understands that Gareth will now be recognizable. Back in the field, Gareth appears in yellow alone. He continues to fight, unhelming and unseating knights; Arthur sees his hair and suspects that this is the same competitor he had watched before. The change is practical as well as symbolic: with the ring gone, the spectacle of shifting colours gives way to a single, identifiable appearance.
Arthur orders heralds to ride near the knight and find out who he is. One sees the words written in gold around Gareth’s helmet, identifying it as Gareth’s of Orkney, and the heralds proclaim him as Gareth, son of [King Lot](entity:character-recall-character-king-lot-9b2d273655ec). The disclosure brings lineage into the open along with the name. As the kings and knights press in to look at him, Gareth redoubles his blows and strikes down Sagramore and Gawaine. Gawaine protests that he had not expected his brother to strike him. Gareth then forces his way out of the crowd, retrieves the ring, and disappears from the company’s view.
## Departure and narrative significance
Once beyond the press, Gareth asks his dwarf what course to take. The dwarf advises him to send Dame Liones her ring. Gareth does so with a message that he will return when he can and asks her to remain true and faithful to him, as he intends to be to her. The ring that had enabled anonymity is therefore returned to the woman who lent it, while Gareth leaves the tournament without resolving his identity through a formal appearance before the court. His departure preserves the episode’s tension between public acclaim and private intention.
The scene’s recognition is earned first through action and only afterward attached to a name: the kings, princes, and Round Table knights witness Gareth’s success before the heralds establish who he is. Yet the story does not make recognition the same thing as possession. Gareth is identified, but he escapes, and Launcelot’s earlier restraint has already shown that honour can mean allowing a rival to keep the distinction his deeds have won. The tournament thus brings Gareth’s concealed standing into public view while leaving his chosen distance from the court intact.
Event 60
Gareth and Gawaine Reunite
[Gareth and Gawaine Reunite](entity:event-recall-event-e66091cab810) when a fierce, mistaken combat between the brothers is interrupted by [Linet](entity:character-recall-character-linet-c7e3085b4ddd)’s recognition of them. Their reunion replaces the contest’s uncertain outcome with kinship and public reconciliation: the brothers embrace, [King Arthur](entity:character-recall-character-king-arthur-2b97864f54aa) and their mother respond with overwhelming joy, and the court remains with them for eight days while they recover.
## The Fight and the Recognition
After [Gareth](entity:character-recall-character-e1d13addfd5f) has parted from the duke he defeated, he stands alone and sees an armed knight approaching. Gareth takes the duke’s shield, mounts, and meets the stranger without exchanging words. They charge at one another, and the combat continues on foot with swords for two hours. Neither fighter initially recognizes the other; each is committed to the encounter before its meaning becomes clear.
Linet arrives riding a mule and calls to the approaching knight, identifying him as [Gawaine](entity:character-recall-character-gawaine-e52d508f7128) and telling him to stop fighting his brother. The recognition changes the course of the scene at once. Gawaine throws away both shield and sword, runs to Gareth, embraces him, and asks his forgiveness. Gareth, who had just faced him as an opponent, removes his helmet, kneels, and asks forgiveness in turn.
## Reconciliation Between Brothers
Once they know each other, the brothers rise and embrace again, weeping before they can speak. Each gives the other the prize of the battle, refusing to claim victory over his brother. Their exchange turns the contest’s measure of prowess into a gesture of mutual honor: Gawaine acknowledges Gareth’s achievements even apart from their kinship, saying Gareth has brought great honor to King Arthur and his court through the knights he has sent there.
Linet, also called the damsel Savage, tends the brothers’ wounds and helps bring the immediate consequences of the fight to an end. The encounter had put both brothers in danger; recognition restores their relationship, while her care allows them to recover together rather than remain divided by the accidental combat.
## King Arthur and the Family Gather
Gawaine asks Linet to carry news of the reunion to King Arthur, who is only two miles away. [Arthur](entity:character-recall-character-arthur-2e33b65bbe57) rides to the brothers with the court following in haste. When he reaches the hillside where [Gareth and Gawaine](entity:relation-recall-relation-gareth-and-gawaine-15b68c59ac9a) are sitting, he is so overcome with gladness that he cannot speak and falls from his horse in a swoon. The brothers hurry to him and comfort him.
Their mother, [Morgause](entity:character-recall-character-morgause-d81dccaad851), arrives as well. Seeing Gareth’s face, she too collapses in a swoon and lies as though dead. Gareth comforts her until she recovers. The reactions of uncle and mother make the reunion more than a private reconciliation: it restores members of a family whose separation has been felt as sorrow and labor, and brings that recovered bond into the presence of the court.
## The Court’s Celebration
Arthur orders the knights under his authority to lodge at the meeting place in honor of his nephews. Provisions are gathered so that nothing obtainable, tame or wild, is lacking, and the company remains there for eight days. The scale of the welcome marks the brothers’ reunion as a courtly event, not merely the end of a dangerous encounter.
During the stay, Linet helps heal both men. Arthur then asks why her sister, [Dame Liones](entity:character-recall-character-dame-liones-652d309466c1), has not come to visit Gareth, who has endured so much for her love. Linet explains that her sister does not know Gareth is there. Arthur asks her to fetch [Liones](entity:character-recall-character-liones-f6c0d5cf0838) so that a decision can be made according to Gareth’s wishes. The reunion thus reconnects the brothers while also returning Gareth’s relationship with Liones to the attention of the court.
Event 61
加雷斯与莱昂尼斯成婚
[Gareth and Dame Liones](entity:relation-recall-relation-gareth-and-dame-lion-5b407ccdced5)’s marriage brings his adventures in her cause to a public and reciprocal conclusion. Their union is presented not as a match imposed by the court but as a freely acknowledged love, affirmed by both partners before [King Arthur](entity:character-recall-character-king-arthur-2b97864f54aa). The wedding at [Michaelmas](entity:time-recall-time-b428544bcee1) then gathers the rescued, the defeated, and the king’s fellowship around [Gareth](entity:character-recall-character-e1d13addfd5f), translating individual feats into marriage, homage, and a new network of lasting obligations.
## Love Declared Before the Court
When [Dame Liones](entity:character-recall-character-dame-liones-652d309466c1) arrives at [Arthur](entity:character-recall-character-arthur-2e33b65bbe57)’s court, she is acclaimed among the ladies as exceptionally beautiful. Gareth and [Liones](entity:character-recall-character-liones-f6c0d5cf0838) exchange affectionate looks and words, and their relationship becomes a matter of public recognition when Arthur asks Gareth whether he wishes to take her as his wife. Gareth answers that he loves her above all living ladies. Asked in turn, Liones says she would rather have Gareth as her husband than any Christian king or prince: he is her first love, and she declares that she will have no other if she cannot have him. Her answer makes the attachment mutual and explicit, rather than an inference drawn from Gareth’s prior efforts on her behalf.
Arthur then asks whether Gareth will take Liones as his wife, and Gareth confirms that no other lady will bring him joy if he cannot have her. The scene places the lovers’ own choice at the center of the proposed marriage. Arthur promises not to obstruct their affection, but to support and strengthen it with all the authority available to him. Gareth’s mother likewise expresses her support. The king’s approval matters, but it follows the lovers’ declarations rather than replacing them.
## From Agreement to Wedding Plans
After the couple and their wishes have been acknowledged, arrangements are made for a wedding the following Michaelmas at Kinkenadon by the sea. Arthur’s advice determines the date and place, and the event is proclaimed throughout the realm, transforming a private commitment into a public occasion. Gareth summons to the wedding the knights and ladies he had previously overcome in battle. Their invitation connects the celebration to the course of his adventures: those who had once stood across from him are now called to attend the beginning of his married life.
Before returning to her castle with her sister [Linet](entity:character-recall-character-linet-c7e3085b4ddd) and their brother Gringamore, Liones gives Gareth a rich ring, and he gives her another. The exchange makes their agreement reciprocal in a visible, personal form. Arthur also gives Liones a rich gold bee. The passage records these gifts as part of the preparations, alongside the king’s public patronage, rather than presenting the marriage as a private union detached from the court and its networks.
## The Michaelmas Celebration and Its Retinue
On Michaelmas Day, the Bishop of [Canterbury](entity:location-recall-location-canterbury-d9d154d6633e) solemnizes the marriage of Gareth and Liones. Arthur also arranges two other marriages: [Gaheris](entity:character-recall-character-e643b62e350f) weds Linet, Liones’s sister, and [Agravaine](entity:character-recall-character-agravaine-eb42da8223f0) weds Liones’s niece, Dame Laurel. The wedding therefore joins more than its principal couple. It places several relationships among the families and companions in the same ceremonial setting, with Arthur acting as the organizer of the matches.
The feast also displays the political consequences of Gareth’s earlier deeds. Sir Pertolope comes with thirty knights, pays homage and fealty to Gareth, and asks to serve as chamberlain. [Sir Perimones](entity:character-recall-character-sir-perimones-ff8f2c99b080) arrives with sixty knights and seeks the role of chief butler; [Sir Persant of Inde](entity:character-recall-character-sir-persant-of-inde-da96b37c67f2) comes with a hundred knights and asks to serve as chief sewer; the Duke de la Rowse, also accompanied by a hundred knights, requests the service of the wine; and Sir Ironside brings three hundred knights and asks to be Gareth’s carver. Each group’s homage and service turns the wedding retinue into a public account of allegiance. Their lands are to be held of Gareth, making the gathering a display of territorial ties as well as celebration.
Thirty women, described as widows, also come with other gentlewomen and kneel before Arthur and Gareth. They say Gareth delivered them from the Dolorous Tower and defeated the Brown Knight, and they and their heirs undertake to do homage to him thereafter. Their testimony connects the wedding directly to Gareth’s rescue of them: the gratitude occasioned by his earlier action becomes an enduring bond acknowledged in front of the king and assembled company.
## Tournament, Recognition, and the Ending of the Tale
The celebration includes plentiful food, games, music, and three days of jousting. Because Liones asks Arthur that no newly married man joust at the feast, the king does not permit Gareth to take part. The restriction sets the wedding’s immediate purpose above the public demonstration of his prowess: the newly married knight is to remain with his bride rather than return to combat for the entertainment of the gathering.
Other knights take their places in the lists. On the first day [Lamorak](entity:character-recall-character-lamorak-9d86b1c9a151) defeats thirty knights; Arthur makes Persant of Inde and his two brothers [Knights of the Round Table](entity:character-recall-character-3f167931be46) and grants them lands. On the second day [Tristram](entity:character-recall-character-tristram-a0b006f42abd) defeats forty knights, and Ironside is admitted to the [Round Table](entity:object-recall-object-round-table-04fef19b82fd) and granted lands. On the third day [Launcelot](entity:character-recall-character-launcelot-0b02a99ce6f7) defeats fifty knights; the Duke de la Rowse likewise becomes a Knight of the Round Table for life and receives lands. Gareth’s wedding thus frames the recognition of other men’s service, while the king’s grants extend the event’s significance beyond the couple.
Lamorak and Tristram depart suddenly after the jousts without wishing to be recognized, displeasing Arthur and the court. The court nevertheless continues its celebration for forty days. The tale’s closing account names Gareth as a noble, well-governed knight who speaks courteously, and records the three marriages and the lands and riches Arthur grants so that the couples may live honorably for the rest of their lives. Gareth and Liones’s union ends his adventure in a formal settlement: love is affirmed by the couple, sanctioned by the king, and surrounded by the service, homage, and rewards that bind the wider company.
Event 62
Tristram’s Birth and His Mother’s Death
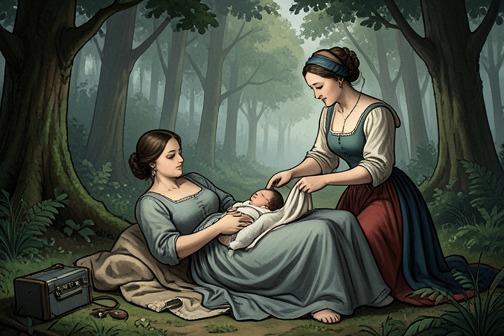
[Tristram](entity:character-recall-character-tristram-a0b006f42abd)’s birth and his mother’s death form a defining origin episode: [Elizabeth](entity:character-recall-character-elizabeth-83df578df81e) dies after giving birth in the forest, and her last request names her son for the sorrow of his arrival. The scene makes his name a memorial to his mother and places his life’s beginning within the peril and separation that shape the surrounding narrative.
## Family and Circumstances
Tristram is born to [King Meliodas](entity:character-recall-character-king-meliodas-bd15f8e65e50), ruler of [Liones](entity:character-recall-character-liones-f6c0d5cf0838), and Elizabeth, the sister of [King Mark of Cornwall](entity:character-recall-character-king-mark-of-cornwa-8e1e5eb75cee). The narrative presents the couple as devoted to one another and describes Elizabeth as meek; when her time to give birth approaches, their household anticipates the child with joy. That expectation is broken when Meliodas disappears during a hunt. A woman who had long loved him, but had never won his love, uses enchantment to draw him after a hart to an old castle, where he is taken prisoner. Elizabeth, not knowing what has happened to her husband, goes into the forest with a gentlewoman to search for him.
## Birth in the Forest
Far from help, Elizabeth’s labor begins, and she cannot continue farther. Her gentlewoman assists her as best she can, and Elizabeth gives birth after great difficulty. The account attributes the delivery to the miracle of Our Lady of Heaven, but says that Elizabeth, having suffered from the cold and lacked proper assistance, is dying. The child’s arrival therefore coincides with the loss of the mother who had gone into the forest seeking her absent husband.
## Elizabeth’s Farewell and the Naming
Knowing she cannot recover, Elizabeth asks her gentlewoman to carry a message to Meliodas: she has endured these pains for his love, is sorry to leave him, and asks him to be a friend to her soul. She then asks to see the child. Addressing him, she says that he has “murdered thy mother,” and supposes that one so manly in infancy may become a manly man in adulthood. Her words combine grief at the cost of childbirth with a prediction about her son’s future character.
Elizabeth gives a final instruction about the child’s name: when he is christened, he is to be called Tristram, meaning “a sorrowful birth.” She dies after making this request. The gentlewoman lays her beneath the shade of a great tree and wraps the child as well as she can against the cold. The scene ends not with a reunion, but with the mother dead, the father still absent, and the newborn entrusted to the care of another woman.
## Narrative Significance
The episode makes Tristram’s name a compact record of the circumstances of his birth: it preserves Elizabeth’s sorrow and the separation of the family at the moment of his arrival. Her parting message also fixes the emotional terms of the scene, connecting love for Meliodas with suffering and an appeal for the care of her soul. The narrative’s later account of [Arthur](entity:character-recall-character-arthur-2e33b65bbe57)’s birth likewise concerns concealed parentage and the arrangements made for a child’s upbringing, but Tristram’s origin is distinguished by the mother’s direct farewell and her explicit choice of his name.
Event 63
Tristram Saves His Stepmother from Burning
[Tristram Saves His Stepmother from Burning](entity:event-recall-event-80b58f0564fc) is an episode in which [Tristram](entity:character-recall-character-tristram-a0b006f42abd)’s mercy intervenes in a royal household already broken by dynastic fear and attempted murder. His stepmother has sought to kill him so that her own children may inherit the land of [Liones](entity:character-recall-character-liones-f6c0d5cf0838); after she is condemned, Tristram wins her life by asking the king to forgive her. The reprieve prevents her execution but does not undo the betrayal or restore her marriage, and Tristram himself is sent away from court.
## The Queen’s Plot and Its Motive
[King Meliodas](entity:character-recall-character-king-meliodas-bd15f8e65e50) has married the daughter of King Howell of Brittany. After she bears children, the queen becomes resentful that they may not inherit Liones and arranges to poison the young Tristram. She places poison in a silver cup in a chamber shared by Tristram and her children, intending that he drink when thirsty. Instead, her own son finds the cup, drinks from it, and dies. The queen grieves, but the king does not yet know that the death resulted from her [treachery](entity:concept-recall-concept-22ce6e5d8b9f).
The first attempt’s failure does not end the plot. The queen has more poison prepared in a cup of wine. King Meliodas, thirsty, finds it and is about to drink; seeing him take the cup, she suddenly pulls it away. Her intervention makes the threat visible. Remembering that her son has already died from poison, Meliodas confronts her and demands to know what the drink contains. Faced with his threat to kill her if she refuses the truth, she confesses that she intended to kill Tristram so her children could enjoy his land.
## Condemnation and Tristram’s Plea
The barons assent to the queen’s condemnation, and a fire is prepared for her execution. As she is about to be put to death, Tristram kneels before King Meliodas and asks for a boon. The king agrees before hearing what he wants. Tristram then asks for the life of the woman who had tried to poison him.
Meliodas argues that the request is unjust: the queen deserves punishment, he says, and Tristram has particular reason to hate her because she sought his death. Tristram answers by appealing to mercy. He says that he forgives her and asks the king, for God’s love, to keep his promise and grant the boon. The appeal makes forgiveness—not denial of the attempted murder—the basis for the reprieve. Meliodas gives Tristram the queen’s life and authorizes him to take her away from the fire; Tristram goes to her and delivers her from execution.
## [Mercy](entity:concept-recall-concept-8a56d86ef182)’s Limits and the Aftermath
Tristram’s intervention changes the queen’s sentence, but it does not repair the marriage. Meliodas will no longer live with her as husband and wife. Tristram then works to bring the king and queen to an accord, and succeeds in reconciling them in some measure; the account nevertheless distinguishes that settlement from a return to married life. The consequences of the queen’s betrayal therefore remain in the household even after her life has been spared.
The episode ends with a further cost for Tristram: Meliodas will not allow him to remain at court any longer. The narrative thus gives mercy a concrete but limited effect. Tristram prevents a death and seeks peace between the estranged pair, yet his act does not erase the political motive behind the attempted poisoning, restore marital intimacy, or secure his own place in the king’s household.
## Narrative Significance
The episode turns on an unusually direct reversal: the intended victim becomes the person who saves his would-be killer. Tristram does not dispute that the queen plotted against him; instead, he asks that her life be spared and declares his own forgiveness. His plea places mercy beside the barons’ judgment and the king’s authority, showing how personal action can alter a sentence without making its underlying offense disappear.
The family conflict is rooted in succession: the queen fears that her children will not inherit Liones, and Tristram’s survival stands in the way of that aim. Her attempt to change the future through poison instead brings her before a sentence of death, while Tristram’s appeal changes the immediate outcome. Yet the final expulsion of Tristram and the king’s refusal to resume married life keep the resolution from becoming a restoration of the family. Mercy saves the queen; it does not return the household to what it was.
Event 64
特里斯特拉姆与马豪斯决斗
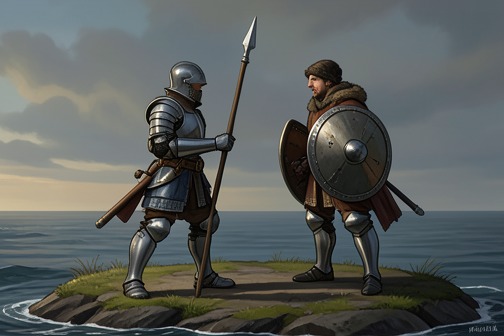
[Sir Tristram](entity:character-recall-character-sir-tristram-58eb12b2af0e)’s duel with [Sir Marhaus](entity:character-recall-character-sir-marhaus-1bd99ec8e2d9) is a trial of arms over [Cornwall](entity:location-recall-location-cornwall-5562c2fa740e)’s arrears to [Ireland](entity:location-recall-location-ireland-3247a2c8bcbe), but it also marks [Tristram](entity:character-recall-character-tristram-a0b006f42abd)’s first proving as a knight. He accepts the challenge when Cornwall cannot find a defender, wins the encounter on an island, and sends Marhaus back to Ireland with a fatal wound. The victory establishes Tristram’s courage and reputation, yet it leaves him close to death from the poisoned spear that wounded him.
## Causes and Stakes
[King Anguish of Ireland](entity:character-recall-character-king-anguish-of-ire-322b54eeb085) demanded the tribute Cornwall had paid in earlier years. [King Mark](entity:character-recall-character-king-mark-7cea1086241a) and his barons refused, with Cornwall seven years behind, and answered that Ireland should send a champion to fight for its claim. Anguish chose Marhaus, his queen’s brother and a knight of the [Round Table](entity:object-recall-object-round-table-04fef19b82fd), whose renown made the challenge especially daunting. Marhaus stayed at sea beside [Tintagil Castle](entity:location-recall-location-tintagil-castle-96ffff52cf29) and sent his demand to [Mark](entity:character-recall-character-mark-cfbb20016049) each day: pay the arrears or find a knight to fight for them.
Cornwall called for a champion and offered a lifelong reward, but the prospect of fighting Marhaus discouraged its knights. Some barons proposed seeking [Sir Launcelot](entity:character-recall-character-sir-launcelot-c0ea01c62d3d), then famed as an exceptional knight; others thought a Round Table knight would be reluctant to fight a fellow member unless the challenger were unknown or disguised. The dispute thus placed Cornwall’s political claim against the fellowship of the Round Table, while leaving Mark without a ready defender.
## Tristram Takes the Challenge
When the news reached the young Tristram, he felt ashamed that no Cornish knight would face Marhaus. He asked his father, [King Meliodas](entity:character-recall-character-king-meliodas-bd15f8e65e50), what could be done to recover Cornwall’s position. Meliodas warned that Marhaus was among the best knights in the world and that he knew of no one in the country able to match him. Tristram replied that he was not yet a knight, but believed he could meet Marhaus if he received the order; he sought his father’s leave to ride to King Mark.
At Mark’s court, Tristram offered to fight if the king would knight him. Mark observed that he was young but well made and strong, and agreed to his request. Marhaus, however, would fight only a man of royal birth, the son of a king or queen. Tristram then disclosed that he was Meliodas’s son and the child of Mark’s sister, Dame [Elizabeth](entity:character-recall-character-elizabeth-83df578df81e), who had died giving birth to him. Mark welcomed his nephew, had him equipped, and informed Marhaus that his opponent was of royal lineage. Marhaus accepted the match.
The two sides arranged to fight on an island near Marhaus’s ships. Mark and the Cornish barons watched Tristram depart with everything needed for himself and his horse; the company’s distress reflected the danger of sending so young a knight to defend their cause. Before the combat, Tristram instructed his servant [Gouvernail](entity:character-recall-character-gouvernail-3c5afbc5aabe) to ask Mark to bury him if he were killed. He also said that he would not yield from cowardice and directed Gouvernail not to approach the island until the outcome was clear. His terms made the stakes personal as well as political: he would either win the fight or die without abandoning it.
## The Island Combat and Its Outcome
When Tristram reached the island, he saw Marhaus waiting on horseback near six ships anchored offshore. Before Gouvernail returned to the vessel, Tristram sent a message to King Mark: if he fell, the king should arrange his burial; if he fled or surrendered, he should not receive Christian burial. Gouvernail was not to come near the island until Tristram had either won or been overcome. The instruction framed the encounter as a test with no honorable retreat: Tristram would complete the fight or accept its cost.
Marhaus urged the young knight to turn back, explaining that he had already faced the finest knights in the land and elsewhere. Tristram answered that he could not abandon the cause for which he had been made a knight: he had promised to fight to the end and sought to win renown while freeing Cornwall from its Irish tribute. Marhaus reminded him that [King Arthur](entity:character-recall-character-king-arthur-2b97864f54aa) had knighted him and that he had earned a reputation through his deeds. Their exchange sets Tristram’s ambition against Marhaus’s established standing, while the contest’s political purpose remains explicit.
They charged with spears and both were thrown from their horses. The fight continued on foot, and neither could quickly prevail. After more than half a day, both were badly wounded; then Tristram recovered his strength more readily than Marhaus and struck him with enough force to leave a fragment of his sword in Marhaus’s head. Marhaus rose, cast aside his weapons, and fled to his ships. Tristram called after him, protesting that withdrawal shamed a renowned Round Table knight, especially when his opponent was a young man facing his first trial. He claimed Marhaus’s sword and shield and declared that he would carry the shield on his adventures, including before King Arthur and the Round Table.
Marhaus returned to Ireland, where surgeons searched the wound and found the sword fragment lodged in his head; they could not remove it, and he died from the injury. His sister, the queen of Ireland, kept the fragment, hoping to avenge him. Tristram, meanwhile, was so badly wounded that he could scarcely move after the fight. King Mark and his barons came to receive him, and Mark helped lead him into Tintagil Castle, where he was examined and put to bed. Tristram remained there for more than a month, feared near death from the spear wound; the account says the spearhead was poisoned and that this prevented his recovery.
## Significance and Place in the Narrative
The combat joins a dispute over political obligation to the personal test by which Tristram establishes himself as a knight. Cornwall’s refusal to pay the seven years of arrears brings Marhaus to its coast, while the Round Table’s fellowship makes it difficult for King Mark to find a defender against one of its own members. Tristram resolves that impasse by taking the challenge himself: he gains the knighthood required to fight, then proves it against a famous opponent. The victory therefore does more than settle the immediate contest in Cornwall’s favor; it begins Tristram’s public reputation through a deed undertaken for his uncle’s kingdom.
The episode also contrasts the fighters’ positions. Marhaus enters with established renown and confidence grounded in prior contests; Tristram is newly knighted and has never yet been tested against a celebrated opponent. Tristram presents the encounter as a chance to win honor and to free Cornwall from its tribute, while Marhaus warns him of the danger and offers him the chance to withdraw. Their prolonged combat reverses the apparent imbalance: Tristram outlasts Marhaus, who leaves the field, but the result carries a lasting cost for both. Marhaus later dies from the wound, and Tristram himself remains gravely ill from the poisoned spear wound. The scene’s achievement is thus inseparable from its consequences: the young knight wins distinction, but victory does not protect him from suffering or make the conflict harmless.
## Significance and Place in the Narrative
The duel turns a dispute over Cornwall’s tribute into the young Tristram’s first public test as a knight. King Mark’s refusal to pay seven years of arrears brings Marhaus to Cornwall, while Marhaus’s membership in the Round Table makes the search for a defender more difficult: Mark’s barons hesitate to ask one Round Table knight to fight another. Tristram breaks the impasse by accepting the challenge, obtaining knighthood for that purpose, and defending his uncle’s kingdom. The victory begins his reputation through service to Cornwall, rather than through a contest detached from political obligation.
The encounter also reverses the difference in experience between the combatants. Marhaus arrives with formidable renown and confidence from earlier fights; Tristram is newly knighted and has never been tested against a celebrated opponent. Tristram openly seeks honor and Cornwall’s release from the tribute, while Marhaus advises him to withdraw. After more than half a day of fighting, Tristram gains the advantage and Marhaus leaves the island, but neither escapes the cost: Marhaus later dies from the wound, and Tristram lies gravely ill for more than a month with a poisoned spear wound. The duel establishes the young knight’s prowess while showing that the honor won in combat is bound to lasting consequences.
Event 65
特里斯特拉姆赴爱尔兰疗伤并结识伊索德
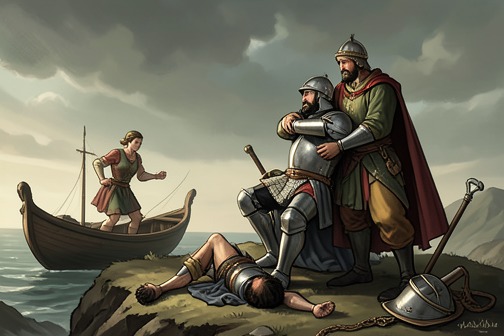
[Sir Tristram](entity:character-recall-character-sir-tristram-58eb12b2af0e)’s voyage to [Ireland](entity:location-recall-location-ireland-3247a2c8bcbe) turns an unresolved wound into a meeting that changes the course of his story: sent to the land where the poison can be treated, he arrives under an assumed name and is healed by [La Beale Isoud](entity:character-recall-character-881eb87025df), whose care gives rise to their mutual attachment. The episode binds physical recovery to a new emotional and political entanglement, as Sir Tristram conceals his identity from King Anguish and finds [Sir Palamides](entity:character-recall-character-sir-palamides-07dff0dd5cb8) already pursuing [Isoud](entity:character-recall-character-isoud-45c23b134f96).
## The Wound and the Journey
After his encounter with [Sir Marhaus](entity:character-recall-character-sir-marhaus-1bd99ec8e2d9), Sir Tristram is left gravely wounded. He reaches a small hill and can scarcely move after the wound has weakened him. [Gouvernail](entity:character-recall-character-gouvernail-3c5afbc5aabe), his attendant, arrives by vessel, and the king and his barons come to receive him. [King Mark](entity:character-recall-character-king-mark-7cea1086241a) takes his nephew in his arms, while he and Sir Dinas the Seneschal escort Sir Tristram to [Tintagil Castle](entity:location-recall-location-tintagil-castle-96ffff52cf29). Seeing his wounds, King Mark weeps and declares that he would not lose his nephew for all his lands.
Sir Tristram remains in bed for more than a month, and his condition seems unlikely to improve. The spearhead that first wounded him had been poisoned; the account identifies this venom as the reason he cannot recover. King Mark summons physicians and surgeons, but none can promise to save his life. A wise lady then gives a stark condition for recovery: Sir Tristram must go to the very country from which the poison came. There, she says, he may be healed; otherwise, he will not recover.
King Mark responds by preparing a well-provisioned vessel. Sir Tristram and Gouvernail sail together, and Sir Tristram takes his harp with him. Their departure is not a quest for glory but a journey imposed by the limits of medicine: the wound dictates the destination, and Ireland, where Sir Marhaus had come from, becomes the only hope of recovery.
## Arrival at King Anguish’s Court
By good fortune, the vessel reaches Ireland near a castle where King Anguish and the queen are staying. Still lying in bed, Sir Tristram plays a lively lay on his harp. The music is described as unlike anything the people of Ireland had heard before, and word of the harpist reaches the king, who sends for him and has his wounds examined.
Asked his name, Sir Tristram says that he is from the country of [Liones](entity:character-recall-character-liones-f6c0d5cf0838) and calls himself Tramtrist. He explains that he was wounded while fighting for a lady’s right. The name conceals the identity of a knight who has killed one of the king’s most honoured men: King Anguish tells him that [Cornwall](entity:location-recall-location-cornwall-5562c2fa740e) has suffered a great loss in Sir Marhaus, a noble Knight of the [Round Table](entity:object-recall-object-round-table-04fef19b82fd). Sir Tristram acts as though he shares the king’s sorrow, although he knows better than the king how Sir Marhaus died. His false name allows him to receive aid in the very court where the truth of his deed could make that aid politically fraught.
King Anguish promises that Sir Tristram will receive whatever help the country can provide. He then places the wounded stranger in the care of his daughter, La Beale Isoud, whom he regards as a skilled healer. The change of setting thus brings Sir Tristram into the household of the sister of the man whose wound he carries: the route to recovery crosses directly into the aftermath of his fight with Sir Marhaus.
## La Beale Isoud’s Care
La Beale Isoud examines the wound and finds poison at its bottom. She treats Sir Tristram, and before long he is healed. The narrative makes her care the immediate answer to the condition the wise lady had set: recovery is possible in the country from which the venom came, and Isoud’s treatment accomplishes it.
During this time, Sir Tristram teaches Isoud to play the harp. Their shared music accompanies the developing attachment between them. Sir Tristram grows deeply fond of her, while Isoud, the account says, begins to feel a strong inclination toward him. Healing and instruction make their time together more than a brief medical encounter: she restores him, and he shares with her the skill that had first drawn the king’s attention to him.
## Sir Palamides and the Rivalry
Sir Palamides, a Saracen knight, is already at King Anguish’s court and is well received there. He comes to Isoud daily and offers her many gifts because he loves her intensely. Sir Tristram notices his attentions and recognizes [Palamides](entity:character-recall-character-palamides-9a6f200e4d74) as a noble and powerful knight. The account presents the rivalry as taking shape through these repeated visits and gifts, rather than through a single formal challenge.
Isoud tells Sir Tristram that Sir Palamides is willing to be baptized for her sake. This disclosure sharpens the contrast between the two men: Palamides’s devotion is accompanied by a declared willingness to change his religious status, while Sir Tristram’s attachment is formed during his recovery and their shared harp-playing. Sir Tristram feels resentment toward his rival, and the narrative states that great envy arises between them. The episode therefore closes not with the completion of Sir Tristram’s healing alone, but with the beginnings of a conflict organized around Isoud’s affection and Palamides’s pursuit.
## Narrative Significance
The journey makes a physical vulnerability the cause of a consequential encounter. Sir Tristram’s poisoned wound cannot be treated at home; the prescribed cure sends him to Ireland, where his assumed name protects him as he accepts help from the family of Sir Marhaus. The sequence joins the consequences of one combat to the relationships that will shape what follows, without allowing the recovery to erase the danger carried by the concealed identity.
Music provides a second thread through the episode. Sir Tristram’s harp-playing brings him before King Anguish, then becomes something he teaches Isoud while she heals him. The instrument thus marks both his arrival and the growing intimacy between them. By the time Sir Palamides’s pursuit is established, recovery has already created new attachments and a rivalry: the wound that drives Sir Tristram across the sea also places him at the center of a conflict he cannot settle simply by getting well.
Event 66
Tristram Defeats Palamides at the Irish Tournament
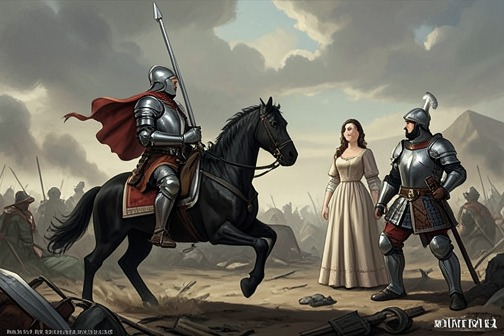
[Tristram Defeats Palamides at the Irish Tournament](entity:event-recall-event-9f1f62eeaae1) is a contest in [Ireland](entity:location-recall-location-ireland-3247a2c8bcbe) in which [Tristram](entity:character-recall-character-tristram-a0b006f42abd), still recovering from a poisoned wound and entering under concealment, defeats [Palamides](entity:character-recall-character-palamides-9a6f200e4d74) at a tournament called by King Anguish. The victory answers the challenge of [Isoud](entity:character-recall-character-isoud-45c23b134f96)’s suitor, brings Tristram renewed favor at court, and ends with Palamides sworn to keep away from her and to bear no arms for a year and a day.
## Rivalry and the Tournament’s Stakes
Tristram is in King Anguish’s care while Isoud treats the poison found in his wound. He falls in love with her, and she begins to favor him; meanwhile Palamides, a Saracen knight welcomed at court, pursues Isoud with gifts and loves her deeply. Tristram knows Palamides to be a formidable knight and resents his attention. Isoud also tells Tristram that Palamides is willing to be baptized for her sake, a detail that sharpens the rivalry without resolving it.
King Anguish announces a tournament for the Lady of the Lawns, his near kinswoman. The winner is to marry her three days later and receive all her lands. The challenge is proclaimed across [England](entity:location-recall-location-england-b153c1f368ea), [Wales](entity:location-recall-location-6d9a7b286e78), [Scotland](entity:location-recall-location-scotland-4e112aa71aa3), [France](entity:location-recall-location-france-f5cafc8a8ad4), and Brittany. Isoud urges the recently wounded Tristram to take part because Palamides is expected to win. Tristram initially protests that he is weak and has only just recovered from an injury; he agrees on condition that she keep his participation secret and act as his lady. Isoud arranges his horse and armor.
## A Hidden Entry and a Public Victory
On the first day Palamides rides with a black shield and defeats many knights. Among those he unhorses are [Gawaine](entity:character-recall-character-gawaine-e52d508f7128), [Gaheris](entity:character-recall-character-e643b62e350f), [Agravaine](entity:character-recall-character-agravaine-eb42da8223f0), Bagdemagus, [Kay](entity:character-recall-character-kay-2946c1889f8a), Dodias le Savage, Sagramore le Desirous, Gumret le Petit, and Griflet le Fise de Dieu. His success earns him great renown, and the other knights grow afraid to meet him. When King Anguish asks Tristram why he has not jousted, Tristram again gives his recent wound as the reason.
For the next day Isoud secretly equips Tristram in a white horse and armor, then sends him into the field through a private postern. His appearance draws immediate attention. Palamides sees him, lowers his spear, and meets his charge; Tristram knocks him down. The crowd cannot agree at first which knight has fallen, but the result is unmistakable to Isoud, who is delighted. Gawaine and his companions wonder who the unknown victor is. The other competitors refuse to joust with Tristram, and he uses the occasion to make [Hebes le Renoumes](entity:character-recall-character-hebes-le-renoumes-6a37a024868a) a knight.
## The Sword Fight and Its Terms
Ashamed by his fall, Palamides withdraws from the field as privately as he can. Tristram follows and calls him back, insisting on testing him further before he leaves. They fight with swords, and Tristram knocks Palamides down again. He demands Palamides yield and obey his conditions or die. Palamides, fearing further blows, accepts.
Tristram’s terms are specific: Palamides must renounce Isoud and not approach her, and for a year and a day he must carry no armor or other equipment of war. Palamides swears to obey, then casts aside and cuts up his armor in anger and humiliation. The contest therefore continues beyond the tournament field: its decisive consequence is not only Palamides’s defeat but a sworn restriction on his pursuit of Isoud and his public identity as a warrior.
## Recognition, Favor, and Narrative Significance
On the ride back, a damsel asks Tristram whether he is [Launcelot](entity:character-recall-character-launcelot-0b02a99ce6f7), assuming that only Launcelot could have achieved such feats. Tristram denies the identification and credits God with the ability to make him as good a knight as Launcelot. The exchange makes his prowess legible through comparison with the court’s most renowned knight, while preserving his own name from the questioner. He returns secretly to Isoud through the postern, and she thanks God for his success.
The secrecy does not last: the king and queen learn that Tramtrist was the knight who unhorsed Palamides, and he receives greater favor than before. The episode thus moves from hidden preparation to public acclaim. It also places personal attachment, tournament reputation, and enforceable promises in the same sequence: Isoud helps arrange the encounter, Tristram wins before the assembled knights, and Palamides’s defeat is converted into a year-and-a-day vow. The passage records the immediate outcome of the rivalry, not its final resolution.
Event 67
King Anguish's trial by combat
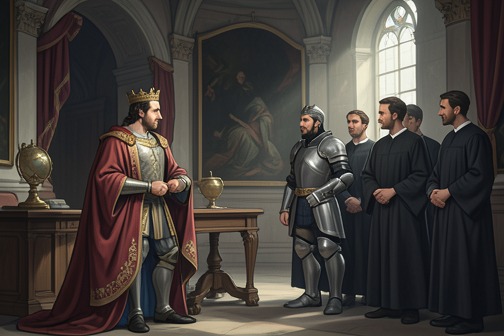
King Anguish’s trial by combat begins with an accusation of murder and ends not in a death or a humiliated surrender, but in a negotiated reconciliation. [Sir Tristram](entity:character-recall-character-sir-tristram-58eb12b2af0e) takes the field for the king, who faces [Sir Blamor de Ganis](entity:character-recall-character-sir-blamor-de-ganis-b4eacd60fa2d) under a custom requiring the accused either to fight personally or to find a champion. [Tristram](entity:character-recall-character-tristram-a0b006f42abd) wins the combat, then asks the judges to spare Blamor; the settlement makes the episode a demonstration that the demands of legal combat can be moderated by mercy, kinship, and knightly honor.
## Accusation and the law of combat
[Sir Bleoberis](entity:character-recall-character-sir-bleoberis-4991a2970156) and Sir Blamor de Ganis summon [King Anguish of Ireland](entity:character-recall-character-king-anguish-of-ire-322b54eeb085) to [King Arthur](entity:character-recall-character-king-arthur-2b97864f54aa)’s court. Anguish arrives without knowing why he has been called. Blamor then accuses him of treason, alleging that the king killed one of Blamor’s kinsmen in his own court. The accusation leaves Anguish abashed: under the custom described in the narrative, a charge of treason or murder must be answered by combat, either by the accused himself or by a knight fighting in his place. Murder, the account adds, is treated as treason in this system. The judges grant Anguish until the third day to prepare an answer.
The procedure makes the charge more than a dispute of testimony: it places the king’s standing and life at risk in a contest between armed champions. Anguish recognizes the difficulty of facing Blamor, whom he knows to be a noble knight, and he understands that the brothers belong to [Sir Launcelot](entity:character-recall-character-sir-launcelot-c0ea01c62d3d)’s kin, a family famed for its prowess. The episode thus frames judgment through both a formal custom and the personal reputation of the men expected to enact it.
## Tristram offers to champion the king
Sir Tristram learns of Anguish’s predicament from [Gouvernail](entity:character-recall-character-gouvernail-3c5afbc5aabe). He welcomes the news as an opportunity to repay the king, who had shown him kindness in [Ireland](entity:location-recall-location-ireland-3247a2c8bcbe), and says he will fight for him. Anguish and Tristram greet one another at Tristram’s pavilion; Tristram recalls his obligation to serve the king and offers to take the battle on two conditions. Anguish must swear that he is innocent and had no part in the knight’s death, and, if Tristram wins, he must grant Tristram whatever reasonable reward he asks. Anguish agrees.
Before the judges, Tristram declares himself ready to die rather than prove recreant in the king’s cause. He does not underestimate his opponent: he calls Sir Launcelot the noblest knight in the world, acknowledges the excellence of the knights of his blood, and recognizes Blamor as a good knight. The court has already heard of Tristram’s reputation, including his victory over [Sir Marhaus](entity:character-recall-character-sir-marhaus-1bd99ec8e2d9) and his joust against [Sir Palamides](entity:character-recall-character-sir-palamides-07dff0dd5cb8). These precedents heighten the stakes, but Tristram presents his acceptance of the contest as a service owed to Anguish, not as proof that the challenge will be easy.
## The combat and the crisis of honor
Blamor enters the lists determined not to yield. His brother Sir Bleoberis reminds him of their lineage and of the family’s unbroken honor in battle. Blamor answers that he would rather die than accept the shame of surrender. The narrative makes this resolve central to the conflict: victory alone cannot settle matters if the defeated knight regards yielding as dishonor and treats death as preferable.
The knights charge one another with their spears. Tristram strikes Blamor and his horse to the ground; Blamor then rises from the encounter, draws his sword, and calls on Tristram to dismount and continue the fight. When Blamor can speak, he asks Tristram to kill him, insisting that he would not choose even lordship over the whole earth in place of dying with honor. He warns that Tristram cannot win the field otherwise: Blamor will not say the word of surrender.
Tristram faces a conflict the rules of combat do not resolve by themselves. He is fighting for Anguish, yet he is reluctant to kill Blamor because of his respect for the knight and regard for Sir Launcelot’s kin. He cannot simply declare himself the victor while Blamor refuses to yield. Rather than press the encounter to a fatal conclusion, Tristram leaves the lists and kneels before the judges, appealing to their honor and to King Arthur’s. He asks them to take the matter into their hands and argues that it would be a shame and a pity for such a noble knight to die. He also asks Anguish, as the king for whom he fights, to show mercy; Anguish agrees to be guided by his champion.
## Judgment, reconciliation, and consequence
Sir Bleoberis is consulted. Although his brother has lost through force of arms, he maintains that Tristram has beaten Blamor’s body, not his heart, and that Blamor has not been shamed. At first he says that, rather than let his brother be shamed, he would have Tristram kill him. The judges reject that conclusion, observing that both the king and his champion have shown pity for Blamor’s knighthood. Bleoberis accepts their decision.
The kings consult with Anguish and find him willing to settle the matter. With the judges’ agreement, Tristram and Bleoberis raise Blamor; the brothers and Anguish are reconciled, and the two brothers kiss and become friends with the king. Tristram and Blamor also make peace and swear that neither of the brothers will fight Tristram, a pledge to which Tristram likewise binds himself. The account extends the consequence beyond the immediate verdict: Sir Launcelot’s whole kin come to love Tristram for the gentleness he showed in the combat.
Anguish and Tristram then return to Ireland by ship. The king has the manner of Tristram’s service made known throughout the land, and the queen and the people there honor him. [La Beale Isoud](entity:character-recall-character-881eb87025df) welcomes him with particular joy; the narrative describes her as loving him more than any other earthly man. The trial therefore resolves the king’s peril while strengthening Tristram’s ties to the royal household and to the family whose champion he has defeated but chosen to spare.
Event 68
Tristram and Isolde drink the love potion
[Tristram and Isolde drink the love potion](entity:event-recall-event-tristram-and-isolde-dri-12dc6d0b59f3) while sailing from [Ireland](entity:location-recall-location-ireland-3247a2c8bcbe) to [Cornwall](entity:location-recall-location-cornwall-5562c2fa740e), where Isolde is to marry [King Mark](entity:character-recall-character-king-mark-7cea1086241a). Neither knows what the golden flask contains: thirsty during the voyage, they take it for wine and drink together. The draught binds them in enduring love, turning a journey undertaken to honor a promise into the origin of a relationship that will persist through both good fortune and hardship.
## The Marriage Errand
The episode follows [Tristram](entity:character-recall-character-tristram-a0b006f42abd)’s return to King Anguish after helping him. Anguish asks why Tristram has not claimed the reward promised to him. Tristram asks for Isolde, not for himself but as a bride for his uncle, King Mark, explaining that he has given his word. Anguish would rather have Tristram marry his daughter, but accepts that Tristram’s promise must guide the decision and leaves him free to take Isolde to Cornwall for [Mark](entity:character-recall-character-mark-cfbb20016049).
Isolde is prepared for the voyage with [Dame Bragwaine](entity:character-recall-character-dame-bragwaine-83330d563117), her principal gentlewoman, and others. Before they leave, Isolde’s mother entrusts a drink to [Bragwaine](entity:character-recall-character-bragwaine-bc0b50922ef5) and [Gouvernail](entity:character-recall-character-gouvernail-3c5afbc5aabe), Tristram’s servant. Her instruction is that, on the day of the wedding, they should give it to Mark to drink with Isolde; she expects the two intended spouses to love one another for life. The potion is therefore meant to establish a bond between Mark and Isolde, not between Isolde and Tristram.
## The Accidental Draught
During the crossing, Tristram and Isolde become thirsty in their cabin. They see a small golden flask and mistake its contents for fine wine. Tristram offers it to Isolde, saying that Bragwaine and Gouvernail had kept it for themselves. The pair share the drink freely, unaware of the queen’s plan and of the flask’s intended recipients.
Once they have drunk it, their feelings change irrevocably: they love each other so deeply that their love does not depart in prosperity or sorrow. Malory identifies this as the beginning of their love. The abrupt contrast is central to the episode: Tristram has insisted on keeping faith with his uncle, yet the potion meant to accompany the marriage ceremony instead joins him to the bride he is escorting.
## From Voyage to Peril
After the draught, the ship continues until it reaches the vicinity of [Castle Pluere](entity:location-recall-location-4aed5fb63cff), where the travelers land expecting lodging. Instead, Tristram and Isolde are taken prisoner. The castle’s custom requires any knight who arrives with a lady to fight its lord, [Sir Breunor](entity:character-recall-character-sir-breunor-09473f7a3e42); the outcome places both knight and lady in danger, whichever side wins. The narrative thus carries the new bond straight from the voyage into a threat to their safety, without suggesting that the drink itself frees them from the obligations or hazards surrounding Isolde’s intended marriage.
## Place in the Larger Narrative
The love-drink episode is a turning point in the story of Tristram and Isolde: a carefully arranged marriage for King Mark becomes inseparable from the enduring love between his nephew and his bride. Its force comes from the gap between intention and consequence. Tristram’s stated purpose is fidelity to his promise, and Isolde’s mother has prepared a drink to encourage fidelity between the future spouses; a mistake aboard ship redirects the potion’s effect to the two travelers instead. The account makes the potion the cause of their lasting attachment, while the journey to Cornwall and the danger at Castle Pluere establish the immediate circumstances in which that attachment begins.
Event 69
The Castle Pluere ordeal
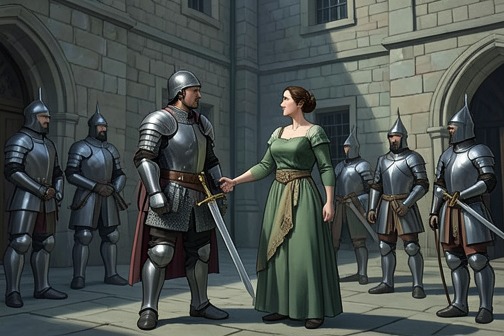
[The Castle Pluere ordeal](entity:event-recall-event-the-castle-pluere-ordea-c8b3fc4be0b6) brings [Sir Tristram and La Beale Isoud](entity:relation-recall-relation-sir-tristram-and-la-7d6c6d39f64e) into a contest governed by a custom that turns hospitality into a threat of death. [Tristram](entity:character-recall-character-tristram-a0b006f42abd) condemns the practice, fights [Sir Breunor](entity:character-recall-character-sir-breunor-09473f7a3e42) to end it, and then accepts a conditional defeat before [Sir Galahad](entity:character-recall-character-sir-galahad-72b97de59df8)’s assembled company. The episode converts an adventure about immediate survival into an encounter with the consequences of unjust custom, while bringing Tristram closer to the fellowship of [Sir Launcelot](entity:character-recall-character-sir-launcelot-c0ea01c62d3d) that he most desires.
## The Castle’s Custom and Its Stakes
The ordeal begins after Sir Tristram and La Beale Isoud arrive near the castle of Pluere, intending to rest and find lodging. Instead, they are taken prisoner. A knight who visits them explains the castle’s established rule: a visiting knight must fight the lord, Sir Breunor, and the weaker combatant loses his head. The ladies face a separate judgment. If the visitor’s lady is judged less fair than Breunor’s wife, the visitor’s lady dies; if she is judged fairer, Breunor’s wife dies. The custom has been practiced for many winters, making the castle’s name, “the weeping castle,” a description of the suffering sustained by its rules.
Tristram objects not only to the prospect of danger but to the abuse of hospitality itself. He remarks that a place of worship should not receive a knight and lady as guests only to destroy them afterward. Yet he agrees to fight, confident that [Isoud](entity:character-recall-character-isoud-45c23b134f96)’s beauty will protect her from the beauty judgment. At the same time, he insists on a fair-field battle and asks to have his horse and armor. The castle’s rule therefore subjects them to two intertwined ordeals: a fight between knights and a public comparison that places the ladies’ lives at stake.
## The Beauty Judgment and Tristram’s Decision
On the appointed morning, the castle’s people gather to witness the battle and judgment. Breunor brings his wife, veiled, and proposes that if Isoud proves fairer, Tristram may strike off his wife’s head; if Breunor’s wife is fairer, he will kill Isoud. Tristram refuses to accept a judgment he considers unrighteous, declaring that no one present will judge fairly. Instead, he presents Isoud and turns her three times with his sword in hand, then challenges anyone who disputes her superiority to answer him.
The assembled people judge Isoud the fairer and better-formed lady. Breunor acknowledges that she is fairer than his wife, but Tristram does not treat the verdict as a reason simply to leave. He recalls that Breunor and his wife have maintained the wicked custom for a long time and that many good knights and ladies have been destroyed by it. He takes Breunor’s wife from him and kills her, reasoning that the rulers of the custom deserve the fate they had imposed on visitors. The judgment that was meant to decide which lady would die thus becomes the occasion for Tristram to punish those responsible for the practice.
## Combat and the End of the Custom
After his wife’s death, Breunor takes up the fight, saying he will try to win Isoud. The knights mount and charge; Tristram unhorses Breunor, but Breunor rises, kills Tristram’s horse, and pursues him before Tristram can ready his shield and sword. They continue their contest on foot. The narrative emphasizes that Breunor is an experienced fighter who has already killed many good knights, while Tristram is renowned for exceptional strength and stature.
Their combat continues for nearly two hours, and both are badly wounded. At last Breunor closes with Tristram and tries to rely on his strength. Tristram overpowers him, brings him down, removes his helmet, and kills him. The people of the castle then offer Tristram homage and fealty and ask him to remain long enough to abolish the foul custom. He agrees. The outcome is therefore more than a victory over one opponent: the local community asks him to end the practice that has governed its treatment of visiting knights and ladies.
## [Galahad](entity:character-recall-character-galahad-e8a04503b5e9), [Mercy](entity:concept-recall-concept-8a56d86ef182), and Tristram’s Fellowship
A knight from the castle carries news of Breunor’s and his wife’s deaths to their son, Sir Galahad, the high prince. Galahad arrives with the [King with the Hundred Knights](entity:character-recall-character-king-with-the-hundr-225bebe60e00) and challenges Tristram to single combat. They meet on horseback and both fall, then fight with swords for nearly half a day. Tristram gradually gains the advantage, driving Galahad back and bringing him close to defeat. When Galahad’s company advances against him, Tristram recognizes that he cannot withstand them all.
Rather than present the outcome as a defeat by Galahad’s individual strength, Tristram objects that it is no knighthood for Galahad to let all his men fight him together. He yields, saying that he would rather submit than die, since the numbers rather than Galahad’s own strength would decide the result. He gives Galahad his sword by the point, placing its pommel in Galahad’s hand. Galahad immediately orders his men not to touch Tristram, explaining that he has granted him his life.
The King with the Hundred Knights objects that Tristram killed Galahad’s father and mother. Galahad answers that Breunor had imprisoned Tristram and forced him to fight, while imposing a shameful custom that made a visiting knight’s lady face death unless she was fairer than Breunor’s wife. Galahad says he would never have stood by his father under that custom and calls Tristram the noblest living knight apart from Sir Launcelot. His response makes the episode’s moral distinction explicit: the deaths of his parents do not outweigh the injustice of the rule they enforced.
## Tristram’s Identity and the Road Ahead
Galahad asks Tristram to identify himself and explain his purpose. Tristram names himself [Sir Tristram de Liones](entity:character-recall-character-sir-tristram-de-lio-fb7d532f0a63) and says Sir [Mark](entity:character-recall-character-mark-cfbb20016049) of [Cornwall](entity:location-recall-location-cornwall-5562c2fa740e) sent him to [King Anguish of Ireland](entity:character-recall-character-king-anguish-of-ire-322b54eeb085) to bring Anguish’s daughter to be Mark’s wife. That daughter is [La Beale Isoud](entity:character-recall-character-881eb87025df), who is with him and is ready to travel to Cornwall. Their presence at Pluere is thus part of a journey with an existing royal purpose, not an expedition undertaken to challenge the castle.
Galahad welcomes Tristram to the marches and offers him freedom to go wherever he wishes with Isoud, on condition that he promise to join Sir Launcelot. He also promises that the castle will no longer follow its former customs. Tristram explains that he initially thought Galahad was Sir Launcelot and says that this was why he feared him more. He then promises to seek [Launcelot](entity:character-recall-character-launcelot-0b02a99ce6f7) as soon as he can, because of all the knights in the world he most desires Launcelot’s fellowship. The ordeal therefore ends with two linked changes: Pluere’s murderous custom is to cease, and Tristram’s stated longing for fellowship becomes a promise that directs his next steps.
## Narrative Significance
The episode tests the claims of custom against the obligations of hospitality, justice, and knightly conduct. Breunor’s rule gives an established practice the force of law within his castle, but its longevity does not make it just: visitors are placed in deadly danger simply for seeking lodging, and the women’s lives are made subject to an imposed beauty contest. Tristram’s protest, intervention, and victory expose the gap between a rule’s customary status and its moral legitimacy.
The encounter also stages mercy as a judgment rather than a reflexive refusal to punish. Tristram kills Breunor and his wife after identifying them as the enforcers of a practice that has destroyed visitors; Galahad, in turn, spares Tristram after hearing the circumstances and refuses to avenge his parents through a collective attack. By explaining that his father’s conduct made him unwilling to stand by him, Galahad places justice above family allegiance. His promise to end the custom extends that judgment beyond the immediate combat, while Tristram’s promise of fellowship connects the resolution at Pluere to the larger fellowship of Sir Launcelot.
Event 70
The marriage of King Mark and Isolde
[The marriage of King Mark and Isolde](entity:event-recall-event-the-marriage-of-king-ma-c26c37f5849c) is a public wedding whose celebration cannot settle the private attachment at its center: [Tristram](entity:character-recall-character-tristram-a0b006f42abd) and Isolde, the narrative says, continue to love one another. The feast brings together lords and ladies and praises Tristram above the other guests, while its aftermath turns toward danger for Isolde’s maid, [Bragwaine](entity:character-recall-character-bragwaine-bc0b50922ef5), and an unexpected act of rescue by [Palamides](entity:character-recall-character-palamides-9a6f200e4d74).
## The Wedding and Its Public Celebration
The wedding is described as richly conducted and attended with great ceremony. Jousts and tournaments follow, and many lords and ladies gather for the feast. Tristram receives the greatest praise among those present, a distinction that places him conspicuously within the celebration of his uncle’s marriage.
## The Love That Persists
The account immediately qualifies the public union: despite [Mark](entity:character-recall-character-mark-cfbb20016049) and Isolde’s marriage, Tristram and Isolde continue to love one another. The contrast between the wedding’s formal celebration and the surviving attachment gives the event its lasting narrative tension. Marriage changes Isolde’s public status, but it does not extinguish the relationship that complicates her bond with Mark.
## Bragwaine’s Endangerment and Rescue
Not long after the feast, two ladies in Isolde’s company, acting from hatred and envy, arrange to destroy Bragwaine, Isolde’s maiden and attendant. They send her into the forest to fetch herbs, where she is found and bound to a tree; she remains there for three days. Palamides discovers Bragwaine and saves her, then takes her to a nearby nunnery to recover.
## Palamides, Isolde, and the Aftermath
When Isolde realizes Bragwaine is missing, she is deeply distressed. She later goes alone into the forest to grieve at a well, where Palamides approaches after hearing her lament. He offers to return Bragwaine safely if Isolde grants him a request; relieved, she agrees before learning what he will ask. Palamides retrieves Bragwaine from the nunnery, although Bragwaine is unwilling to return because her loyalty to Isolde had put her life at risk. The wedding chapter thus closes its central celebration by showing how private attachment, jealousy, danger, and obligation continue to shape the relationships around the new marriage.
Event 71
Palamides claims Isolde and Tristram rescues her
[Palamides claims Isolde and Tristram rescues her](entity:event-recall-event-palamides-claims-isolde-049a76163876) is an episode in which a promised boon turns a rescue into a contested claim over Queen Isolde. [Sir Palamides](entity:character-recall-character-sir-palamides-07dff0dd5cb8) fulfills his promise to bring [Bragwaine](entity:character-recall-character-bragwaine-bc0b50922ef5) back, then asks to take Isolde away; her husband, [King Mark](entity:character-recall-character-king-mark-7cea1086241a), rules that she must honor her freely granted pledge. With [Sir Tristram](entity:character-recall-character-sir-tristram-58eb12b2af0e) absent, others attempt to protect her, until [Tristram](entity:character-recall-character-tristram-a0b006f42abd) returns and the rivalry is settled not by victory but at Isolde’s request. Her final command sends [Palamides](entity:character-recall-character-palamides-9a6f200e4d74) away, while her message to [Queen Guenever](entity:character-recall-character-queen-guenever-f27d6f31454b) places the episode within the book’s wider pattern of courtly love.
## The Promise and Its Terms
Isolde’s promise begins in relief and gratitude. Two ladies, acting from hatred and envy, had arranged for Bragwaine to be bound to a tree in the forest, where she remained for three days. Sir Palamides found and freed her, taking her to a nearby nunnery to recover. When Isolde went alone into the forest to ease her troubled thoughts, she came to a well and lamented Bragwaine’s loss. Palamides appeared, having heard her complaint, and offered to return Bragwaine safely if Isolde granted him whatever boon he asked.
Overjoyed at the prospect of seeing her companion again, Isolde promised before considering what the request might be. Palamides quickly brought Bragwaine back from the nunnery. Bragwaine had not wished to return, since her love for Isolde had put her life at risk, but she came with Palamides despite her reluctance. Once Isolde had welcomed her, Palamides reminded the queen of her pledge. He did not immediately disclose his desire; instead, he said he would make it known before her husband.
At court, Palamides asked King Mark to judge the matter. Isolde confirmed that she had promised to grant Palamides’ request, explaining that she had done so in her joy at Bragwaine’s return. [Mark](entity:character-recall-character-mark-cfbb20016049) ruled that she must keep her word. Palamides then named his boon: he would take the queen away and govern her where he pleased. The exchange makes the scene turn on the weight of a promise: Isolde’s spontaneous gratitude becomes an obligation, and Mark’s judgment gives that obligation public and political force.
## The Interrupted Departure
Mark expected that Tristram might rescue Isolde, but Tristram was away hunting in the forest, as was his custom when he was not occupied with arms. Mark lamented that, by his own decision, his queen was now exposed to danger. Sir Lambegus, a knight of Tristram’s, offered to pursue Palamides in his lord’s place. Mark thanked him and promised to reward his service if he lived.
Lambegus caught up with Palamides, who left Isolde and challenged the approaching knight. When Lambegus identified himself as Tristram’s servant, Palamides said he would rather have faced Tristram. They fought, and Palamides wounded Lambegus so severely that he fell as if dead. Palamides looked for Isolde, but she had disappeared. She had run into the forest and reached a well, where she considered drowning herself rather than remain in the situation created by the claim.
Sir Adtherp, whose castle stood nearby, found Isolde and brought her to safety. Once he learned who she was, he armed himself and rode out to confront Palamides. Palamides wounded him too, then compelled him to explain why he had challenged him and where the queen had gone. Adtherp told him that Isolde was in his castle. Palamides rode there, but Isolde saw him from a window and ordered the gates shut. Unable to enter, he removed his bridle and saddle, turned his horse out to pasture, and sat at the gate in a state of distraction.
## Tristram’s Intervention
When Tristram returned and learned that Palamides had taken Isolde away, he was furious and ashamed. He hurried to arm himself, convinced that Lambegus could not withstand Palamides. On the way, he found Lambegus gravely wounded and entrusted him to a forester’s care. He then met the wounded Adtherp, who explained that he had rescued Isolde when she was about to drown herself and had brought her to his castle. Tristram thanked him and continued there.
Tristram found Palamides sitting asleep, or so deeply absorbed that he did not respond when [Gouvernail](entity:character-recall-character-gouvernail-3c5afbc5aabe) first called to him. At Tristram’s command, Gouvernail returned and told Palamides that his mortal enemy was there. Palamides rose without speaking, prepared his horse and arms, and met Tristram in combat. Tristram unhorsed him at the first encounter, but Palamides recovered and drew his sword. The two fought fiercely for Isolde’s love, while she watched from the castle wall. Their battle continued for more than two hours, and both were badly hurt, Palamides more seriously.
Isolde asked Tristram to stop. She loved Tristram, she said, but felt pity for Palamides and did not want him to die unbaptized, as a Saracen. Tristram asked whether she meant for him to accept shame, but acknowledged that he would be ruled by her. Isolde answered that she did not wish to dishonor him; she wanted him to spare Palamides. Tristram yielded and ended the fighting for her sake. The contest’s resolution therefore comes through Isolde’s intervention, not through the defeat of one lover by the other.
## Exile, Return, and Wider Significance
Isolde then ordered Palamides to leave the country for as long as she remained there. He accepted the command reluctantly. She directed him to go to [King Arthur](entity:character-recall-character-king-arthur-2b97864f54aa)’s court and give Queen Guenever a message: there were only four lovers in the land, [Sir Launcelot and Queen Guenever](entity:relation-recall-relation-sir-launcelot-and-qu-4dd1e991acf3), and Sir Tristram and Queen Isolde. The message places the two couples side by side, linking the private contest over Isolde to a broader pattern of love that crosses the ordinary boundaries of court and marriage.
Palamides departed sorrowfully, and Tristram brought Isolde back to King Mark. Her return was welcomed with great joy, and Tristram was cherished. Lambegus, whom Tristram had left with a forester, eventually recovered, though it took a long time. The rescue restores Isolde to Mark’s court and repairs the immediate danger, but it does not settle the deeper conflict. The subsequent account says that Sir Andred watched for a chance to catch Tristram and Isolde together and slander them. After he reported seeing them talking at a window, Mark confronted Tristram; Tristram disarmed him, then left for the forest. The return, then, closes Palamides’ claim but leaves the lovers’ attachment exposed to renewed suspicion and hostility.
The episode brings together several competing forms of obligation: a promise made in gratitude, a king’s judgment that the promise must be kept, the duty of Tristram’s knight to intervene, and Isolde’s authority to stop the duel. Palamides’ rescue of Bragwaine earns him a boon, but does not make Isolde’s removal uncontested; Lambegus, Adtherp, and finally Tristram each stand between his claim and its fulfillment. At the decisive moment, Isolde’s compassion for Palamides and concern for his unbaptized state redirect a contest driven by rivalry toward restraint. The reprieve is temporary: Palamides must leave, the queen returns to Mark, and suspicion soon resumes.
Event 72
The magic horn ordeal at King Mark's court
[The magic horn ordeal at King Mark's court](entity:event-recall-event-the-magic-horn-ordeal-a-9b18eb50fe22) is a public test of marital fidelity whose apparent verdict turns into a source of strife. Sent by [Morgan le Fay](entity:character-recall-character-morgan-le-fay-5476b1a672cb) and delivered to [King Mark](entity:character-recall-character-king-mark-7cea1086241a) at [Sir Lamorak](entity:character-recall-character-sir-lamorak-6fa764f44bdb)’s instigation, the horn is used to test Queen [Isoud](entity:character-recall-character-isoud-45c23b134f96) and a hundred other women; its result raises the threat of punishment, but the barons challenge the test’s authority and prevent the episode from becoming a straightforward judgment of guilt.
## The horn and its purpose
A knight carrying a fair horn mounted with gold is on his way from Morgan le Fay to [King Arthur](entity:character-recall-character-king-arthur-2b97864f54aa) when Sir Lamorak intercepts him. The horn is said to have a special virtue: a woman who is false to her husband will spill its drink, while a faithful woman can drink without mishap. The account identifies the device’s stated rule, but also makes clear that it is presented as a magical test, not as ordinary testimony or a formal legal proceeding.
Sir Lamorak forces the messenger to explain why he carries the horn. He then orders him to take it to King Mark and present it as a way to test the king’s lady. Sir Lamorak’s stated purpose is to affront King Mark and [Sir Tristram](entity:character-recall-character-sir-tristram-58eb12b2af0e): the challenge is directed at [Mark](entity:character-recall-character-mark-cfbb20016049)’s marriage, but it is also expressly made in despite of Sir Tristram. Thus the ordeal enters the court already entangled in hostility between knights, rather than as a neutral inquiry.
## Queen Isoud is tested
The messenger delivers the horn to King Mark and explains its supposed power. Mark makes Queen Isoud drink, along with a hundred ladies. The account reports that only four of the women drink cleanly. The narrative gives this as the horn’s outcome, but does not identify those four or independently establish the truth of the accusations implied by the result.
King Mark responds with anger and swears that Queen Isoud and the other women should be burned. The dramatic turn is from a test that claims to expose fidelity to a threat of severe punishment based on the test’s result. The episode supplies no separate evidence or hearing that would verify the horn’s verdict; its authority rests entirely on the magical property claimed for it.
## The barons reject the verdict’s authority
The barons gather and state that they will not allow the women to be burned on the evidence of a horn made by sorcery. They condemn its source as well, describing Morgan le Fay as a sorceress and witch, and argue that the horn has done no good but has caused strife and debate. Their response blocks the move from apparent failure at the test to punishment: they dispute the instrument itself, not simply the severity of Mark’s proposed sentence.
Their opposition turns the ordeal into a conflict about how judgment should be made. The horn purports to make private marital fidelity publicly legible, yet the court’s response stresses that a device attributed to sorcery cannot justify condemning the women. The passage records the barons’ resistance and their hostility toward Morgan le Fay, but does not describe a final judicial ruling or a punishment carried out against the women.
## Wider consequences in the court
Sir Tristram is angry with Sir Lamorak because he recognizes the horn as an act of spite against him. The ordeal therefore sharpens an existing personal rivalry while placing Queen Isoud and the other women at risk. In the same sequence, Sir Andred watches Sir Tristram’s visits to Queen Isoud; he gathers twelve knights, takes [Tristram](entity:character-recall-character-tristram-a0b006f42abd) with her, and, with King Mark’s agreement, has him bound and led toward judgment at a chapel by the sea. The ordeal’s immediate political and personal atmosphere is thus one of suspicion and escalating hostility, even though the passage does not say the horn alone caused Tristram’s capture.
The horn’s consequence is less the establishment of truth than the exposure of competing claims to authority. Morgan le Fay’s device asserts that fidelity can be tested by magic; King Mark treats its result as grounds for punishment; and the barons refuse to accept that result as a sound basis for burning the women. At the same time, Sir Lamorak’s deliberate insult intensifies the conflict among the court’s knights, tying a supposed test of marriage to the rivalries surrounding Queen Isoud and Sir Tristram.
Event 73
Tristram's capture and escape from Cornwall
[Tristram's capture and escape from Cornwall](entity:event-recall-event-tristram-s-capture-and-f4966bb3e8db) is a reversal from exposure and apparent execution to a precarious escape, followed by the rescue of [La Beale Isoud](entity:character-recall-character-881eb87025df) and a renewed separation. The episode turns on his physical resourcefulness, but it does not secure the lovers' freedom: [King Mark](entity:character-recall-character-king-mark-7cea1086241a) recaptures [Isoud](entity:character-recall-character-isoud-45c23b134f96), and [Tristram](entity:character-recall-character-tristram-a0b006f42abd)'s poisoned wound carries the story onward to Brittany.
## Capture and Judgment
Sir Andred, Tristram's cousin, watches for the moment Tristram visits La Beale Isoud. He recruits twelve knights and surprises the couple; Tristram is seized and bound hand and foot. With King Mark's agreement, Andred and some of the barons have him taken under guard by forty knights to a chapel on the sea rocks, where he is to receive judgment.
Facing what seems an unavoidable death, Tristram appeals to the knights' sense of obligation. He reminds them that he fought [Sir Marhaus](entity:character-recall-character-sir-marhaus-1bd99ec8e2d9) over [Cornwall](entity:location-recall-location-cornwall-5562c2fa740e)'s tribute when they had all refused the battle, and argues that allowing him to die in this manner would bring shame upon knighthood. Andred rejects his appeal and calls him a traitor. Tristram answers that Andred is his kinsman, yet has become his enemy; he also insists that, if they were alone, Andred would not dare put him to death. The family bond, invoked as a reason for restraint, instead sharpens the betrayal.
## Escape from the Chapel
When Andred draws his sword to kill him, Tristram pulls his bound hands toward himself and frees them from the two knights holding him. He seizes Andred's sword, knocks Andred down, and fights until he has killed ten of the knights. The violence breaks the immediate attempt to execute him, but it cannot hold back the much larger crowd gathering in support of Andred.
Tristram reaches the chapel and defends it, then recognizes that he is unarmed and that more than a hundred people are drawing near. He shuts the chapel door, breaks the bars of a window, and leaps out onto the sea crags. Andred and his followers cannot reach him there. The escape is a change in circumstance, not a settled victory: Tristram has evaded the crowd, but remains exposed and apart from his companions.
## Isoud's Rescue and Recapture
[Gouvernail](entity:character-recall-character-gouvernail-3c5afbc5aabe), Sir Lambegus, and Sir Sentraille de Lushon search for their master. On learning that he has escaped, they find him on the rocks and pull him up with towels. Tristram immediately asks where Isoud is, fearing Andred's people have taken her away. Gouvernail tells him that she has been placed in a lazar-house, and Tristram resolves not to leave her there. With his men, he takes her away and brings her to a manor in the forest.
Tristram sends his other men away, and only Gouvernail remains with him. During this period, an unnamed man whose brother Tristram had previously killed finds Tristram asleep in the forest and shoots him through the shoulder with an arrow. Tristram wakes and kills the attacker. Meanwhile, word reaches King Mark that Tristram and Isoud are at the manor. [Mark](entity:character-recall-character-mark-cfbb20016049) arrives with many knights, but Tristram has already gone. Mark takes Isoud home and keeps her so strictly that neither she nor Tristram can send word to the other. The rescue therefore restores their immediate companionship only briefly; Mark's intervention reimposes separation.
## The Wound and the Journey to Brittany
Returning to the old manor, Tristram sees the tracks of many horses and understands that Isoud has been taken. He suffers deeply at her loss, while the arrow wound causes prolonged pain because it is poisoned. Isoud, though held apart from him, finds a means to send help: through a lady related to [Dame Bragwaine](entity:character-recall-character-dame-bragwaine-83330d563117), she tells Tristram that she cannot heal him and directs him to [King Howel of Brittany](entity:character-recall-character-king-howel-of-britt-d5916518df61), whose daughter [Isoud la Blanche Mains](entity:character-recall-character-isoud-la-blanche-ma-b1e013685f2f) can.
Tristram and Gouvernail secure a ship and sail to Brittany. King Howel welcomes Tristram when he learns who his visitor is. Tristram explains that he has come for his daughter's help, having been told that she alone can heal him; Isoud la Blanche Mains does so. The episode thus ends with the wound treated and Tristram received at a new court, while La Beale Isoud remains in Cornwall under King Mark's control.
## Narrative Significance
The sequence makes rescue and reversal inseparable. Tristram escapes a judgment arranged by his own king and kin, then uses his freedom to recover Isoud; almost at once, the lovers are separated again. His appeal to the knights' memory of his service for Cornwall fails to change their course, while his own combat skill succeeds only long enough to create an opening for escape.
The movement from the sea-rock chapel to the forest manor and then across the sea to Brittany also changes the form of the danger. First Tristram faces a public execution, then a sudden attack and a poisoned wound, and finally the enforced loss of contact with Isoud. The ending resolves the immediate physical crisis through healing, but not the conflict that began with their discovery: Tristram's departure gives him a way to recover, while Mark's confinement of Isoud leaves their separation in place.
Event 74
Tristram's marriage to Isolde of the White Hands
[Tristram](entity:character-recall-character-tristram-a0b006f42abd)’s marriage to [Isoud la Blanche Mains](entity:character-recall-character-isoud-la-blanche-ma-b1e013685f2f) is a turning point shaped by separation, healing, and divided allegiance. After an envenomed wound leaves him unable to recover, he sails to Brittany at [La Beale Isoud](entity:character-recall-character-881eb87025df)’s urging and is healed by King Howel’s daughter. He then fights for her father, marries her, and faces the judgment of [Arthur](entity:character-recall-character-arthur-2e33b65bbe57)’s court: [Launcelot](entity:character-recall-character-launcelot-0b02a99ce6f7) treats the marriage as a betrayal of Tristram’s first lady and ends their friendship. The episode makes a political and personal bond out of gratitude, while exposing the cost of Tristram’s unresolved attachment to La Beale Isoud.
## Wound, Separation, and the Journey to Brittany
The marriage grows out of Tristram’s separation from La Beale Isoud. After an adversary shoots him with an envenomed arrow, [King Mark](entity:character-recall-character-king-mark-7cea1086241a) takes her away and keeps her under close guard, preventing communication between the two. Tristram returns to their manor, finds signs that many horses have been there, and understands that she is gone. His wound continues to trouble him, so both the loss of his lady and the need for a cure shape what follows.
Through La Beale Isoud’s intervention, a woman related to [Dame Bragwaine](entity:character-recall-character-dame-bragwaine-83330d563117) brings Tristram news of a possible remedy: he must go to Brittany, where Isoud la Blanche Mains can heal him. Tristram and [Gouvernail](entity:character-recall-character-gouvernail-3c5afbc5aabe) take ship. King Howel welcomes the injured knight, and his daughter heals him. The journey therefore offers a practical answer to Tristram’s immediate need, but brings him into the household and affections of another woman while he remains separated from the first.
## Service to King Howel
Tristram’s connection to Brittany deepens when King Howel faces war with Earl Grip. The earl has put the king at a disadvantage and besieged him; Howel’s son, [Sir Kehydius](entity:character-recall-character-sir-kehydius-eadeffaa851f), is too badly wounded to take the field. Gouvernail advises the king to seek Tristram’s help, and Tristram agrees to fight in the king’s need.
He rides out with what company he can gather, kills Earl Grip, and kills more than a hundred knights in the battle. His service earns him a public welcome: King Howel receives him with honor and offers to resign the whole kingdom to him. Tristram refuses the offer, explaining that he is already indebted to the king because of his daughter. His refusal frames the marriage that follows within an exchange of care and service: Howel’s household has healed and welcomed him, and Tristram has answered the king’s military need.
## The Marriage and Its Divided Allegiance
Through the efforts of King Howel and his son Kehydius, and amid substantial offers, affection grows between Tristram and Isoud la Blanche Mains, whom the account describes as noble-born and renowned. Tristram has received hospitality, wealth, and other pleasures in Brittany; he nearly forsakes La Beale Isoud. He eventually agrees to marry Isoud la Blanche Mains, and they celebrate the marriage solemnly.
The narrative sets this marriage against Tristram’s existing attachment rather than presenting it as a clean beginning. He has been driven from La Beale Isoud by separation and injury, but the report of his marriage will be understood at court through his prior bond to her. The account does not describe how the marriage develops; it establishes instead that Tristram makes the choice while the first attachment remains a measure by which others judge him.
## Launcelot’s Judgment and the Aftermath
A knight named Suppinabiles brings the news of Tristram’s marriage to Arthur’s court, where he meets Launcelot. Launcelot condemns Tristram for being untrue to La Beale Isoud, whom he identifies as queen of [Cornwall](entity:location-recall-location-cornwall-5562c2fa740e). He tells Suppinabiles that he had loved Tristram more than any other knight and had taken joy in his noble deeds, but that their love is finished; from then on, he will regard Tristram as a mortal enemy.
When Suppinabiles returns to Brittany and reports this judgment, Tristram says that he regrets it, because he had most wanted Launcelot’s fellowship. He is distressed and ashamed that noble knights will defame him on account of his lady. The marriage thus carries consequences beyond the new household: it damages a treasured friendship and alters Tristram’s standing among Arthur’s knights. The episode’s closing emphasis is not on a resolution between the two women or on the future of the marriage, but on Tristram’s awareness that his choice has cost him the companionship he valued.
Event 75
The liberation of the Isle of Servage
[The liberation of the Isle of Servage](entity:event-recall-event-the-liberation-of-the-i-4adcb8120441) turns a shipwreck into a transfer of power. [Sir Tristram](entity:character-recall-character-sir-tristram-58eb12b2af0e), arriving with his wife [Isoud la Blanche Mains](entity:character-recall-character-isoud-la-blanche-ma-b1e013685f2f) and [Sir Kehydius](entity:character-recall-character-sir-kehydius-eadeffaa851f), finds the island governed by Sir Nabon, a lord whose domain is known for imprisoning or killing the knights who enter it. [Tristram](entity:character-recall-character-tristram-a0b006f42abd) defeats Nabon, rejects the offer to rule in his place, and helps bring about the release of prisoners and a new government under [Sir Segwarides](entity:character-recall-character-sir-segwarides-e18b7239f604). The episode’s resolution depends not only on victory in combat but on the victor’s choice not to claim the territory for himself.
## Arrival and the Island’s Peril
While taking a small barge along the coast, Tristram, Isoud la Blanche Mains, and her brother Kehydius are driven by the wind to the [Isle of Servage](entity:location-recall-location-4393c5a120c7) in [Wales](entity:location-recall-location-6d9a7b286e78). The barge is wrecked, and [Isoud](entity:character-recall-character-isoud-45c23b134f96) is hurt. The party makes its way into the forest, where Tristram encounters Sir Segwarides and a damsel. Segwarides recognizes him and admits that Tristram had given him cause for resentment by separating him from his wife. He nevertheless sets that grievance aside: he will not hate a noble knight over a lady he calls light, and offers to help Tristram because both are in danger.
A woman born in [Cornwall](entity:location-recall-location-cornwall-5562c2fa740e) explains the island’s threat: knights who come there are captured or killed. Tristram answers by declaring his identity and naming earlier deeds that establish his reputation, including slaying [Sir Marhaus](entity:character-recall-character-sir-marhaus-1bd99ec8e2d9), freeing Cornwall from [Ireland](entity:location-recall-location-ireland-3247a2c8bcbe)’s tribute, and defeating [Sir Palamides](entity:character-recall-character-sir-palamides-07dff0dd5cb8). He promises to deliver the island. His confidence is not merely a claim to fame; it places the coming fight within a wider record of service and makes the island’s liberation the objective of his arrival.
## Tristram and [Lamorak](entity:character-recall-character-lamorak-9d86b1c9a151) Meet
Tristram learns that another knight of [King Arthur](entity:character-recall-character-king-arthur-2b97864f54aa)’s company has been shipwrecked on the island. The stranger is brought to the lady’s lodging dressed as a fisherman. Tristram recognizes [Sir Lamorak](entity:character-recall-character-sir-lamorak-6fa764f44bdb), though Lamorak does not recognize him. Lamorak gives his name only after asking whether Tristram is Nabon, the island’s lord. Tristram replies that he is Nabon’s enemy and does not hold land from him. Lamorak then identifies himself as the son of [King Pellinore](entity:character-recall-character-king-pellinore-3c458d75379d).
Their meeting gives the island’s crisis a second strand: the two knights have a history of conflict, but the immediate danger makes cooperation necessary. Lamorak recalls that Tristram once brought him down and later refused to fight him on foot. Tristram denies that fear was the reason. The encounter thus reopens an earlier rivalry even as they discover that they share an enemy. Lamorak’s position is especially precarious: Nabon’s people hold him and his companions under their power, and his earlier illness has left him weakened.
## The Challenge and Nabon’s Defeat
Nabon summons the island’s people to his castle for the fifth day, when his son is to be made a knight and a gathering of knights is to joust. Five hundred knights assemble. Lamorak is brought there with Tristram, Kehydius, and Segwarides, since Nabon’s people dare not do otherwise. Nabon lends Lamorak a horse and armour at his request. Despite his weakness, Lamorak performs so impressively that he unhorses most of the five hundred knights; the account singles out the scale of his achievement before turning from the tournament to the decisive contest.
Nabon offers to fight Lamorak, but Lamorak is weary and bruised. Nabon kills Lamorak’s horse rather than meet him in the mounted encounter, and Lamorak continues on foot until Nabon pauses the fight. Acknowledging the knight’s prowess, Nabon offers him courtesy and asks whether any of his companions will take up the challenge. Tristram steps forward, asks for a horse and reliable armour, and arms himself in the pavilion. He understands that Nabon will attack horses rather than face a spear thrust, so he chooses to fight on foot.
The two fight on foot for a long time. Nabon eventually asks his opponent’s name, and Tristram identifies himself as a knight of Cornwall serving [King Mark](entity:character-recall-character-king-mark-7cea1086241a). Nabon welcomes the opportunity, saying that he had most wanted to fight Tristram or [Sir Launcelot](entity:character-recall-character-sir-launcelot-c0ea01c62d3d). They engage again, and Tristram kills Nabon. He then kills Nabon’s son. With Nabon and his heir dead, the people of the island say that they will hold of Tristram: the battle has opened the way to a new ruler, but does not determine that Tristram himself must take it.
## Settlement and Aftermath
Tristram refuses the island when its people offer it to him. Instead, he proposes Sir Lamorak, who has already demonstrated his prowess in the tournament. Lamorak also declines, saying that he has not earned the lordship as well as Tristram. When neither knight will accept, Tristram suggests giving the island to someone who has not performed as much. They settle on Sir Segwarides, who accepts the gift, becomes lord, and governs the island. He releases all the prisoners and establishes good governance in the valley.
The episode therefore makes the distribution of power part of the victory. Tristram’s defeat of Nabon removes the ruler who had made the island dangerous; his refusal to possess the territory prevents liberation from becoming a simple exchange of masters. Lamorak’s renown is recognized without being converted into a claim, while Segwarides receives authority and puts the change into practice by freeing the captives. The newly appointed lord later returns to Cornwall and tells [King Mark and La Beale Isoud](entity:relation-recall-relation-king-mark-and-la-bea-99cd0cc79e59) of Tristram’s advancement of him, making the island’s political settlement known beyond its shores. The news also causes [La Beale Isoud](entity:character-recall-character-881eb87025df) sorrow because she learns that Tristram is married to Isoud la Blanche Mains, a personal consequence that follows the public account of the victory.
Event 76
Arthur's rescue from Annowre
[Arthur's rescue from Annowre](entity:event-recall-event-arthur-s-rescue-from-an-be319088c5ee) turns a planned killing in the [Forest Perilous](entity:location-recall-location-6711bcdc8022) into a rescue by [Sir Tristram](entity:character-recall-character-sir-tristram-58eb12b2af0e) and the [Lady of the Lake](entity:character-recall-character-lady-of-the-lake-afb8b77d3497), [Nimue](entity:character-recall-character-nimue-ff0b672503ec). [Annowre](entity:character-recall-character-annowre-05428577a498) lures [King Arthur](entity:character-recall-character-king-arthur-2b97864f54aa) into the forest and arranges for him to be killed after he refuses her demand for his love. Nimue recognizes the danger, finds [Tristram](entity:character-recall-character-tristram-a0b006f42abd), and directs him to the king; together they interrupt the attack. [Arthur](entity:character-recall-character-arthur-2e33b65bbe57) survives, Annowre is killed, and Tristram departs without revealing who he is. The episode makes Arthur's vulnerability—and his dependence on help from outside his immediate company—central to the adventure.
## Annowre's Design
The account begins at [Cardiff](entity:location-recall-location-3c79e72aefef), where Annowre approaches Arthur with fair promises and inducements and persuades him to ride with her into the Forest Perilous, in [North Wales](entity:location-recall-location-3df16a26c9ed). She is described as a powerful sorceress who has loved Arthur for many days. Once she has brought him to her tower, she asks him to love her. Arthur remembers his lady and refuses, despite Annowre's powers. Her aim then shifts from winning him to destroying him: she repeatedly sends him riding in the forest with his own knights in order to bring about his death.
This sequence gives the rescue its cause. Arthur's refusal is the immediate turning point, while Annowre's control of the route and the repeated rides make the danger deliberate rather than accidental. The forest, introduced as a place into which the king is enticed, becomes the setting for an attempted killing arranged by someone who has gained access to him through apparent favour.
## Nimue Finds Tristram
Arthur's knights, including [Sir Launcelot](entity:character-recall-character-sir-launcelot-c0ea01c62d3d) and [Sir Brandiles](entity:character-recall-character-sir-brandiles-e9a5dfae5cac), follow after they notice that he is missing. Nimue, however, acts on knowledge the others do not possess: through her subtle craft, she understands that Arthur is in danger. She comes into the forest seeking either Sir Launcelot or Sir Tristram, knowing that the king will be slain that day unless one of the two helps him.
Nimue meets Tristram and addresses him as the knight who can intervene. She warns that within two hours an exceptionally grave deed will be done, and tells him that a noble knight is in dire need. When Tristram asks whether he can remedy the danger, she names Arthur. Tristram immediately agrees to help. Nimue thus serves as the messenger who recognizes the hidden crisis and connects the threatened king with the rescuer able to reach him in time.
## The Attack and Rescue
Nimue and Tristram ride at speed to a small turret or castle. Beneath it, they see Arthur on foot, fighting two knights. The two attackers bring him down, and one prepares to finish the assault. At the same moment, Annowre has Arthur's sword in her hand and is about to strike him. Tristram arrives crying out against the [treachery](entity:concept-recall-concept-22ce6e5d8b9f), strikes one knight through the body, and then attacks the second, defeating both. His intervention ends the immediate threat; Arthur himself pursues Annowre and kills her with the same sword.
The rescue reverses the danger in a few linked actions: Nimue's warning gets Tristram to the scene, his attack prevents the two knights from killing Arthur, and Arthur is able to act against Annowre once the assault is broken. The episode's outcome is not merely the king's survival. The plotters' arrangement is defeated, and the woman who engineered it does not escape.
## An Unnamed Rescuer
Afterward, Tristram helps Arthur onto his horse and rides with him. Arthur thanks him and asks his name, but Tristram will identify himself only as a poor knight adventuring. He remains Arthur's companion until they meet [Sir Ector de Maris](entity:character-recall-character-3847e8e21d1c), who does not recognize either man and challenges one of them to joust. Tristram rides against [Ector](entity:character-recall-character-ector-8f00ddc6c029) and unhorses him; he then returns to Arthur and says that the king's knight can now keep him company. He adds that, by what he has done for Arthur, the king may understand on another day that he is willing to serve him.
Even after Arthur asks again to know who he is, Tristram keeps his identity secret. He then leaves, separating the service he has rendered from any immediate recognition or reward. The episode consequently gives the rescue a second, quieter conclusion: Arthur is safe, but the rescuer's name remains undisclosed, and his promise of future service is left for another day.
Event 77
La Cote Male Taile's adventure of the black shield
La Cote Male Taile’s adventure of the black shield is the testing and recognition of [Breunor le Noire](entity:character-recall-character-breunor-le-noire-9d9c8b94cd9e), a young knight who accepts an adventure that the assembled knights at [Arthur](entity:character-recall-character-arthur-2e33b65bbe57)’s court will not undertake. The black shield, the torn coat inherited from his murdered father, and [Kay](entity:character-recall-character-kay-2946c1889f8a)’s mocking name all place him under judgment before his prowess is known. His progress is neither an uninterrupted string of victories nor a simple vindication: he is repeatedly thrown from his horse and ridiculed, but persists, fights his way through danger, and eventually receives a lordship, a place at the [Round Table](entity:object-recall-object-round-table-04fef19b82fd), and [Maledisant](entity:character-recall-character-maledisant-d0136a88bca5)’s hand in marriage.
## Identity and the call of the shield
Breunor arrives at Arthur’s court asking to be made a knight. He is strongly built and richly dressed, but his gold-cloth outer garment hangs awry. When Arthur asks about it, Breunor explains that it belonged to his father, a noble knight whom an enemy killed while he slept. Breunor found the coat as it was after the attack and wears it unrepaired in remembrance, declaring that he will keep it until he has avenged his father. He gives his name and says he has come to Arthur, whom he regards as the world’s noblest king, to seek knighthood.
Kay, Arthur’s seneschal, makes the coat a public joke by naming its wearer La Cote Male Taile, the evil-shaped coat. Breunor does not reject the insult. After Arthur knights him, he asks the king and court to call him by that name because Kay gave it to him. The choice binds his new identity to the visible sign of his father’s death, but also shows that the name need not remain Kay’s instrument of mockery: Breunor takes it on deliberately.
The adventure begins when a damsel arrives bearing a great black shield. In its centre, a white hand holds a sword; there is no other device. She explains that the shield’s former owner had undertaken an arduous deed of arms, then fought another powerful knight until both were badly wounded and the battle ended without a victor. Believing he would die, the shield’s owner sent her to Arthur’s court to ask that a worthy knight take up and complete his quest. Arthur asks whether anyone will bear the shield, but the knights remain silent. Kay takes it only to inspect it; the damsel tells him it is not meant for him and that its bearer must be a better knight.
Breunor volunteers, saying that this is the first adventure he has undertaken since being made a knight and that he will accept it if he can learn where the journey leads. The damsel warns that the adventure will leave him as battered as his coat. He replies that, if he is injured, he will not ask her for a remedy. Arthur would rather he did not take so hard an adventure, but Breunor insists that it is his and that he will pursue it whatever happens. Once equipped with horse, armour, and spears, he follows the damsel; when he catches up, she immediately rebukes him.
## Early trials and public contempt
Kay sends Dagonet, Arthur’s fool, after Breunor, having him armed and mounted to challenge the new knight. Breunor knocks Dagonet over his horse’s rump. Rather than treating this as a promising first success, the damsel uses the encounter to shame him: she says that Arthur’s court has sent a fool to face him at his first joust. Her scorn becomes a running test alongside the physical challenges of the quest.
Bleoberis soon unhorses Breunor, and Breunor rises ready to continue the fight on foot. Bleoberis declines to fight him that way. The damsel, Maledisant, tells Breunor to turn back and calls him a coward. He asks her for mercy, saying that the defeat itself is enough without further abuse; he does not consider himself dishonoured merely because he fell to Bleoberis. Two days later, [Palamides](entity:character-recall-character-palamides-9a6f200e4d74) likewise unhorses him. Maledisant again mocks him, saying he cannot withstand a knight’s blow except when facing Dagonet. Breunor answers that a fall from Palamides does not make him a worse knight, and notes that neither Palamides nor Bleoberis would dismount to fight him on foot. The narrative thus distinguishes repeated defeat from a settled verdict on his capacity: Breunor is outmatched in these encounters, but does not confuse losing a joust with having no worth.
[Mordred](entity:character-recall-character-431d80a88894) joins the travelling company. At [Castle Orgulous](entity:location-recall-location-12b274cfbcfc), the custom is that a knight must joust with the defenders, become a prisoner, or lose his horse and armour. One defender knocks Mordred from his horse. Breunor then jousts with the other, and both fall; each takes the other’s horse. Breunor turns against the knight who defeated Mordred, wounds him severely, and drives him from his horse. He then pursues the other defender into the castle and kills him. The passage marks a change in the pattern of his journey: after being repeatedly put down by celebrated knights, he acts decisively against the castle’s armed resistance.
## The hundred knights and Lancelot’s intervention
The account next places Breunor inside Castle Orgulous, where a hundred knights surround and attack him. When he sees that his horse is in danger, he dismounts, puts the bridle beneath his feet, and sends the horse out through the gate. He then fights with his back against the wall of a lady’s chamber. The narration emphasizes his choice to remain and face the attackers rather than abandon the encounter; he would rather die honourably than endure Maledisant’s rebukes. The lady slips out through a postern, finds his horse, ties it there, and returns to her chamber to watch him. From a window behind him she tells him that he fights remarkably well, while warning that he must eventually die unless he can use his prowess to escape. Her intervention offers a possible way out, but the surviving account here does not give the full resolution of this confrontation.
Lancelot later hears at Arthur’s court that Breunor has slain a lion and accepted the black-shield adventure, which is described as the world’s hardest adventure. He objects that the established knights have allowed so young a knight to undertake something apparently meant for his destruction, and rides after him. Lancelot also explains the shield’s history: Maledisant has carried it for a long time in search of the most proven knights; Breuse Saunce Pite took it from her, and [Tristram](entity:character-recall-character-tristram-a0b006f42abd) recovered it from him and returned it to her. The shield’s journey therefore links Breunor’s trial to earlier tests of knightly reputation, rather than making it an isolated challenge.
After seven days Lancelot catches up with Breunor and Maledisant. Mordred leaves their company when he sees Lancelot. As they ride together, Maledisant continues to rebuke Breunor, and Lancelot answers on his behalf until she turns her insults on Lancelot instead. When Lancelot learns that a knight of the Round Table has been taken prisoner at [Castle Pendragon](entity:location-recall-location-6c17cfe40358), he identifies Breunor as his fellow and declares that he will rescue him or lose his life in the attempt. He rides to the castle, defeats its six attacking knights, and then overcomes its lord, Brian de les Isles. Brian yields; Lancelot requires him to release the prisoners held within the castle. The rescue establishes that Breunor’s adventure has drawn him into a wider network of obligation among Arthur’s knights, and that Lancelot’s aid is an act of fellowship as well as combat.
## Recognition, lordship, and ending
After the castle’s prisoners are freed, Lancelot’s settlement of its affairs changes Breunor’s position. He removes Brian de les Isles from his lands because Brian will not submit to Arthur, and gives Castle Pendragon and its lands to Breunor. Lancelot also appoints Nerovens, whom he had earlier knighted, to govern the castle and country under Breunor. The young knight’s reward is therefore not only recognition of prowess but authority over a territory, administered through a subordinate appointment.
At the next [Pentecost](entity:time-recall-time-16e2becf2ca1) feast, both Breunor, also called La Cote Male Taile, and Plenorius are made [Knights of the Round Table](entity:character-recall-character-3f167931be46), and Arthur grants them substantial lands. Breunor marries Maledisant, who thereafter is called Beauvivante. He remains more commonly known as La Cote Male Taile, so the nickname that began as Kay’s ridicule survives his elevation. Its meaning has changed through the adventure: it now accompanies the name of a knight acknowledged by Arthur’s court, rather than merely describing a coat that hangs badly.
The conclusion looks beyond the quest itself. Breunor becomes a notably noble and powerful knight and performs many honourable deeds later in life; Plenorius also proves a noble knight. For the most part, both men serve Lancelot throughout their lives, while Plenorius’s brothers remain knights of Arthur. The French book, as Malory reports it, adds that Breunor avenges his father’s death. That final act fulfils the purpose attached to the coat from the moment Breunor entered court: the inherited garment first preserves the memory of an unfinished wrong, while his eventual vengeance brings that personal history to its stated close.
Event 78
Tristram's madness in the forest
[Sir Tristram](entity:character-recall-character-sir-tristram-58eb12b2af0e)’s madness in the forest begins when he discovers that [La Beale Isoud](entity:character-recall-character-881eb87025df) has exchanged letters with [Sir Kehydius](entity:character-recall-character-sir-kehydius-eadeffaa851f), a young knight whom [Tristram](entity:character-recall-character-tristram-a0b006f42abd) had brought into [Cornwall](entity:location-recall-location-cornwall-5562c2fa740e). The discovery turns private heartbreak into public withdrawal: Tristram leaves [Tintagil](entity:location-recall-location-5185f645bc56), refuses food and company, and lives for months in the wilderness, at times playing a harp and weeping. His eventual recognition by La Beale Isoud’s little brachet brings him back into the court’s reach, but also makes concealment impossible. The episode makes grief visible through a series of changes in Tristram’s conduct and appearance, while the harp and brachet preserve links to the life from which he has fled.
## The discovery at Tintagil
[Sir Tristram and La Beale Isoud](entity:relation-recall-relation-sir-tristram-and-la-7d6c6d39f64e) are reunited secretly at [King Mark](entity:character-recall-character-king-mark-7cea1086241a)’s court after Sir Dinas and [Dame Bragwaine](entity:character-recall-character-dame-bragwaine-83330d563117) bring Tristram and Sir Kehydius into a chamber assigned by the queen. Kehydius, who has fallen in love with La Beale Isoud, has sent her letters and ballads; she has answered with a letter intended to comfort him. The two exchanges are private, but their discovery gives Tristram proof that his trust in La Beale Isoud has been broken.
The discovery occurs while King Mark is playing chess beneath the chamber. Tristram finds both Kehydius’s letter and the queen’s reply, confronts La Beale Isoud with them, and turns on Kehydius. He recalls that he brought Kehydius from Brittany and had won the lands of his father, King Howel. He also points to his own marriage to Kehydius’s sister, [Isoud la Blanche Mains](entity:character-recall-character-isoud-la-blanche-ma-b1e013685f2f), as a bond that makes the perceived betrayal especially bitter. La Beale Isoud swoons, while Kehydius escapes by leaping from a window over King Mark’s head and excuses himself by claiming he had fallen asleep there.
## Departure and withdrawal
Fearing discovery at court, Tristram arms himself in the tower and rides openly out of Tintagil once he sees no one will stop him. At the gate he encounters Gingalin, [Sir Gawaine](entity:character-recall-character-sir-gawaine-bf0b0cf3eb43)’s son, who challenges him. Tristram, carrying only a sword, knocks Gingalin from his horse and continues into the forest. King Mark witnesses the encounter and later learns from Gingalin only that the unknown knight was sighing and grieving; the scene establishes that Tristram’s sorrow is apparent even before his identity is known.
Tristram meets Sir Fergus in the forest and falls from his horse in a swoon. He remains overwhelmed for three days and nights. When a damsel sent by [Sir Palamides](entity:character-recall-character-sir-palamides-07dff0dd5cb8) finds him, she reports his condition to Sir Fergus, and La Beale Isoud herself is described as ill in bed with grief. The damsel tries to help Tristram, but her efforts intensify rather than relieve his distress. He repeatedly rides away from her, refuses the food and drink brought to him, and avoids the human company that might restore him to ordinary life.
His retreat lasts first a quarter of a year near a castle whose lady remembers him for his harp-playing. Tristram had taught her to play the instrument, and she sends it to him along with food and drink. At times, when the lady plays, he comes to listen; at other times he plays the harp himself and weeps. The instrument thus becomes a fragile connection to his former identity: music draws him near other people, but does not end his grief. Eventually he disappears again, leaving the lady unable to find him.
## Life among the shepherds
Tristram’s withdrawal becomes a change in his outward life as well as his conduct. Naked and physically diminished, he falls in with herdsmen and shepherds, who give him food and drink. When he behaves badly, they beat him with rods and shear his hair, making him look like a fool. He remains in the forest, avoiding towns and villages, for a period that extends to half a year. The narrative moves from the noble knight’s sudden departure to his dependence on pastoral workers, marking how far he has fallen from the courtly world without suggesting that his skill or former standing has simply vanished.
Even in this altered state, traces of Tristram’s character and abilities remain. When [Sir Dagonet](entity:character-recall-character-sir-dagonet-7fb0bc2509e2), [King Arthur](entity:character-recall-character-king-arthur-2b97864f54aa)’s fool, and his squires stop at a well to drink, their horses break loose. Tristram plunges Dagonet and the squires into the well, then catches the horses and returns them to their riders. The shepherds laugh at the incident. It is an irreverent episode, but it also shows Tristram acting decisively and capably while he continues to live outside settled society.
The same forest contains danger as well as comic encounters. Sir Dinant later tells King Mark that a naked man rescued him from the giant Tauleas at the fountain, describing the rescuer as the mad man of the forest. King Mark goes out with his hunters and finds Tristram lying beside the well with a sword. He orders his knights to approach gently, cover Tristram with mantles, and bring him to Tintagil. There, Tristram is bathed and given hot broth until he recovers his senses. No one at court recognizes him at first, so his return begins under a temporary anonymity that contrasts with his former public identity.
## Recognition and consequence
La Beale Isoud hears that King Mark has brought a wild man from the forest and goes to see him with Dame Bragwaine. She cannot identify him, though she feels she has seen him before. Tristram recognizes her at once, turns his face away, and weeps. Recognition initially runs in only one direction: the man who has lost his place in the court still knows the queen, but the queen cannot yet name the man before her.
The little brachet resolves the uncertainty. La Beale Isoud has kept it since Tristram gave it to her when she first came to Cornwall; it had been sent to Tristram by the king’s daughter of [France](entity:location-recall-location-france-f5cafc8a8ad4). When it catches his scent, it leaps upon him, licks his face, and searches over his hands and body. The animal’s recognition succeeds where La Beale Isoud’s memory has failed. Dame Bragwaine identifies him to the queen, and La Beale Isoud faints before blessing God that Tristram is alive.
The brachet’s fidelity also makes Tristram’s disguise untenable. La Beale Isoud warns him that King Mark will banish or destroy him if he recognizes him, and urges him to accept the king’s will and go to King Arthur’s court, where he is loved. She promises that she will continue to send word and remain at Tristram’s command, even if she must live poorly. Tristram refuses her approach and asks her to leave, saying that he has already escaped great anger and danger for her sake. His return to awareness therefore does not resolve the relationship’s conflict: recognition restores his name, but the letters and their consequences remain between the lovers, and the risk posed by King Mark still shapes what Tristram can do.
Event 79
Tristram's banishment from Cornwall
[Tristram's banishment from Cornwall](entity:event-recall-event-tristram-s-banishment-f-be23f312aba8) is the consequence of [King Mark](entity:character-recall-character-king-mark-7cea1086241a)'s hostility toward the knight whose exploits have repeatedly defended [Cornwall](entity:location-recall-location-cornwall-5562c2fa740e) and served the royal family. When a brachet identifies [Tristram](entity:character-recall-character-tristram-a0b006f42abd) at court, [Mark](entity:character-recall-character-mark-cfbb20016049) calls for his death, but leading barons refuse to assent. Their intervention changes the sentence to ten years' exile. As Tristram departs by ship, he names the deeds for which he believes he has been repaid with banishment, making the episode both a political punishment and a reckoning over loyalty, service, and royal ingratitude.
## Recognition and Sentence
The chapter presents the banishment as a decision reached after Tristram's identity is exposed. The queen departs, but the brachet will not leave Tristram; it sits upon him and bays. Sir Andred interprets this behavior as proof that the armed man is Tristram. King Mark initially refuses to believe him, then asks the knight under oath who he is. Tristram answers truthfully, naming himself [Sir Tristram de Liones](entity:character-recall-character-sir-tristram-de-lio-fb7d532f0a63) and leaving his fate to the king.
Mark regrets that Tristram has recovered and summons his barons to judge him to death. The proposed punishment does not secure their agreement: many will not assent, particularly [Sir Dinas the seneschal](entity:character-recall-character-sir-dinas-the-senes-d96e13cfeb9b) and Sir Fergus. By their counsel, the king and barons impose banishment from Cornwall for ten years instead. Tristram swears to the sentence upon a book before the king and his barons. The oath makes the exile a formal judgment, while the barons' resistance marks a limit on Mark's ability to turn his hostility into an execution.
## Departure with Dinadan
The sentence is carried out at the edge of the kingdom. Tristram is made to leave Cornwall, and barons escort him to his ship. The company is divided: some of those who accompany him are friends, others foes. That mixed escort gives the departure a public, unsettled character; Tristram is expelled under the authority of the court, yet his standing among Cornwall's nobles has not simply disappeared.
[Sir Dinadan](entity:character-recall-character-sir-dinadan-fc57ab74ca1a) arrives while Tristram is armed and on his way to the ship, having come to seek him. Before Tristram leaves the court, Dinadan asks to joust with him. The barons grant permission, and Tristram unhorses Dinadan. Rather than treating the encounter as an obstacle to departure, Tristram welcomes Dinadan into his fellowship when Dinadan asks to ride with him. They take their horses and ride together to their ships, so the sentence separates Tristram from Cornwall but does not leave him without a companion.
## Tristram's Account of Service
Once at sea, Tristram sends a message back to King Mark and his enemies: he will return when he can. His farewell then becomes a carefully itemized protest. He recalls fighting [Sir Marhaus](entity:character-recall-character-sir-marhaus-1bd99ec8e2d9) and delivering the country from servitude; fetching [La Beale Isoud](entity:character-recall-character-881eb87025df) from [Ireland](entity:location-recall-location-ireland-3247a2c8bcbe); and facing danger on the way home, including the effort to bring Queen [Isoud](entity:character-recall-character-isoud-45c23b134f96) back from [Castle Pluere](entity:location-recall-location-4aed5fb63cff). He also cites fighting [Sir Bleoberis](entity:character-recall-character-sir-bleoberis-4991a2970156) for [Sir Segwarides](entity:character-recall-character-sir-segwarides-e18b7239f604)' wife and [Sir Blamor de Ganis](entity:character-recall-character-sir-blamor-de-ganis-b4eacd60fa2d) on behalf of King Anguish, Isoud's father.
The list extends beyond those services. Tristram remembers that he struck down [Sir Lamorak de Galis](entity:character-recall-character-sir-lamorak-de-gali-b664a5436e75) at Mark's request, fought the [King with the Hundred Knights](entity:character-recall-character-king-with-the-hundr-225bebe60e00) and the King of [Northgalis](entity:location-recall-location-northgalis-aaee6aef58cf) when they threatened to place Mark's land in servitude, and slew the giant Tauleas. He adds that many [Knights of the Round Table](entity:character-recall-character-3f167931be46) spared Cornwall's barons for his sake. These episodes are not recounted as a fresh sequence of adventures; they are evidence in Tristram's argument that his past work should have earned a different reward.
His final examples bring the grievance back to Isoud and to Mark's own words. Tristram says that he fought [Sir Palamides](entity:character-recall-character-sir-palamides-07dff0dd5cb8) and rescued Queen Isoud from him. On that occasion, Mark had declared before his barons that Tristram should have been better rewarded. The king's earlier public acknowledgment now stands in sharp contrast to the ten-year sentence. Tristram's accusation therefore rests not only on a broad record of military service but on Mark's own recognition of what that service deserved.
## Meaning and Immediate Outcome
The scene closes with Tristram taking the sea, not with the dispute resolved. His promise to return when he can leaves open a future beyond the prescribed ten years, while his departure makes the sentence's immediate consequence plain: Cornwall loses the services of the knight who repeatedly defended its ruler's interests. The catalogue also clarifies why the exile reads as a reversal. Tristram recalls deeds performed for Mark, Mark's family, and the kingdom, yet the king's final judgment removes him from the country he helped protect.
The episode places royal authority, noble counsel, and personal reputation in tension. Mark can pronounce judgment, but the barons' refusal to approve execution redirects that power toward exile. Tristram, in turn, answers the sentence not by denying the court's decision but by setting it against a public record of service and a promise of return. His banishment thus separates him from Cornwall while preserving the claim that his loyalty has been repaid unjustly.
Event 80
The Tournament at the Castle of Maidens
[The Tournament at the Castle of Maidens](entity:event-recall-event-the-tournament-at-the-c-a68dcc4b8dec) is a three-day martial gathering where [Sir Tristram](entity:character-recall-character-sir-tristram-58eb12b2af0e) competes under an unmarked black shield, wins the first day’s prize, and continues a rivalry with [Sir Palamides](entity:character-recall-character-sir-palamides-07dff0dd5cb8) amid the assembled kings and knights. The action turns on more than victories: [Tristram](entity:character-recall-character-tristram-a0b006f42abd)’s concealment makes his deeds visible before his identity is known, while his decision to oppose whichever side [Palamides](entity:character-recall-character-palamides-9a6f200e4d74) joins repeatedly reshapes the field.
## Background and Approach
The tournament is announced as a great contest between [King Carados of Scotland](entity:character-recall-character-king-carados-of-sco-a92e2601829d) and the King of [Northgalis](entity:location-recall-location-northgalis-aaee6aef58cf). Pursuivants travel through the country seeking notable knights, particularly [Sir Launcelot](entity:character-recall-character-sir-launcelot-c0ea01c62d3d) for Carados and Sir Tristram for Northgalis. Tristram intends to attend, but first meets [Sir Kay](entity:character-recall-character-sir-kay-b93c82975d98) and [Sir Sagramor le Desirous](entity:character-recall-character-sir-sagramor-le-des-1d70ba275e3f). He initially refuses [Kay](entity:character-recall-character-kay-2946c1889f8a)’s challenge because he wants to avoid injury before the larger contest; when Kay presses him, Tristram unhorses him, then does the same to Sagramor, and rides on.
The tournament also draws Tristram into contact with Palamides, whose presence gives the contest a personal charge. After Tristram’s companion Sir Persides is unhorsed by Palamides, Tristram tries to avenge him. Palamides takes advantage of Tristram’s unprepared state and unhorses him in turn. Tristram is angered and ashamed, but Palamides declines a further contest that evening, preferring to keep himself fresh for the tournament. Their unfinished encounter carries into the competition itself.
## First Day: The Knight with the Black Shield
Before riding to the field, Tristram orders his servant [Gouvernail](entity:character-recall-character-gouvernail-3c5afbc5aabe) to prepare a black shield bearing no identifying device. He and Persides leave their host, Sir Pellounes, and ride to the tournament, where the sides of Carados and Northgalis are already engaged. Tristram first helps force the Northgalis party back. When Persides is overwhelmed by [Sir Bleoberis de Ganis](entity:character-recall-character-sir-bleoberis-de-ga-37e83158ad33) and [Sir Gaheris](entity:character-recall-character-bef64136a8ef), Tristram intervenes, unhorses [Gaheris](entity:character-recall-character-e643b62e350f), and then defeats Bleoberis as well.
[Sir Dinadan](entity:character-recall-character-sir-dinadan-fc57ab74ca1a) rides against Tristram and receives a blow that leaves him faint in the saddle. He then recognizes Tristram and promises not to come against him again, saying that Tristram’s sword will never strike his helmet. Tristram continues against Bleoberis, striking him down and pulling him beneath his horse. The fighting ends when [King Arthur](entity:character-recall-character-king-arthur-2b97864f54aa) calls the combatants to withdraw. At the close of the first day, [Arthur](entity:character-recall-character-arthur-2e33b65bbe57) and the other judges award the prize to the unidentified knight with the black shield. Some spectators recognize Tristram but keep silent; the honor is thus publicly conferred on his deeds before his name is publicly established.
## The Sides and the Rivalry
On the following day Palamides joins Arthur’s side. Tristram responds by choosing the opposing side of Northgalis, explaining that he will ride against whichever party Palamides supports. The choice gives their rivalry a clear structure: the tournament’s factions become, for Tristram, a means of seeking another encounter with his adversary.
During the second day, Tristram sees two hundred knights attacking a group of only twenty. He objects that the greater force gains no honor by defeating so few, and offers to help the twenty. The [King with the Hundred Knights](entity:character-recall-character-king-with-the-hundr-225bebe60e00) stops his men at Tristram’s request, recognizing the courtesy behind the intervention. This episode sets a measure of knightly conduct beside the contest for victory: Tristram’s reputation rests not only on force, but also on his willingness to restrain an unfair advantage.
Tristram and his companions later leave the field without others seeing where they have gone. Arthur awards the day’s prize to the King of Northgalis because Tristram has fought on that side. [Launcelot](entity:character-recall-character-launcelot-0b02a99ce6f7), who has been watching for Tristram in hopes of becoming his companion, searches for him in vain. The crowd’s acclamation that the black-shielded knight has won the field contrasts with the uncertainty surrounding his whereabouts and identity.
## The Third Day and the Contest with Arthur
At the opening of the third day, the King with the Hundred Knights and the King of Northgalis encounter [King Carados](entity:character-recall-character-king-carados-187c3fe16976) and the King of [Ireland](entity:location-recall-location-ireland-3247a2c8bcbe). Arthur enters the fighting and drives the opposing kings back. Tristram then rides in under the black shield and unhorses Palamides. Arthur challenges him, and Tristram unhorses the king as well. The sequence abruptly reverses when Arthur’s knights help their king back onto his horse and Arthur unhorses Tristram.
Palamides then rides against Tristram while he is on foot. Tristram avoids being ridden down, pulls Palamides from his horse, and fights him with swords before the watching kings, queens, and lords. Tristram strikes Palamides three times on the helmet, naming Sir Tristram with each blow. The repeated name makes the contest a belated declaration of identity as well as a personal reckoning. The account ends during this confrontation, after Tristram has brought Palamides to the ground; it does not establish the final outcome of the tournament or of their rivalry.
## Significance
The tournament repeatedly separates achievement from recognition. Tristram’s unmarked shield conceals his identity while his victories earn him the first day’s prize, and his name becomes explicit only when he invokes it against Palamides. The difference between what the spectators see and what some of them know gives the contest a sustained tension: fame accumulates in public even as the knight remains partly unknown.
The competition also places personal rivalry beside the responsibilities of fellowship. Tristram seeks Palamides across the opposing sides, yet intervenes when a crowd of knights threatens a much smaller group. His conduct joins ambition to restraint: he pursues honor through combat, but challenges a victory that would be won by overwhelming numbers. The event therefore presents reputation not simply as the result of unhorsing opponents, but as something shaped by allegiance, recognition, and a knight’s treatment of others.
Event 81
Castle of Maidens Tournament
The [Castle of Maidens Tournament](entity:event-recall-event-castle-of-maidens-tourn-d5be36c2216e) is the contest at which [Sir Tristram](entity:character-recall-character-sir-tristram-58eb12b2af0e), bearing a black shield, wins renown through three days of fighting. His prowess is measured not only by the knights he unhorses, but also by the regard he earns from [King Arthur and Sir Launcelot](entity:relation-recall-relation-king-arthur-and-sir-e98e18d75fb4). When [Launcelot](entity:character-recall-character-launcelot-0b02a99ce6f7) is acclaimed as the field’s victor, he redirects the honor to [Tristram](entity:character-recall-character-tristram-a0b006f42abd), making the tournament’s defining outcome an act of recognition as much as a martial triumph.
## Setting and Course
The tournament takes place at the [Castle of Maidens](entity:location-recall-location-85d1dfde73ef) and draws kings, queens, lords, and knights to watch. Its contests gather into a sustained sequence rather than a single encounter: Tristram begins the fighting and continues across the first, second, and third days. By the end, the scale of his performance has made the knight with the black shield the subject of a widespread cry across the field.
Tristram’s encounters include a clash with [Sir Palamides](entity:character-recall-character-sir-palamides-07dff0dd5cb8) and an unintended meeting with [Sir Launcelot](entity:character-recall-character-sir-launcelot-c0ea01c62d3d). Launcelot challenges the unknown knight with the black shield, and their joust ends with Tristram hurt. The injury does not erase the significance of the encounter: neither knight initially recognizes the other, and Launcelot later says he would not have engaged Tristram had he known whose shield he faced. The mistake places two renowned knights in opposition without making their underlying esteem disappear.
## Tristram’s Performance
The account singles out Tristram’s achievement against eleven good knights of [King Ban](entity:character-recall-character-king-ban-70615110b555)’s blood, Sir Launcelot’s kin. He unhorses them during the tournament, and the assembled company marvels at his deeds. The number and kinship of these opponents give his success a particular weight: he has prevailed against members of the very lineage from which Launcelot comes, while Launcelot himself remains unaware that the black-shielded combatant is Tristram.
After Launcelot wounds him, Tristram leaves the field. [Sir Dinadan](entity:character-recall-character-sir-dinadan-fc57ab74ca1a) follows and offers to confront Sir Palamides, who is pursuing Tristram, so that the wounded knight can withdraw. Tristram declines the protection and returns to fight. He agrees with [Palamides](entity:character-recall-character-palamides-9a6f200e4d74) that, if Tristram unhorses him, he will do no more; he then knocks Palamides down. This renewed encounter, followed by Tristram’s departure with Dinadan, extends his record of combat even after his earlier clash with Launcelot.
## Launcelot and the Prize
Once Tristram has left, Launcelot continues fighting with great force. [King Arthur](entity:character-recall-character-king-arthur-2b97864f54aa) joins him, and together with the knights who enter the field on the king’s side, they put the King of [Northgalis](entity:location-recall-location-northgalis-aaee6aef58cf) and the [King with the Hundred Knights](entity:character-recall-character-king-with-the-hundr-225bebe60e00) to the worse. Launcelot is the last to remain in the field, so the prize is awarded to him. Yet he refuses to claim the victory for himself, despite the acclaim of the crowd.
Instead, Launcelot orders a contrary cry: Tristram has won, because he began the contest and endured through its days. The account treats this decision as an extraordinary act of honor. The assembled people praise Launcelot for giving Tristram credit, and his generosity brings him greater renown than defeating five hundred knights would have done. The prize therefore becomes a means of acknowledging a rival rather than simply rewarding the last combatant standing.
## Recognition and Significance
King Arthur’s response confirms the distinction between Tristram’s martial accomplishment and Launcelot’s public judgment of it. [Arthur](entity:character-recall-character-arthur-2e33b65bbe57) calls Tristram one of the noblest knights he has seen and remembers the blows Tristram struck against Palamides, naming them for Tristram as he fought. Arthur is distressed that Tristram has departed and says that finding him matters more than the hurts suffered by all the other knights at the tournament.
Launcelot, for his part, regrets that he wounded Tristram, explaining that he did not see the black shield and would not have fought him had he recognized it. His praise connects the tournament to their prior respect: Tristram has helped him before, and Launcelot recognizes that debt even after their accidental encounter. The event’s decisive turn is thus from anonymous combat to acknowledged identity and worth. Tristram earns distinction through endurance and arms; Launcelot earns it by surrendering the prize’s claim to him, while Arthur’s admiration makes that recognition part of the wider court’s judgment.
Event 82
Tristram Rescues Palamides and They Arrange a Duel
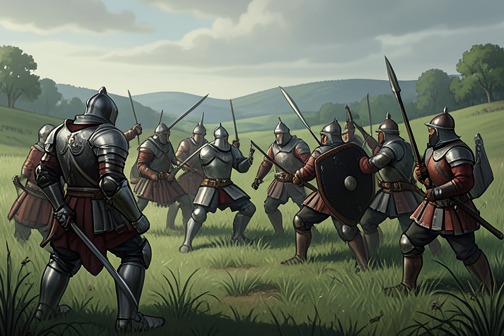
[Tristram Rescues Palamides and They Arrange a Duel](entity:event-recall-event-b6a690cf441c) is an episode in which rescue and rivalry become inseparable. [Tristram](entity:character-recall-character-tristram-a0b006f42abd) breaks up a nine-to-one attack on [Palamides](entity:character-recall-character-palamides-9a6f200e4d74), then, despite naming him his mortal enemy, refuses to take advantage of his wounds: he promises to see him safely beyond immediate danger and sets a later day for their combat. The rescue does not end their enmity; it temporarily places a knightly obligation between its next blows.
## The unequal fight
After departing, Tristram searches in vain for news of [Launcelot](entity:character-recall-character-launcelot-0b02a99ce6f7) and rides beside a forest. Near a tower and a meadow, he sees ten knights fighting. One stands against nine, performing so impressively that Tristram wonders at his feats. As he draws nearer, he recognizes the lone knight by his shield and suspects that it is Palamides. The leader of the attackers is [Breuse Saunce Pité](entity:character-recall-character-breuse-saunce-pit-f5d97978d9c9), whom the narrative identifies as a particularly malicious knight.
Tristram calls on the attackers to stop, arguing that it is shameful for so many to fight one. Breuse challenges his right to interfere and warns him to leave. Tristram answers that such a good knight should not be killed in so cowardly a fashion, and declares he will help with all his strength. The scene shifts from witnessing an unequal contest to taking responsibility for the threatened knight.
## Rescue and its cost
Because the combatants are on foot, Tristram dismounts so that the attackers will not kill his horse. He takes up his sword and strikes down knights as he presses them back; the group flees with Breuse toward the tower. Tristram follows, but they escape inside and shut him out. Returning to the meadow, he finds Palamides sitting beneath a tree, badly wounded. The rescue has driven off the attackers, but it has not prevented Palamides from suffering or brought the encounter to a decisive conclusion.
Palamides thanks Tristram for saving his life. Tristram then discloses the sharp contradiction at the heart of his intervention: he has rescued the man he hates most in the world. He calls Palamides his mortal enemy and immediately proposes that they fight. Palamides declines to make the rescue itself an occasion for combat. Since Tristram is fresh and he is wounded, Palamides says it would bring Tristram no honour to fight him then; if Tristram insists, they should choose another day.
## The promise and its cause
Tristram agrees and names a meeting place: the meadow by the river of [Camelot](entity:location-recall-location-camelot-352b4eac6f0e), where [Merlin](entity:character-recall-character-merlin-3f8c52535684) set the Peron. The date is a fortnight later. Palamides promises not to fail him, and Tristram in turn promises not to leave him among his enemies before he is safe. The arrangement gives their rivalry a definite future appointment, while their immediate conduct is governed by the rescue and Palamides’s condition.
When Tristram asks why the ten knights attacked him, Palamides explains that he had found a dead knight with a grieving lady beside him. She identified Breuse as the man who had killed her lord. Palamides helped her mount her palfrey, promised to protect her and help bury the dead knight, and then encountered Breuse by the tower. Breuse struck him from his horse; before Palamides could recover it, Breuse killed the damsel. Palamides says that this was the cause of the battle. His fight had begun as an attempt to protect and assist others, and Tristram’s intervention continues that chain of aid even though the two rescuers are enemies.
## Rivalry held in suspension
After confirming the appointed duel, Tristram says he will remain with Palamides until he is clear of his enemies. The two then ride together into the forest. At a well, they encounter an armed stranger resting beneath a tree. The knight rises, mounts, and strikes both [Tristram and Palamides](entity:relation-recall-relation-tristram-and-palamid-ad71d66506c2) from their horses before riding away. The interruption changes their immediate priorities: Tristram wants to pursue the stranger, while Palamides intends to rest with a friend.
Even as they part in different directions, each reminds the other of the duel they have promised. Tristram doubts Palamides will keep the appointed day; Palamides replies that he will not fail unless sickness or captivity prevents him, and turns the doubt back on Tristram, who may be endangered in pursuit of the unknown knight. Their separation therefore leaves the promised combat unresolved, not abandoned. The episode’s central reversal is ethical rather than final: Tristram’s hatred does not prevent him from rescuing Palamides, and the debt created by that rescue delays their duel until they can meet on more equal terms.
Event 83
Tristram, Palamides, and Dinadan Imprisoned and Released
[Tristram, Palamides, and Dinadan Imprisoned and Released](entity:event-recall-event-65a45a7946cd) recounts how a tournament’s deaths bring three companions into [Sir Darras](entity:character-recall-character-sir-darras-9fcd9328859d)’s prison, where sickness and old enmity give way to mercy and a negotiated release. The episode’s decisive turn is not a victory in combat but Darras’s judgment that [Tristram](entity:character-recall-character-tristram-a0b006f42abd)’s actions were deeds of knighthood rather than [treachery](entity:concept-recall-concept-22ce6e5d8b9f): although three of his sons have died, he will not destroy a noble knight in his keeping.
## The Black Shield and the Arrest
At a tournament, Tristram rides under the black shield and wins the prize. During the same affair, Dinadan is wounded by [Sir Lucan the Butler](entity:character-recall-character-sir-lucan-the-butle-f0e4ffbedcf3); Tristram pursues Lucan and knocks him down, then also defeats [Sir Uwaine](entity:character-recall-character-sir-uwaine-42c6462a7fa0), who challenges him after seeing Lucan hurt. Tristram’s response to Dinadan’s injury draws the scene into a chain of encounters, but the black shield becomes the clue that connects the victorious stranger to the deaths in Darras’s family.
A damsel reports that three of Darras’s sons have been killed and two so gravely wounded that they are not expected to recover. She identifies their opponent as the knight who carried the black shield and took the tournament’s prize. When she recognizes Tristram’s shield in his chamber, Darras acts without delay: he has Tristram, [Palamides](entity:character-recall-character-palamides-9a6f200e4d74), and Dinadan put in a strong prison. The arrest therefore reaches beyond the knight blamed for the deaths, taking his two companions with him.
## Captivity and Rivalry
The three prisoners’ confinement is made more dangerous by Tristram’s illness. He suffers greatly and fears he may die; the account emphasizes that sickness compounds the distress of imprisonment, taking away the prisoners’ hope of enduring until release. Tristram’s sorrow becomes so severe that he nearly kills himself. The episode makes bodily vulnerability, rather than a further contest of arms, the immediate threat to the captive knight.
Palamides continues to reproach Tristram for their longstanding enmity, while Tristram answers him mildly and declines to fight. Dinadan challenges Palamides to act on his hostility now that Tristram is within reach, comparing their situation to a wolf and a sheep sharing a prison. Palamides is disconcerted and falls silent. Tristram explains that he will not take up the quarrel because he fears Darras, who has authority over them, more than he fears Palamides. The exchange briefly exposes the rivalry, but the prison’s rules and their shared peril keep it from becoming another combat.
Their relations shift further when Tristram’s sickness worsens. Dinadan weeps, and Palamides joins him in mourning, despite his earlier reproaches. A damsel brings news that they are safe from execution, reporting what she has heard from Darras; the daily expectation that they might die begins to lift. When Darras learns that the black-shield knight is near death, he refuses to let a knight who has come under his protection perish in prison and summons all three captives before him.
## Darras’s Judgment and Their Release
Darras tells Tristram that he regrets his illness and recognizes him as a noble knight. He acknowledges that Tristram killed three of his sons and that this has deeply grieved him, but distinguishes the deaths from a treacherous killing: he believes they occurred through force of arms, and says this is why he did not put Tristram to death. In this decision, the injured father’s claim to vengeance gives way to his judgment of the means by which the deaths occurred and to his responsibility toward knights in his custody.
Release comes with terms. Darras orders that Tristram and his companions may go wherever they wish, and that their horses and equipment have been kept clean and in good condition. In return, Tristram must promise to be a good friend to Darras’s two surviving sons and reveal his identity. He names himself Tristram de [Liones](entity:character-recall-character-liones-f6c0d5cf0838), born in [Cornwall](entity:location-recall-location-cornwall-5562c2fa740e) and nephew to [King Mark](entity:character-recall-character-king-mark-7cea1086241a). He says he could not have acted otherwise in the encounter, and accepts that he would deserve death if he had killed Darras’s sons through treason or treachery. Darras asks him to serve as a friend to the surviving sons; Tristram promises, on his bodily faith, to do so for as long as he lives, recognizing Darras’s conduct as that of a natural knight.
## Recovery and Departure
Tristram remains at Darras’s castle until he has recovered from his illness. Once he is well and strong again, the three knights take their horses and depart together. Their freedom is thus completed only after Tristram’s recovery, not merely by Darras’s decision to release them. At a crossroads, Tristram tells his companions that they will now go separate ways; because Dinadan has the first adventure, Tristram’s narrative turns next to him.
The episode resolves captivity through restraint rather than retaliation. Darras neither excuses the loss of his sons nor treats the tournament deaths as treachery without distinction: he releases Tristram because he judges the deaths to have occurred in knightly combat, while binding the release to a promise of friendship with the surviving family. Inside the prison, the old antagonism between [Tristram and Palamides](entity:relation-recall-relation-tristram-and-palamid-ad71d66506c2) likewise gives way, briefly, to concern when Tristram falls ill. Release restores the companions’ freedom, but the crossroads returns each knight to his own course.
Event 84
Gaheris and Sir Kay Defeat King Mark
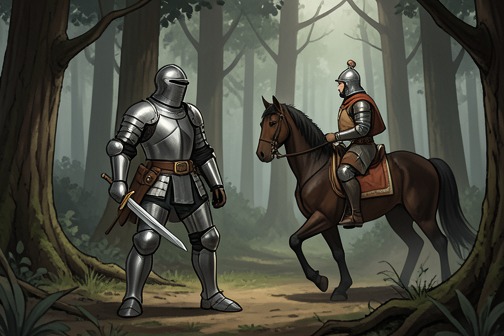
[Gaheris and Sir Kay Defeat King Mark](entity:event-recall-event-768aeb531428) is an episode of [treachery](entity:concept-recall-concept-22ce6e5d8b9f) uncovered and checked by knightly loyalty. When [King Mark](entity:character-recall-character-king-mark-7cea1086241a) invites [Sir Kay](entity:character-recall-character-sir-kay-b93c82975d98) to test an adventure in the Forest of Morris, [Gaheris](entity:character-recall-character-e643b62e350f) warns that [Mark](entity:character-recall-character-mark-cfbb20016049) is known for treachery; the warning proves justified when Mark and his cousin Andred ride out in secret to attack the knights. Gaheris defeats Mark, while [Kay](entity:character-recall-character-kay-2946c1889f8a) overcomes Andred, and the encounter ends not in execution but in sworn promises and mercy at Gaheris’s urging.
## The Invitation and the Warning
King Mark approaches Sir Kay with an outward show of good cheer and proposes an adventure in the Forest of Morris, describing it as exceptionally difficult. Kay agrees to try it. Gaheris, however, is wary: he declines to accept Mark’s invitation at once, saying that Mark has always been full of treason, and rides away. He then waits along the route Kay is to take, charging his squire to watch for him. When Kay arrives, Gaheris directly warns him that it is unwise to ride at Mark’s request because Mark deals in treason. Kay still wishes to undertake the adventure, and Gaheris agrees not to leave him unsupported.
Their caution is borne out by what Mark does at [Tintagil](entity:location-recall-location-5185f645bc56). He clears his chamber of his barons and everyone except those in his confidence, then summons his nephew Sir Andred. At midnight, Mark and Andred arm themselves and ride out with their attendants by a private postern. Their secrecy turns the seemingly chivalric invitation into a trap: the adventure is not a fair challenge openly offered, but a concealed attack on the knights who accepted it.
## The Encounter at the Lake
The two sides meet at a lake then called the perilous lake, beneath the wood. The moon is bright enough for Sir Kay to see the armed riders first. He takes his spear and offers to joust. King Mark rides against him; they strike hard, and Kay’s horse falls. Gaheris, angry at seeing his companion brought down, calls on the opposing knight to hold fast in his saddle and says that he will avenge his fellow. Mark rides against Gaheris unwillingly, and Gaheris unhorses him.
Gaheris then turns to Andred, knocks him from his horse, and orders both men to yield and identify themselves on pain of death. Andred names himself and Mark. The disclosure confirms that the night’s attack was led by [Cornwall](entity:location-recall-location-cornwall-5562c2fa740e)’s king himself, under the false appearance of a friendly invitation. Gaheris condemns both men for the treason they have plotted beneath their feigned welcome. Mark appeals for his life, offering to make amends and asking consideration because he is an anointed king; Gaheris counters that a consecrated ruler has a greater obligation to uphold honorable conduct, not a special exemption from it.
## Oaths, Restraint, and Aftermath
As Gaheris strikes at Mark, Mark covers himself with his shield. He then yields and swears on the cross of Gaheris’s sword that, for as long as he lives, he will not act against errant knights. He also promises to be a good friend to [Sir Tristram](entity:character-recall-character-sir-tristram-58eb12b2af0e) if [Tristram](entity:character-recall-character-tristram-a0b006f42abd) ever comes into Cornwall. The promise links the immediate defeat to Mark’s prior hostility toward his nephew: Kay notes that Andred is Tristram’s near cousin, has been a traitor to him, and was involved in Tristram’s exile from Cornwall.
While Kay would kill Andred, Gaheris asks him not to do so. He reasons that since he has granted Mark his life, Kay should grant Andred his as well. Kay relents, and Andred is spared. This is not a simple victory over treachery: Gaheris and Kay expose and defeat the attackers, but Gaheris refuses to let justified anger become an unrestrained killing. The outcome is a pair of commitments extracted from Mark and a second act of restraint toward Andred.
Afterward, Kay and Gaheris ride to Dinas the seneschal, said to love Sir Tristram. They later reach the realm of [Logris](entity:location-recall-location-logris-15cd419db8d9) and meet [Sir Launcelot](entity:character-recall-character-sir-launcelot-c0ea01c62d3d), who has [Dame Bragwaine](entity:character-recall-character-dame-bragwaine-83330d563117) with him while hoping to meet Tristram. When [Launcelot](entity:character-recall-character-launcelot-0b02a99ce6f7) asks for news of Cornwall and Tristram, Kay and Gaheris say they have heard nothing of him, then recount their adventure. Launcelot smiles and remarks on how difficult it is to remove what is bred in the flesh and bone, and the company makes merry together. The episode thus closes with the danger reported as an adventure among companions, while Tristram’s continuing absence remains unresolved.
## The Episode’s Ethical Conflict
The scene contrasts the language and appearance of chivalric adventure with the misuse of that appearance for ambush. Mark’s pleasant reception and proposal conceal a midnight attack; his royal and anointed status does not erase the treachery Gaheris identifies. The knights’ combat settles the immediate encounter, but the moral turn comes in the aftermath: Gaheris demands a pledge from Mark and then asks Kay to spare Andred. His conduct joins defense of a companion to restraint toward a defeated enemy, making mercy part of the episode’s account of knightly honor rather than a denial of the wrong done.
Event 85
The Roche Dure Tournament
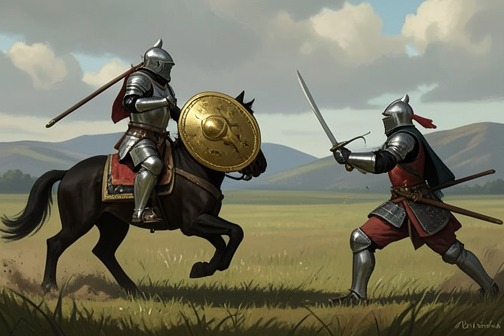
[The Roche Dure Tournament](entity:event-recall-event-5bd6250a8046) is a martial contest transformed into a public warning against [King Arthur and Queen Guenever](entity:relation-recall-relation-king-arthur-and-quee-f97972152dd9). [Sir Tristram](entity:character-recall-character-sir-tristram-58eb12b2af0e) arrives bearing a shield supplied by [Morgan le Fay](entity:character-recall-character-morgan-le-fay-5476b1a672cb), unaware that its image was devised to expose the love between [Sir Launcelot and Queen Guenever](entity:relation-recall-relation-sir-launcelot-and-qu-4dd1e991acf3) and to bring dishonour upon the royal couple. When [Arthur](entity:character-recall-character-arthur-2e33b65bbe57) confronts him about it, the tournament’s spectacle gives way to a dangerous encounter: [Tristram](entity:character-recall-character-tristram-a0b006f42abd) defeats Arthur and [Sir Uwaine](entity:character-recall-character-sir-uwaine-42c6462a7fa0), then departs without knowing the shield’s full purpose.
## Morgan le Fay’s Shield
At Morgan le Fay’s castle, she detained Sir Tristram until she learned his name. Having promised to let him go once he told her, she kept her word but asked him to carry a shield to the tournament at the Castle of the Hard Rock and perform as many deeds of arms as he could. Tristram accepted the request and the shield without knowing that it had been prepared as a weapon of accusation.
The shield was golden in appearance and showed a king and queen with a knight standing above them, one foot on each ruler’s head. Tristram asked what the image meant. Morgan identified the king and queen as Arthur and [Guenever](entity:character-recall-character-112dfc46734b), and the knight as one who held them both in bondage and servitude, but withheld the knight’s identity. The image thus made a private accusation legible as a public emblem, while concealing the person at its center.
The account explains Morgan’s purpose: she loved [Launcelot](entity:character-recall-character-launcelot-0b02a99ce6f7), who did not return her love or comply with her requests. She believed that Launcelot and Guenever loved one another, and arranged the shield to rebuke Launcelot and make Arthur understand the relationship. Tristram, however, did not know that the device was aimed at Launcelot when he agreed to bear it.
## The Tournament and Its Audience
At the Roche Dure, the King of Scots and the King of [Ireland](entity:location-recall-location-ireland-3247a2c8bcbe) opposed Arthur’s knights, and a great melee began. Tristram entered and performed striking deeds of arms, striking down many knights. He rode before Arthur with Morgan’s shield, so his battlefield success repeatedly brought its image into the king’s view.
Arthur marvelled at the shield’s design, while Guenever understood what it implied and grew troubled. A damsel in Morgan’s service, positioned in a chamber near Arthur, made the intended accusation explicit: she told the king that the shield had been made to warn him of his shame and dishonour, and that it concerned him and his queen. She then slipped away privately, and no one knew where she had gone. Her brief intervention supplied the charge but removed the messenger from questioning, leaving the shield as the visible evidence.
Guenever told [Sir Ector de Maris](entity:character-recall-character-3847e8e21d1c) that she believed Morgan had made the shield out of spite toward her and Launcelot, and feared that she might be destroyed. Arthur watched Tristram’s feats and wondered who the unknown knight was; he knew the man was not Launcelot. He had been told that Tristram was in [Petit Britain](entity:location-recall-location-petit-britain-5b3d6ebcaecc) with [Isoud la Blanche Mains](entity:character-recall-character-isoud-la-blanche-ma-b1e013685f2f), and reasoned that, had the knight been in [Logris](entity:location-recall-location-logris-15cd419db8d9), Launcelot or one of the companions who had sought Tristram would have found him. The shield therefore provoked suspicion even as Tristram’s identity remained concealed.
## Arthur’s Challenge and Tristram’s Reply
As the King of Scots and the King of Ireland began to withdraw, Arthur resolved that the knight bearing the strange shield should not escape. He summoned Sir Uwaine la Blanche Mains, and the two approached Tristram together. Asked where he had obtained the shield, Tristram answered that Morgan le Fay, Arthur’s sister, had given it to him.
In the continuation, Arthur questioned whether Tristram deserved to bear arms he could not explain and asked him to disclose his name. Tristram replied that he could not describe the design, since that was no part of his charge, but trusted he could bear it honourably. He refused to give his name at that time. Arthur then demanded battle, making the encounter not merely a contest over heraldic knowledge but a test of honour and authority: Arthur insisted on an explanation, while Tristram maintained that he had no obligation to provide one.
Tristram also objected that Arthur was asking for combat after seeing how much effort he had already expended that day. He nevertheless agreed to fight and said he did not fear Arthur, even if Arthur thought he held an advantage. Arthur and Tristram charged one another. Arthur’s spear broke against Tristram’s shield; Tristram’s answering blow brought horse and rider to the ground and left Arthur seriously wounded in the left side. Sir Uwaine then challenged Tristram in turn. [Uwaine](entity:character-recall-character-uwaine-6468cffc7b73)’s spear also broke on Tristram’s shield, and Tristram struck him from his saddle.
## Reversal and Aftermath
Tristram turned away after the two encounters and said he had already had enough to do that day; he had not needed to joust either knight. Arthur acknowledged that both had suffered through their own pride in demanding battle before learning Tristram’s name. Uwaine, despite his defeat, judged Tristram to be among the strongest knights living.
The tournament episode ends without Tristram learning the shield’s original purpose. He leaves and asks in various places after Launcelot, unable to discover whether he is alive or dead, a lack of news that brings Tristram sorrow. The narrative then carries him onward to a forest, where he sees one knight fighting nine. The shift from the royal confrontation to another unequal contest places the shield episode within Tristram’s continuing adventures, while its unresolved accusation remains with Arthur and Guenever. In the following account, the narrator clarifies the central irony: Tristram had not known why Morgan made the shield, nor could he tell Arthur the reason when challenged. He had carried a political insult without understanding it, yet his refusal to claim knowledge he did not possess helped turn the emblem into a fight with the king himself.
Event 86
Tristram and Launcelot Duel by Merlin’s Tomb
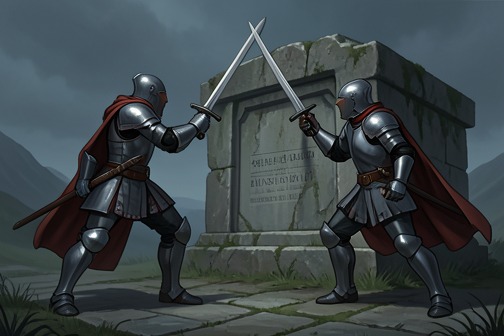
[Tristram and Launcelot Duel by Merlin’s Tomb](entity:event-recall-event-12f9e4ba9749) brings two celebrated knights into combat before either knows the other’s identity. The fight unfolds beside the tomb of Lanceor and [Colombe](entity:character-recall-character-colombe-8d20abe4c90a), where [Merlin](entity:character-recall-character-merlin-3f8c52535684) had prophesied that the two best knights and the best lovers of [Arthur](entity:character-recall-character-arthur-2e33b65bbe57)’s days would one day meet. The prophecy’s setting gives the encounter a double charge: a test of martial prowess takes place at a grave that already holds the memory of love and loss, and recognition transforms the duel from a possible tragedy into an act of fellowship.
## The Tomb and the Prophecy
[Tristram](entity:character-recall-character-tristram-a0b006f42abd) rides toward [Camelot](entity:location-recall-location-camelot-352b4eac6f0e) and comes to the stone Merlin had raised over Lanceor and Colombe. Lanceor, the king of [Ireland](entity:location-recall-location-ireland-3247a2c8bcbe)’s son, had been killed by [Balin](entity:character-recall-character-balin-4b106c0600f6); after his death, Colombe, his beloved, took his sword and killed herself. Merlin had arranged for the two to be buried beneath one stone and prophesied that the place would later see a fight between two of the greatest knights in Arthur’s time, who would also be the greatest lovers.
At the tomb, Tristram looks around for [Palamides](entity:character-recall-character-palamides-9a6f200e4d74). Instead, he sees a courteous-looking knight riding toward him in white, his shield covered. The stranger welcomes Tristram and says that he has kept his promise. Neither combatant’s identity is yet known to the other, so the welcome leads not to reunion but to the formal challenge of arms.
## The Four-Hour Fight
The knights lower their shields and charge with their spears. Their meeting is so forceful that both horses and riders fall. They get to their feet, put their shields before them, and continue with swords. The combat lasts four hours; neither speaks, and each suffers wounds as their armor is cut apart. The account emphasizes the equality of the contest rather than a quick victory: neither knight can simply overcome the other.
Their attendants watch with growing distress. [Gouvernail](entity:character-recall-character-gouvernail-3c5afbc5aabe) marvels at the blows Tristram has given the other knight, while [Launcelot](entity:character-recall-character-launcelot-0b02a99ce6f7)’s servant answers that Tristram has received as many or more. Both fear that Palamides—or Launcelot—may endure too much, and lament the prospect that either worthy knight might destroy the other. The scene thus places the combat’s honor beside its cost: the knights’ prowess is unmistakable, but so is the danger of continuing without knowing who stands opposite them.
## Recognition and Reconciliation
At last Launcelot speaks, praising his opponent’s fighting and asking his name. Tristram is reluctant to disclose it, but asks Launcelot to name himself first. When Launcelot identifies himself, Tristram reveals that he is [Sir Tristram de Liones](entity:character-recall-character-sir-tristram-de-lio-fb7d532f0a63) and says that Launcelot is the man he loves best in the world. Launcelot responds with astonishment at the adventure that has brought them to fight.
The recognition reverses the meaning of the encounter. Launcelot kneels and yields his sword to Tristram; Tristram kneels in turn and yields his sword to Launcelot. Each gives the other the degree, making the exchange a reciprocal acknowledgment rather than a victor’s claim over a defeated opponent. They then sit together on the tombstone, remove their helmets to cool themselves, and kiss repeatedly. The account moves from silence and armed equality to named affection and mutual honor.
## Return to Camelot
After taking up their helmets, Tristram and Launcelot ride to Camelot together. There they meet [Gawaine](entity:character-recall-character-gawaine-e52d508f7128) and [Gaheris](entity:character-recall-character-e643b62e350f), who had promised Arthur that they would not return to court until they had brought Tristram with them. The duel therefore ends not in separation but in Tristram’s arrival at court in Launcelot’s company, fulfilling the brothers’ promise and bringing the encounter into Arthur’s fellowship.
The tomb’s earlier prophecy is fulfilled through a meeting that begins as an anonymous contest and ends with the two knights recognizing one another as beloved companions. Its structure turns on the delay of names: while identity is withheld, admiration is expressed through endurance and the attendants fear a fatal outcome; once the names are spoken, the same excellence that sustained the fight becomes the basis for reciprocal esteem. The scene keeps the grave and its history in view, but answers the possibility of another loss with reconciliation and a shared ride to Camelot.
Event 87
Lamorak’s Tournament at Morgan le Fay’s Castle
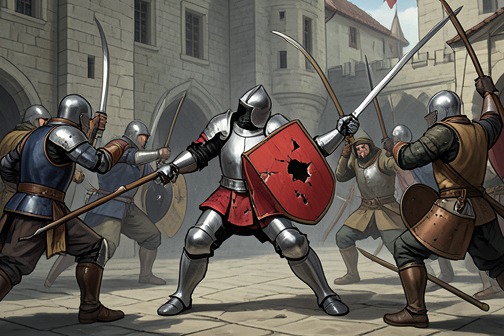
[Lamorak’s Tournament at Morgan le Fay’s Castle](entity:event-recall-event-da5e0c41fb7f) brings [Sir Lamorak](entity:character-recall-character-sir-lamorak-6fa764f44bdb) into conflict with the hostile custom maintained at the castle of [Morgan le Fay](entity:character-recall-character-morgan-le-fay-5476b1a672cb), [King Arthur](entity:character-recall-character-king-arthur-2b97864f54aa)’s sister. Riding under a red shield, [Lamorak](entity:character-recall-character-lamorak-9d86b1c9a151) defeats a series of challengers and makes the castle’s knights renounce their practice. The spectacle becomes a test of judgment as well as prowess: [Sir Palamides](entity:character-recall-character-sir-palamides-07dff0dd5cb8), injured while trying to take Lamorak’s place, pursues him for revenge, but their combat ends with the revelation of their names and a pledge of lasting affection.
## Setting and the Castle’s Custom
[Sir Dinadan](entity:character-recall-character-sir-dinadan-fc57ab74ca1a) identifies the castle as Morgan le Fay’s, a place King Arthur had given his sister and later regretted giving. [Arthur](entity:character-recall-character-arthur-2e33b65bbe57) and Morgan had fallen into conflict, and she made war on him when she could. The castle offered shelter to dangerous knights whom Morgan kept there to oppose Arthur’s favored knights.
Its rule turned passage into a compulsory contest. A knight approaching the castle had to joust with one, two, or three opponents. If Arthur’s knight was defeated, he risked losing his horse and equipment and might be taken prisoner. Sir Palamides condemns this practice as an unworthy way for a queen to wage war on her own lord. He says he wants to end it and refuses to serve Morgan.
## Lamorak’s Jousts
Before [Palamides](entity:character-recall-character-palamides-9a6f200e4d74) can begin, a knight carrying a red shield asks him to leave the fighting to him: Lamorak has come specifically to undertake the deed. He asks Palamides to watch and, if he is defeated, to avenge him. Palamides agrees to observe.
Lamorak successively unhorses three knights of the castle. As the challengers come out, his squire removes their horses and sends them into the forest, while the defeated knights are kept until the jousting is over. The fourth opponent is also brought down, and the fall proves fatal. Although Palamides offers to help, Lamorak insists that he can face even twenty knights and continues by himself. The people watching from the walls call out their approval.
A further opponent comes out with a shield marked in black and white. Lamorak strikes him through shield and body, bringing down horse and rider. Palamides again asks to take his place, but Lamorak refuses, telling him not to offer an insult when he is doing well. Palamides then challenges Lamorak himself. Lamorak wounds him with a spear and unhorses him; he does not, however, let his squires take Palamides’ horse. He goes on to face seven more knights, defeating them all. In total, he kills four of the twelve knights he defeats in the jousts and makes the other eight swear on the cross of a sword that they will abandon the castle’s abusive custom. He then releases them.
The castle’s lords and ladies praise the knight with the red shield from the walls. At last, an unarmed knight comes out to say that the castle has suffered enough damage and that no one else will fight him. The speaker declares that the old custom is ended. Lamorak rides away, having changed the terms under which the castle’s knights confront travelers: the remaining eight have sworn to give up the practice, and the castle acknowledges its defeat.
## Palamides Pursues the Red Shield
Palamides is humiliated by his defeat and says that he intends to follow the red-shielded knight and seek revenge on foot, since he believes he cannot win distinction against him on horseback. Dinadan counsels against it: Lamorak has already done more than enough fighting and is exhausted. Palamides nonetheless insists on following him. They retrieve their horses and ride after Lamorak.
They find him in a valley beside a fountain, dismounted and resting after removing his helmet to drink. Palamides confronts him over the shame he believes Lamorak has caused him and demands combat. Lamorak points out that Palamides has seen how much he has already fought and asks him to reconsider. Palamides will not; but he declines to joust, judging that he would gain no distinction that way. Instead, he dismounts and draws his sword. Lamorak also dismounts, and the two fight on foot.
## Recognition and Reconciliation
The sword fight lasts for about an hour before either man rests. Their contest is fierce, and both are wounded. Palamides eventually grows faint because of the spear wound he received in the earlier joust. He asks the red-shielded knight for his name and offers his own in return. Palamides identifies himself first; the other reveals that he is [Sir Lamorak de Galis](entity:character-recall-character-sir-lamorak-de-gali-b664a5436e75), son and heir of [King Pellinore](entity:character-recall-character-king-pellinore-3c458d75379d), and half-brother of [Sir Tor](entity:character-recall-character-sir-tor-0a4084725d5c).
Recognition transforms the meaning of the fight. Palamides kneels and asks forgiveness, admitting that he acted outrageously by demanding battle after seeing Lamorak’s exertions. Lamorak embraces him and likewise regrets that they fought. Palamides says that, despite being more severely wounded, he is glad they met and will love Lamorak above all other knights except his brother [Sir Safere](entity:character-recall-character-sir-safere-edb9203bc4db). Lamorak returns the pledge, placing Palamides above all knights except his brother Sir Tor. Dinadan joins them in rejoicing. Their squires tend their equipment and wounds, and the three spend the night at a priory.
## Significance
The episode moves from public victory to private conflict, then replaces rivalry with recognition and friendship. Lamorak’s achievement is not only his defeat of the castle’s challengers: he compels the surviving knights to swear off the rule that made every traveler face a forced joust. Yet his success does not erase the risk of knightly contests. Palamides, who had wanted to help him, first becomes his opponent, and their second fight follows from injured pride and a mistaken view of what honor requires. The disclosure of their identities allows both men to exchange apology and esteem rather than continue the quarrel.
The red shield initially conceals Lamorak’s identity, while the final exchange of names makes kinship and allegiance newly legible. Their separate exceptions for their brothers also give the declaration of friendship a precise shape: each honors the other deeply without displacing existing family bonds. The episode thus resolves a challenge to Arthur’s order not through a royal judgment, but through Lamorak’s public action, an oath imposed on the defeated knights, and the personal reconciliation that follows.
Event 88
The Family Revenge That Preceded Lamorak’s Death
[The Family Revenge That Preceded Lamorak’s Death](entity:event-recall-event-7383a367c50a) is a chain of kinship-driven retaliation that turns a private meeting into a public rupture at [Arthur](entity:character-recall-character-arthur-2e33b65bbe57)’s court. [Gaheris](entity:character-recall-character-e643b62e350f) kills his mother, the [Queen of Orkney](entity:character-recall-character-queen-of-orkney-7bab60f5b3ad), because of her relationship with [Lamorak](entity:character-recall-character-lamorak-9d86b1c9a151) and the family’s grievance over their father’s death; Lamorak escapes, but the murder intensifies the brothers’ resolve to kill him and leaves Arthur fearing the loss of a leading knight.
## Family Grievance and the Planned Meeting
[Gawaine](entity:character-recall-character-gawaine-e52d508f7128) and his brothers arrange for their mother, the Queen of Orkney, to be brought to a castle near [Camelot](entity:location-recall-location-camelot-352b4eac6f0e), intending to use her presence as part of a plan to kill Lamorak. Lamorak learns that she is there and welcomes the opportunity to meet her. The two agree on a time, but Gaheris discovers the arrangement and rides ahead to wait for Lamorak. The meeting is therefore not a chance encounter: Gaheris arrives prepared, while Lamorak comes armed but enters the private room unarmed.
The hostility has more than one layer. Gaheris objects to Lamorak’s love for their mother as a source of shame to the brothers, and invokes the feud between their families: Lamorak’s father was [King Pellinore](entity:character-recall-character-king-pellinore-3c458d75379d), whom Gawaine and Gaheris had killed. In the confrontation, Gaheris also claims that [Pellinore](entity:character-recall-character-pellinore-edfd409e1ed7) had slain their father. Lamorak disputes that account, saying their father was killed by [Balan](entity:character-recall-character-balan-abfb5ce228d0) le Savage, and adds that Pellinore’s death remains unavenged. Their exchange shows how the grievance is sustained not by a settled account of the past but by rival claims about who killed whom and what revenge is still owed.
## [Gaheris Kills the Queen of Orkney](entity:action-recall-action-9233d445a661)
After Lamorak arrives, ties his horse at a private postern, and goes into a room to unarm, the Queen of Orkney receives him with evident affection. Gaheris then enters armed and kills her. Lamorak is dismayed by the sudden attack and condemns Gaheris for killing the mother who bore him. He says that Gaheris had greater reason to kill him than to kill her, making the violence’s reversal of family obligation explicit.
Gaheris answers that Lamorak and his father have brought shame on him and his brothers. He does not kill Lamorak while he is unarmed, saying that doing so would dishonour him, but threatens to kill him if he can find him elsewhere. He tells Lamorak to arm himself and leave. The episode thus places a limited chivalric restraint beside an act of familial violence: Gaheris refuses to strike an unarmed opponent, yet has already killed his own mother in order to enforce the family’s grievance.
## Lamorak’s Flight and the Court’s Response
Lamorak sees that there is no remedy at the scene. He arms himself, mounts his horse, and rides away in sorrow. Ashamed and distressed, he does not go to Arthur’s court, choosing another route instead. His departure makes the consequences of the killing immediate: the court may punish Gaheris, but Lamorak, one of its most valued knights, is now outside its protection and exposed to the brothers’ threat.
When the killing becomes known, Arthur is deeply angry and orders Gaheris out of court. Gawaine is also angry that Gaheris killed their mother and allowed Lamorak to escape. [Launcelot](entity:character-recall-character-launcelot-0b02a99ce6f7) calls the queen’s death a great wrong, describes it as the result of [treachery](entity:concept-recall-concept-22ce6e5d8b9f), and warns Arthur that Lamorak is likely to be lost. He further reports that Gawaine and his brothers have agreed and sworn to kill Lamorak whenever an opportunity arises. Arthur says that he will prevent this, but the account closes with the danger unresolved: the king’s intention to protect Lamorak stands against a sworn family vendetta already set in motion.
## Kinship, Retaliation, and the Fracture of Loyalty
The episode binds several kinds of kinship into one conflict: Gaheris’s duty to his mother, the brothers’ solidarity with one another, and Lamorak’s attachment to the Queen of Orkney all compete with the inherited feud between the [Orkney](entity:location-recall-location-orkney-f100d579207b) family and King Pellinore’s line. Gaheris treats his mother’s relationship with Lamorak as a dishonour to the brothers; Lamorak answers by distinguishing the family’s accusation from the actual death of their father. Neither appeal ends the cycle of retaliation.
The killing also exposes the limits of Arthur’s authority. He can expel Gaheris and declare his intention to protect Lamorak, but the account records no reconciliation or settlement. Instead, a murder within the royal family drives a major knight away from court and deepens an existing feud. The event anticipates Lamorak’s death not by showing its circumstances, but by establishing the threat surrounding him and the failure of courtly allegiance to contain private revenge.
Event 89
King Mark Kills Bors and Amant and Is Brought Before Arthur
[King Mark Kills Bors and Amant and Is Brought Before Arthur](entity:event-recall-event-17d2441b4d8f) is an episode in which jealousy turns a king’s plot against [Sir Tristram](entity:character-recall-character-sir-tristram-58eb12b2af0e) into the murder of two knights and a public reckoning at [King Arthur](entity:character-recall-character-king-arthur-2b97864f54aa)’s court. [Mark](entity:character-recall-character-mark-cfbb20016049)’s effort to act secretly collapses when Sir Bersules refuses complicity, Sir Amant becomes his accuser, and the violence of their deaths is brought into the open. Yet the ending stops short of lasting justice: Mark submits to [Arthur](entity:character-recall-character-arthur-2e33b65bbe57), who holds him at court and makes a provisional peace between uncle and nephew.
## Background: Mark’s Jealousy of [Tristram](entity:character-recall-character-tristram-a0b006f42abd)
[King Mark](entity:character-recall-character-king-mark-7cea1086241a) is angered by Sir Tristram’s growing renown and has driven his nephew out of [Cornwall](entity:location-recall-location-cornwall-5562c2fa740e). His suspicion is bound up with [La Beale Isoud](entity:character-recall-character-881eb87025df), Mark’s queen: he believes that too much love exists between her and Tristram. Their responses to Tristram’s success sharpen the contrast between them. Mark is distressed by reports of his prowess, while [Isoud](entity:character-recall-character-isoud-45c23b134f96) is glad to hear them.
Mark disguises himself and travels into [England](entity:location-recall-location-england-b153c1f368ea) with two knights, Sir Bersules and Sir Amant, and two squires. His stated purpose to his companions is to destroy Tristram by guile or treason. The plan is not merely a private quarrel: Tristram has won renown at the [Castle of Maidens](entity:location-recall-location-85d1dfde73ef), defeated thirty knights, and been made a knight of the [Round Table](entity:object-recall-object-round-table-04fef19b82fd) by Arthur. Mark’s decision to pursue him therefore sets his personal jealousy against the honor Tristram has acquired at Arthur’s court.
## Bersules Refuses the Plot
Mark tells Bersules and Amant that he has come to destroy Tristram by [treachery](entity:concept-recall-concept-22ce6e5d8b9f). Bersules rejects the proposal outright. He regards Tristram as a knight of great honor, says he will not consent to bring about his death, and withdraws his service from Mark. Mark answers the refusal with violence, striking Bersules with his sword.
Amant and the two squires condemn what Mark has done and refuse to serve him further. They say they will accuse him of treason before Arthur. Mark is unable to take revenge on them at that moment, so he asks Amant not to disclose his identity as King Mark. Amant agrees not to reveal the name, and he and the squires bury Bersules. That promise does not amount to silence about the crime: Amant’s later accusation identifies Mark’s actions and brings the matter before Arthur’s court.
## Amant’s Accusation and Death
At Arthur’s court, Mark encounters Amant, who has appealed him of treason. The appeal leads to a judicial combat, and Mark kills Amant in a wrongful cause. The episode makes the contrast between formal judgment and its peril plain: the contest is the means by which the accusation is answered, but its outcome does not establish Mark’s innocence. Amant is described as fighting in a righteous quarrel, and his account before the court confirms why he had brought the appeal.
While still able to speak, Amant sends a message to La Beale Isoud and says that he has been slain for love of her and Tristram. He explains that he and Bersules refused to take part in a treacherous attempt on Tristram’s life, and that he had accused Mark of treason before being killed in the right. Two maidens whom Isoud had sent to Tristram hear his account. They repeat it aloud, so the hidden identity and purpose behind the attack become public knowledge at court.
## [Launcelot](entity:character-recall-character-launcelot-0b02a99ce6f7) Brings Mark Before Arthur
When the report reaches Arthur and the assembled court, Arthur is intensely angry. Tristram grieves for the loss of Bersules and Amant. [Sir Launcelot](entity:character-recall-character-sir-launcelot-c0ea01c62d3d) sees his sorrow and asks Arthur for permission to return after Mark; Arthur authorizes him to fetch the king but expressly says that he does not want Mark killed in the pursuit.
Launcelot overtakes Mark after riding about three English miles. Mark asks his pursuer’s name; when Launcelot identifies himself and prepares to confront him, Mark yields. He offers no resistance and agrees to go with Launcelot to Arthur. The return is thus not a voluntary appearance: Mark acknowledges that Launcelot has brought him by force, and Launcelot delivers him to the court alive, in accordance with Arthur’s instruction.
## Submission, Judgment, and an Unsettled Peace
Before Arthur, Mark lays aside his helmet and sword and places himself in the king’s mercy. Arthur receives him with deliberate reservation: Mark is welcome because he has been brought to court, but not welcome in light of his conduct. Arthur reminds him that he owes service, homage, and fealty, which he has refused, and that he has repeatedly acted against the king and destroyed his knights. Mark promises to make amends as Arthur requires.
The settlement is shaped by Tristram’s desire for reconciliation. Arthur keeps Mark at court to please Tristram and makes what the narrative calls a broken love day between them. It is an accommodation, not evidence that the murders have been repaired or Mark’s loyalty secured. The episode closes with Mark under Arthur’s authority, but with the peace between him and Tristram explicitly fragile. Its reversals—from secret conspiracy to public accusation, and from a king’s power to Launcelot’s compelled escort—show how the court’s claims to honor and justice depend on confronting violence rather than accepting a victor’s account of it.
Event 90
Arthur Reconciles King Mark and Tristram
[Arthur Reconciles King Mark and Tristram](entity:event-recall-event-4137413125ee) is a political reconciliation that fails almost as soon as it is made. [King Arthur](entity:character-recall-character-king-arthur-2b97864f54aa) persuades [King Mark](entity:character-recall-character-king-mark-7cea1086241a) to take [Sir Tristram](entity:character-recall-character-sir-tristram-58eb12b2af0e) back to [Cornwall](entity:location-recall-location-cornwall-5562c2fa740e) under a sworn promise of protection; [Mark](entity:character-recall-character-mark-cfbb20016049) and [Tristram](entity:character-recall-character-tristram-a0b006f42abd) clasp hands, but Mark is already understood by the narrator to be acting falsely. Tristram accepts the journey for his own reason: he wants to see [La Beale Isoud](entity:character-recall-character-881eb87025df). The episode sets public oath and royal mediation against private purpose and a reputation for [treachery](entity:concept-recall-concept-22ce6e5d8b9f), making the apparent accord a fragile pause rather than a resolution.
## Causes and the proposed settlement
King Arthur asks King Mark for a gift and receives his agreement to grant whatever lies within his power. [Arthur](entity:character-recall-character-arthur-2e33b65bbe57) then makes his request specific: Mark is to be a good lord to Sir Tristram, take him to Cornwall to see his friends, and cherish him for Arthur’s sake. The settlement is framed as both a personal favor and an obligation of lordship, with Tristram’s honor invoked as the reason Mark should receive him well.
Arthur adds his own concession, offering to forgive the ill will he has borne Mark if Mark swears to the promise before him. Mark agrees, and the oath is made publicly, on a book, in the presence of Arthur and his knights. The arrangement therefore has the outward forms of a binding settlement: a royal request, a sworn commitment, and witnesses at court. Its force depends, however, on Mark’s good faith.
## The public accord and its warning signs
After the oath, Mark and Tristram take one another by the hands and clasp them firmly. The gesture gives the reconciliation a visible conclusion, but the narration immediately undercuts it: Mark’s thoughts remain false, as later events will show. The episode distinguishes the appearance of agreement from any genuine change in character or intention.
The departure alarms much of the [Round Table](entity:object-recall-object-round-table-04fef19b82fd). [Launcelot](entity:character-recall-character-launcelot-0b02a99ce6f7), [Lamorak](entity:character-recall-character-lamorak-9d86b1c9a151), and Dinadan are especially angry and sorrowful, because they believe Mark will kill or destroy Tristram. Tristram himself is so distressed by the prospect of leaving that he is described as bewildered. Their response makes clear that Arthur’s settlement has not persuaded those closest to the danger; it has instead placed a trusted knight in the hands of a king whose conduct they distrust.
## Arthur’s authority and the knights’ dissent
Launcelot challenges Arthur directly, warning that the court may lose its most honorable knight. Arthur answers that the journey is Tristram’s own desire and that he has done everything he can to bring the two men to an accord. His defense presents mediation as limited by the parties’ choices: having obtained Mark’s oath, Arthur does not prevent Tristram from accompanying him.
Launcelot rejects the settlement as an accord in name only. He warns Mark that betraying Tristram would bring Launcelot’s personal retaliation, invoking both his faith to God and his knightly order. Mark replies that he has sworn before Arthur and the assembled knights not to kill or betray Tristram, and that breaking such a promise would bring him shame. Launcelot remains unconvinced, treating Mark’s established reputation as stronger evidence than his public pledge. The exchange turns the episode into a contest between formal assurance and accumulated distrust.
## Tristram’s purpose and the outcome
Despite his companions’ fears, Tristram chooses to ride with Mark. The narration explains that his purpose is to see La Beale Isoud: he cannot endure without seeing her. His decision gives the journey an inward motive distinct from Arthur’s political settlement and Mark’s spoken promise. Tristram is not simply being sent away by the court; he proceeds of his own will, drawn by attachment that makes the risk acceptable to him.
The episode closes with the two men riding together in sorrow, while Launcelot’s warning and the narrator’s disclosure of Mark’s false intent foreshadow the accord’s failure. The relevant outcome is not safety or restored trust but an uneasy departure toward Cornwall, where the promise will be tested. Arthur can reconcile the men ceremonially and secure an oath before witnesses; he cannot make Mark faithful or separate Tristram from the desire that has led him to go.
Event 91
The War Between Cornwall and the Sessoynes
[The War Between Cornwall and the Sessoynes](entity:event-recall-event-132d364ccc1b) is a conflict over [Cornwall](entity:location-recall-location-cornwall-5562c2fa740e)’s survival and its tribute, but its decisive turn depends on a strained family bond: [King Mark](entity:character-recall-character-king-mark-7cea1086241a) must seek the aid of [Sir Tristram](entity:character-recall-character-sir-tristram-58eb12b2af0e), the knight he hates, and [Tristram](entity:character-recall-character-tristram-a0b006f42abd) chooses to defend him anyway. The fighting first brings Cornwall close to defeat; Tristram’s return changes the balance, and his victory over Elias ends the enemy’s claim to yearly tribute. It leaves the deeper danger untouched, since [Mark](entity:character-recall-character-mark-cfbb20016049)’s hostility and Tristram’s trust persist after the battle.
## Causes and the threat to Cornwall
While Sir Tristram is taking part in jousts and tournaments, he is seriously wounded, though he continues to win distinction. He goes to recover at the castle of [Sir Dinas the seneschal](entity:character-recall-character-sir-dinas-the-senes-d96e13cfeb9b). Meanwhile, a large force from Sessoin enters Cornwall and approaches [Tintagil Castle](entity:location-recall-location-tintagil-castle-96ffff52cf29) under the command of Elias, a capable warrior. King Mark is unwilling to summon Tristram because he hates him, but his council warns that the enemy cannot be overcome without Tristram’s help. Faced with the prospect of losing the country, Mark reluctantly sends for his nephew.
Tristram answers the first summons with a limit: his wounds mean that he cannot bear arms for eight days. Mark accepts this and prepares to meet the Sessoynes with his own forces. The resulting battle is costly. Mark divides his army among Sir Dinas, Sir Andred, and Sir Arguis; Dinas performs notably, but Mark’s side is driven back toward [Tintagil](entity:location-recall-location-5185f645bc56), suffering heavy losses as the enemy presses close to the gates. Mark then sends for Tristram again. Tristram says he will come when he has recovered, because until then he cannot help effectively.
## Tristram returns and takes command
Once recovered, Tristram gathers ten good knights of [Arthur](entity:character-recall-character-arthur-2e33b65bbe57)’s court and rides to Tintagil. He approaches by woods and ditches and fights his way into the castle, where his arrival is welcomed by Mark and the company. The next morning, Elias challenges Mark to come out and fight. Mark turns to Tristram for counsel, and Tristram asks permission to answer the challenge and direct the battle. Mark grants him both.
Tristram arranges the defence in six divisions, placing Dinas in the vanguard and assigning other knights to command the rest. That night, he burns the Sessoynes’ ships, cutting off their apparent means of escape. Elias recognizes the purpose of the act and urges his men to fight without losing heart. In the battle that follows, Dinas’s division is driven back before Tristram enters the fighting. Tristram strikes down opponents and helps turn the contest, while the engagement moves back and forth between the open ground and Tintagil’s gates.
The confrontation remains uncertain even after Tristram’s intervention. Elias knocks Mark from his horse, and Dinas helps him remount. Tristram then meets Elias, who is also forced from his saddle. Fighting continues until nightfall. Mark returns to Tintagil having lost a hundred knights; the Sessoynes have lost two hundred. Both sides attend to their wounded, and neither appears eager to resume a general battle if it can avoid further loss and preserve its honour.
## Elias’s challenge and the single combat
With his men dead and both armies reluctant to fight again, Elias proposes a contest between champions to settle Cornwall’s tribute. If Elias defeats Mark’s champion, the Sessoynes are to receive the tribute yearly; if their champion loses, Elias’s claim is to be relinquished for ever. Mark consults his barons, who consider a champion’s combat preferable to another full battle. They also acknowledge that Tristram’s prowess had been what enabled them to escape destruction.
Mark explains the proposal to Tristram, but does not ask him to fight, recognizing that Tristram has already saved their lives. Tristram nevertheless offers his help, provided he can act without forfeiting his honour or life. Though still bruised, he accepts Elias’s challenge. He identifies himself as Tristram, a knight of [King Arthur](entity:character-recall-character-king-arthur-2b97864f54aa) and of the [Round Table](entity:object-recall-object-round-table-04fef19b82fd), and requires the two sides to make the terms secure. The agreement provides for a contest first on horseback and then on foot, continuing to the finish; hostages are given by both sides to ensure that the outcome will be honoured.
## The duel and its consequences
The two knights meet in the field outside Tintagil. After their horses fall, they continue on foot. At first Elias has the advantage, and the spectators on Mark’s side fear that Tristram is beaten. Tristram remembers his lady, [La Beale Isoud](entity:character-recall-character-881eb87025df), and the possibility that he may never see her again; he raises the shield that had been hanging low and renews his effort. The reversal is visible to both armies: Mark’s followers, who had been grieving, begin to rejoice, while the Sessoynes’ confidence gives way. Tristram eventually overcomes Elias, who falls and dies. Before Elias’s death, Tristram recognizes him as a formidable opponent, second in his experience only to [Sir Launcelot](entity:character-recall-character-sir-launcelot-c0ea01c62d3d).
After the duel, Elias’s followers withdraw. Mark takes prisoners to compensate for the damage inflicted on his people and sends the others home to ransom their companions. Tristram is attended to and healed. The contest has settled the political stake established by Elias’s offer: the Sessoynes’ claim to Cornwall’s yearly tribute is ended. The result follows from an agreed combat between champions rather than another battle between the armies, with hostages intended to make the settlement binding.
## The unresolved breach between Mark and Tristram
The victory does not reconcile the king and the knight. Mark still wants Tristram dead, despite the defence of Tintagil and the defeat of Elias. Tristram, for his part, does not learn from Mark’s conduct to guard against his [treachery](entity:concept-recall-concept-22ce6e5d8b9f). He continues to remain where La Beale Isoud is, the personal attachment that had returned him to the fight also keeping him close to the danger posed by Mark.
The episode therefore closes with a divided consequence. Cornwall is rescued from invasion and its tribute claim is removed, but the alliance that made that rescue possible is not secure. Tristram’s service proves indispensable precisely where Mark’s feelings make him least willing to rely on it; his victory repairs the kingdom’s immediate peril without repairing the king’s hostility.
Event 92
Baldwin Repels the Saracens
[Baldwin Repels the Saracens](entity:event-recall-event-8c70c1938e70) is a Cornish victory that turns abruptly into a family tragedy: Prince Baldwin saves the country through a surprise attack, but the honour he wins helps provoke [King Mark](entity:character-recall-character-king-mark-7cea1086241a) to murder him. The episode links military courage and public acclaim to the private [treachery](entity:concept-recall-concept-22ce6e5d8b9f) that follows.
## The Saracen Landing and Baldwin’s Response
The Saracens landed in [Cornwall](entity:location-recall-location-cornwall-5562c2fa740e) soon after the Sessoynes had departed. Baldwin acted quickly and secretly, raising the country before dawn rather than waiting for a summons or allowing the invaders time to establish themselves. The account presents his initiative as an urgent defense of Cornwall.
Baldwin used three of his own ships as fire-ships. He set them ablaze and, with the wind, sent them into the Saracen fleet. The ships caught fire and destroyed the enemy vessels, leaving none saved. This attack deprived the invaders of their fleet before Baldwin and his company moved against them on land.
## The Victory and Its Scale
At daybreak Baldwin led his company in an assault, and the narrative reports that they killed forty thousand Saracens, leaving none alive. The account gives the victory an extraordinary scale and emphasizes Baldwin’s direct leadership: he first devised the naval stratagem, then took the field with his followers.
The episode’s outcome is therefore both defensive and personal. Baldwin’s action prevents the landing force from carrying its attack further into Cornwall, while the scale of the reported triumph establishes him as a figure of conspicuous military success. That public distinction becomes the source of danger within his own family.
## King Mark’s Jealousy and the Aftermath
When King Mark heard of the victory, he was angry that Baldwin had won such honour. The narrative also identifies Baldwin as more beloved than [Mark](entity:character-recall-character-mark-cfbb20016049) throughout the country and notes that Baldwin loved [Sir Tristram](entity:character-recall-character-sir-tristram-58eb12b2af0e). Mark’s resentment thus concerns not only the success itself but Baldwin’s standing and loyalties.
Mark summoned Baldwin, his wife [Anglides](entity:character-recall-character-anglides-65fbdc867241), and their young son on the pretext of seeing the child. He planned to kill the boy as well as Baldwin. After dinner, Mark challenged his brother over the Saracen campaign, claiming that Baldwin should have sent for him so that Mark could have received the honour. Baldwin answered that delaying to summon him would have allowed the invaders to destroy the country. Mark accused him of seeking glory at his expense and struck him with a dagger, killing him.
Anglides secretly kept Baldwin’s doublet and shirt. Sir Tristram, Sir Dinas, Sir Fergus, and the other knights mourned Baldwin, who had been greatly loved. [La Beale Isoud](entity:character-recall-character-881eb87025df) then warned Anglides to leave or their son, [Alisander le Orphelin](entity:character-recall-character-alisander-le-orphel-4da4f0d58274), would be killed. Anglides fled with the child and the few poor men willing to accompany her. The victory that had saved Cornwall thus leads into the murder of its defender, the flight of his family, and the displacement of the honour he had won from the battlefield to the court of a treacherous king.
Event 93
马克王谋杀布德温王子
[King Mark](entity:character-recall-character-king-mark-7cea1086241a)’s murder of [Prince Boudwin](entity:character-recall-character-prince-boudwin-39bb2ca30c44) turns a victory won in [Cornwall](entity:location-recall-location-cornwall-5562c2fa740e)’s defense into a family crime. Resenting his brother’s greater popularity and goodwill toward [Sir Tristram](entity:character-recall-character-sir-tristram-58eb12b2af0e), [Mark](entity:character-recall-character-mark-cfbb20016049) arranges a seemingly welcoming family visit, then kills Boudwin and drives his widow, [Anglides](entity:character-recall-character-anglides-65fbdc867241), and their young son, [Alisander le Orphelin](entity:character-recall-character-alisander-le-orphel-4da4f0d58274), into flight. The deed extends beyond the murder itself: it makes survival and the prospect of vengeance part of the family’s future.
## Background: Boudwin’s service
The episode follows an attack on Cornwall by Saracens, who land after the departure of the Sessoynes. Boudwin responds quickly, raising the country in secret and without waiting to summon King Mark. Before daybreak, he has three of his own ships set alight and sent with the wind into the Saracen fleet; the fire destroys the enemy ships. At daybreak, Boudwin and his companions attack, and the narrative reports that they kill forty thousand. His action saves Cornwall, but its success makes his standing with the people a source of danger.
Mark is enraged that Boudwin has won such renown. He particularly resents that his brother is more beloved throughout the country than he is, and that Boudwin loves Sir Tristram, whom Mark himself hates. The account presents these resentments as the immediate grounds for Mark’s decision to kill him. A service that should have strengthened the brothers’ bond instead intensifies their rivalry.
## The murder
Mark summons Boudwin, his wife Anglides, and their young son, saying that he wishes to see the child. The invitation conceals a further intention: Mark means to kill the boy as well as his father. He receives the family with apparent courtesy until they have dined, then turns to Boudwin’s recent victory and accuses him of withholding news so that he could take the honor for himself.
Boudwin answers that he acted before Cornwall could be devastated while he waited to send for the king. Mark calls him a liar and accuses him of continually trying to win renown at his expense. He then strikes his brother with a dagger. Boudwin dies without speaking again. The account sets the contrast plainly: his defense of the country has just saved its people, yet the king’s envy makes that service the pretext for a staged welcome and murder.
## Anglides and the threatened heir
Anglides witnesses the killing, grieves, and faints. Boudwin is prepared for burial, while she secretly keeps his doublet and shirt. These garments become more than belongings of the dead prince: they preserve a material reminder of the murder for the son Mark has also targeted.
Afterward, Mark searches from room to room for Anglides and Alisander. When he cannot find them, he orders [Sir Sadok](entity:character-recall-character-sir-sadok-55803f967f9d), under threat of death, to bring them back. Sadok catches up with Anglides within ten miles and tells her to return. Rather than obeying Mark’s command, he offers her a way to leave with her son and keep him until he is old enough to seek vengeance for his father.
Anglides accepts the protection and promises that, if Alisander lives to become a knight, she will give him Boudwin’s doublet and shirt with their bloody marks and charge him to remember his father’s death. Sadok returns to Mark and falsely reports that he has drowned the child; Mark is pleased by the report. His belief that the heir is gone, however, is mistaken.
## Escape and significance
Anglides rides day and night southward, resting little and only in a few places, until she reaches [Magouns](entity:location-recall-location-magouns-a13b844e1668), later called Arundel, in Southsex. The castle constable welcomes her as its rightful owner: the land belongs to her by inheritance, and the constable, Bellangere, says so when he receives her. She remains there for years and winters, until Alisander is grown strong.
The murder thus fails to extinguish the family line or the possibility of retaliation. Mark’s attempt to eliminate both father and son instead leaves a survivor carrying the memory of Boudwin’s death, while the preserved garments give that memory a concrete form. In this episode, political renown, popular affection, and kinship turn against the king: Boudwin’s service makes him beloved, Mark treats that popularity as a threat, and the violence intended to secure Mark’s position creates the conditions for his nephew’s eventual claim to vengeance.
Event 94
Alyssander’s Tournament at Morgan le Fay’s Castle and Slaying of Mallegrin
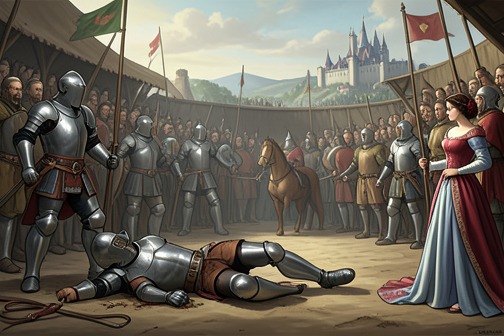
Alyssander’s tournament victory at [King Carados](entity:character-recall-character-king-carados-187c3fe16976)’s gathering becomes a test of what knightly prowess is for: after winning the prize and imposing a year-and-a-day restriction on those he unhorses, he accepts a castle damsel’s appeal to fight Mallegrin, a powerful knight who has obstructed her marriage. Their encounter ends with Alyssander killing Mallegrin, but victory leaves him unable to stand and gravely wounded. The episode thus joins tournament renown to a more consequential duty: using force to answer an individual’s plea and end a threat to her future.
## Tournament and Reputation
Alyssander is travelling toward [London](entity:location-recall-location-1bfd335cdd1b) to seek [Sir Launcelot](entity:character-recall-character-sir-launcelot-c0ea01c62d3d), carrying his father’s bloodstained shirt as a reminder of his father’s death. By chance, he rides astray along the coast and reaches the tournament held by King Carados. There he wins the prize, unhorsing Carados and twenty of his knights, as well as [Sir Safere](entity:character-recall-character-sir-safere-edb9203bc4db), [Sir Palamides](entity:character-recall-character-sir-palamides-07dff0dd5cb8)’s brother. His performance makes a striking impression on a watching damsel, who regards him as the finest jouster she has seen.
The tournament’s outcome is not simply a tally of victories. Alyssander requires each knight he unhorses to swear that he will wear no armour for a year and a day. This turns his success into a temporary restriction on the defeated men’s ability to take up arms, while establishing the newcomer’s authority before the castle episode begins. The account does not identify the tournament as [Morgan le Fay](entity:character-recall-character-morgan-le-fay-5476b1a672cb)’s castle tournament: Morgan hears reports of Alyssander’s prowess and says she wishes to meet him, while the damsel’s later appeal places Mallegrin’s challenge at her castle.
## The Damsel’s Appeal
After Alyssander has unhorsed four more knights, the damsel calls him aside and asks him to joust and fight for her against Mallegrin, an unwelcome neighbour who will not allow her to marry. Alyssander agrees to put his own body at risk for her sake. The conflict is presented as a concrete plea for aid, not as a tournament contest for a prize: the damsel identifies the obstacle to her marriage, and Alyssander undertakes to confront the man responsible.
Mallegrin is summoned at the damsel’s command. The two knights meet and prepare to joust. Mallegrin’s spear strikes Alyssander, but Alyssander’s counterblow knocks Mallegrin from his saddle. Mallegrin rises, draws his sword, and insists that the fight continue on foot, claiming that he can endure as a knight even if he has lost the mounted encounter. Alyssander accepts, handing his horse to his attendant before joining the fight on foot.
## The Fight and Mallegrin’s Confession
The combat continues for three hours. The narrative stresses that neither man is plainly the better knight throughout: they strike at one another’s helmets and shields, and at times collide and fall to the ground. Mallegrin has a formidable reputation in foot combat, though the account distinguishes this from his lesser standing on horseback. Alyssander, meanwhile, fights fiercely but without good judgment, and Mallegrin wounds him severely. His persistence carries a steep cost even before the final blow.
During a pause, Mallegrin asks Alyssander to hold his hand and reveal who he is. Alyssander refuses unless Mallegrin first explains his own name and why he holds the country. Mallegrin then admits that, because of his attachment to the castle damsel, he has killed ten good knights by misadventure; he also confesses that pride and outrageous conduct led him to kill ten others. Alyssander condemns this as a shameful confession and says that allowing Mallegrin to live would itself be a source of shame. The admission turns the fight into more than a contest over the damsel’s marriage: Mallegrin’s own account establishes a wider pattern of lethal misconduct.
They resume fighting. Alyssander eventually strikes Mallegrin down, removes his helmet, and kills him. The outcome resolves the immediate threat to the damsel and ends the career of a knight who has acknowledged responsibility for the deaths of twenty men. The episode gives Mallegrin a chance to state his guilt, but his confession does not stop the combat or secure his pardon.
## Victory and Its Cost
After the fight, Alyssander calls for his attendant and tries to mount his horse. He is not strong enough to do so: he has sixteen major wounds and cannot stand on the ground. The damsel therefore places him in a litter and has him carried into the castle. His victory is decisive, but the scene refuses to equate winning with emerging unharmed. The knight who accepted danger on the damsel’s behalf survives the encounter only in a condition that requires others to care for him.
Morgan le Fay has watched the battle with the damsel and is present as its consequences unfold. The next chapter turns to Morgan having Alyssander in her castle and healing his wounds. The episode therefore links his public reputation, the damsel’s request, Mallegrin’s confession and death, and Alyssander’s dependence on care after combat. Its movement from tournament display to a private appeal, prolonged combat, and recovery makes prowess answerable to a purpose—and shows that even a successful act of protection can leave its champion at the mercy of others.
Event 95
Alyssander Escapes Morgan le Fay’s Castle of Beau Regard
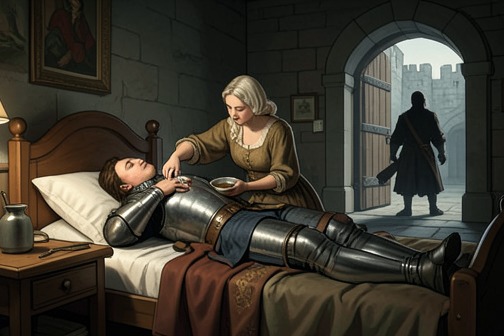
[Alyssander Escapes Morgan le Fay’s Castle of Beau Regard](entity:event-recall-event-3af3cbc91f42) is a rescue-and-escape episode in which healing becomes the pretext for confinement. Wounded after his earlier adventures, Alyssander accepts [Queen Morgan le Fay](entity:character-recall-character-queen-morgan-le-fay-ba90b4d29b8d)’s terms for recovery: he will remain within her castle for a year and a day. A damsel who has a claim to the castle warns him that Morgan intends to use him, then arranges his escape through a private postern as her uncle arrives with four hundred knights to destroy the stronghold. The episode turns on the gap between a knight’s pledged word and the freedom he needs to avoid becoming Morgan’s prisoner in fact as well as by promise.
## From Wounds to Confinement
Morgan first tends Alyssander’s wounds with an ointment that worsens his condition. When he complains the following morning, she applies other ointments, and his pain subsides. The sequence makes his recovery dependent on Morgan’s intervention, but the care does not resolve the danger surrounding him: it gives her leverage over his next decision.
A damsel of the castle asks Morgan to help her marry Alyssander, who has won her through his deeds. Morgan instead tells Alyssander to refuse the match, warning him that the woman is not suitable for him. When the damsel asks Alyssander to give her to Sir Gerine le Grose, a knight who has loved her for many years, he agrees. She and Sir Gerine are then formally joined in marriage. Alyssander’s consent settles her request, while Morgan redirects his own future toward a bargain that will bind him to her castle.
## The Year-and-a-Day Promise
Morgan puts Alyssander into a horse-litter and gives him a drink that leaves him asleep for three days and three nights. She brings him to her own castle, then asks whether he wants to be healed. Alyssander answers that anyone would want recovery if it were possible. Morgan makes the condition explicit: he must promise by his knighthood not to leave the bounds of the castle for a year and a day. He agrees, and, after making the promise, soon recovers.
Once well, Alyssander regrets his oath because it prevents him from taking revenge on [King Mark](entity:character-recall-character-king-mark-7cea1086241a). The healing has therefore restored his capacity to act while the promise restricts what he may do: his body is recovered, but his freedom and intended pursuit remain suspended. The year and a day marks the term of the confinement, and Alyssander understands himself as a prisoner by his own pledged word.
## The Damsel’s Plan and the Castle’s Fall
A second damsel, a cousin of Morgan and of the Earl of Pase, finds Alyssander grieving in the castle. She tells him that Morgan is keeping him there so she can subject him to her will. Alyssander rejects that prospect, saying he would rather die than submit. The damsel offers to secure his release without damaging his honour: the castle, she explains, rightfully belongs to her, and her uncle, the powerful Earl of Pase, already hates Morgan.
Her plan relies on that inheritance claim and the earl’s enmity. She will ask him to attack the castle on the grounds of its evil customs, then lead Alyssander through a private postern into a garden where his horse and armour will be waiting. She also reminds him that he can remain within the castle’s bounds for the promised year and a day, so that his escape need not break his oath. Alyssander accepts the arrangement and kisses her. She sends to her uncle, who agrees to come on a set day.
When the day arrives, the damsel shows Alyssander the postern. He escapes into the garden and finds his horse and armour there. The Earl of Pase comes with four hundred knights and sets fire to the castle; the attack leaves no stone standing. Alyssander has remained in the garden throughout the burning, outside the destroyed stronghold and beyond Morgan’s immediate control.
## The Oath and Its Consequences
After the castle has been destroyed, the earl orders that the ground on which Beau Regard stood be guarded for a year and a day against any knight who comes to challenge him. The same term that defined Alyssander’s promise thus returns as a new public condition attached to the ruined site. The story does not say that Alyssander takes up this challenge; it records the earl’s proclamation as the immediate aftermath of the escape.
The episode distinguishes a promise’s wording from the power that first made it coercive. Alyssander has sworn not to cross the castle’s bounds, and he honours that limit by leaving through the planned route only when the damsel opens the way into the garden. His release depends not on defeating Morgan in combat but on the damsel’s knowledge of her inheritance, her appeal to her uncle, and the provision of horse and armour. The castle’s destruction removes Morgan’s hold over the place, while Alyssander’s unused vow, his regret over revenge, and the earl’s new year-and-a-day proclamation leave the consequences of confinement visible even after the escape.
Event 96
Alyssander and Alice the Fair Pilgrim’s Tournament
[Alyssander and Alice the Fair Pilgrim’s Tournament](entity:event-recall-event-6cce17fea850) turns a challenge over a ruined castle site into both a public test of knightly prowess and the occasion for a new partnership. Alice promises herself and her lands to whoever can overcome the knight defending the ground; when Alyssander succeeds in drawing her attention, their meeting unfolds alongside the continuing daily contests that establish his reputation. The episode ends not with a single victory but with a year’s worth of challenges behind him and Alyssander and Alice leaving together for Benoye.
## The challenge at [La Beale Regard](entity:location-recall-location-la-beale-regard-70d536e6fce9)
Alyssander’s trial at the site follows his escape from the castle of La Beale Regard. Its former keeper, the earl of Pase, arrives with four hundred knights and destroys the castle, leaving no stone standing. The earl then declares that he will defend the patch of ground on which it stood for a year and a day against any knight who comes to challenge him. The burnt-out site thus becomes a test of arms: the ruin is gone, but the contested ground remains.
The challenge draws Alice to [Arthur](entity:character-recall-character-arthur-2e33b65bbe57)’s court. She is the daughter of Duke Ansirus, a pilgrim who goes to Jerusalem every third year, and is known as Alice the Fair Pilgrim. Hearing the proclamation, she publicly promises herself and all her lands to whichever knight can defeat the defender. She has a pavilion set beside the ground, while Alyssander, for his part, keeps the place and calls challengers to come against him. Their separate declarations make the site the meeting point of a contest for land and a contest for Alice’s hand.
## Recognition and the first combats
Sir Sagramor the Desirous is among the first challengers. He breaks his spear against Alyssander, who strikes him from his saddle. Watching from her pavilion, Alice is impressed by Alyssander’s riding and asks him to show his face. He removes his helmet; she declares that she must love him and no other. He then asks to see her face, and, when she unveils it, recognizes her as his own beloved. Their mutual recognition changes the meaning of the tournament: Alice had made her promise as a public wager, but the meeting between the two knights and lady becomes a personal bond as well.
Alyssander names himself, and Alice gives her name in return. They defer telling each other their lineage until they are more at ease, but their attachment is already clear. As they speak, Harsouse le Berbuse asks for a share of Alyssander’s spears. Alyssander knocks him from his horse, then does the same to Sir Hewgon. When Hewgon continues the challenge on foot, Alyssander defeats him in three strokes; Hewgon yields, and Alyssander requires both men to swear that they will wear no armour for a year and a day.
## Lineage, aid, and interruption
The damsel who helped Alyssander escape from La Beale Regard tells Alice how he had been held prisoner and how she secured his release. Alice recognizes the debt he owes his rescuer. Alyssander acknowledges that he is indebted to the damsel, and Alice reveals that she is of the blood of [King Ban](entity:character-recall-character-king-ban-70615110b555), the father of [Sir Launcelot](entity:character-recall-character-sir-launcelot-c0ea01c62d3d). Alyssander says his mother told him that his father was a king’s brother and that he is near cousin to [Sir Tristram](entity:character-recall-character-sir-tristram-58eb12b2af0e). Their exchange supplies the lineages they had postponed discussing, while the damsel’s earlier aid remains present in the relationship taking shape between Alyssander and Alice.
Three more challengers—Vains, Harvis de les Marches, and Perin de la Montaine—come against Alyssander. With a single spear he knocks all three down, and they have no desire to continue the fight on foot. He makes them swear not to wear arms for a year. The episode stresses the frequency and range of the challenge: Alyssander does not simply win one decisive encounter but must repeatedly defend the ground from knights who arrive to test him.
[Sir Mordred](entity:character-recall-character-sir-mordred-f7abe8fecb31) then notices that Alyssander is absorbed in Alice and leads his horse by the bridle, intending to take him away and shame him. The damsel intervenes: she arms herself, mounts Alyssander’s horse, and strikes him with a bare sword. The blow alerts Alyssander to what is happening; he draws his sword, but [Mordred](entity:character-recall-character-431d80a88894) escapes into the forest, as does the damsel, who retreats to the pavilion. Alyssander regrets that Mordred has got away. The interruption shows how his attention to Alice makes him vulnerable, while the damsel’s quick intervention protects him from the attempted humiliation.
## A year of contests and departure
Afterward Alyssander continues to joust day by day and to fight on foot, facing knights from Arthur’s court as well as strangers. The account does not enumerate every combat; it emphasizes their recurrence, saying that for each day within the year he has an encounter, sometimes with three or four knights in a single day, and that no knight defeats him. The year-long defence turns the challenge into sustained proof of prowess rather than a victory measured by one opponent.
When the year ends, Alyssander departs with Alice for their country of Benoye. The damsel refuses to leave him, and the three travel together, living there in great joy. The resolution gathers the episode’s strands: Alyssander keeps the contested ground through repeated combat, Alice becomes his chosen partner, and the woman whose earlier assistance made his escape possible remains with them. The tournament’s outcome is therefore at once a record of public success and a movement from solitary challenge toward shared life.
Event 97
The Eight-Day Tournament at Surluse
[The Eight-Day Tournament at Surluse](entity:event-recall-event-d53596c30061) is a tournament held by [Sir Galahalt the Haut Prince](entity:character-recall-character-sir-galahalt-the-ha-7ccd619cb75c) in [Surluse](entity:location-recall-location-surluse-ab2ff0a6cae3), a country within [King Arthur](entity:character-recall-character-king-arthur-2b97864f54aa)’s lands. At [Queen Guenever](entity:character-recall-character-queen-guenever-f27d6f31454b)’s request, the prince arranges an eight-day gathering where her knights are to joust against all comers. The tournament becomes more than a display of arms: its changing contests include a landholder’s challenge against a lady, [Sir Palamides](entity:character-recall-character-sir-palamides-07dff0dd5cb8)’ successive fights, and encounters involving [Sir Launcelot](entity:character-recall-character-sir-launcelot-c0ea01c62d3d), [Sir Dinadan](entity:character-recall-character-sir-dinadan-fc57ab74ca1a), and [Sir Lamorak](entity:character-recall-character-sir-lamorak-6fa764f44bdb). Through the prince’s decisions about who may fight and under what terms, the episode connects public chivalric spectacle with the settlement of private disputes.
## The Tournament Is Announced
[Sir Galahalt](entity:character-recall-character-sir-galahalt-9433929df1dc) comes to King Arthur’s court and explains his intention to hold jousts in Surluse, which lies within [Arthur](entity:character-recall-character-arthur-2e33b65bbe57)’s lands. Arthur grants permission but says that he cannot attend. Queen Guenever asks to go in his place, and Arthur agrees, placing her under Sir Galahalt’s governance. She chooses the knights she wants to take; at her direction, Sir Launcelot prepares with the company of knights he considers suitable.
The event is proclaimed in every good town and castle in the land. Its advertised format is open: for eight days, Sir Galahalt and the knights serving Queen Guenever will joust against any who come. Kings, princes, dukes, earls, barons, and knights make ready to attend. The scale and duration establish Surluse as a major public gathering, while the arrangement gives the queen’s chosen knights a defined place within the competition.
## Opening Contests and [Launcelot](entity:character-recall-character-launcelot-0b02a99ce6f7) in Disguise
Among the arrivals is Sir Dinadan, who enters disguised and performs notable deeds of arms. On another day, at the request of Queen Guenever and [King Bagdemagus](entity:character-recall-character-king-bagdemagus-59849e5479e4), Sir Launcelot joins the field in disguise, so that few recognize him. His first encounter is with his own brother, [Sir Ector de Maris](entity:character-recall-character-3847e8e21d1c): their lances break against each other, and Launcelot then unhorses [Ector](entity:character-recall-character-ector-8f00ddc6c029). [Sir Bleoberis](entity:character-recall-character-sir-bleoberis-4991a2970156) strikes Launcelot, who answers with blows that knock Bleoberis from his saddle.
The action widens when the King of [Northgalis](entity:location-recall-location-northgalis-aaee6aef58cf) enters against Launcelot and breaks a spear on him. Launcelot then strikes the king from his horse, though the king is mounted again. The King of Northgalis’s party and King Bagdemagus’s party clash, with the former substantially larger. When Launcelot sees his side losing, he rides into the press and knocks down knights on both sides of him. The scale of his performance astonishes those watching. Sir Meliagaunt recognizes him and understands that Launcelot has concealed his identity; Meliagaunt then asks a knight to kill Launcelot’s horse. The disguise thus conceals Launcelot from most of the field but does not prevent a hostile opponent from identifying and targeting him.
## [Palamides](entity:character-recall-character-palamides-9a6f200e4d74) Defends a Lady
During the tournament’s proceedings, a damsel complains that Sir Goneries is withholding all her lands. Goneries is present and throws down his glove, challenging anyone willing to fight on her behalf. The damsel takes it up sorrowfully because she has no champion. A varlet directs her to a knight at a nearby hermitage who follows the [Questing Beast](entity:creature-recall-creature-questing-beast-7a2aacd58701). She finds Sir Palamides, who agrees to take up her cause, arms himself, and accompanies her to seek Sir Galahalt’s permission for the combat.
Once the prince consents, Palamides and Goneries meet in the field. Their spears break; they draw swords, and Palamides defeats Goneries and kills him. The damsel loves Palamides, though the narrative notes that she is of his kin. Afterward, Palamides disguises himself with the Questing Beast displayed on his shield and equipment, and asks to joust with other knights. Sir Galahalt is concerned about the possibility of a contest with Sir Launcelot, so he arranges that Launcelot will not joust against him. The prince also declares that any knight who unhorses Palamides may have the damsel for himself, making her future part of the tournament’s terms.
On the second day, Sir Galahalt meets Palamides in the field. Their spears shatter, and [Galahalt](entity:character-recall-character-galahalt-9d0aecbbd0c3) strikes Palamides so hard that he is carried backward over his horse, though he keeps his stirrups. When they fight with swords, Galahalt’s blow glances from Palamides’ helmet and kills Palamides’ horse. Ashamed of the result, Galahalt dismounts, gives Palamides his own horse, and asks forgiveness. Palamides accepts the gift and says that a knight should not suffer dishonour at the hands of a worthy man. Galahalt then releases the damsel to him, but Palamides replies that they are both at the prince’s command. The episode makes the tournament’s authority visible: Galahalt can set the terms of a match, recognize a victory, and alter the arrangement involving the damsel.
## Challenges, Accusations, and the Third Day
After Palamides’ combat with Galahalt, Sir Dinadan encounters the prince. Their lances break, and Dinadan strikes at Galahalt with repeated blows, but cannot bring him down. Dinadan asks the prince to leave him and choose another opponent. Galahalt does so, not knowing who he is; when told that the knight was Dinadan, he regrets letting him escape, anticipating that Dinadan’s jokes and mockery will continue. Galahalt rides after him, but Dinadan refuses another encounter that day. Galahalt then strikes Sir Meliagaunt and another knight with his spear before knights from Northgalis and elsewhere threaten to overpower the Surluse side. Sir Semound the Valiant arrives with forty knights and drives them back. Queen Guenever and Sir Launcelot then call the company in from the field to the feast.
Another dispute is brought before Galahalt when Sir Archade accuses Palamides of treason over the killing of Archade’s brother, Goneries. Palamides accepts the challenge to answer him. Galahalt orders the knights to dine and then be ready to fight in the field; Queen Guenever, the prince, and Launcelot watch. Palamides unhorses Archade with his spear, then dismounts, removes his helmet, and kills him. The tournament’s spectacle thereby provides a formal arena for a personal accusation: the quarrel is answered through the combat Galahalt authorizes and the assembled court observes.
The third day brings further contests, including one between King Bagdemagus and King Marsil of Pomitain, whose island is a gift from Galahalt. Bagdemagus unhorses Marsil and then defeats another knight who comes to avenge him. A larger group enters against the Surluse side, including the Earl of Arrouse, Sir Breuse, a hundred knights from Pomitain, and the King of Northgalis. The fighting spreads, with knights knocked beneath horses. Bagdemagus continues to distinguish himself, and [Gaheris](entity:character-recall-character-e643b62e350f), [Gawaine](entity:character-recall-character-gawaine-e52d508f7128)’s brother, repeatedly attacks him before Bagdemagus unhorses him.
Palamides also meets [Sir Blamor de Ganis](entity:character-recall-character-sir-blamor-de-ganis-b4eacd60fa2d). Both knights fall when their lances strike, and Blamor is badly hurt in the fall, though surgeons restore him. The Duke of Chaleins and his knight Elis la Noire also enter the fighting; Bagdemagus unhorses Elis. The day’s prize goes to Bagdemagus, with Palamides and the duke also singled out for their deeds. At the feast afterward, Dinadan mocks and jokes with Bagdemagus, amusing the assembled knights. The tournament thus repeatedly shifts from combat to communal celebration, while its public honors distinguish particular performances without ending the rivalries around them.
## The Unknown Knight and the Tournament’s Open End
After the third day’s feast, a varlet brings Palamides four spears and conveys the challenge of an unnamed knight, who asks him to choose a spear and joust for his lady’s sake. Palamides agrees. Galahalt tells him to prepare, and Queen Guenever, the prince, and Launcelot take their places on scaffolds to judge the encounter.
The two knights charge and break their spears, then take larger ones. The stranger unhorses Palamides, but his own horse stumbles and falls upon him as he passes. They rise to sword combat, where they fight at length; Galahalt and Launcelot say they have never seen two knights fight better. The stranger gradually forces Palamides back. When Galahalt calls the combat to an end, the knights return to their lodgings and unarm. Only then is the stranger identified as Sir Lamorak. The tournament’s sequence therefore closes this set of episodes not with a declared victor but with recognition: a disguised or unknown opponent becomes known after the contest, and the two leading observers respond to his identity with particular regard.
Event 98
The Seven-Day Tournament at Surluse
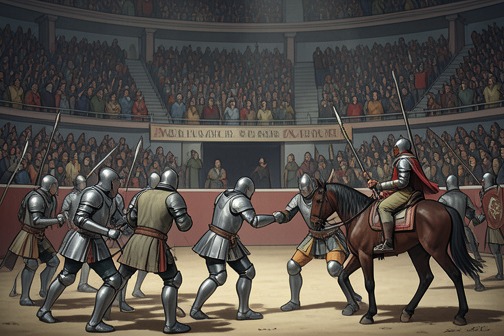
[The Seven-Day Tournament at Surluse](entity:event-recall-event-30ba2ebc7b00) brings the [Round Table](entity:object-recall-object-round-table-04fef19b82fd)’s martial culture into public view: champions are judged by their performances in the field, but victory does not settle the private hostilities surrounding them. On the fourth day, [Sir Lamorak](entity:character-recall-character-sir-lamorak-6fa764f44bdb) dominates the contest and receives the prize; afterward, the warmth of the court contrasts with his insistence that he cannot trust [Sir Gawaine](entity:character-recall-character-sir-gawaine-bf0b0cf3eb43)’s family. The tournament thus joins spectacle and fellowship to an unresolved threat of revenge.
## The Fourth Day and Its Contestants
The account marks the beginning of the fourth day by naming an array of participants, including the [King with the Hundred Knights](entity:character-recall-character-king-with-the-hundr-225bebe60e00), the men of [Northgalis](entity:location-recall-location-northgalis-aaee6aef58cf), the Duke of Chaleins of Clarance, and King Marsil of Pomitain. [Sir Safere](entity:character-recall-character-sir-safere-edb9203bc4db), [Sir Palamides](entity:character-recall-character-sir-palamides-07dff0dd5cb8)’ brother, arrives with news of their mother and explains that he has appealed an earl before [King Arthur](entity:character-recall-character-king-arthur-2b97864f54aa) after killing him in open battle for making war on their parents. The family dispute enters the tournament alongside the contests of arms, where Sir Palamides and [Sir Bleoberis de Ganis](entity:character-recall-character-sir-bleoberis-de-ga-37e83158ad33), and Sir Safere and [Sir Ector de Maris](entity:character-recall-character-3847e8e21d1c), meet in paired combats on foot.
[Lamorak](entity:character-recall-character-lamorak-9d86b1c9a151)’s performance quickly makes him the day’s central figure. He knocks the King with the Hundred Knights from his horse, does the same to the King of Northgalis, and then unhorses King Marsil. Before he stops, he has struck down thirty knights with spear and sword. The Duke of Chaleins refuses to join against him, calling it shameful to attack a knight who has shown such prowess, and orders his own knights not to touch him on pain of death.
## The Contest Turns into a Test of Fellowship
The two kings gather their forces against Lamorak, who continues fighting among them and strikes in every direction. From the viewing stands, [Queen Guenever](entity:character-recall-character-queen-guenever-f27d6f31454b) and the high prince declare that they have never seen a knight perform such deeds on horseback. [Sir Launcelot](entity:character-recall-character-sir-launcelot-c0ea01c62d3d) tells [King Bagdemagus](entity:character-recall-character-king-bagdemagus-59849e5479e4) that he will arm himself to assist Lamorak; Bagdemagus rides with him. [Launcelot](entity:character-recall-character-launcelot-0b02a99ce6f7) enters the press and unhorses [Sir Mador](entity:character-recall-character-sir-mador-8cbb68335e67) de la Porte, while Bagdemagus fights beside him. Their intervention helps drive the three kings back.
The combat ends when [Sir Galahalt](entity:character-recall-character-sir-galahalt-9433929df1dc) orders the field cleared for lodging. The heralds award Lamorak the prize. Meanwhile, [Palamides](entity:character-recall-character-palamides-9a6f200e4d74), Bleoberis, Safere, and [Ector](entity:character-recall-character-ector-8f00ddc6c029) have continued their evenly matched fighting on foot; they are finally parted and return to their lodgings. The contest’s judgment recognizes Lamorak’s individual achievement, while the separate combats underline that the day has also been a meeting of rivalries and family causes.
## Recognition and Estrangement
At court, Queen Guenever embraces Lamorak and praises his conduct. The high prince and [Sir Dinadan](entity:character-recall-character-sir-dinadan-fc57ab74ca1a) also rejoice in him, and Launcelot’s delight is described as beyond telling. The welcome makes Lamorak a celebrated member of the gathering, and his victory is followed by a feast and the customary return to rest before the next day’s field.
Yet the celebration cannot reconcile him with [Gawaine](entity:character-recall-character-gawaine-e52d508f7128)’s brothers. When Launcelot offers to take Lamorak back to King Arthur and says he will arrange for [Arthur](entity:character-recall-character-arthur-2e33b65bbe57) to command Gawaine and his brothers not to harm him, Lamorak refuses to rely on that protection. He says he will never trust Gawaine or any of his brothers, and adds that, but for King Arthur’s sake, he would be ready to match them in combat. His mistrust is not a passing reservation: he asks Launcelot to commend him to Arthur and the Round Table, promises service wherever he may be, and nevertheless declines to accompany the court.
## Departure and Narrative Significance
Lamorak and Launcelot weep as they part. That private farewell gives the tournament’s public acclaim a more unsettled ending: Lamorak has won the prize and the admiration of the queen, the high prince, Dinadan, and Launcelot, but he will not place his safety in the hands of Gawaine’s family. His reference to having recently avenged an earlier defeat of Arthur’s kin by Sir Palamides locates the distrust within a wider chain of contests and reprisals.
The tournament therefore stages two kinds of judgment at once. The heralds can declare the victor, and the assembled court can honor a knight’s prowess, but those ceremonies do not erase old grievances or make trust possible. Lamorak leaves while still affirming loyalty to Arthur and the Round Table; the unresolved division between that allegiance and his suspicion of Gawaine’s brothers is the event’s lasting consequence.
Event 99
Death of Lamorak
[Death of Lamorak](entity:event-recall-event-af58b00d96a2) is narrated retrospectively through the testimony of [Sir Palamides](entity:character-recall-character-sir-palamides-07dff0dd5cb8), who remembers him as an outstanding knight and describes his killing by [Sir Gawaine](entity:character-recall-character-sir-gawaine-bf0b0cf3eb43) and his brothers. The account makes the death more than the loss of a celebrated combatant: [Lamorak](entity:character-recall-character-lamorak-9d86b1c9a151)’s fate exposes [treachery](entity:concept-recall-concept-22ce6e5d8b9f) within the [Round Table](entity:object-recall-object-round-table-04fef19b82fd) and deepens the estrangement among its knights.
## The Recollection of His Death
The episode surfaces when Sir Palamides arrives as [Sir Bleoberis](entity:character-recall-character-sir-bleoberis-4991a2970156) and [Sir Ector](entity:character-recall-character-sir-ector-1a6b9e06011a) are speaking. Asked whether any knight had ever matched him besides [Sir Launcelot](entity:character-recall-character-sir-launcelot-c0ea01c62d3d) and [Sir Tristram](entity:character-recall-character-sir-tristram-58eb12b2af0e), [Palamides](entity:character-recall-character-palamides-9a6f200e4d74) names Lamorak as a third. He recalls that Lamorak had defeated him and thirty other knights at a tournament, winning the degree. That public distinction frames the later account: Lamorak was not an obscure casualty, but a knight whose ability had been recognized even by a formidable rival.
## The Attack After the Tournament
Palamides says that Lamorak was killed after the tournament, when Sir Gawaine and his brothers met him in a secluded place. They first brought down his horse, and then fought him on foot for more than three hours, attacking him from both before and behind. Palamides identifies [Sir Mordred](entity:character-recall-character-sir-mordred-f7abe8fecb31) as the one who dealt the fatal wound from behind, and says that Lamorak was killed by the group’s sustained attack. The manner of the killing, as Palamides tells it, distinguishes it from an honorable contest: the account presents the assault as a betrayal.
## Witnesses and Grief
[Sir Percivale](entity:character-recall-character-sir-percivale-ade9db96f1ec) hears that his brother Lamorak is dead and swoons over his horse’s neck. When he recovers, he mourns both Lamorak and their father, [King Pellinore](entity:character-recall-character-king-pellinore-3c458d75379d), whose death had already brought the family grief. Sir Tristram also laments Lamorak, whom he remembers as exceptionally strong and enduring, and says he would have given much to have been present when Lamorak was killed. Palamides’s praise carries the weight of rivalry as well as mourning: Lamorak had repeatedly overcome him in tournament and combat, yet Palamides speaks of his death as a loss to good knights generally.
## The Breach Within the Round Table
The recollection affects the living as well as the dead. [Sir Gareth](entity:character-recall-character-sir-gareth-eef7b23b7912) condemns his brothers’ actions and says that, although they are his kin, he will neither love them nor join their company because they murdered a good knight. Sir Tristram understands [Gareth](entity:character-recall-character-e1d13addfd5f)’s position and says that Lamorak’s killers would deserve death if they were not relatives of his lord, [King Arthur](entity:character-recall-character-king-arthur-2b97864f54aa); their family connection makes his own approach to court difficult. [Sir Dinadan](entity:character-recall-character-sir-dinadan-fc57ab74ca1a) then broadens the charge, observing that Sir Gawaine and his brothers hate many of the Round Table’s good knights and bear particular hostility toward Sir Launcelot and his kin. Lamorak’s death thus becomes evidence of a widening factional division, in which kinship protects the guilty while fellowship and trust are steadily weakened.
Event 100
Tristram Competes in Lancelot’s Place
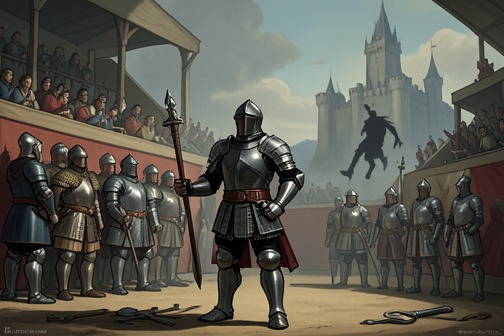
[Tristram Competes in Lancelot’s Place](entity:event-recall-event-84f917b23265) is a tournament episode in which [King Mark](entity:character-recall-character-king-mark-7cea1086241a) exploits a plot directed against [Sir Launcelot](entity:character-recall-character-sir-launcelot-c0ea01c62d3d) to expose [Sir Tristram](entity:character-recall-character-sir-tristram-58eb12b2af0e) to danger. [Tristram](entity:character-recall-character-tristram-a0b006f42abd)’s disguise makes him the target of a mistaken identity; his victory is followed not by the care [Mark](entity:character-recall-character-mark-cfbb20016049) appears to promise, but by his uncle’s [treachery](entity:concept-recall-concept-22ce6e5d8b9f) and imprisonment.
## A Tournament Laid as a Trap
The episode begins when King Mark learns of a tournament organized by [Sir Galahalt the Haut Prince](entity:character-recall-character-sir-galahalt-the-ha-7ccd619cb75c) and [King Bagdemagus](entity:character-recall-character-king-bagdemagus-59849e5479e4). Their purpose is to attack or disgrace [Launcelot](entity:character-recall-character-launcelot-0b02a99ce6f7), who had consistently held the higher standing. Mark welcomes the discovery because it offers him a way to act against Tristram: he sends his nephew to the tournament in disguise, intending the organizers to mistake him for Launcelot.
The arrangement turns the tournament’s public contest into a private plot. Tristram is not simply entering a competition under his own name; Mark has made his identity part of the danger, directing other knights’ hostility toward him while concealing who he is.
## The Disguised Knight Wins
Launcelot is absent, but the disguised knight’s performance persuades the onlookers that he is there. Mark himself says plainly that the knight is Launcelot. Bagdemagus, the Haut Prince, and their knights therefore set upon Tristram, who endures their repeated attacks. Despite the disadvantage and the severe hurts he sustains, he wins the degree at the tournament, injuring and bruising many of his opponents in turn.
Once the jousts are over, the knights discover that the victor is Tristram de [Liones](entity:character-recall-character-liones-f6c0d5cf0838), not Launcelot. The recognition divides those present: Mark’s party is glad that Tristram has been hurt, while the others regret his injuries. The change from mistaken identity to known identity exposes the tournament’s second injustice: Tristram has borne the danger intended for another, and his uncle’s faction takes satisfaction in the harm done to him.
## Mark’s Betrayal and Tristram’s Imprisonment
Mark approaches Tristram with an appearance of concern, calling him nephew and cousin and saying that he is sorry for his hurts. He has Tristram placed in a horse bier and claims that he will act as his leech. The apparent assistance gives way to deception: after taking Tristram to a castle, Mark has him eat and gives him a drink; when Tristram falls asleep, Mark orders him carried by night to another castle and put in a strong prison. A man and a woman are assigned to provide his food and drink, and he remains confined there for a great while.
Tristram’s disappearance prompts [La Beale Isoud](entity:character-recall-character-881eb87025df) to seek help. She goes secretly to [Sir Sadok](entity:character-recall-character-sir-sadok-55803f967f9d) and asks him to find out where Tristram has gone. Sadok discovers that Mark and the traitors of Magons have imprisoned him. The episode thus reveals both the concealment of Mark’s crime and the response it provokes: Tristram’s absence cannot be explained, and [Isoud](entity:character-recall-character-isoud-45c23b134f96) must turn outside Mark’s authority to uncover what happened.
## Political Consequences
Sadok and two cousins lie in ambush near [Tintagil](entity:location-recall-location-5185f645bc56). When Mark rides by with four nephews and other Magons traitors, Sadok attacks; Mark flees, while the fighting leaves four of his nephews dead and one of Sadok’s cousins mortally wounded. Sadok then travels to Liones and reports the treason to Sir Dinas the Seneschal at Arbray. Dinas rejects Mark’s rule, declaring that he will give up the lands he holds from him, and the knights around him follow his example. At Dinas’s and Sadok’s counsel, the towns and castles in Liones are provisioned and local forces assembled.
The tournament’s consequences therefore extend beyond Tristram’s confinement. Mark’s apparent kindness has exposed his betrayal, and the effort to discover Tristram’s whereabouts turns into organized resistance against the king. The episode’s decisive reversal is not merely that the intended victim survives the tournament: the contest meant to harm Tristram becomes the opening of a wider political challenge to Mark.
Event 101
Tristram’s First Imprisonment by King Mark and Rescue
[Tristram’s First Imprisonment by King Mark and Rescue](entity:event-recall-event-dbc597417030) turns a tournament victory into a test of kinship and loyalty. [Tristram](entity:character-recall-character-tristram-a0b006f42abd) wins distinction while disguised as [Sir Launcelot](entity:character-recall-character-sir-launcelot-c0ea01c62d3d), but his uncle [King Mark](entity:character-recall-character-king-mark-7cea1086241a) exploits his injuries to take him captive; resistance gathers around the imprisoned knight, and [Sir Percivale](entity:character-recall-character-sir-percivale-ade9db96f1ec) eventually secures his release. The episode’s central reversal is that a show of familial care conceals a deliberate betrayal, while the rescue exposes the political and personal stakes of [Mark](entity:character-recall-character-mark-cfbb20016049)’s [treachery](entity:concept-recall-concept-22ce6e5d8b9f).
## The Tournament and the Trap
The imprisonment begins at a tournament arranged by [Sir Galahalt](entity:character-recall-character-sir-galahalt-9433929df1dc) the haut prince and [King Bagdemagus](entity:character-recall-character-king-bagdemagus-59849e5479e4) with the intention of defeating or disgracing Sir Launcelot. King Mark learns of their design and sends Tristram in disguise, hoping the opponents will mistake him for [Launcelot](entity:character-recall-character-launcelot-0b02a99ce6f7). Launcelot is not present, but the disguised knight’s prowess convinces the assembled company that he is the intended target. Tristram endures their attacks, wounds and bruises several knights, and wins the tournament’s degree. Once his identity is recognized, the outcome separates those glad to see him hurt from those sorry for him: he is less hated in [England](entity:location-recall-location-england-b153c1f368ea) than Launcelot.
Mark approaches his nephew with apparent solicitude. He calls Tristram his fair nephew and cousin, puts him in a horse bier as a sign of love, offers to act as his leech, and brings him to a castle. After giving Tristram food, Mark gives him a drink that makes him fall asleep. At night he has Tristram carried to another castle and placed in a strong prison, appointing a man and a woman to provide food and drink. The contrast between Mark’s public tenderness and his secret transfer into confinement defines the episode’s betrayal: the signs of care serve as cover for the capture.
## Resistance and Counterfeit Letters
When Tristram disappears, [La Beale Isoud](entity:character-recall-character-881eb87025df) secretly asks [Sir Sadok](entity:character-recall-character-sir-sadok-55803f967f9d) to discover where he has gone. Sadok learns that King Mark and the traitors of Magons have imprisoned him. With two cousins, he lies in ambush near [Tintagil](entity:location-recall-location-5185f645bc56). Mark rides by with four nephews and other supporters; Sadok attacks, Mark flees, and the encounter leaves four of Mark’s nephews dead, while one of Sadok’s cousins is also killed. Sadok carries the news of Mark’s treason to [Liones](entity:character-recall-character-liones-f6c0d5cf0838) and then to Arbray, where [Sir Dinas the seneschal](entity:character-recall-character-sir-dinas-the-senes-d96e13cfeb9b) joins the opposition and gives up his lands held from Mark. On Dinas’s and Sadok’s advice, the towns and castles of Liones are provisioned and the people gathered for resistance.
Mark answers this rising opposition with another deception. After escaping Sadok, he calls the country to arms, then has letters forged in the Pope’s name, ostensibly summoning him to join a war against the Saracens. He uses the supposed summons to offer Tristram release and command his service. Tristram refuses to accept Mark’s authority in the matter, tells the clerk to say that Mark should go himself, and describes himself as ill rewarded for faithful service. Mark then forges a second set of letters, this time claiming that the Pope specifically requests Tristram. Tristram recognizes the forgery and rejects it too. The repeated counterfeit messages turn religious authority into a device of political manipulation, but they do not persuade the prisoner.
## [Percivale](entity:character-recall-character-percivale-67acd4cba5cb)’s Intervention and Mark’s Motive
As the plot against Tristram falters, four wounded knights arrive at Tintagil and report that the country has risen against Mark. [Sir Percivale de Galis](entity:character-recall-character-sir-percivale-de-ga-8d90eb018d47) also comes into the country seeking Tristram. Hearing that he is imprisoned, Percivale secures his release by his knightly means. The two rejoice at their reunion, but Percivale cannot remain in the marches because he must go to [Wales](entity:location-recall-location-6d9a7b286e78). Before leaving, he confronts Mark and says that imprisoning Tristram has brought shame upon the king: Tristram is now the most renowned knight in the world, and the noblest knights love him. Percivale warns that Mark could not withstand Tristram if he chose to make war on him.
Mark answers that he cannot love Tristram because Tristram loves his queen and wife, La Beale Isoud. Percivale rebukes him for speaking so of his nephew. He argues that Tristram would not commit the dishonour Mark alleges, while allowing that Tristram may love [Isoud](entity:character-recall-character-isoud-45c23b134f96) without sin because she is renowned for her beauty. This exchange clarifies the personal grievance behind Mark’s conduct, but does not validate his response: Percivale’s rebuke emphasizes the uncle-nephew bond and the dishonour of imprisoning a celebrated knight. Mark promises Percivale that he will not harm Tristram, then soon acts against that pledge.
## Broken Promise and the Episode’s Reversal
Mark tells Sir Dinas to disband the people he has raised, swearing that he will go to [Rome](entity:location-recall-location-f3877a21016f) at the Pope’s request to fight the Saracens. Dinas accepts this account and dismisses the gathered force. Once the people have returned home, Mark discovers where Tristram is with La Beale Isoud and, despite his promise to Percivale, has Tristram seized and imprisoned again. Isoud grieves when she learns of the capture. Tristram sends her a letter asking her to prepare a vessel so that they can go together to [Logris](entity:location-recall-location-logris-15cd419db8d9); she replies that he should take heart and that she will make the vessel ready. The episode thus ends not with secure freedom, but with a renewed confinement and a plan for escape, while Mark’s broken oath confirms that Percivale’s intervention has not ended the danger.
The narrative makes imprisonment one part of a wider contest over honour and trust. Tristram’s victory at the tournament first shows how Mark treats his nephew’s prowess as something to exploit; the false messages and broken promise then show how readily he turns public institutions and sworn assurances into instruments of betrayal. Against that pattern, Sadok’s and Dinas’s resistance and Percivale’s direct intervention establish a network of loyalty around Tristram. His rescue is therefore both a literal release from custody and a revelation of the relationships that make Mark’s rule unstable.
Event 102
King Mark Imprisons Tristram and Is Countered
[King Mark Imprisons Tristram and Is Countered](entity:event-recall-event-3cd26d3ecf76) is a reversal in which [Mark](entity:character-recall-character-mark-cfbb20016049)’s attempt to control his nephew through imprisonment is answered by an alliance between [La Beale Isoud](entity:character-recall-character-881eb87025df) and the seneschal Sir Dinas. Mark violates a promise not to harm [Sir Tristram](entity:character-recall-character-sir-tristram-58eb12b2af0e); [Isoud](entity:character-recall-character-isoud-45c23b134f96) turns the same weapon of confinement against him, enabling the lovers to escape together.
## The Broken Promise
[Sir Percivale](entity:character-recall-character-sir-percivale-ade9db96f1ec) had secured Sir Tristram’s release and challenged Mark over his treatment of his nephew. Mark acknowledged [Tristram](entity:character-recall-character-tristram-a0b006f42abd)’s renown and admitted that he resented him because he loved La Beale Isoud, Mark’s queen and wife. Sir Percivale rebuked Mark for speaking so of a knight of Tristram’s nobility and reminded him of their uncle-nephew bond. Mark nevertheless promised that he would not harm Tristram.
That pledge proves temporary. After Sir Percivale leaves, Mark devises another act of [treachery](entity:concept-recall-concept-22ce6e5d8b9f). He tells Sir Dinas to disperse the people Mark had raised, claiming that he intends instead to go to [Rome](entity:location-recall-location-f3877a21016f) to wage war against non-Christians. Once the people have returned home, Mark seizes Sir Tristram and puts him in prison, directly contradicting his assurance to Sir Percivale.
## Isoud’s Countermove
La Beale Isoud grieves when she learns that Sir Tristram has been imprisoned. Tristram sends her a letter asking her to prepare a vessel so they can leave together for [Logris](entity:location-recall-location-logris-15cd419db8d9). She replies that he should take heart: she will arrange the vessel and make the necessary preparations.
Isoud also seeks help from Sir Dinas and [Sir Sadok](entity:character-recall-character-sir-sadok-55803f967f9d), asking them to imprison Mark until she and Tristram have departed. Sir Dinas agrees after learning of Mark’s treachery, and the plan is carried out. The reversal is practical as well as political: Mark’s breach of his promise leaves him vulnerable to the very tactic he used against Tristram.
## Release and Departure
With Mark confined, Sir Tristram is freed. He and La Beale Isoud then make their preparations and take counsel about what they will bring with them as they leave. Their escape carries the immediate consequences of the imprisonment beyond the prison itself: Mark’s attempt to separate them instead precipitates their departure together for Logris.
The episode also sharpens the contrast between kinship and conduct. Mark’s position as Tristram’s uncle does not prevent his treachery, while Sir Percivale invokes that relationship as a reason Mark should not act against him. The sequence turns on broken assurances and countermeasures rather than a formal judgment: Isoud and her allies answer Mark’s private seizure with confinement of their own, and Tristram’s freedom becomes the condition for the pair’s escape.
Event 103
Tristram and Isolde Arrive at Joyous Gard
[Tristram and Isolde Arrive at Joyous Gard](entity:event-recall-event-a1ba2dd58b76) is the episode in which [Sir Tristram and La Beale Isoud](entity:relation-recall-relation-sir-tristram-and-la-7d6c6d39f64e), having escaped [King Mark](entity:character-recall-character-king-mark-7cea1086241a), cross into [England](entity:location-recall-location-england-b153c1f368ea) and find refuge at [Sir Launcelot](entity:character-recall-character-sir-launcelot-c0ea01c62d3d)’s castle. Their arrival reconnects [Tristram](entity:character-recall-character-tristram-a0b006f42abd) with the fellowship around [King Arthur](entity:character-recall-character-king-arthur-2b97864f54aa), but the welcome also gives the king a reason to call a tournament that [Launcelot](entity:character-recall-character-launcelot-0b02a99ce6f7) recognizes as potentially dangerous. The episode turns an escape into a public return: first the pair travel privately, then Tristram’s skill draws attention, and finally Launcelot’s hospitality establishes [Joyous Gard](entity:location-recall-location-joyous-gard-c7d2751b6533) as their shelter.
## Escape and Arrival in England
After King Mark’s treason is discovered, [Sir Dinas the seneschal](entity:character-recall-character-sir-dinas-the-senes-d96e13cfeb9b) promises [Isoud](entity:character-recall-character-isoud-45c23b134f96) that [Mark](entity:character-recall-character-mark-cfbb20016049) will be imprisoned, and the plan is carried out. Tristram is released from prison. He and Isoud take counsel about what to bring with them, then board a vessel and travel by water to England. Their departure is therefore a consequence of the plot against them and of Tristram’s release, rather than a journey presented as an ordinary visit.
They have been in England fewer than four days when news reaches them of a tournament ordered by King Arthur. The short interval gives their arrival an immediate public sequel: before they have had time to settle, the tournament draws Tristram back into the world of knightly contests. He disguises himself and Isoud and rides to the gathering, concealing their identities as they enter the scene.
## The Tournament and Recognition
At the tournament, Tristram joins the contests and overthrows fourteen knights of the [Round Table](entity:object-recall-object-round-table-04fef19b82fd). Sir Launcelot sees the knights fall and prepares to joust with the unknown newcomer. Isoud recognizes Launcelot in the field and sends him a ring with a message identifying the victorious stranger as [Sir Tristram de Liones](entity:character-recall-character-sir-tristram-de-lio-fb7d532f0a63). The ring turns an anonymous display of prowess into a recognition between friends: instead of engaging Tristram, Launcelot is glad to learn who he is.
Launcelot follows Tristram, and the two greet one another with joy. Recognition changes the direction of the episode. The tournament has brought them together, but Launcelot does not make their meeting another contest; he leads Tristram and Isoud away to his own stronghold, Joyous Gard. The sequence contrasts the public arena, where Tristram’s concealed identity attracts challengers, with the private welcome offered once Isoud’s token makes that identity known.
## Refuge at Joyous Gard
Launcelot gives the couple refuge at Joyous Gard, a castle he had won by his own efforts. The account describes it as equipped and furnished to accommodate a king and queen, making its suitability for Tristram and Isoud part of the welcome itself. Launcelot also commands his household to honour and love them as they would honour and love him. His hospitality is not merely permission to stay: he uses his standing as lord of the castle to set the terms of their reception.
The refuge follows their escape from King Mark and places them under Launcelot’s protection. After bringing them to the castle, however, Launcelot departs to return to King Arthur. He tells [Queen Guenever](entity:character-recall-character-queen-guenever-f27d6f31454b) that the knight who jousted so successfully at the tournament was Tristram, and that Tristram has brought Isoud with him despite King Mark. [Guenever](entity:character-recall-character-112dfc46734b) passes the news to [Arthur](entity:character-recall-character-arthur-2e33b65bbe57), carrying the private arrival into the royal household.
## The [May Day](entity:time-recall-time-may-day-c9cdfdf972a4) Tournament and Its Risks
Arthur responds to the news by ordering a May Day tournament before the castle of [Lonazep](entity:location-recall-location-lonazep-1552249ffece), close to Joyous Gard. He calls for knights from Arthur’s lands, [Cornwall](entity:location-recall-location-cornwall-5562c2fa740e), and [North Wales](entity:location-recall-location-3df16a26c9ed) to contend against knights from [Ireland](entity:location-recall-location-ireland-3247a2c8bcbe), [Scotland](entity:location-recall-location-scotland-4e112aa71aa3), the remaining parts of [Wales](entity:location-recall-location-6d9a7b286e78), [Gore](entity:location-recall-location-gore-b6ce2dde700e), [Surluse](entity:location-recall-location-surluse-ab2ff0a6cae3), [Listinoise](entity:location-recall-location-listinoise-9af3b12e8fa7), and [Northumberland](entity:location-recall-location-northumberland-1d87d0a03a77), as well as those who hold lands from him on this side of the sea. The proposed gathering is thus broader than a local contest, bringing together knights from across the territories named in the account.
Launcelot warns Arthur that the announcement may place those around him in jeopardy: many knights envy them, he says, and a meeting on the tournament day could lead to hard fighting among their company. Arthur dismisses the warning, saying that the contest will show whose hands are best. Once Launcelot understands the reason for Arthur’s decision, he arranges a concealed but appropriate place from which Isoud can watch the jousts. The episode ends with the pair established at Joyous Gard and with a tournament looming nearby, its expected display of prowess shadowed by Launcelot’s explicit concern about the danger to his party.
## Narrative Significance
The episode links three kinds of movement: escape from King Mark’s imprisonment, recognition at Arthur’s tournament, and entry into Launcelot’s household as guests. Isoud’s ring is the hinge between concealment and recognition, while Joyous Gard becomes the practical consequence of that recognition: a castle capable of sheltering the pair and a host prepared to defend their standing as honoured guests.
The tournament announcement also makes their refuge unstable in a distinct way. Launcelot can offer protection within Joyous Gard, but Arthur’s planned gathering draws potentially envious knights to the neighbouring castle and creates the prospect of conflict. The episode therefore closes not with the pair’s fate resolved, but with their welcome secured and a new public test approaching.
Event 104
Palamedes Kills Corsabrin
[Palamedes Kills Corsabrin](entity:event-recall-event-457ab97adf91) is a tournament combat at [Surluse](entity:location-recall-location-surluse-ab2ff0a6cae3) in which Palamedes champions a king’s daughter against Corsabrin, a Saracen knight who has obstructed her marriage by disparaging her. Palamedes wins the fight and kills Corsabrin; the aftermath turns the victory into a moment of religious questioning, as Palamedes explains that he came to the land intending to be baptized but has vowed to complete seven battles for Jesus first.
## The Damsel’s Appeal
The damsel is the daughter of King Bandes. Corsabrin loves her, but will not allow her to marry: he defames her and calls her out of her mind, thereby preventing her from finding a husband. The account establishes her predicament through the power Corsabrin exercises over her prospects, rather than through any judgment that confirms his accusations.
Hearing that Palamedes often acts for damsels, she sends him a pennon and asks him to fight Corsabrin for her. Her appeal offers him both her love and the lands that will fall to her from her father. She also sends word to Corsabrin, telling him to meet Palamedes and explaining that she has sent her pennon; should Corsabrin defeat Palamedes, she says, she will marry him. The challenge thus makes the damsel’s situation the cause and stated object of the combat, while placing the pennon in Palamedes’s hands as a visible token of her request.
## Combat at Surluse
Corsabrin reacts angrily when he learns what the damsel has done and rides to Surluse, where Palamedes is ready with the pennon. The two agree to fight before [Sir Galahalt](entity:character-recall-character-sir-galahalt-9433929df1dc), the high prince, who orders that they joust that day and that their progress be seen after dinner. The tournament’s public setting gives the dispute a formal audience, but the account centers the contest on the particular demand that Corsabrin release the damsel and her pennon.
After the other knights’ jousting, Palamedes plants the pennon in the middle of the field. He and Corsabrin charge with spears and both fall from their horses. They then take up swords and continue the combat. Palamedes asks Corsabrin to release the damsel and the pennon; Corsabrin refuses and strikes him hard enough to bring him to one knee. Palamedes rises, strikes Corsabrin’s helmet, and brings him down. He removes Corsabrin’s helmet and gives him the choice to yield or die. Corsabrin refuses to yield, and Palamedes kills him.
## Victory and Its Religious Consequence
After the fight, the court returns to lodging and Palamedes is unarmed. Sir Galahalt points to what happened when Corsabrin died as a miracle and urges Palamedes to accept baptism, saying that the knights will esteem him more and speak more honorably of him. The episode links Palamedes’s battlefield victory with a question the surrounding company considers spiritually significant, but it does not make baptism an immediate consequence of the combat.
Palamedes answers that he came to the land to be baptized and is already baptized in his heart, but that he has made a vow not to receive baptism until he has completed seven true battles for Jesus. He says he trusts that God will accept his intention. Rather than treat his continued unbaptized status as indifference, the account presents it as a condition attached to his vowed service. He then invites [Queen Guenever](entity:character-recall-character-queen-guenever-f27d6f31454b), Sir Galahalt, [Sir Launcelot](entity:character-recall-character-sir-launcelot-c0ea01c62d3d), [Sir Lamorak](entity:character-recall-character-sir-lamorak-6fa764f44bdb), and other knights to supper. The next morning they hear Mass before the field is opened again, carrying the religious setting of Palamedes’s explanation back into the tournament’s continuing action.
Event 105
King Hermance Is Murdered by Helios and Helyak
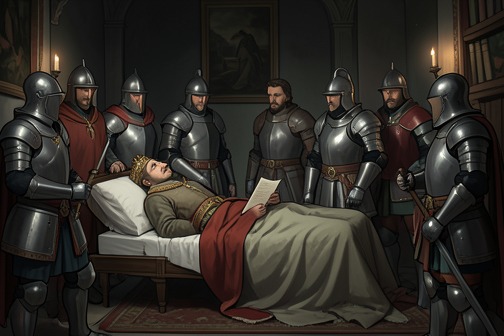
The murder of [King Hermance of the Red City](entity:character-recall-character-king-hermance-of-th-f294b2a0a5c6) is presented as both a betrayal within the royal household and a failure of political judgment: two knights whom Hermance had brought up and trusted kill him after isolating him from his own kindred. His dying request, carried in a letter to [King Arthur](entity:character-recall-character-king-arthur-2b97864f54aa)’s court, converts the crime into a public appeal for vengeance. [Sir Palamides](entity:character-recall-character-sir-palamides-07dff0dd5cb8) hears the account and undertakes the mission against the traitors.
## Background: a king’s misplaced trust
Sir Ebel explains that Hermance was remembered as a noble, generous ruler who delighted in the company and activities of errant knights. Yet the king’s affection for the two men he had raised came at a political cost. He trusted neither his blood relatives nor others around him as much as he trusted these knights, and allowed them to govern his affairs while preventing his kindred from exercising influence.
The excluded lords of Hermance’s blood eventually withdrew to their own lands. Ebel presents that estrangement as a warning about the choice of advisers: the king’s generosity and the knights’ deceptive conduct left his household vulnerable. The account does not describe a battle between rival armies; it locates the danger inside the king’s circle, where personal trust has displaced kinship and sound counsel.
## The killing in the forest
Hermance rode into the nearby forest fully armed, following the advice of the two knights. After riding and hunting, he became thirsty, dismounted, and drank at a well. With the other conspirator’s assent, Helius suddenly attacked him with a spear. The two men then left the king there.
Ebel came upon Hermance by chance at the well and found him mortally wounded. The king’s vulnerability at that moment contrasts with the armed, knightly life he had embraced: he had gone into the forest as a ruler who enjoyed the pursuits of chivalry, but was betrayed by men admitted to his confidence. The narrative makes the well the scene of the crime and the point from which Hermance’s last appeal begins.
## The dying king’s letter
Ebel brought Hermance to the water’s edge and placed him alive aboard a vessel. At the king’s request, he wrote a letter addressed to King Arthur and the errant knights of [Arthur](entity:character-recall-character-arthur-2e33b65bbe57)’s court. Hermance identified himself as a king slain by felony and treason at the hands of two knights of his own upbringing and making. He asked that a worthy knight avenge his death and offered his lands and rents to whoever risked his life against the two traitors in single combat.
Hermance’s request makes the crime a matter of both justice and knightly obligation. He invokes his past goodwill toward Arthur’s court as grounds for its help, and offers his holdings as a reward. The letter does not erase the political failure that preceded the murder; instead, it gives that failure a public consequence, carrying the king’s accusation beyond the household where he had been betrayed.
## [Palamides](entity:character-recall-character-palamides-9a6f200e4d74) takes up the cause
Hermance ordered Ebel to place the letter in his hand after his death and to send the vessel down the [Humber](entity:location-recall-location-humber-7bcb1d8f7631) toward [Logris](entity:location-recall-location-logris-15cd419db8d9), where noble knights would be assembled. He hoped that one of them would pity his death and answer the appeal. The letter thus travels from a dying king through his loyal servant and onward to the courtly world in which redress might be obtained.
When Sir Palamides later hears Ebel’s account at the castle, he recognizes the letter and says that he came to avenge Hermance at the command of the knight who had read it to him. He asks where the traitors can be found and says he will have no ease until he confronts them. Ebel directs him toward the [Delectable Isle](entity:location-recall-location-delectable-isle-1139b9877161), near the [Red City](entity:location-recall-location-red-city-6936894f63ab), and asks him also to protect the castle. Palamides accepts the danger of the quest and leaves the castle’s defenders to keep it; he names [Sir Tristram and Sir Launcelot](entity:relation-recall-relation-sir-tristram-and-sir-2f3e993e27e1) as knights who might avenge him should he be killed.
## Political and narrative significance
The murder’s central reversal is that Hermance’s trust, intended as a bond of loyalty, helps make him vulnerable: the two knights he raised turn their privileged position into the means of his destruction. Ebel’s account links the killing to the earlier exclusion of Hermance’s relatives, making the crime a consequence of a damaged political household rather than an isolated act of violence.
The episode also shows how justice is pursued in this narrative through personal service and the risk of combat. Hermance cannot prosecute his killers; instead, his letter asks a knight to take up the cause, and Palamides answers through a quest for confrontation. The king’s death therefore continues to act after his own life has ended: his written appeal recruits a champion and sets the revenge narrative in motion.
Event 106
Palamedes Avenues King Hermance
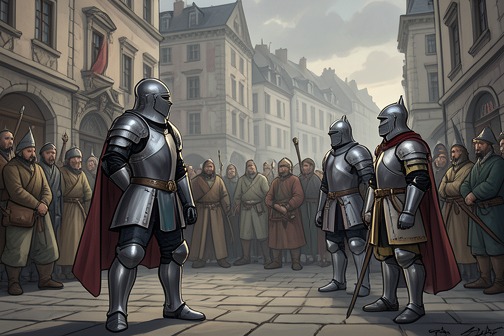
[Palamedes Avenues King Hermance](entity:event-recall-event-388d60c39166) is a revenge episode in which a dead ruler’s appeal draws Palamedes to the [Red City](entity:location-recall-location-red-city-6936894f63ab) to confront the two knights who murdered him. The combat tests not only Palamedes’s strength but his fidelity to a promise: he fights on Hermance’s behalf, secures the city’s release from the traitors, and refuses its offer of riches so he can return to the commitments he has already made.
## The King’s Appeal and Palamedes’s Promise
King Hermance’s death is presented through the letter he ordered written before he died. He describes himself as slain by felony and treason at the hands of two knights he had raised and formed, and offers his lands and rents to any knight willing to meet them in single combat. His servant Ebel carries the letter, which was placed in Hermance’s hand after he received the sacrament; following the king’s instructions, the vessel bearing the appeal is sent down the [Humber](entity:location-recall-location-humber-7bcb1d8f7631) toward [Logris](entity:location-recall-location-logris-15cd419db8d9), where noble knights are expected to gather.
The appeal gives the revenge a public and political purpose as well as a personal one. Ebel explains that the Red City and its people would accept as their lord the knight who kills the two betrayers. Palamedes says the account grieves him and recalls that he has already seen the letter: a knight he calls one of the best on earth read it to him and directed him to come. He has therefore undertaken the revenge before reaching the city, and says he will not be at ease until he has met the traitors. His promise, rather than the proposed reward, is what binds him to the cause.
Ebel directs Palamedes by ship to the [Delectable Isle](entity:location-recall-location-delectable-isle-1139b9877161), close by the Red City. Palamedes tells the people guarding the castle to hold it securely even if he is killed; he expects that another great knight, either [Sir Tristram](entity:character-recall-character-sir-tristram-58eb12b2af0e) or [Sir Launcelot](entity:character-recall-character-sir-launcelot-c0ea01c62d3d), would avenge his death. This instruction reveals how he treats the expedition as a risk to be borne, not a guaranteed victory, and places the castle and its people within the stakes of the undertaking.
## The Challenge at the Red City
As Palamedes approaches the city, another armed knight comes out to meet him and claims the quest as his own. Palamedes acknowledges that the other may have had an earlier claim, but argues that when the letter was taken from the dead king’s hand no knight had yet undertaken the revenge; he had made his promise then. The two agree that the better knight will take up the battle. The episode thus makes competing claims to a righteous cause part of the approach to combat, but Palamedes’s prior commitment remains his reason for proceeding.
When Palamedes arrives, the people welcome and assess him as a capable knight. The account emphasizes that, though unchristened, he believes in God and is faithful, true, and well-conditioned. It also recalls his vows: he will not be christened until he has achieved the [Questing Beast](entity:creature-recall-creature-questing-beast-7a2aacd58701), and will not take full christendom until he has fought seven battles within the lists. These vows frame his identity as a Saracen knight whose fidelity and religious belief coexist with an unfinished commitment to baptism; the text does not say that Hermance’s revenge completes either vow.
On the appointed occasion, Helius and Helake come to the lists with forty knights, boasting of their power and their damage to the Red City. Palamedes directly asks whether they are the brothers who killed their king by treason. They admit that they are, and address him as a Saracen while threatening him. Palamedes answers that he is not afraid of them and trusts in God; he declares that one side will be left dead in the place. The confrontation turns Hermance’s written accusation into an explicit, acknowledged charge, with the alleged murderers themselves confirming their identity and deed.
## The Long Fight and Its Reversal
The brothers ride against Palamedes together. He strikes Helake through shield and breast, knocking him to the ground. Helius holds back at first, but when he sees his brother down, attacks Palamedes, knocks him from his saddle, and rides over him two or three times. Palamedes pulls Helius’s horse by the bridle; horse and rider fall, but Helius rises quickly and strikes Palamedes on the helmet, bringing him to one knee.
The combat continues without rest for two hours. The account reverses their apparent fortunes: Palamedes grows faint and weary while Helius grows stronger and drives him across the field. The people of the city weep at the prospect that Palamedes will be killed for their king, while Helius’s party rejoices. Palamedes has endured a hundred strokes, but the turning point comes when he sees the common people grieving. Ashamed, he raises his shield, looks at Helius, and answers with a series of blows. He brings Helius to the ground, removes his helmet, and kills him. The scene makes the city’s concern part of the action: its grief prompts the renewed effort that turns a failing fight into victory.
With Helius dead and Helake already fallen, Palamedes has defeated both brothers. The Red City’s people rejoice and bring him to his lodging with ceremony; they all become his men. The reversal is complete: the knight who entered as a foreign champion for a dead king is received as the people’s victorious lord, and Hermance’s appeal has been answered through the defeat of the men who confessed to killing him.
## Victory, Allegiance, and Departure
Palamedes’s victory does not end in his taking possession of the offered reward. He urges the people to protect King Hermance’s lordship and says he cannot remain, because he must return promptly to [King Arthur](entity:character-recall-character-king-arthur-2b97864f54aa) at [Lonazep](entity:location-recall-location-lonazep-1552249ffece), as he has promised. The citizens are saddened by his departure and offer him a third part of their goods if he will stay. He refuses, leaves, and returns to the castle where Ebel is lieutenant; there, the company rejoices when it learns how he has succeeded.
Palamedes then continues to Lonazep. Finding that Sir Tristram is not there, he crosses the Humber to [Joyous Gard](entity:location-recall-location-joyous-gard-c7d2751b6533), where [Tristram and La Beale Isoud](entity:relation-recall-relation-tristram-and-la-beal-de4d6f9b6c67) are. [Tristram](entity:character-recall-character-tristram-a0b006f42abd) has instructed the townspeople to inform him when an errant knight arrives. After hearing the visitor’s appearance described, Dinadan identifies him as Palamedes. Tristram sends Dinadan to him, and the two greet one another with joy; they spend the night together, and the next morning Tristram and [Sir Gareth](entity:character-recall-character-sir-gareth-eef7b23b7912) come to them before they rise, after which they break their fast. This reunion carries Palamedes out of the revenge episode and back into the company and obligations that shaped his decision to leave the Red City.
## Revenge and the Measure of Honour
The episode builds revenge from a sequence of obligations: Hermance’s last appeal, Palamedes’s promise, the brothers’ admission, and the people’s expectation that their king’s death be avenged. It makes the result legible not through a formal ruling but through a fight in the lists, with the accused men’s confession and the combat’s outcome settling the immediate claim. The victory changes Palamedes’s standing in the Red City, whose people accept him as their lord, but he declines both its offer of wealth and the opportunity to remain.
That refusal is the episode’s decisive counterweight to triumph. Palamedes earns allegiance and could claim material reward, yet chooses the prior pledge to King Arthur over possession of Hermance’s lands. His courage appears in the reversal after two hours of combat; his honour is measured afterward, in what he does not take. The vengeance restores the city’s confidence in its lordship, while Palamedes’s departure keeps the episode connected to the wider fellowship and promises of the Arthurian court.
Event 107
Tournament at Lonazep
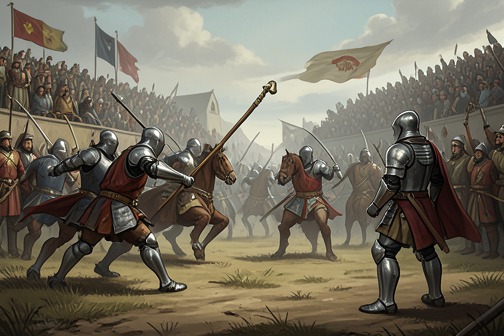
The [Tournament at Lonazep](entity:event-recall-event-5be6b2a270f3) is a public contest turned test of loyalty: called by [King Arthur](entity:character-recall-character-king-arthur-2b97864f54aa) to mark [Sir Tristram](entity:character-recall-character-sir-tristram-58eb12b2af0e)’s return with [La Beale Isoud](entity:character-recall-character-881eb87025df), it brings rival kingdoms and [Round Table](entity:object-recall-object-round-table-04fef19b82fd) companions into the same field. Across several days, [Tristram](entity:character-recall-character-tristram-a0b006f42abd)’s prowess wins recognition even from his opponents, while [Sir Palamides](entity:character-recall-character-sir-palamides-07dff0dd5cb8)’s rivalry and eventual refusal to change sides expose the strain between private honour and allegiance to [Arthur](entity:character-recall-character-arthur-2e33b65bbe57).
## Background and Stakes
Arthur announces the jousts after learning that Tristram has escaped [King Mark](entity:character-recall-character-king-mark-7cea1086241a) and brought La Beale Isoud with him, despite [Mark](entity:character-recall-character-mark-cfbb20016049)’s opposition. The castle of [Lonazep](entity:location-recall-location-lonazep-1552249ffece) stands close to [Joyous Gard](entity:location-recall-location-joyous-gard-c7d2751b6533), and the proposed gathering is broad in scope: knights from Arthur’s lands and [Cornwall](entity:location-recall-location-cornwall-5562c2fa740e) are to joust against those from [Ireland](entity:location-recall-location-ireland-3247a2c8bcbe), [Scotland](entity:location-recall-location-scotland-4e112aa71aa3), [Wales](entity:location-recall-location-6d9a7b286e78), [Gore](entity:location-recall-location-gore-b6ce2dde700e), [Surluse](entity:location-recall-location-surluse-ab2ff0a6cae3), [Listinoise](entity:location-recall-location-listinoise-9af3b12e8fa7), and [Northumberland](entity:location-recall-location-northumberland-1d87d0a03a77). The event therefore makes Tristram’s return the occasion for a contest among a wide assembly of kingdoms and territories.
[Sir Launcelot](entity:character-recall-character-sir-launcelot-c0ea01c62d3d) warns Arthur that the proclamation places the knights around him in danger. Many, he says, envy them, and the gathering may produce fierce encounters. Arthur accepts that risk, saying that the jousts will prove who is strongest. [Launcelot](entity:character-recall-character-launcelot-0b02a99ce6f7), meanwhile, arranges for La Beale Isoud to watch from a private place suited to her rank. Her presence is kept discreet, but the tournament is also a scene in which Tristram’s return and standing will be witnessed.
Before the contest, Tristram and [Sir Dinadan](entity:character-recall-character-sir-dinadan-fc57ab74ca1a) ride to Lonazep to learn what is happening. They hear a horn summon the kings and knights who intend to oppose Arthur. The King of Ireland, Marhalt, father of [Sir Marhaus](entity:character-recall-character-sir-marhaus-1bd99ec8e2d9), speaks at their council. When Tristram asks which side his company should join, [Palamides](entity:character-recall-character-palamides-9a6f200e4d74) advises fighting against Arthur: Launcelot and many accomplished knights of his kin will be on the king’s side, and facing such opponents will bring greater honour. Tristram accepts this counsel, and the company chooses its initial position against Arthur.
## The First Day: Disguises and Recognition
On the morning of the jousts, Tristram’s party appears in green equipment, and La Beale Isoud and her three damsels wear the same colour. She watches from a bay window with her face covered. Arthur notices the unfamiliar knights and asks Launcelot who they are. Launcelot cannot identify them with certainty, but suspects [Tristram and Palamides](entity:relation-recall-relation-tristram-and-palamid-ad71d66506c2) are among them, with [Isoud](entity:character-recall-character-isoud-45c23b134f96). Arthur then has [Sir Kay](entity:character-recall-character-sir-kay-b93c82975d98) check the vacant places at the Round Table. Ten knights are absent, including Tristram, Palamides, [Sir Gareth](entity:character-recall-character-sir-gareth-eef7b23b7912), and Sir Dinadan, confirming Arthur’s suspicion that some missing companions may be fighting against him.
The opening encounters establish the day’s forceful pace. Sir Edward of [Orkney](entity:location-recall-location-orkney-f100d579207b) unhorses the King of Scotland, while [Sir Sadok](entity:character-recall-character-sir-sadok-55803f967f9d) knocks down the King of [North Wales](entity:location-recall-location-3df16a26c9ed). Palamides responds by unhorsing Edward and then Sadok. [Sir Gawaine](entity:character-recall-character-sir-gawaine-bf0b0cf3eb43) recognizes Palamides as the knight who had defeated him and seven other companions in an earlier encounter. Tristram then arrives on a black horse and unhorses four knights of Orkney in a single charge; [Gareth](entity:character-recall-character-e1d13addfd5f) and Dinadan also defeat opponents.
Tristram and Palamides continue to dominate the field. Tristram rides into the press, knocks knights down, and strips away helmets and shields; Palamides performs with comparable distinction on the other side. Arthur compares Tristram on the black horse to a lion and Palamides on the white horse to a leopard, while Gareth and Dinadan are likened to wolves. The imagery emphasizes not just individual success but a compact fellowship moving together through the contest.
The heralds count twenty knights unhorsed by Tristram and twenty by Palamides, with many of the defeated men belonging to Arthur’s household. Arthur regards this as a challenge to his party and prepares to enter the contest with Launcelot, [Sir Bleoberis](entity:character-recall-character-sir-bleoberis-4991a2970156), and [Sir Ector](entity:character-recall-character-sir-ector-1a6b9e06011a). Launcelot cautions that the two leading opponents have already laboured hard, but Arthur insists on answering their success. The matchups are arranged: Launcelot chooses Tristram, Bleoberis is set against Palamides, [Ector](entity:character-recall-character-ector-8f00ddc6c029) against Gareth, and Arthur against Dinadan.
Launcelot strikes Tristram so forcefully that horse and rider are carried down. Yet the encounter turns from straightforward opposition into a display of mutual respect. Seeing Tristram’s achievement, an unnamed knight dismounts and offers him his own horse, judging Tristram more worthy of it. Tristram accepts and promises to repay the kindness if he can. He then meets Arthur and knocks the king from his saddle. When Isoud sees Tristram unhorsed and loses sight of him, she weeps; Tristram soon returns to the field, where she can see him again.
Launcelot recognizes Tristram and regrets having struck him down. Tristram continues fighting, helps Palamides, Gareth, and Dinadan back onto their horses, and supports them without their knowing who has assisted them. The day’s honours go to Palamides, who has remained in the field and fought persistently. Once Tristram’s identity is known to his companions, Dinadan brings Isoud to the pavilions beside the well, where Tristram receives her.
## The Second Day: Rivalry and Reversal
A chapter heading announces that on the second day Palamides forsakes Tristram and joins the opposing side. The rivalry between them becomes especially visible as the crowd’s acclaim shifts. Tristram fights with such force that observers say he does twice as much as Palamides did earlier. The praise turns toward Tristram, who defeats the Orkney knights and draws the crowd’s attention with both spear and sword. Arthur agrees that Tristram is an exceptional knight; Launcelot explains that the celebrated fighter is Tristram himself.
Palamides watches Tristram’s success and weeps in distress, knowing that he is unlikely to win the same honour while Tristram is displaying his full strength. Their contest is thus not merely against outside opponents: public recognition separates the two men even while they remain connected through their shared party and their competition for honour. On the field, Launcelot and three of his kinsmen fight the Kings of Wales and Scotland, but by Launcelot’s command they spare Tristram. Tristram and Gareth continue to endure the fighting.
The next day, Tristram and his company again appear in red, with Isoud dressed to match. In the renewed fighting, Tristram unknowingly knocks Arthur down. When the opposing kings try to take Arthur and Launcelot prisoner, Launcelot resists; Sir Ector also intervenes against Palamides, knocking him down. The scene pushes the tournament beyond a contest for individual renown: the king and his leading knight are at risk, and the divided field must decide whether its participants will maintain their chosen sides or defend their fellowship.
Tristram then tells Palamides, Gareth, and Dinadan that he will join Arthur’s party. He cannot accept seeing so few men perform so well while their own lord, Arthur, and the noble Launcelot are dishonoured. Gareth and Dinadan agree. Palamides refuses to change sides, saying that he will remain with the party he joined; Tristram answers that this refusal is for his sake and lets him depart. Tristram, Gareth, and Dinadan turn to Launcelot. Arthur defeats Palamides, while Launcelot unhorses the Kings of Ireland, Scotland, and Wales, and Tristram fights against all whom he meets. The opposing party flees, and Palamides rides away lamenting the loss of the honour he had won.
## Recognition and the Shared Prize
At the close, opinion is divided over whether Tristram or Launcelot deserves the prize. Tristram asks the assembly to give its voice to Launcelot, offering his own support; Launcelot refuses to take the honour solely for himself. The prize is therefore shared between them. Their exchange reverses the tournament’s earlier rivalry: each knight publicly recognizes the other’s worth rather than claiming precedence.
Sir Bleoberis and Sir Ector ride with Tristram and Isoud to her pavilions. Palamides remains at the well, grieving over his defeat, until the fleeing Kings of Wales and Scotland find him. They restore his horse, help him arm, and invite him to ride with them. The tournament ends not with a single, uncontested victor, but with honour distributed between Tristram and Launcelot, while Palamides’s departure leaves the costs of rivalry in view. The repeated shifts in sides make the contest a measure of knightly reputation and fellowship: prowess can earn an opponent’s respect, but the choice of whom to defend ultimately defines allegiance.
Event 108
Lancelot Rescues the Imprisoned Lady and Slays the Dragon
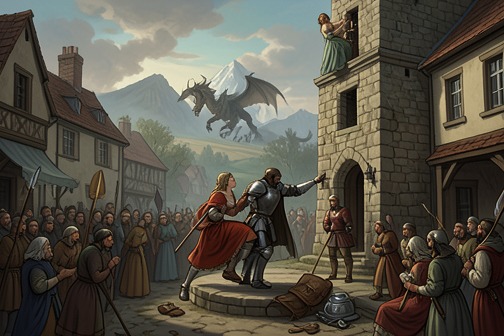
In [Lancelot Rescues the Imprisoned Lady and Slays the Dragon](entity:event-recall-event-6e49a40a1512), [Sir Launcelot du Lake](entity:character-recall-character-sir-launcelot-du-la-390bf6228175) turns an enchanted captivity into a public deliverance, then accepts a second danger when the townspeople ask him to face a dragon. The episode establishes his exceptional reputation through action: the imprisoned woman is freed because he takes her by the hand, and the people’s confidence in him is borne out when he kills the creature. The encounter also brings him before [King Pelles](entity:character-recall-character-king-pelles-c21481cad617), connecting a rescue adventure to the wider Grail narrative.
## Setting and Prophecy
The episode begins after the hermit’s prediction at [King Arthur](entity:character-recall-character-king-arthur-2b97864f54aa)’s court that the person destined to occupy the [Siege Perilous](entity:object-recall-object-fbc65bd41808) and win the [Sangreal](entity:object-recall-object-sangreal-c287525e0d7a) would be born that same year. The narration then turns from this prophecy to [Launcelot](entity:character-recall-character-launcelot-0b02a99ce6f7)’s adventures. Crossing the bridge of [Corbin](entity:location-recall-location-corbin-a56863b419f8), he comes upon a fine tower above a populous town. Its setting first presents the promise of welcome and recognition: the people greet him as the foremost of knights and say that he can help them out of danger.
The danger is concentrated within the tower. A lady has been confined there for five years, enduring an enchantment that keeps her in pain. [Sir Gawaine](entity:character-recall-character-sir-gawaine-bf0b0cf3eb43) had already visited and failed to free her. The townspeople, however, say they know Launcelot is the knight who will deliver her. Their expectation recalls the hermit’s earlier prediction without making the two prophecies identical: one concerns the Grail and the Siege Perilous, while the other names the knight who can end this particular enchantment.
## The Lady’s Deliverance
Launcelot asks what the people mean by their welcome, hears their account, and goes into the tower. Its iron doors unlock for him, and he enters the chamber where the lady has been held. The enchantment is attributed to [Queen Morgan le Fay](entity:character-recall-character-queen-morgan-le-fay-ba90b4d29b8d) and the queen of [Northgalis](entity:location-recall-location-northgalis-aaee6aef58cf), who imprisoned her because she was called the fairest lady in that country. Release comes through the simple, decisive act the prophecy required: Launcelot takes her by the hand.
Once the people have brought the woman clothes, Launcelot sees her as exceptionally beautiful and compares her with [Queen Guenever](entity:character-recall-character-queen-guenever-f27d6f31454b). The lady asks him to accompany her to a chapel so that they may give thanks to God. He agrees, and the townspeople, both learned and lay, join in giving thanks for her deliverance and his help. The movement from the locked chamber to the chapel marks the change the rescue has achieved: a private enchantment has ended, and the act is acknowledged by the community as a cause for gratitude to God.
## The [Dragon](entity:creature-recall-creature-dragon-02f141a6fc03) and King Pelles
The people next ask Launcelot to free them from a serpent lying in a tomb. He takes his shield and agrees to do what he can for God’s pleasure and theirs. On the tomb, golden letters foretell that a royal-blooded leopard will come and slay the serpent, then father a lion in that foreign country, a lion destined to surpass other knights. Launcelot lifts the tomb; a fire-spitting dragon emerges, and after a long fight he kills it with great effort.
The tomb inscription gives the encounter a prophetic frame, associating the monster’s death with royal blood and the future birth of an exceptional knight. The narrative does not pause to identify or explain every part of that prediction here. It does make Launcelot’s victory its immediate fulfillment: he confronts the creature the townspeople fear and kills it, completing the second deliverance they sought from him.
Afterward King Pelles arrives and greets Launcelot. He asks the knight’s name and requests that he reveal it. This meeting is the episode’s hinge into what follows: the next chapter concerns Launcelot’s arrival at [Pelles](entity:character-recall-character-pelles-4a1ad88053c1)’s court, the Sangreal, and Elaine, Pelles’s daughter. The rescue-and-combat episode therefore ends not with an isolated triumph but with Launcelot brought into the company and story surrounding the Grail.
## Narrative Significance
The episode builds its movement through two successive acts of service. First, Launcelot answers a plea on behalf of a woman whom another renowned knight could not free; then, after the people have given thanks, he accepts their further request and kills the dragon. Each change enlarges the scope of the deliverance, from one captive to the town’s broader danger, while the people’s welcome and gratitude frame knightly prowess as aid rendered to others.
The story also places physical adventure beside religious language and prophecy. The lady’s release is followed by thanksgiving in a chapel; the townspeople ask Launcelot to act for God’s pleasure; and the inscription on the tomb casts the dragon’s death as part of a future that reaches beyond the immediate battle. King Pelles’s appearance then carries that prophetic and devotional register forward into the Sangreal narrative. The episode’s decisive significance lies in this transition: Launcelot’s chivalric deeds establish him as a deliverer, and those deeds bring him to the threshold of a larger sacred adventure.
Event 109
The Grail Appears at King Pelles’s Feast
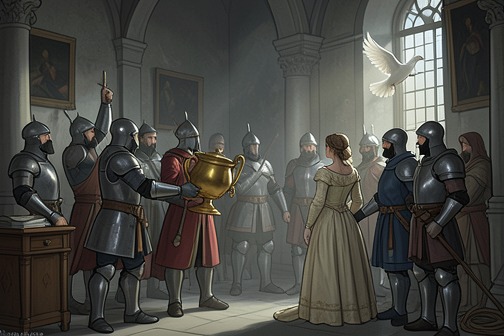
[The Grail Appears at King Pelles’s Feast](entity:event-recall-event-57e45874fa31) is a turning point in which a sacred vision and a calculated enchantment converge. [Sir Launcelot](entity:character-recall-character-sir-launcelot-c0ea01c62d3d) sees the [Holy Grail](entity:object-recall-object-8fc3592652aa) in the hall of [King Pelles](entity:character-recall-character-king-pelles-c21481cad617), who understands the vessel as a sign that the [Round Table](entity:object-recall-object-round-table-04fef19b82fd) will one day be broken; at the same time, [Pelles](entity:character-recall-character-pelles-4a1ad88053c1) and [Dame Brisen](entity:character-recall-character-dame-brisen-a5d07d69d473) arrange for [Launcelot](entity:character-recall-character-launcelot-0b02a99ce6f7) to mistake Elaine for [Queen Guenever](entity:character-recall-character-queen-guenever-f27d6f31454b), believing their union will produce [Galahad](entity:character-recall-character-galahad-e8a04503b5e9), the knight destined to achieve the Grail.
## The Meeting with King Pelles
Sir Launcelot identifies himself to his host as [Sir Launcelot du Lake](entity:character-recall-character-sir-launcelot-du-la-390bf6228175), and Pelles names himself as king of the foreign country and a near kinsman of [Joseph of Arimathea](entity:character-recall-character-joseph-of-arimathea-79b90306708c). Their mutual recognition and welcome lead into the castle and to a meal, where the feast becomes the setting for an event far beyond ordinary hospitality.
## The Grail’s Appearance
A dove enters through a window carrying what seems to be a small golden censer. A fragrance fills the hall, and the table is supplied with every kind of food and drink the company can imagine. Then a remarkably fair young damsel enters carrying a golden vessel in both hands. Pelles kneels to pray, as do the others present; Launcelot, who does not understand what he is seeing, asks its meaning. Pelles identifies the vessel as the Holy Grail, the richest thing a living person could possess, and says that when it goes about, the Round Table will be broken. The scene joins abundance and reverence to a warning: the vision offers a glimpse of sacred presence while foreshadowing the fellowship’s eventual fracture.
## Pelles’s Design for Galahad
The Grail vision is followed by Pelles’s effort to secure the future he believes it requires. He knows that Launcelot will father a son by his daughter Elaine, that the child will be named [Sir Galahad](entity:character-recall-character-sir-galahad-72b97de59df8), and that Galahad will bring the foreign country out of danger and achieve the Holy Grail. Pelles’s purpose is therefore bound to both dynastic succession and the sacred quest, but Launcelot’s love for Queen Guenever stands in the way.
## Brisen’s Enchantment and Its Consequence
Pelles turns to Dame Brisen, whom the narrative identifies as one of the greatest enchantresses of the time. She proposes to make Launcelot see Elaine as [Guenever](entity:character-recall-character-112dfc46734b). Through her counsel, a messenger familiar to Launcelot brings him a ring like one Guenever commonly wore and claims that the queen is at the castle of Case, five miles away. Elaine is sent there with twenty-five knights. Received among people who seem to Launcelot to belong to Guenever’s company, he drinks wine Brisen gives him and becomes so enchanted that he believes Elaine is the queen. Elaine knows that Galahad will be born from their union and is glad; Launcelot, briefly remembering himself, rises and goes to the window. The episode thus makes Galahad’s anticipated destiny depend on deception rather than on a freely chosen courtship, sharply contrasting the Grail’s sacred appearance with the enchantment used to bring about the heir.
Event 110
Lancelot Meets Elaine and the Birth of Galahad
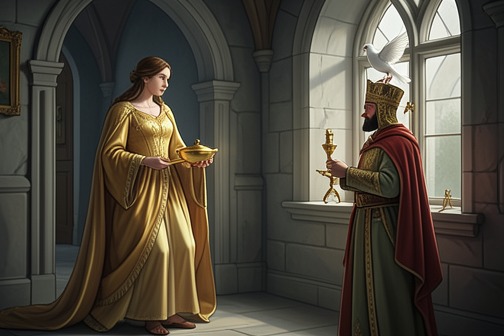
[Lancelot Meets Elaine and the Birth of Galahad](entity:event-recall-event-1c2bcf19cf5d) is the episode in which [King Pelles](entity:character-recall-character-king-pelles-c21481cad617) and [Dame Brisen](entity:character-recall-character-dame-brisen-a5d07d69d473) arrange for [Sir Launcelot](entity:character-recall-character-sir-launcelot-c0ea01c62d3d) to mistake Elaine, [Pelles](entity:character-recall-character-pelles-4a1ad88053c1)’s daughter, for [Queen Guenever](entity:character-recall-character-queen-guenever-f27d6f31454b). The encounter fulfills a prophecy that Elaine will bear [Galahad](entity:character-recall-character-galahad-e8a04503b5e9), the knight destined to achieve the [Holy Grail](entity:object-recall-object-8fc3592652aa) and deliver Pelles’s country from danger. When [Launcelot](entity:character-recall-character-launcelot-0b02a99ce6f7) discovers the deception, he condemns the enchantment but forgives Elaine; Galahad is later born at [Corbin](entity:location-recall-location-corbin-a56863b419f8). The episode makes a foretold spiritual destiny depend on a carefully engineered personal betrayal, linking the Grail’s future to the damage done to Launcelot’s trust and love.
## Prophecy and the Plan
At King Pelles’s castle, a dove appears carrying a small golden censer, and a young woman enters bearing a golden vessel. Pelles identifies the vessel as the Holy Grail and says that when it has passed away, the [Round Table](entity:object-recall-object-round-table-04fef19b82fd) will be broken. The sacred vision is therefore accompanied by an announcement of an ending: the Grail’s presence points beyond the present fellowship even as it reveals what is to come.
Pelles has a specific purpose in mind for Launcelot. He knows, he says, that Launcelot will have a child by Elaine, and that this son, Galahad, will be the good knight through whom Pelles’s foreign country is brought out of danger and the Grail achieved. Yet Launcelot loves no lady except Queen Guenever. Pelles asks Dame Brisen, an enchantress, to devise a way for Launcelot to see Elaine as the queen. The plan is not presented as a meeting born of mutual recognition: it is designed to make Launcelot act under a false impression.
## The Deception at the [Castle of Case](entity:location-recall-location-castle-of-case-1800091c6973)
Brisen sets the scheme in motion by arranging for a messenger known to Launcelot to bring him a ring like one [Guenever](entity:character-recall-character-112dfc46734b) commonly wears. The messenger says that the queen is at the Castle of Case, five miles away. Launcelot is delighted by what he takes to be a token from his beloved and rides there that night, expecting to find Guenever.
At Case, the welcome and surroundings seem to him to belong to Guenever’s household. Brisen gives him a cup of wine; after drinking it, he believes Elaine is the queen. Elaine knows that their union is expected to bring Galahad into the world, but Launcelot does not understand who is before him. When he opens a window, the enchantment ends and he realizes that he has been deceived. The reversal is immediate: what he had understood as a reunion with Guenever is revealed as an encounter arranged by Pelles and Brisen to fulfill the prophecy.
## Discovery, Forgiveness, and Elaine’s Claim
Launcelot reacts with shame and anger, threatens Brisen, and demands to know who Elaine is. Elaine kneels and asks for mercy, explaining that she is King Pelles’s daughter and that she will have a son by him, destined to be the noblest knight. Launcelot forgives her and distinguishes her from the enchantress: he blames the deception on Brisen’s magic rather than on Elaine, and says Brisen should answer for it if he finds her.
His forgiveness does not turn the episode into a freely chosen courtship. Elaine has been enlisted in her father’s prophetic design, and Launcelot’s understanding of the encounter was deliberately altered. Elaine nevertheless asks for his goodwill, saying that she has obeyed her father’s prophecy and given what she describes as her maiden love and faith. Launcelot leaves her mildly and rides to Corbin, where Pelles is. The account preserves both the coercive structure of the plan and Launcelot’s decision not to punish Elaine for it.
## Galahad’s Birth and the Consequence
When Elaine’s time comes, she gives birth at Corbin to a boy who is christened Galahad. He is carefully kept and nourished. The narrative connects his name with Launcelot’s own naming at the fontain stone, tying the child’s identity to his father while also announcing the separate destiny prepared for him by Pelles’s prophecy.
The consequences of the encounter continue beyond Galahad’s birth. After Elaine has been delivered and churched, Sir Bromel la Pleche, a lord who has long loved her, presses her to marry him. Elaine refuses and tells him her love is set on Launcelot. Bromel responds by threatening Launcelot and promising to keep the bridge of Corbin for a year, so that Launcelot cannot come or go to Elaine without meeting him. The prophecy has secured Galahad’s birth, but it has not resolved the human attachments around it; instead, the episode leaves Elaine’s continuing devotion and a new threat to Launcelot in its wake.
## Narrative Significance
The episode sets two kinds of knowledge against each other. Pelles understands Galahad’s future through prophecy and treats Launcelot’s meeting with Elaine as necessary to that end; Launcelot, by contrast, acts on the apparent evidence of Guenever’s ring and the enchanted welcome at Case. The reader sees how a future represented as sacred can be brought about through deception, and how the distinction between Elaine and Brisen matters to Launcelot’s judgment once the illusion breaks.
The Grail and the broken Round Table frame the personal plot with a larger change already foretold. Galahad’s birth begins the line toward the Grail’s achievement, while Pelles’s warning anticipates the fellowship’s eventual rupture. Launcelot’s exclusive love for Guenever remains the emotional fact that makes Brisen’s impersonation necessary; the prophecy does not erase that attachment but takes advantage of it. The result is a turning point in which the Grail’s promised future and the fragility of the present court are bound together.
Event 111
Lancelot Rescues Palamedes from Execution
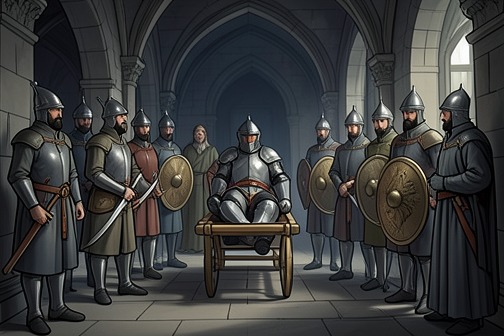
[Lancelot Rescues Palamedes from Execution](entity:event-recall-event-dbc1ae2be404) is the rescue of Palamedes while he is being taken to face judgment for killing a knight at the [Lonazep](entity:location-recall-location-lonazep-1552249ffece) tournament. The episode turns a sentence of death into a demonstration of the obligations knighthood imposes even between men at odds: [Tristram](entity:character-recall-character-tristram-a0b006f42abd) rides to save a former companion despite their quarrel, and Lancelot acts before Tristram arrives, declaring that he cannot let a renowned knight die a shameful death if he can prevent it. Their reunion at [Joyous Gard](entity:location-recall-location-joyous-gard-c7d2751b6533) gives the rescue a further consequence, as Palamedes is restored to the fellowship he feared he had forfeited.
## Condemnation and the Journey to Execution
At the castle where Palamedes and Safere had been imprisoned, twelve knights judged Palamedes guilty of their lord’s death and Safere innocent. Safere was released, and the brothers parted in grief. Palamedes said that had he known the death he faced, he would never have yielded himself. The separation makes the sentence more than a threat to his life: Safere leaves, while Palamedes is placed under guard and carried away alone.
The escort’s intended destination was [Pelownes](entity:location-recall-location-pelownes-68ee0144e31a), a castle by the sea where Palamedes was to receive justice from the father of the knight he had killed. His legs were bound beneath an old horse as he was taken there. Near Joyous Gard, a knight who recognized him asked what had happened. Palamedes explained that he was being led to his death for the killing at Lonazep and lamented that he had left Tristram, his lord, when he ought not to have done so. He believed that, had he remained with Tristram, his life might have been secure.
Palamedes asked the passing knight to carry messages of farewell and apology to Tristram, Queen [Isoud](entity:character-recall-character-isoud-45c23b134f96), [King Arthur](entity:character-recall-character-king-arthur-2b97864f54aa), and the fellowship of the [Round Table](entity:object-recall-object-round-table-04fef19b82fd). The request shows how broadly he understood his ties, even while he expected to die: he sought reconciliation with Tristram and Isoud, and remembrance among the wider community of knights. The witness was so moved that he rode quickly to Joyous Gard to report what he had seen.
## Tristram Sets Out; Lancelot Intervenes
When Tristram heard that Palamedes was being taken to his death, he was troubled. Though angry with him, Tristram refused to let a noble knight suffer a shameful death if he could help. He armed himself, took his horse and two squires, and rode toward Pelownes to attempt a rescue. The narrative thus makes Palamedes’s former lord a would-be rescuer, not an indifferent observer of the sentence.
Before Tristram reached the escort, Lancelot encountered it at a well. He had dismounted and removed his helmet to drink, but, seeing the knights pass with Palamedes bound, he put his helmet back on and followed. The escort warned him not to interfere: Palamedes had been judged deserving of death. Lancelot first regretted that he could not ransom him peaceably, then announced that he would rescue him or die trying.
Lancelot struck down the leading knight and three others with his spear; when it broke, he drew his sword and brought down the rest of the twelve, most of them wounded. He then took the best horse he found, freed Palamedes, and set him upon it. The action reverses the procession’s course: the condemned man is no longer being carried toward Pelownes, but is riding back with his rescuer toward Joyous Gard.
## Recognition and Reconciliation at Joyous Gard
Tristram met Lancelot and Palamedes on the return journey. Because Lancelot wore a golden shield on his shoulder, Tristram did not recognize him and prepared to joust. Palamedes called out that the unknown knight had saved him from death, preventing Tristram from mistaking his rescuer for an enemy. Palamedes thanked Tristram as well, acknowledging that his lord had offered his own body in an effort to rescue him, even though Palamedes had greatly offended him.
Lancelot initially withheld his name and described himself as a knight errant seeking adventures. Tristram invited him to Joyous Gard and asked him, in the name of knighthood, to stay the night. Lancelot accepted; the narrator also explains that he had come into that country to see Tristram. Once Lancelot removed his helmet at the castle, Tristram and Palamedes recognized him. Tristram embraced him, as did [La Beale Isoud](entity:character-recall-character-881eb87025df), and Palamedes knelt to thank him. Lancelot raised him and said that any knight of honor ought to succour and rescue so noble a knight, renowned throughout the realm.
## Aftermath and the Rescue’s Meaning
The rescue brings the three knights together at Joyous Gard, but it does not erase the tensions among them. Lancelot left after three or four days with [Ector de Maris](entity:character-recall-character-ector-de-maris-ebbe170b5361), while Palamedes and Dinadan remained with Tristram for more than two months. During that stay Palamedes grew increasingly mournful as he saw La Beale Isoud. His captivity had ended, but his return to the company of Tristram and Isoud exposed the continuing pain of his attachment to her.
The episode gives rescue a double meaning. Tristram’s response shows that anger does not cancel his sense of responsibility toward a former companion; Lancelot’s intervention makes that responsibility still more expansive, grounded in Palamedes’s standing as a renowned knight rather than in personal allegiance. Yet the outcome also recalls the limits of such fellowship: Palamedes’s rescue restores him to Joyous Gard, not to ease of heart, and the narrative carries the story from public danger into private grief. The event’s decisive reversal is therefore both practical and relational: the journey to execution becomes a return to friends, while the gathering renews the relationships that will continue to trouble Palamedes.
Event 112
Lancelot's madness
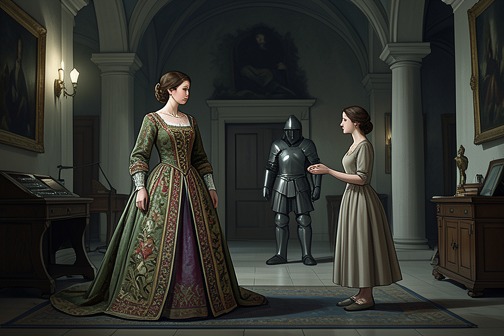
[Lancelot's madness](entity:event-recall-event-85bbb57c5e6f) is the rupture that follows a mistaken meeting, [Queen Guenever](entity:character-recall-character-queen-guenever-f27d6f31454b)’s rebuke, and his flight from court. The episode changes an intimate misunderstanding into a prolonged disappearance: Lancelot wanders for two years, while [Dame Elaine](entity:character-recall-character-dame-elaine-f3720a146c7b) and his kin are left to reckon with the consequences and search for him.
## Causes and Background
Dame Elaine, daughter of [King Pelles](entity:character-recall-character-king-pelles-c21481cad617), rides to [King Arthur](entity:character-recall-character-king-arthur-2b97864f54aa)’s feast at [Camelot](entity:location-recall-location-camelot-352b4eac6f0e) in great state, accompanied by twenty knights, ten ladies and gentlewomen, and a train totaling a hundred horses. The court admires her appearance, but her journey also brings her into the presence of Lancelot, the father of her son [Galahad](entity:character-recall-character-galahad-e8a04503b5e9). He is ashamed because he once drew his sword on her, and though he considers her exceptionally beautiful, he refuses to greet or speak to her. Elaine, who loves him deeply, takes his silence as a painful rejection.
Queen Guenever makes arrangements for Elaine to sleep in a chamber near her own. She then summons Lancelot and warns him not to go to Elaine. Elaine’s companion, [Dame Brisen](entity:character-recall-character-dame-brisen-a5d07d69d473), learns of this exchange and promises to bring Lancelot to her lady. Elaine would rather have that meeting than all the gold in the world, but the plan depends on concealing whom Lancelot is being summoned to see.
## The Enchanted Meeting and Rebuke
Brisen approaches Lancelot as though she were carrying a message from [Guenever](entity:character-recall-character-112dfc46734b). He readily agrees to follow and takes his sword with him. Brisen leads him by the finger to Elaine and leaves the two together. Lancelot believes he has come to the queen; Elaine is glad to have him with her. The meeting is therefore founded on a mistaken identity, not on Lancelot’s deliberate decision to disobey Guenever’s warning.
When one of Guenever’s women discovers that Lancelot is absent, she reports it to the queen. Guenever becomes distraught and, when she encounters Lancelot, calls him a false and traitorous knight and orders him never to remain at her court or come before her again. Lancelot faints at her words. On waking, he takes his sword, leaps from a bay window into a garden, and runs away, not knowing where he is going. The abrupt movement from a concealed misunderstanding to public accusation and banishment makes Guenever’s rebuke the immediate turning point of the episode.
## Wandering and Separation
Lancelot’s flight becomes a prolonged absence: he wanders for two years, and no one can recognize him. The narrative gives no account here of where he goes or what he does during that time. Instead, it marks the duration and the failure of others to identify him, leaving his loss visible through the reactions of those who knew him.
Guenever orders Elaine to leave court. Elaine protests that the queen has caused Lancelot’s madness and says that she saw him faint before fleeing. She also reveals that she is Lancelot’s, that she has borne his son Galahad, and that she loves him. Elaine maintains that she did nothing to displease him; in her account, the decisive injury to their situation is Guenever’s rebuke. Her departure, escorted by King Arthur and more than a hundred knights, separates her from the court as Lancelot has already been separated from it.
## Search, Kinship, and Consequences
On the journey away from court, Elaine tells [Sir Bors de Ganis](entity:character-recall-character-sir-bors-de-ganis-adca9ed6c2f4) what happened and where she last saw Lancelot: he leapt from a window and ran away in a state of madness. Bors grieves and asks where his lord has gone, but Elaine cannot tell him. She says she would risk her life rather than see Lancelot hurt and hopes to discover his whereabouts, though she fears she may never see him again. Bors asks her to delay King Arthur with a tale while he returns to Queen Guenever, and he urges her to keep watch for any sign of Lancelot.
Bors confronts Guenever, who is weeping, and reproaches her for grieving only after there is no remedy. He describes Lancelot as the finest knight of their blood, their leader and their succour, and says that no Christian or heathen king could match his nobility, courtesy, beauty, and gentleness. [Sir Ector de Maris](entity:character-recall-character-3847e8e21d1c) and [Lionel](entity:character-recall-character-5da35f9944b1) join the lament. The episode thus measures Lancelot’s disappearance not only as a personal crisis for Guenever and Elaine but also as a loss to the kin who depended on him.
## Narrative Significance
The cause of the crisis is conveyed through a sequence of actions whose meanings diverge: Brisen presents Elaine as the queen’s destination, Lancelot believes her, and Guenever interprets his absence as betrayal. The resulting punishment is real even though the meeting began in deception. The story sets Lancelot’s private distress beside the public value his companions attach to him, making the two-year disappearance a break in both a love relationship and the fellowship’s confidence in its chief support.
The event is presented through ordinary chronological narration, with the immediate scene followed by Elaine’s departure and the reactions of Bors and Lancelot’s other kin. Its ending does not resolve the search: Elaine does not know where Lancelot has gone, and his relatives are left lamenting his loss. The emphasis remains on separation and uncertainty rather than on recovery.
Event 113
Healing of Lancelot at Corbin
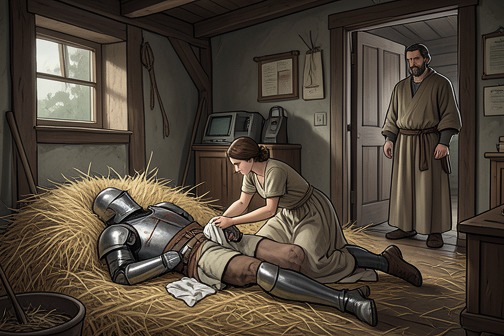
The [Healing of Lancelot at Corbin](entity:event-recall-event-29fc6ba690f9) is the miraculous recovery of [Sir Launcelot](entity:character-recall-character-sir-launcelot-c0ea01c62d3d) after madness and hunger have left him wandering far from [King Arthur](entity:character-recall-character-king-arthur-2b97864f54aa)’s court. In [King Pelles](entity:character-recall-character-king-pelles-c21481cad617)’s city, [Dame Elaine](entity:character-recall-character-dame-elaine-f3720a146c7b) recognizes him asleep beside a well; the king and his trusted companions bring him to the chamber where the [Holy Grail](entity:object-recall-object-8fc3592652aa) is kept, and its power heals him. The episode turns the Grail from a distant object of quest into an immediate instrument of mercy, while [Launcelot](entity:character-recall-character-launcelot-0b02a99ce6f7)’s shame and continuing exile show that bodily and mental recovery do not undo the consequences of his past.
## From the Forest to [Corbin](entity:location-recall-location-corbin-a56863b419f8)
After a hermit and another knight have carried the wounded Launcelot to the hermitage in a cart and the hermit has treated him, his lack of sustenance worsens his condition. He runs into the forest and eventually reaches Corbin, the city where Dame Elaine lives. There the townspeople pursue and strike him; he defends himself when he can, and then escapes into the castle. The people who shelter him judge from his appearance and many wounds that he must once have been a man of high standing, but he is not recognized at first and is kept apart, given clothing, straw to lie on, and food and drink that few bring directly to him.
His recovery begins not with public recognition but with a chance encounter. On the day Sir Castor is made a knight at [Candlemas](entity:time-recall-time-candlemas-0f707536d9d8), Castor gives the apparently helpless Launcelot a scarlet robe and the other clothing he needs. Once dressed, Launcelot appears again as an exceptionally handsome knight. He goes into the garden and falls asleep beside a well, where Dame Elaine’s maiden notices him. Elaine recognizes him and weeps, but leaves the garden without revealing him to the others. She goes straight to her father, King Pelles, and tells him that Launcelot is there and seems to have lost his reason.
## The Grail’s Intervention
King Pelles responds cautiously. [Dame Brisen](entity:character-recall-character-dame-brisen-a5d07d69d473) recognizes Launcelot and warns that, because he is out of his mind, waking him abruptly could be dangerous. She uses an enchantment to keep him asleep for an hour. Once the way has been cleared, [Pelles](entity:character-recall-character-pelles-4a1ad88053c1), Elaine, Brisen, and the king’s trusted attendants carry Launcelot into a tower and then into a chamber where the Holy Grail is kept. They lay him beside the vessel by force; a holy man uncovers it, and the Grail’s miraculous virtue restores Launcelot. When he wakes, he groans and complains that he is sore, but his recovery marks the end of the episode’s acute madness.
The miracle belongs to a wider account of the Grail as a Christian sacred vessel. The introductory account connects it with the dish of the Last Supper and with the blood of [Jesus Christ](entity:character-recall-character-jesus-christ-1861cf215964), which [Joseph of Arimathea](entity:character-recall-character-joseph-of-arimathea-79b90306708c) received and brought to [Britain](entity:location-recall-location-01048caf1f48). The story of [Balin](entity:character-recall-character-balin-4b106c0600f6) likewise connects the blood of Jesus Christ and the [Holy Spear](entity:object-recall-object-44f63dc070ff) with [King Pellam](entity:character-recall-character-king-pellam-3f2bbc2daf06)’s suffering, and says that [Galahad](entity:character-recall-character-galahad-e8a04503b5e9) later heals Pellam during the Grail quest. Against this background, Launcelot’s restoration at Corbin is not merely a change in his condition: the vessel’s healing power brings the wandering knight into contact with the sacred history associated with Pelles’s household and the Grail.
## Recognition and Aftermath
When Launcelot regains his senses, he sees King Pelles and Elaine and is ashamed. He asks how he came to be there. Elaine explains that he had entered the country mad, had been kept as a fool, and was unknown to everyone until one of her maidens found him asleep by the well and she recognized him. She says only she, her father, and Dame Brisen know of his madness. Launcelot asks them to keep the matter secret because he is deeply ashamed of having been so disordered.
The recovery is slow in its consequences even though the Grail’s intervention is decisive: Launcelot remains in bed for more than a fortnight before he can move. He tells Elaine that he has suffered much for her sake, and acknowledges that he wronged her when he drew his sword against her, while also naming the deception by Elaine and Brisen as the cause. He asks Elaine to obtain a place where he may live, since he believes he can never return to King Arthur’s court. Elaine promises to remain with him and secure her father’s help. Pelles grants Launcelot Castle Bliant, with Elaine, twenty high-born ladies, and ten knights to attend them; he says that Launcelot’s presence will bring honour to the household.
## Healing Without Restoration
The episode gives the Grail a direct, practical role in the narrative: after Launcelot’s isolation, mistreatment, and declining condition, its power restores his mind and allows recognition to return. Yet recognition does not erase what has happened. Launcelot wakes into shame, requires a long period before he can move, and sees himself as barred from the court that once defined his public life. His refuge at Castle Bliant is a new arrangement, secured through Elaine and Pelles, rather than a return to his former position.
The contrast between the crowded city and the private chamber concentrates the episode’s meaning. In the streets, Launcelot is treated as an unknown fool and attacked; by the well, Elaine identifies him; beside the Grail, he is healed. The sequence moves from social misrecognition through personal recognition to sacred intervention, but stops short of reconciliation with his former court. The Grail grants recovery, while the story preserves the cost of Launcelot’s separation and the dependence of his new life on Pelles’s protection.
Event 114
Lancelot's return to Camelot
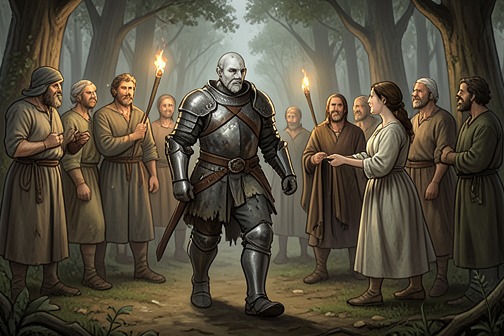
[Lancelot's return to Camelot](entity:event-recall-event-284934d9adf1) closes a long and troubled absence from [King Arthur's court](entity:organization-recall-organization-king-arthur-s-co-8cb741f94c27). Persuaded by his brother [Sir Ector](entity:character-recall-character-sir-ector-1a6b9e06011a) and welcomed by the king, [Queen Guenever](entity:character-recall-character-queen-guenever-f27d6f31454b), and the assembled court, he comes back after a period of madness and wandering. The reunion restores him to the fellowship he had resolved to leave, while the account also makes his son [Galahad](entity:character-recall-character-galahad-e8a04503b5e9) and the disputed explanation for [Lancelot's madness](entity:event-recall-event-85bbb57c5e6f) matters of public knowledge.
## The decision to return
Lancelot initially refuses to go back. When Sir Ector and [Sir Percivale](entity:character-recall-character-sir-percivale-ade9db96f1ec) ask whether he will ride with them to [King Arthur](entity:character-recall-character-king-arthur-2b97864f54aa), he says that he cannot return and that his treatment at court had led him to resolve never to come there again. Sir Ector answers as both brother and advocate: he says that Lancelot is the person he loves most, recalls the knight's renown, and reports the sorrow that the king, the knights, and especially Queen Guenever have shown during his absence. He adds that the queen spent twenty thousand pounds seeking Lancelot. Moved by his brother's counsel, Lancelot agrees to ride with them.
## The reunion at [Camelot](entity:location-recall-location-camelot-352b4eac6f0e)
After taking leave of [King Pelles](entity:character-recall-character-king-pelles-c21481cad617) and [Dame Elaine](entity:character-recall-character-dame-elaine-f3720a146c7b), Lancelot travels with Sir Ector and Sir Percivale. Within five days they reach Camelot, which the narrative also identifies as [Winchester](entity:location-recall-location-winchester-704b3b26db1f). King Arthur and the knights greet Lancelot with great joy; the return is not a solitary arrival but a public restoration witnessed by the court. Sir Percivale and Sir Ector recount Lancelot's adventures during his absence, including that he had lost his reason, called himself Le Chevaler Mal Fet, and struck down five hundred knights in three days. As they tell the story, Queen Guenever weeps as though she were dying, then welcomes him with great gladness.
## Galahad and the account of Lancelot's madness
Lancelot's return brings his son Galahad into the court's conversation. King Arthur says that he wonders why Lancelot went out of his mind and reports that he and others believe it was for love of [Elaine, daughter of King Pelles](entity:character-recall-character-elaine-daughter-of-dcb81eb68bbe); he also says that people report Lancelot has a child named Galahad who is destined for great deeds. Lancelot answers that, if he committed folly, he has what he sought. The king says no more, while the narrative notes that Lancelot's kin know for whom he went mad. The exchange leaves the court with a public explanation and a family-held understanding, without making the king's suspicion the only account.
## Significance of the return
The return resolves the immediate separation between Lancelot and the court, but it does not erase the conflict that caused him to leave: he had believed his treatment there made a return impossible. His brother's appeal to affection, reputation, and the queen's efforts turns that refusal into a journey back. The joyful welcome and [Guenever](entity:character-recall-character-112dfc46734b)'s tears register the personal cost of his absence, while the discussion of Elaine and Galahad connects his return to a story that reaches beyond the court's reunion.
Event 115
Galahad Takes the Siege Perilous and Draws the Sword from the Stone
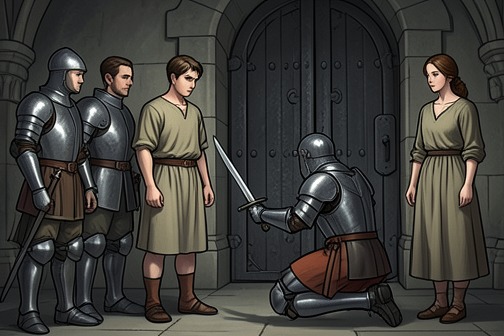
At the [Pentecost](entity:time-recall-time-16e2becf2ca1) gathering at [Camelot](entity:location-recall-location-camelot-352b4eac6f0e), [Galahad](entity:character-recall-character-galahad-e8a04503b5e9) takes the [Siege Perilous](entity:object-recall-object-fbc65bd41808) and draws a sword from a stone floating on the river. The two marvels establish him as the knight appointed to achieve the [Holy Grail](entity:object-recall-object-8fc3592652aa), disclose his royal and Joseph-of-Arimathea lineage, and signal that [Launcelot](entity:character-recall-character-launcelot-0b02a99ce6f7) is no longer the greatest knight in the world. What begins as a day of courtly custom becomes a public recognition of a new, spiritually charged order of knighthood.
## The Pentecost arrival
Launcelot is summoned away from the feast by a gentlewoman who says she comes on behalf of [King Pelles](entity:character-recall-character-king-pelles-c21481cad617). She leads him to an abbey of nuns, where he finds his cousins [Sir Bors and Sir Lionel](entity:relation-recall-relation-sir-bors-and-sir-lio-f02f75c2de66), and twelve nuns bring forward the young Galahad, whom they have raised. They ask Launcelot to make him a knight, explaining that no more worthy man could confer the order. Galahad himself desires it, and Launcelot agrees to knight him the next morning, at the high feast.
The timing places Galahad’s arrival within the court’s established Pentecost observances. When Launcelot and his cousins return to Camelot on [Whitsunday](entity:time-recall-time-whitsunday-48c879e8cd9c), the knights discover that golden letters have appeared on the [Round Table](entity:object-recall-object-round-table-04fef19b82fd)’s seats, assigning places to their future occupants. At the Siege Perilous, a new inscription declares that the seat’s appointed time has arrived: four hundred and fifty-four years after the [Passion of Jesus Christ](entity:time-recall-time-86ebf023348c). Launcelot calculates that the date is that very Pentecost. He proposes covering the inscription until the person meant to fulfil the adventure appears, preserving the seat’s significance without prematurely exposing its claimant.
## The appointed knight
After the court has gathered, an old man enters with a young knight dressed in red arms. He tells [King Arthur](entity:character-recall-character-king-arthur-2b97864f54aa) that the youth is of royal lineage and descended from [Joseph of Arimathea](entity:character-recall-character-joseph-of-arimathea-79b90306708c), and that through him the wonders of the court and distant realms will be brought to completion. The old man then leads Galahad to the covered seat. Beneath the cloth, the gold letters name it as the Siege of Galahad the haut prince, and the old man seats him there.
The assembled knights take the event as confirmation that Galahad will achieve the [Sangreal](entity:object-recall-object-sangreal-c287525e0d7a): in their understanding, no one else could sit in the Siege Perilous without coming to harm. The young knight’s claim is thus established not by a contest or a declaration of worldly authority, but by the seat’s inscription and his safe occupation of it. Before departing, Galahad asks the old man to commend him to his grandfather King Pelles and to his lord Petchere, adding that he will visit them when he can. The request supplies family and courtly connections alongside the lineage announced to [Arthur](entity:character-recall-character-arthur-2e33b65bbe57).
Launcelot recognizes his son and is glad to see him. [Sir Bors](entity:character-recall-character-sir-bors-eb41f6b6a451) predicts that Galahad will attain great renown, while [Queen Guenever](entity:character-recall-character-queen-guenever-f27d6f31454b) hears that the newcomer resembles Launcelot and infers that he is Launcelot’s son by King Pelles’ daughter. Arthur welcomes him and declares that Galahad will draw many good knights toward the Grail quest and accomplish what no knights before him could bring to an end.
## The sword in the river
Arthur next takes Galahad to see a great stone floating on the water, with a rich sword fixed in it. Other worthy knights have already tried and failed to draw it. Galahad explains that the adventure belongs to him and points out that, although he brought no sword, he has a scabbard hanging at his side. He lays his hand on the weapon, draws it lightly from the stone, and places it in the sheath. His success confirms, through a second public test, the appointment announced by the Siege Perilous.
Galahad identifies the weapon as the sword once belonging to [Balin](entity:character-recall-character-balin-4b106c0600f6) le Savage. He recalls that Balin killed his brother [Balan](entity:character-recall-character-balan-abfb5ce228d0) with it, after Balan had dealt the Dolorous Stroke to King Pelles. [Pelles](entity:character-recall-character-pelles-4a1ad88053c1), Galahad says, remains unhealed and will not recover until Galahad heals him. The sword therefore carries a history of fraternal violence and continuing injury into a scene that otherwise celebrates the new knight’s election. Its recovery does not erase that history; it connects Galahad’s future work to an unresolved wound in his own family.
## Consequences for the court
A lady riding a white palfrey arrives and tells Launcelot that his standing has changed since that morning: the sword’s adventure has proved that another knight is now better than he. She recalls Launcelot’s former pre-eminence but distinguishes it from the new comparison, which is made in relation to the coming Grail quest. Launcelot accepts that he was never the best without qualification. The scene consequently makes Galahad’s rise a reversal in public reputation as well as a sacred appointment.
The event gathers together signs of succession, kinship, and spiritual purpose. Galahad is made a knight by his father, recognized by the Siege Perilous, and confirmed by the sword in the floating stone; the court reads these signs as the beginning of the Grail quest’s fulfilment. Yet the ancestral sword also recalls the destruction associated with Balin’s blow and points toward the healing Galahad must accomplish for Pelles. The marvels therefore announce not simply a new champion, but a task in which achievement depends on confronting consequences inherited from an earlier generation.
Event 116
The Grail Appears at Camelot and the Quest Begins
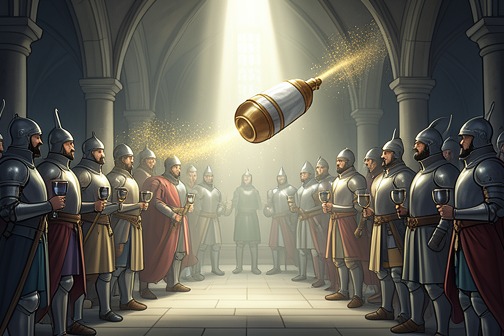
[The Grail Appears at Camelot and the Quest Begins](entity:event-recall-event-83ecc7f65025) marks the rupture between the fellowship of [King Arthur](entity:character-recall-character-king-arthur-2b97864f54aa)’s court and the spiritual trial that will carry its knights away. At [Pentecost](entity:time-recall-time-16e2becf2ca1), the [Holy Grail](entity:object-recall-object-8fc3592652aa) enters the hall unseen, bringing each knight the food and drink he most desires; but its concealment turns a gift into a summons. [Sir Gawaine](entity:character-recall-character-sir-gawaine-bf0b0cf3eb43) vows to seek the vessel openly, most of the [Round Table](entity:object-recall-object-round-table-04fef19b82fd) joins him, and King Arthur recognizes that their departure may bring the fellowship to an end.
## The Feast and the Apparition
The episode follows the knights’ return to [Camelot](entity:location-recall-location-camelot-352b4eac6f0e) and their observance of the court’s Pentecost feast. After the company has taken its places, thunder sounds through the hall; a light described as seven times brighter than daylight appears, and the knights are illuminated by the grace of the Holy Ghost. For a time they cannot speak. The sacred presence alters the familiar gathering before the Grail itself is seen—or, more precisely, before its passage is announced.
The vessel enters covered with white samite. No one can see the Grail or identify its bearer, yet the hall is filled with good odours and each knight receives the food and drink he most loves. When the vessel has passed through the room, it disappears so suddenly that the company does not know where it has gone. The feast offers a real abundance, but withholds the direct sight that would make the marvel fully knowable. The knights have been served and transformed by the apparition, yet the thing they desire to see remains beyond their grasp.
## From Vision to Vow
Once the company can speak again, King Arthur gives thanks to God for the grace shown at the high feast of Pentecost. Sir Gawaine, however, focuses on what the vision has denied them: although they received the foods and drinks they had in mind, they did not see the Grail, because it was so carefully covered. He answers that absence with a public vow. Beginning the next day, he will pursue the quest for a year and a day, or longer if necessary, and will not return to court until he has seen the vessel more openly. If he fails, he will accept that the outcome is contrary to the will of [Jesus Christ](entity:character-recall-character-jesus-christ-1861cf215964).
Most of the [Knights of the Round Table](entity:character-recall-character-3f167931be46) rise and make vows like [Gawaine](entity:character-recall-character-gawaine-e52d508f7128)’s. The transformation is immediate: an apparition that took only a moment in the hall redirects the company’s future. What had been a shared feast becomes the threshold of separate journeys, undertaken under a religious obligation the knights have freely declared before one another.
## [Arthur](entity:character-recall-character-arthur-2e33b65bbe57) and the Cost to the Fellowship
King Arthur is greatly displeased, not because he denies the sacredness of the vision, but because he understands what the vows will cost. He believes the knights cannot go back on promises made in this way. Their departure, he tells Gawaine, has nearly slain him: he expects that many will die on the quest and that the fellowship, once dispersed, will never meet again in this world. Arthur says he has loved them as well as his own life and grieves at the impending separation.
The scene therefore binds religious aspiration to political and personal loss. The Grail offers the knights a higher object of pursuit, but the same commitment that sends them after it loosens the court’s bonds. Arthur’s response gives the marvel a second meaning: what appears as grace to the company is also the beginning of the fellowship’s dissolution.
## The Grail’s Meaning in the Narrative
The surrounding account explains the Grail through Christian tradition: it is associated with the vessel of the Last Supper and with [Joseph of Arimathea](entity:character-recall-character-joseph-of-arimathea-79b90306708c), who is said to have received Jesus Christ’s blood in it and brought it to [England](entity:location-recall-location-england-b153c1f368ea). The story also preserves the vessel’s older, miraculous association with food. At Camelot, the Grail provides each knight with the food and drink he most loves, while remaining invisible; this particular wonder thus joins material abundance to sacred mystery without making the vessel available to ordinary sight.
The quest’s spiritual emphasis also reaches back to the court’s earlier history. In the account of [Balin](entity:character-recall-character-balin-4b106c0600f6)’s blow against [King Pellam](entity:character-recall-character-king-pellam-3f2bbc2daf06), the wound remains unhealed until [Galahad](entity:character-recall-character-galahad-e8a04503b5e9) heals Pellam during the Grail quest, in a place connected with the blood of Jesus Christ brought to [Britain](entity:location-recall-location-01048caf1f48) by Joseph of Arimathea. That history makes the new quest part of a larger sacred narrative of relic, injury, and healing. At Camelot, however, the immediate consequence is not a cure but a departure: the hidden Grail draws the knights toward a test whose promise of spiritual encounter comes at the cost Arthur fears most, the loss of his fellowship.
Event 117
Departure of the Knights of the Round Table
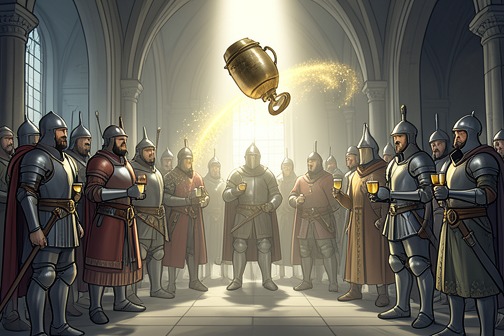
The [Departure of the Knights of the Round Table](entity:event-recall-event-c23620e5653c) is the rupture that sends [Arthur](entity:character-recall-character-arthur-2e33b65bbe57)’s greatest fellowship out of [Camelot](entity:location-recall-location-camelot-352b4eac6f0e) in pursuit of the [Holy Grail](entity:object-recall-object-8fc3592652aa). The quest begins not with a battle but with a [Pentecost](entity:time-recall-time-16e2becf2ca1) marvel: the Grail passes through the hall unseen, and the vision turns the gathered company toward a sacred undertaking that Arthur already fears will divide it beyond repair.
## The feast and the vow
At Camelot, the knights return from church to find gold letters marking places at the [Round Table](entity:object-recall-object-round-table-04fef19b82fd), including a prophecy that the [Siege Perilous](entity:object-recall-object-fbc65bd41808) should be fulfilled on that day. [Launcelot](entity:character-recall-character-launcelot-0b02a99ce6f7) observes that the appointed time has arrived, and Arthur orders the seat covered until the one destined to achieve the adventure comes. Then word reaches the court of a sword fixed in a stone floating on the river, drawing the company away from the hall and toward another marvel.
The Grail’s arrival completes the day’s sequence of signs. A light brighter than ordinary daylight fills the hall; the knights seem transformed, and the covered vessel passes among them without revealing either itself or its bearer. Each receives the food and drink he most desires, yet the sacred object remains beyond sight. Once it vanishes, [Gawaine](entity:character-recall-character-gawaine-e52d508f7128) makes a vow to seek the Grail for a year and a day, or longer if necessary, and not to return until he has seen it more openly. Most of the Round Table rise and take vows in turn, binding themselves to leave.
## Arthur’s grief and the terms of the quest
Arthur understands the consequence before the knights depart: their vow cannot be undone, and the fellowship that has given his court its distinction will be scattered. He tells Gawaine that the promise has nearly slain him and that many of the knights will die on the quest. His distress is personal as well as political; he says that he has loved them as his own life and doubts that they will ever all meet again in the world.
Launcelot counsels him that the undertaking will bring the knights honour, but Arthur cannot take comfort in that prospect. He asks Launcelot to advise him how the quest might be undone, and Launcelot replies that the many knights who have sworn cannot simply withdraw. The exchange sets sacred obligation against the king’s attachment to the fellowship: Arthur can acknowledge the force of their vows without ceasing to mourn what obedience to them will cost his court.
The departure also has a religious restriction. As ladies and gentlewomen consider following the knights they love, Nacien the Hermit arrives in religious clothing with a warning: no woman is to accompany the quest, which he declares too sacred for such company, and a knight not clean of sin will not see the mysteries of Christ. The women remain behind. The rule gives the expedition a defined spiritual character, setting it apart from the courtly relationships that shape life at Camelot.
## Leaving Camelot
After the service, the court counts the knights who have taken the vow: 150, all members of the Round Table. They put on their helmets and commend themselves to [Guenever](entity:character-recall-character-112dfc46734b). The departure is marked by public mourning, while Guenever withdraws to her chamber so that others will not see the depth of her sorrow. Launcelot goes to her; she grieves that he is leaving her and Arthur, and he promises to return as soon as he can with honour. She, in turn, prays for his safety and that of the fellowship.
The knights ride through Camelot’s streets as rich and poor alike weep, and Arthur turns away, unable to speak through his grief. Their first stop is the castle of Vagon, whose elderly lord welcomes them. The following morning the company agrees to separate. They leave in mourning, each knight taking the road that seems best to him. The movement from a counted company to individual departures makes visible the loss Arthur anticipated: a fellowship sworn together at the feast becomes a host of solitary questers.
## Consequence for the fellowship
The Grail’s appearance gives the departure its sacred occasion, but the scene also makes its cost unmistakable. Arthur’s court has been bound by shared vows and affection; now the very vow that honours the quest breaks up that community. The knights’ commitment is not presented as casual adventure: the warning about purity, the prohibition on female companions, and Arthur’s conviction that many will die place spiritual trial and separation at its centre.
The episode therefore turns Pentecost from a feast of reunion into a threshold. The knights leave Camelot in a body, but do not remain a company for long. Their separate roads begin a quest that tests each knight beyond the sustaining order of Arthur’s court, while the king is left to reckon with a fellowship he cannot hold together by affection alone.
Event 118
Baptism of Palamedes
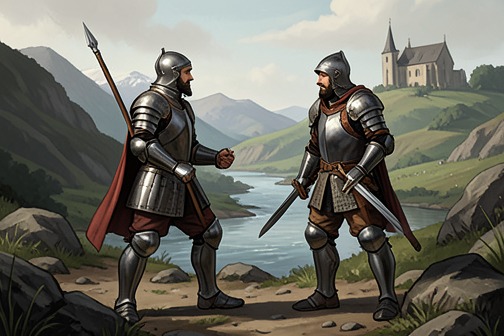
The [Baptism of Palamedes](entity:event-recall-event-4f0d5ad8edfe) marks a turning point in the long rivalry between [Sir Tristram and Sir Palamides](entity:relation-recall-relation-sir-tristram-and-sir-781af16d3cf0): a duel born of their contest over [La Beale Isoud](entity:character-recall-character-881eb87025df) ends not in the death of either knight but in reconciliation, confession, and baptism. [Palamides](entity:character-recall-character-palamides-9a6f200e4d74)’s conversion fulfills a vow he had delayed while pursuing one last battle, and carries the personal conflict into the religious and communal life of [King Arthur](entity:character-recall-character-king-arthur-2b97864f54aa)’s court.
## Background and the Deferred Vow
Palamides is a Saracen knight who has not yet been baptized, although he tells [Tristram](entity:character-recall-character-tristram-a0b006f42abd) that he believes in [Jesus Christ](entity:character-recall-character-jesus-christ-1861cf215964) and Mary. He explains that an old vow still binds him: he has one battle left to fight, and intends to be baptized when it is done. The episode brings that unresolved commitment into direct contact with his rivalry with Tristram, whose departure from La Beale Isoud leads the two men to meet on the road.
## The Duel and Its Reversal
Tristram sets out without armor, carrying only his spear and sword. He finds Palamides after Palamides has struck down Sir Galleron of Galway, a Knight of the [Round Table](entity:object-recall-object-round-table-04fef19b82fd). Tristram borrows Galleron’s armor and spear so he can fight; Palamides agrees to the arrangement. Their encounter thus begins with the old adversaries facing one another in a contest that Tristram enters at a disadvantage, having left unarmed.
The fight lasts more than two hours. Palamides is formidable, and the combat moves back and forth: he wounds Tristram and damages his shield, while Tristram’s blows force Palamides to his knees. At last, Tristram knocks Palamides’s sword from his hand. He has the advantage, but refuses to kill a knight who is unarmed, telling Palamides to take up his sword and finish the contest. The refusal turns a potential victory into an opening for settlement: Palamides says he no longer wishes to fight and asks Tristram to forgive him.
## Reconciliation and Baptism
Palamides identifies the source of his hostility as his love for La Beale Isoud. He says that he has never dishonored her, and that his offenses were against Tristram personally. He acknowledges Tristram’s strength, comparing him favorably only with [Sir Launcelot](entity:character-recall-character-sir-launcelot-c0ea01c62d3d), and asks forgiveness for the wrongs he has done. His request joins personal reconciliation to the religious step he had promised to take: he asks first to be fully confessed and then baptized before they part.
Tristram accepts the request and forgives him. Within a mile, the companions find the suffragan of [Carlisle](entity:location-recall-location-633c98fd4569). A large vessel is filled with water and blessed; Palamides is confessed, and Tristram and Galleron serve as his godfathers. The sequence is specific and communal: the conversion is not merely announced after the duel, but enacted through confession, baptism, and the participation of fellow knights.
## Return to Court and Aftermath
After the baptism, Palamides, Tristram, and Galleron ride toward [Camelot](entity:location-recall-location-camelot-352b4eac6f0e), where King Arthur, [Queen Guenever](entity:character-recall-character-queen-guenever-f27d6f31454b), and most of the [Knights of the Round Table](entity:character-recall-character-3f167931be46) are gathered for a feast. The king and court rejoice that Palamides has been baptized. The public welcome gives the private reconciliation a place within the fellowship of [Arthur](entity:character-recall-character-arthur-2e33b65bbe57)’s court, while the narrative also records another significant arrival: at the same feast, [Galahad](entity:character-recall-character-galahad-e8a04503b5e9) takes the [Siege Perilous](entity:object-recall-object-fbc65bd41808).
The gathering does not end the companions’ separate quests. The Knights of the Round Table disperse; Tristram returns to [Joyous Gard](entity:location-recall-location-joyous-gard-c7d2751b6533), and Palamides follows the [Questing Beast](entity:creature-recall-creature-questing-beast-7a2aacd58701). The episode therefore resolves the immediate enmity between the two knights without making them inseparable: forgiveness and conversion alter their relationship, while their paths continue on different adventures. Its decisive movement is from rivalry toward restored fellowship, with Palamides’s long-delayed baptism giving that change a visible religious form.
Event 119
Galahad Liberates the Castle of Maidens
[Galahad Liberates the Castle of Maidens](entity:event-recall-event-80056c13a977) is a Grail-quest episode in which [Galahad](entity:character-recall-character-galahad-e8a04503b5e9) answers a heavenly instruction by defeating the seven brothers who control the castle and restoring its people to lawful allegiance. Its resolution turns a place of captivity and predatory rule into a community released from oppression, making the knight’s spiritual calling visible through a public act of justice.
## A Call During the Quest
After leaving a castle where he had heard mass, as was his custom, Galahad came to a desolate chapel on a mountain. He knelt before the altar and asked God for wholesome counsel; a voice directed him to go to the [Castle of Maidens](entity:location-recall-location-85d1dfde73ef) and put an end to its wicked customs. The adventure is thus framed not as an accidental challenge but as an answer to prayer, and the purpose of the journey is named before Galahad reaches the castle.
The castle stood in a valley beside the River Severn, defended by deep ditches. An elderly man identified it, warned Galahad against entering, and described it as a place where pity had vanished and cruelty prevailed. Seven maidens he met also challenged his approach, pointing out that he had water to cross. Galahad did not turn back. A squire then reported that the knights inside forbade him to proceed until they knew his purpose; Galahad answered that he had come to destroy the castle’s wicked custom.
## The Seven Brothers’ Rule
Seven brothers came out to confront Galahad and threatened him with death. They chose to fight him together. Galahad struck the foremost brother from his horse with his spear; when the others’ blows broke against his shield, he drew his sword and pressed them so hard that they abandoned the field and fled through the castle by another gate. His victory breaks their immediate hold, but the episode’s account of how that hold began explains why defeating the brothers alone would not complete the restoration.
A priest told Galahad that the brothers had arrived seven years earlier and lodged with Duke Lianour, lord of the country. They conspired to turn against their host; when the duke tried to reconcile them, they killed him and his eldest son. They seized his daughter and the castle’s treasure, then forced the local knights into obedience and imposed service and tribute. The brothers also robbed and despoiled the common people. The castle’s corruption therefore rests on both a violent seizure of authority and the continuing exploitation of those under it.
The duke’s daughter had foretold that one knight would overcome the brothers and take the castle from them. They answered by resolving that no lady or knight should pass freely: visitors would have to remain against their will or die. The name Castle of Maidens is connected in the account to the maidens the brothers had taken and mistreated. The duke’s daughter died within three nights of the seizure; her younger sister and other women were still being held and enduring hardship when Galahad arrived.
## Victory and Restoration
After the brothers fled, an old man in religious clothing gave Galahad the castle keys. Galahad opened the gates and found so many people in the streets that he could not count them. They welcomed him as the deliverer for whom they had long waited. A gentlewoman then warned that the brothers might return that night and renew their custom. Her concern shifts the episode from battlefield victory to the practical question of how to keep the castle’s people safe after the immediate confrontation.
The gentlewoman asked Galahad to summon the knights who held their lands from the castle and require them to swear to restore the customs observed there in former times. She gave him an ivory horn bound with gold; its sound could be heard two miles around. Galahad blew it, calling the local knights to the castle, then sat down on a bed. The horn is not a weapon in the contest with the brothers: it is the means of assembling those whose allegiance and participation are needed to re-establish order.
When the country’s knights had gathered, Galahad required them to do homage and fealty to the duke’s daughter. That act restored the rightful allegiance associated with the dispossessed ruling family and, as the account puts it, set the knights at ease of heart. The narrative thus gives the relief of the people and the reordering of political loyalty separate, complementary places in the outcome: the brothers’ predatory rule ends, while the local knights’ obligations are redirected to the duke’s daughter.
## Aftermath and Significance
The next morning, someone told Galahad that [Gawaine](entity:character-recall-character-gawaine-e52d508f7128), [Gareth](entity:character-recall-character-e1d13addfd5f), and [Uwaine](entity:character-recall-character-uwaine-6468cffc7b73) had slain the seven brothers. Galahad responded that he supposed so, gathered his armour and horse, commended his companions to God, and continued on his way. The episode therefore does not end with Galahad remaining to govern the restored castle. His role is to break the brothers’ control, summon the local knights, and establish the daughter’s claim; the brothers’ deaths are reported afterward as the final removal of the threat.
The adventure links spiritual discipline with the duties of knighthood without treating them as separate concerns. Galahad receives his direction in prayer, then acts against a rule founded on murder, seizure, forced obedience, and theft. The restoration likewise goes beyond personal combat: it depends on opening the castle gates, gathering the country’s knights with the horn, and securing their homage and fealty to the duke’s daughter. In the wider movement of the Grail quest, the episode presents Galahad’s holiness through service that repairs a damaged community as well as through his private devotion.
Event 120
Lancelot Fails to Behold the Grail and Begins Repentance
[Lancelot Fails to Behold the Grail and Begins Repentance](entity:event-recall-event-67a0f485ec5f) marks a decisive reversal in [Sir Launcelot](entity:character-recall-character-sir-launcelot-c0ea01c62d3d)’s story: the knight celebrated for worldly prowess discovers that his achievements cannot secure access to the sacred. He witnesses the [Holy Grail](entity:object-recall-object-8fc3592652aa) heal another man, yet remains unable to act in its presence. The failure turns his quest from a pursuit of honour into a reckoning with sin, confession, and penance.
## The Grail’s appearance and [Launcelot](entity:character-recall-character-launcelot-0b02a99ce6f7)’s failure
Sir Launcelot lies half asleep when two white palfreys carry a litter bearing a sick knight to a cross. The ill man asks when his suffering will end and when the holy vessel will come to him. Launcelot sees a candlestick with six tapers arrive, followed by a silver table and the Holy Grail, which he had previously seen in [King Pelles](entity:character-recall-character-king-pelles-c21481cad617)’s house. The sick knight rises, approaches on his hands and knees, touches and kisses the vessel, and is immediately healed.
The sacred appearance makes Launcelot’s incapacity unmistakable. Although he sees the scene, he cannot rise to approach the Grail. When the vessel and its lights disappear into a chapel, the healed knight departs with Launcelot’s horse, helmet, and sword. The episode sets physical restoration beside spiritual failure: the sick man is made whole through contact with the vessel, while the renowned knight is left disarmed and unable to participate.
## Rebuke and recognition
After Launcelot wakes, a voice tells him to leave the holy place and describes him as harder than stone, more bitter than wood, and barer than a fig tree. Finding his horse and equipment gone, Launcelot understands the encounter as a source of dishonour. He acknowledges that he had succeeded in worldly adventures, whether his causes were right or wrong, but that his old sin prevented him from moving or speaking when the holy blood appeared.
Launcelot goes on foot through a forest and reaches an hermitage, where he kneels and asks God for mercy. The hermit explains that Launcelot’s inability to see the sacred vessel is a consequence of presumption: he attempted to stand in God’s presence while remaining in mortal sin. His worldly beauty, strength, intelligence, and success, the hermit says, increase rather than diminish his obligation to God. The rebuke redirects Launcelot’s understanding of his reputation: prowess has been a gift, not proof of spiritual fitness.
## Confession and the source of his former prowess
Launcelot initially says that he is reluctant to reveal an old sin. He then admits that for fourteen years he had confessed none of the conduct he had practised. He tells the hermit that he has loved a queen excessively and for a long time, and that most of his great deeds of arms were performed for her sake. He fought for her whether the cause was right or wrong, seeking honour and hoping to be more loved, rather than acting for God’s sake.
This confession gives the Grail failure a specific moral cause. Launcelot’s exceptional record in arms has been bound to private desire and worldly recognition; the very achievements that made him celebrated do not answer the spiritual demands of the quest. The hermit asks him to promise that he will avoid the queen’s fellowship as far as he can. Launcelot gives his word, and the hermit warns him that his heart and mouth must agree.
## Penance and the beginning of change
The hermit interprets the voice’s images through a Christian lesson about sin and fruitfulness. Launcelot is hard like stone because he has resisted goodness; bitter because excessive sin leaves little sweetness; and barren like the fig tree Christ cursed, which had leaves but no fruit. The hermit applies the image directly to Launcelot: when the Grail appeared, it found in him neither good thought nor good will, but a life defiled by lechery. The interpretation turns the scene from an unexplained marvel into a judgment on Launcelot’s conduct.
Launcelot accepts the charge and resolves, by God’s grace, not to continue as he has been. The hermit assigns him penance, absolves him, and tells him to pursue knighthood. Launcelot agrees to remain with the hermit for the day, explaining that he has neither helmet, horse, nor sword; the hermit promises to provide what he needs by the following evening. His [repentance](entity:concept-recall-concept-4100212400b4) begins not with a renewed victory but with confession, submission to penance, and a pledge to change.
## Narrative significance
The episode places the Grail’s sacred standard against the values that have governed Launcelot’s worldly career. The vessel heals the sick knight, but its presence also exposes the divide between outward renown and inward readiness. Launcelot’s defeat is not a loss in combat: it is the recognition that skill, strength, and public honour cannot overcome an unconfessed sin.
The sequence gives the failure consequences beyond the single vision. Launcelot’s account identifies his love for the queen as the motive behind much of his past fighting, while the hermit’s demand that he avoid her fellowship establishes a practical condition for repentance. His departure from the holy place, loss of his equipment, confession, and assigned penance form a turning point: the quest requires him to judge his celebrated deeds by a spiritual measure he had not previously followed.
Event 121
Percivale Resists the Devil’s Temptation
[Percivale Resists the Devil’s Temptation](entity:event-recall-event-0812bdc9bd48) is a spiritual trial within the Grail quest: a knight alone in the wilderness nearly abandons his religious allegiance, but recognizes the danger in time and is saved by the grace of God. The episode turns an apparently ordinary appeal for a knight’s protection into a test of whether [Percivale](entity:character-recall-character-percivale-67acd4cba5cb) will keep faith with his Christian purpose when hunger, hospitality, and desire pull him elsewhere.
## A knight stranded in the wilderness
After remaining on a rock in the wilderness, Percivale sees a richly appointed ship driven toward him. A beautiful gentlewoman aboard asks how he came to be in such a desolate place and warns that he may die there. He answers from his faith, declaring that he serves the best man in the world and trusts that one who seeks him will not be abandoned.
The woman already knows Percivale’s name. She says that she has seen the red knight with the white shield, whom Percivale wishes to meet, and offers to take him to him if Percivale will fulfill her desire when she summons him. She describes the knight’s recent pursuit of two other knights to the [Water of Mortaise](entity:location-recall-location-water-of-mortaise-bd45f057ca8a), where the knight’s horse drowned but the knight himself escaped. Her knowledge of the red knight makes the offer seem a promising route onward through Percivale’s quest.
## The appeal of the disinherited woman
Before asking for his allegiance, the woman presents herself as an injured lady. She says that she once dwelled with the greatest man in the world, who made her exceptionally beautiful, but that pride and a word displeasing to him led to her expulsion and loss of her inheritance. She adds that she and her followers have since taken many of his men and are at war against him. Because Percivale is a [Round Table](entity:object-recall-object-round-table-04fef19b82fd) knight, she argues, he should not fail a gentlewoman who has been disinherited and asks for help.
Percivale promises to help her as much as he can, and she thanks him. In the heat of the day, she has a pavilion set up for him and removes his helmet and shield so that he can rest. When he wakes hungry, she provides a table laden with food and strong wine. The narrative makes the temptation depend on a sequence of apparent courtesies: shelter, refreshment, the posture of a wronged lady, and the offer of useful knowledge about the quest.
## The moment of recognition
After eating and drinking, Percivale becomes more ardent toward the woman and asks her to be his. She initially refuses, then makes acceptance conditional on his swearing to be her true servant and do whatever she commands. Percivale gives his word by the faith of his body. When she then invites him to do as he pleases, he moves toward her, but sees his sword lying unsheathed on the ground. The red cross in its pommel recalls both his knighthood and the promise he has already made to the holy man.
Percivale makes the sign of the cross on his forehead. The pavilion overturns and changes into smoke and a black cloud, exposing the apparent refuge as a deception. The woman departs in the ship, accusing him of betrayal. The transformation makes the spiritual stakes visible: the bargain that seemed to offer aid and intimacy was an attempt to claim Percivale’s service and turn him from the faith that his quest requires.
## Penitence and the devil’s identity
Percivale grieves at how near he came to losing what he describes as his virginity, and punishes himself in penitence before dressing and arming himself again. He stops the bleeding wound with a piece of his shirt. The account presents the act as an expression of alarm and remorse, not as a victory won by his own strength: when the holy man returns, Percivale admits that a gentlewoman led him toward deadly sin and that he believes the fiend sent her to shame him.
The holy man identifies the woman as the master fiend of hell, the same figure Percivale had seen earlier in a vision riding on a serpent. He explains that she had once been the brightest angel in heaven but was cast out by [Jesus Christ](entity:character-recall-character-jesus-christ-1861cf215964) for her sin and thereby lost her heritage. The supposed disinheritance thus mirrors her own spiritual fall, while her attempt to recruit Percivale repeats that rebellion by drawing him into service against his proper allegiance. The holy man says she would have overcome Percivale had the grace of God not intervened, and presents the encounter as a warning. After the holy man vanishes, Percivale takes his arms, enters the ship, and departs.
## A trial within the Grail quest
The episode sets worldly knighthood beside spiritual discipline. The gentlewoman invokes the obligations of a Round Table knight toward a disinherited lady, and Percivale initially answers that appeal in good faith. Yet the episode shows that a chivalric promise cannot be judged apart from the allegiance it serves: the apparent rescue of a wronged woman is in fact a demand that he become the devil’s man.
The sword’s red cross, the sign of the cross, and the holy man’s prior counsel are the concrete means by which Percivale recognizes the danger. His near-failure makes the quest’s religious standard more exacting than prowess alone. The ending returns him to the journey, but only after the encounter has demonstrated how spiritual vigilance, rather than a knight’s readiness to fight or assist, determines whether he remains fit to continue.
Event 122
Quest for the Holy Grail
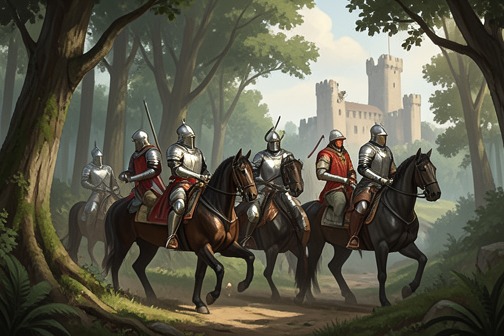
The [Quest for the Holy Grail](entity:event-recall-event-quest-for-the-holy-grai-a582f9b016d3) is the sacred adventure that divides the fellowship of [King Arthur](entity:character-recall-character-king-arthur-2b97864f54aa)’s [Round Table](entity:object-recall-object-round-table-04fef19b82fd) according to spiritual rather than worldly standards of knighthood. Its arrival interrupts the long prosperity of [Arthur](entity:character-recall-character-arthur-2e33b65bbe57)’s court: prowess and renown can no longer guarantee success, and the Grail is achieved by the knights who meet its religious demands. [Galahad](entity:character-recall-character-galahad-e8a04503b5e9) reaches the Quest’s culmination, while Bors returns to [Camelot](entity:location-recall-location-camelot-352b4eac6f0e) with the story of what happened. The Grail’s departure from [Logris](entity:location-recall-location-logris-15cd419db8d9) makes the change permanent, and the fellowship cannot simply resume its former wholeness.
## From worldly chivalry to spiritual trial
The Quest stands at a turning point in the history of the Round Table. The fellowship has won fame through feats of arms and the ordering of a realm, but the Grail imposes a different test. The introductory account describes the knights as entering the Quest with the self-reliance that had served them in worldly chivalry, only to find that these qualities cannot carry them through a spiritual undertaking. Even leading members of the fellowship, including [Launcelot](entity:character-recall-character-launcelot-0b02a99ce6f7), [Ector de Maris](entity:character-recall-character-ector-de-maris-ebbe170b5361), and [Gawaine](entity:character-recall-character-gawaine-e52d508f7128), fail to withstand its tests. The distinction is not between celebrated knights and unknown ones, but between earthly achievement and fitness for a sacred end.
This contrast gives the Quest its larger narrative force. Arthur’s fellowship had seemed to rise beyond ordinary misfortune as its honour opened into ever brighter forms; the Grail reveals a limit that military achievement cannot overcome. The knights are judged by a standard that does not reward prowess alone. In the introductory reading, the Quest declares a separation between good and evil that cannot later be undone, even when the court resumes its feasts and tournaments.
## The Grail and its sacred meaning
The Grail is presented as both a vessel and the centre of a Christian history. The introductory account notes that the word can mean a dish, drinking vessel, or tureen, and that earlier descriptions vary between a shallow vessel for food and a cup. It also traces a pre-Christian tradition of a vessel that miraculously provides food. In the romances as discussed there, that older image is joined to the Christian account: the Grail is identified with the dish that held the paschal lamb at the Last Supper, and with the vessel in which [Joseph of Arimathea](entity:character-recall-character-joseph-of-arimathea-79b90306708c) received Christ’s blood.
The Quest makes this sacred history active within the plot. At the [Pentecost](entity:time-recall-time-16e2becf2ca1) feast, the Grail passes through the hall concealed beneath white samite; although it cannot be seen or borne by any person the knights can identify, the hall is filled with good odours and each knight receives the food and drink he most desires. The vessel then disappears. The marvel offers abundance to the whole court, but its presence does not mean that the fellowship has already attained spiritual worth. Rather, the feast announces an adventure that will test the knights individually and distinguish those who can advance from those who cannot.
## The chosen knights and the Quest’s culmination
The Quest’s central promise is that the knights who will achieve the Grail can be recognized. One chapter heading describes [Merlin](entity:character-recall-character-merlin-3f8c52535684) likening the Round Table to the world and explaining how the successful knights will be known; the episode therefore frames the undertaking as a trial that reveals a divinely ordered distinction within the fellowship. The opening of the Quest is also explicitly marked in Caxton’s contents: the book devoted to Galahad’s arrival at Arthur’s court begins the account of how the Quest of the [Sangreal](entity:object-recall-object-sangreal-c287525e0d7a) was begun, followed by a separate book of Quest adventures.
At the culmination, Galahad and his companions are fed from the Grail. The apparition identifies the vessel as the dish in which Christ ate the lamb on [Maundy Thursday](entity:time-recall-time-maundy-thursday-548f12429338), and Galahad is told that he has seen what he most desired, though not yet as openly as he will see it at [Sarras](entity:location-recall-location-sarras-7f588eb58475). The revelation also carries a consequence for the kingdom: because the people of Logris have turned to evil living and do not properly serve or honour the vessel, it will leave the realm and never be seen there again. Galahad, [Percivale](entity:character-recall-character-percivale-67acd4cba5cb), and Bors are directed to take it onward, carrying with them the sword with the strange girdles and some of the blood from the spear, which is to be used to heal the maimed king. The sacred object thus connects spiritual revelation to a specific mission beyond Logris.
## Return, loss, and aftermath
The Quest does not return the fellowship to its former condition. In the introductory account, two of the successful knights depart from this life to a higher one; Bors, described as not wholly spotless but forgiven and sanctified, comes back as the link between the earthly and spiritual worlds. His return allows the feasts and tournaments at Camelot and [Westminster](entity:location-recall-location-westminster-797ba54e0a11) to resume, but the court’s outward activity cannot close the separation the Quest has disclosed. The Grail has departed, and the fellowship has learned that its worldly measures of honour were not sufficient.
At Camelot, Bors recounts the adventures to the king, and Arthur has learned clerks record the account in books kept at [Salisbury](entity:location-recall-location-salisbury-6189e0490d55). Bors also reports that Galahad and Percivale have been buried by his own hands at Sarras, and conveys Galahad’s greeting to Launcelot. The return is therefore both a homecoming and a report of irreversible loss: Bors brings the story back, but not the companions who completed the Quest with him. Launcelot receives the message as a reminder of the uncertain world and of a promise he had made to Galahad. The Quest leaves its mark not only in the departure of the Grail but in the changed spiritual understanding of those who remain.
## Place in the larger story
The introductory account places the Quest between the Round Table’s height and the tragedy that follows. It interrupts years of prosperity with a test the leading earthly knights cannot pass, and makes visible a moral division that later events cannot heal. Even the attempts of Arthur and Launcelot to avert the coming disaster are presented as insufficient to restore what has been broken. Against that movement toward catastrophe, the Quest offers a distinct but limited spiritual triumph: the Grail is achieved by the holy knights, and Bors returns forgiven, yet neither achievement reverses the loss of the fellowship’s former unity.
Caxton’s arrangement reinforces the Quest’s importance by giving it several connected books among the volume’s twenty-one books and 507 chapters. Its story begins with Galahad’s arrival and the opening of the Quest, continues through separate accounts of adventures and the Grail, and is followed by books concerning Launcelot and the queen. The structure places the sacred trial within the wider history of Arthur’s court: it is not an isolated marvel, but the point at which the ideals governing the fellowship are tested and their limits become consequential.
Event 123
Bors Chooses to Rescue the Maiden Instead of Lionel
[Bors Chooses to Rescue the Maiden Instead of Lionel](entity:event-recall-event-9d9a51bb8f7c) is a pivotal choice in Bors’s Grail-quest adventures: seeing his brother [Lionel](entity:character-recall-character-5da35f9944b1) being taken captive at the same moment that a maiden appeals for protection, Bors chooses to help her. The decision puts the obligations of kinship and knighthood into direct conflict, and the narrative later subjects his choice to a troubling religious interpretation that weighs its consequences against the alternatives he faced.
## The Choice in the Forest
After restoring a young lady to her lands, Bors refuses the riches she offers and rides on. At a fork in the forest, he encounters two knights leading Lionel away bound, while another knight is taking a gentlewoman deeper into the woods, apparently to isolate her. Lionel’s captors are beating him, but he remains silent. The maiden calls for help and, as Bors approaches, appeals to him as a knight of the [Round Table](entity:object-recall-object-round-table-04fef19b82fd). Her plea invokes his faith, his knightly obligations, and [King Arthur](entity:character-recall-character-king-arthur-2b97864f54aa), presenting assistance as a duty owed to the chivalric order as well as to her.
The scene gives Bors no safe or cost-free option. He recognizes that Lionel may be killed if left to his captors; he also believes that if he fails to help the maiden, she will lose her honour and never recover it. Rather than treating the choice as a contest of affection, Bors weighs two dangers and turns to prayer. He asks [Jesus Christ](entity:character-recall-character-jesus-christ-1861cf215964) to protect Lionel from being killed, then rides to succour the maiden. His decision is therefore both an act of intervention and an act of trust: he takes responsibility for the woman before him while placing his brother’s immediate safety in divine care.
## A Choice Reconsidered
The episodes that follow do not let Bors regard the rescue as a settled answer to the moral conflict. A priest interprets a dream Bors has had, including images of birds, a rotten tree, and white flowers. In the priest’s account, a fair and wealthy gentlewoman loves Bors, and the great bird represents the force that will lead him to refuse her. The interpretation then turns his attention back to the choice in the forest: the priest says that Bors’s refusal of the woman’s love will cause his cousin [Launcelot](entity:character-recall-character-launcelot-0b02a99ce6f7) to die, and accuses him of having chosen to rescue a maiden who was no relation to him instead of preventing that outcome.
This is a retrospective, spiritual judgment rather than a simple restatement of what Bors knew at the fork in the forest. At the moment of decision, he understood the immediate peril to Lionel and the threatened loss of the maiden’s honour; the priest’s interpretation introduces further consequences and frames the rescue within a test of [chastity](entity:concept-recall-concept-5c00cc82f274). Bors hears the accusation and says he would rather do anything than see Launcelot die through his default. The episode thus sharpens the tension between a choice made to protect one person and the far-reaching obligations that the narrative subsequently attaches to it.
## Chivalric and Religious Stakes
Bors’s appeal to Christ and Mary, and his request that Lionel be kept safe, make prayer part of the action rather than an afterthought. His decision is represented as a knight’s response to a direct plea for aid, but its consequences are measured in terms that exceed worldly reputation: the priest interprets the dream through chastity, responsibility, and the possible loss of Launcelot. The episode belongs to a larger narrative in which the Grail quest tests not only prowess but also the intentions and spiritual condition of its knights.
The scene’s central conflict remains unresolved by a neat declaration that one duty always outranks another. Bors acts for the maiden because he judges her danger immediate and her loss irreparable, while entrusting Lionel to God; the priest later challenges that judgment by pointing to what Bors might have prevented. By setting the choice and its reinterpretation beside each other, the narrative makes the rescue a test of judgment under pressure, and of how an apparently merciful act may be reconsidered within a wider field of kinship, chastity, and spiritual responsibility.
Event 124
Bors and Lionel’s Conflict Is Halted by a Miracle
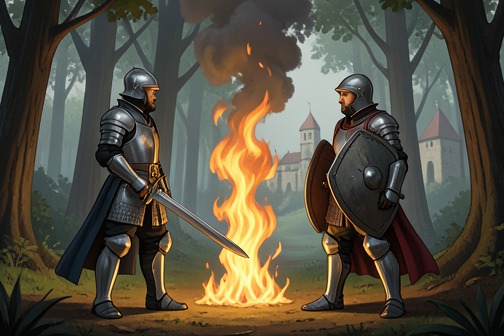
[Bors and Lionel’s Conflict Is Halted by a Miracle](entity:event-recall-event-750f3dfe40cc) is a crisis in the [Holy Grail](entity:object-recall-object-8fc3592652aa) quest in which a brother’s accusation nearly becomes fratricide. [Lionel](entity:character-recall-character-5da35f9944b1) holds Bors responsible for leaving him in danger to aid a damsel; Bors refuses to fight his elder brother, even as Lionel attacks him and kills those who try to intervene. Only a heavenly warning and a cloud of flame prevent the brothers from killing one another. The intervention preserves both their lives, restores their reconciliation, and directs Bors toward [Percivale](entity:character-recall-character-percivale-67acd4cba5cb) and the ship that carries them onward.
## The grievance behind the reunion
Bors encounters Lionel at an hermitage near a castle, where the brothers have separately arrived on the eve of a tournament. Bors has been riding in hope of meeting Lionel or another companion from the Grail quest. Seeing his brother, he is overjoyed; Lionel’s response is accusation rather than welcome. He recalls that Bors once saw two knights leading him away and beating him, yet left him there to rescue a gentlewoman. Lionel calls this abandonment a grave wrong and declares that Bors deserves death.
The brothers’ opposed understandings of that earlier choice give the scene its moral and emotional pressure. Lionel regards Bors’s rescue of the damsel as a betrayal of brotherly duty. Bors neither denies the history nor answers anger with anger: he kneels, asks forgiveness, and appeals to the love that ought to bind them. When Lionel demands that he arm himself, Bors still hesitates, remembering that Lionel is his elder and that he owes him reverence. The quarrel is therefore not merely a contest of strength; it tests whether Bors will meet kinship’s breakdown with violence or continue to seek mercy.
## The attack and the failed interventions
Lionel rides over the unarmed Bors, leaving him unconscious, then dismounts intending to kill him. An aged hermit who has heard their exchange steps between them and pleads with Lionel to spare both himself and his brother from sin. Lionel threatens the hermit too. The hermit accepts the danger rather than abandon Bors, but Lionel strikes him down and returns to his purpose against his brother.
Colgrevance, a fellow of the [Round Table](entity:object-recall-object-round-table-04fef19b82fd), arrives and finds the hermit dead and Lionel preparing to kill Bors. He pulls Lionel away and challenges him, identifying himself as Bors’s companion. Lionel answers by fighting him. Bors comes round but, badly weakened, can only watch as Colgrevance is overcome. The rescuer’s plea for help makes Bors’s position still more agonizing: he is unable to intervene at first, while the man who defended him is now in mortal danger because of that defence.
## Bors chooses defense, then receives the warning
Lionel kills Colgrevance and turns again on Bors. Bors grieves over the dead hermit and his Round Table fellow, and condemns Lionel’s actions, but continues to plead for an end to the fight. He says he does not greatly fear Lionel; what he fears is God’s wrath, since a war between brothers is unnatural and sinful. Yet when Lionel presses the attack, Bors finally draws his sword and prepares to protect his life, asking God to show a miracle between them.
The answer comes before the brothers can strike. A voice orders Bors to flee and not touch Lionel, warning that otherwise Bors will kill him. A cloud like fire descends between them, and both shields burn. The brothers fall to the ground in a swoon. When they recover, Lionel is unharmed. Bors raises his hands, fearing that God has taken vengeance; the voice then commands him to leave Lionel’s company and go straight to the sea, where Percivale is waiting. The supernatural interruption halts violence at its decisive threshold, before Bors’s defensive blow can turn the quarrel into the death he has been trying to prevent.
## Reconciliation and the road to the sacred ship
Before parting, Bors asks Lionel to forgive him for his past wrong. Lionel does so willingly, and the brothers separate without further combat. The reconciliation does not erase the earlier harm or the deaths caused during the quarrel; instead, it ends the immediate hostility and makes possible the next stage of Bors’s journey.
Bors follows the instruction to go to the sea, resting first at an abbey near the shore. A voice comes to him again in sleep and repeats the command. He makes the sign of the cross, prepares his horse and armor, and rides through a broken wall until he reaches the strand. There he finds a ship covered in white samite. After entrusting himself to [Jesus Christ](entity:character-recall-character-jesus-christ-1861cf215964), he enters; the ship departs swiftly, and darkness overtakes him. At daybreak he sees an armed knight aboard and recognizes Percivale. Their meeting joins the two companions in the Grail quest, turning a family crisis into a divinely directed passage toward the next sacred adventure.
## Narrative and religious significance
The episode sets Bors’s response to injury and accusation against Lionel’s escalating violence. Bors first seeks pardon, then tries to prevent a sinful battle even after the hermit and Colgrevance have died. His readiness to defend himself does not lead to triumph through force: the voice and fiery cloud intervene, and the command that follows determines his route away from Lionel and toward Percivale. The crisis thus places mercy, family obligation, and obedience to divine direction in direct tension, resolving the immediate conflict not by a brother’s victory but by a warning that both brothers must heed.
Event 125
Galahad Completes the Grail Quest and Heals the Maimed King
[Galahad Completes the Grail Quest and Heals the Maimed King](entity:event-recall-event-87202535ee3c) is the climactic [Carbonek](entity:location-recall-location-carbonek-c1932541a872) episode in which [Galahad](entity:character-recall-character-galahad-e8a04503b5e9) proves capable of completing the quest’s sacred trials, receives the [Holy Grail](entity:object-recall-object-8fc3592652aa), and heals the maimed king. Its marvels do more than reward the knights: the Grail’s departure is explained as a consequence of [Logris](entity:location-recall-location-logris-15cd419db8d9)’s failure to honor it properly, so spiritual achievement and the kingdom’s loss are bound together.
## Arrival at Carbonek
After their separate adventures, Galahad, [Percivale](entity:character-recall-character-percivale-67acd4cba5cb), and Bors come together and ride to Carbonek. [King Pelles](entity:character-recall-character-king-pelles-c21481cad617) recognizes them, and the welcome makes clear that their arrival is understood as the culmination of the Grail quest. [Pelles](entity:character-recall-character-pelles-4a1ad88053c1)’s son, Eliazar, brings before them the broken sword associated with Joseph, who had been wounded with it in the thigh. Bors tries to join the pieces, but cannot; Percivale fares no better. Galahad takes the fragments and fits them together so perfectly that the sword appears unbroken, as though it had just been forged.
## The worthy company and the Grail
The restored sword is given to Bors, judged a fitting recipient as a good and worthy knight. Soon afterward, the sword rises and grows intensely hot, frightening those present. A voice orders all who are unworthy to remain at the table of [Jesus Christ](entity:character-recall-character-jesus-christ-1861cf215964) to depart, and the company clears until only Pelles, Eliazar, their niece, and the three questing knights remain. Nine armed knights then enter, identifying themselves as three from Gaul, three from [Ireland](entity:location-recall-location-ireland-3247a2c8bcbe), and three from Denmark, and join the company gathered for the holy meal.
A sick king is brought into the hall on a wooden bed, wearing a gold crown. He tells Galahad that he has long awaited his coming and trusts that the promised end of his suffering is near. The episode thus places the king’s healing within the same sequence as the Grail’s revelation: the wonder is not an isolated cure, but part of a sacred encounter whose participants and outcome are governed by spiritual worthiness.
## Joseph and the sacred meal
Pelles and Eliazar depart, and a bishop-like figure appears, carried by four angels and bearing a cross. The inscription on his forehead identifies him as Joseph, the first bishop of Christendom, whom the Lord had succored at [Sarras](entity:location-recall-location-sarras-7f588eb58475). Though Joseph had been dead for more than three hundred years, he explains that he was once an earthly man. [Angels](entity:creature-recall-creature-angels-e0849f69f23c) then bring candles, a towel, and a spear that supplies drops of blood to a box. Joseph performs the mass; at the elevation of the bread, the knights see the figure of a child enter it, and Joseph gives the transformed bread to Galahad, telling him to kiss his companions in turn.
Christ then appears from the vessel, bearing the signs of the Passion, and offers the knights the holy food they have desired. Galahad kneels to receive it, and his companions receive it after him. Christ identifies the vessel as the dish in which he ate the lamb on [Maundy Thursday](entity:time-recall-time-maundy-thursday-548f12429338). Galahad has seen what he most desired, but is told that he will behold it still more openly in Sarras. The Grail is to leave Logris that very night and never be seen there again, because the people of the land have turned to evil living and do not serve or worship it rightly. The revelation therefore makes the quest’s success inseparable from a loss: the knights attain the vision, while Logris forfeits the sacred vessel.
## The healing and the road to Sarras
Christ instructs Galahad to travel with Percivale and Bors, to take the sword with the strange girdles, and to carry blood from the spear so that the maimed king may be anointed. The other companions are to separate from them; two are destined to die in Christ’s service, while one will return to tell the news. Galahad touches the spear’s blood and anoints the king’s legs. The king immediately rises from bed whole and gives thanks to the Lord. His recovery is not a return to worldly life: he enters a religious house of white monks and becomes a holy man.
That night, a voice sends the knights onward. Galahad, Percivale, and Bors depart, and three days later reach the shore and find the ship described earlier in the tale. Within it are the silver table they had left with the maimed king and the Grail, covered in red samite. Their arrival at the vessel carries the episode beyond the healing: the sacred objects and the surviving company are already being directed toward the next stage of the quest, while the Grail itself is departing the realm of Logris.
## Meaning within the quest
The episode gathers several strands of the Grail narrative into one test of spiritual fitness. The broken sword is repaired by Galahad, but awarded to Bors; the Grail’s meal admits a restricted company; and the healing is entrusted to Galahad, who applies the spear’s blood as commanded. Ability, worthiness, and service are distributed across the companions rather than collapsed into a single achievement.
The maimed king’s restoration gives visible form to the quest’s spiritual consequences, while his withdrawal into religious life distinguishes healing from a simple resumption of worldly power. At the same time, Christ’s explanation for removing the Grail turns the marvel into a rebuke of Logris. The quest reaches fulfillment for its worthy participants, but not as a permanent possession for the realm: its decisive reward is a sacred encounter, a cured king, and the charge to continue toward Sarras.
Event 126
Percival’s Sister Gives Her Blood to Heal a Sick Lady and Dies
[Percival’s Sister Gives Her Blood to Heal a Sick Lady and Dies](entity:event-recall-event-add15ee64cbd) is a self-sacrificial episode in the Grail quest: Percival’s sister supplies the remedy demanded by a castle custom, heals its sick mistress, and dies from the bloodletting. Her death does not end the episode’s meaning. She directs her burial toward [Sarras](entity:location-recall-location-sarras-7f588eb58475), joining her own fate to the quest’s destination and to [Galahad](entity:character-recall-character-galahad-e8a04503b5e9)’s foretold end.
## The Castle’s Custom
At a castle visited by Galahad, Percival, and their companion, the travelers ask why the place observes its particular custom. They learn that the castle belongs to a gentlewoman who had suffered from a long illness and then developed a malady that no physician could cure. An old man had declared that a dishful of blood from a maiden who was a king’s daughter and pure in will and deed would heal her if used as an anointing remedy. The custom had grown out of that claim.
Percival’s sister recognizes that the sick woman may otherwise be beyond help. Galahad warns her that giving so much blood could cost her life. She accepts that danger, saying she would gain honor, the health of her soul, and honor for her lineage by dying to heal the woman; in her judgment, one harm would be better than two. Her choice turns a rule enforced by the castle into a freely accepted act of service. The men’s compliance matters as well: without her undertaking, a mortal conflict over the custom was expected the following morning.
## The Healing and the Cost
The next morning, after the three knights have heard Mass, Percival’s sister asks that the sick woman be brought before her. She then asks who will let her blood. Once the bleeding begins, enough is taken to fill the dish required by the custom. She blesses the sick woman and tells her that she has come to die so that the woman may recover, asking her to pray for her.
Galahad and his two companions immediately rise to help and try to stop the bleeding, but they cannot save her. When she awakens, she tells her brother Percival that she is dying for the sick woman’s healing. The remedy works: the woman recovers when anointed with the blood. The episode thus gives both outcomes their full weight. The castle’s demand is met and its sick mistress is healed, but the promised cure is bought with the life of the person who provides it.
## The Journey to Sarras
Before her death, Percival’s sister asks her brother not to bury her in that country. He is to place her in a boat at the nearest harbor and let it go wherever adventure leads. She predicts that when the three knights reach Sarras to achieve the [Holy Grail](entity:object-recall-object-8fc3592652aa), they will find her arrived beneath a tower and should bury her in a spiritual place. She further foretells that Galahad and Percival will be buried there too. Percival understands her words and, weeping, agrees to do as she asks.
After receiving the sacrament, she dies. Percival writes a letter recounting how she had helped the knights through strange adventures, places it in her right hand, and lays her in a barge covered with black silk. The wind rises and carries the barge away from land until it disappears from sight. Her burial is therefore postponed, not abandoned: the boat’s departure sets her on a path toward the same sacred city that gives direction to the knights’ quest.
## Consequence and Narrative Significance
The episode binds healing, sacrifice, and the Grail quest without collapsing them into a simple victory. The sick woman’s recovery confirms the efficacy of the prescribed remedy, while the sister’s death makes its cost unmistakable. Her act is presented as voluntary and purposeful: she knowingly accepts the risk, seeking both spiritual and familial honor, and asks her companions to fulfill a specific burial wish.
Her prediction also looks beyond the immediate scene. Sarras is not merely the destination named in her instructions; it is where she says the knights will find her and where she anticipates the burial of Galahad and Percival. The departure of the barge carries that forecast forward, while the letter and the promise to bury her preserve a record of her service and make her fate part of the companions’ continuing obligations. The episode consequently places a woman’s act of mercy at the heart of the knights’ religious adventure: she does not achieve the Grail herself, but her sacrifice and prophecy shape the journey toward its end.
Event 127
Galahad and His Companions Punish the Evildoers of Castle Castellois
[Galahad and His Companions Punish the Evildoers of Castle Castellois](entity:event-recall-event-6bfe56a840f7) is a Grail-quest episode in which [Galahad](entity:character-recall-character-galahad-e8a04503b5e9), [Sir Percivale](entity:character-recall-character-sir-percivale-ade9db96f1ec), and [Sir Bors](entity:character-recall-character-sir-bors-eb41f6b6a451) overcome the violent rulers of a fortress and restore their captive father, Earl Hernox. Its decisive turn comes after the fighting: the knights must make sense of their victory, and Galahad rejects the idea that a human avenger may claim the authority that belongs to God.
## Approach to the Fortress
The episode begins when a squire encounters the three knights and questions whether they truly belong to [King Arthur](entity:character-recall-character-king-arthur-2b97864f54aa)’s household. He calls them ill equipped and turns back toward a cliff fortress. A gentlewoman then warns them that they have come to their deaths and urges them to turn aside. They refuse, declaring their reliance on the one whose service they have entered. The warning establishes the danger before the fighting begins, while the knights’ answer frames their advance as an act of religious service rather than a search for ordinary combat.
Armed knights emerge from the fortress and demand that the newcomers surrender or die. The three companions answer by charging. Sir Percivale knocks down the foremost opponent and takes his horse; Galahad and Sir Bors likewise secure mounts. They had been without horses in this country because they had left theirs when they took ship elsewhere. Once mounted, they drive the defenders back into the stronghold, follow them inside, dismount, and fight their way into the hall.
## The Defeat of the Brothers
The fighting leaves many people dead. Faced with the scale of what they have done, the three knights recognize the gravity of the scene. Sir Bors reasons that God would not have allowed them to prevail in this manner if the dead had been serving God. Galahad corrects him: even if the defenders had sinned against God, vengeance did not belong to the knights, but to the one with power to judge it. The distinction does not erase the violence of the encounter; it limits the claim the victors may make about their role in it.
A priest arrives carrying the consecrated host in a cup and is astonished by the dead in the hall. Galahad removes his helmet and kneels, as do his companions. They identify themselves as members of King Arthur’s court and explain how the fight occurred. The priest says that they could not have performed a greater charitable deed even if they lived as long as the world. Galahad responds with regret because he believes the slain men were Christians. The priest corrects him: they were not baptized, and their conduct explains why their defeat is understood within the episode as more than a military victory.
The priest recounts the history of the fortress. Earl Hernox had ruled there only a year earlier and had three sons, all knights, and a daughter renowned for her beauty. The brothers abused their sister against her will; after she appealed to her father, they killed her, imprisoned Hernox, and wounded him nearly to death. A cousin rescued the earl, but the brothers continued their wrongdoing: they killed clerks and priests and had chapels torn down, obstructing the performance of religious service. On this very day, Hernox had sent for the priest to hear confession and receive communion. The earl had told him to endure the brothers’ conduct because three servants of God would soon destroy them. The arrival and victory of Galahad, Sir Percivale, and Sir Bors thus fulfill the prediction within the story.
## The Earl’s Death and Galahad’s Charge
The companions bring Earl Hernox out of prison into the hall. Though he has never seen Galahad before, he recognizes him. Hernox weeps and asks Galahad to hold him while his soul leaves his body, so that he may die in the arms of a good man. Galahad agrees. A voice then declares that Galahad has avenged God’s enemies and commands him to go as soon as possible to the Maimed King, who is to receive healing through him after waiting a long time. Hernox dies, and Galahad ensures that he is buried as befits him.
The episode therefore ends with both restoration and a new obligation. The earl has been released from imprisonment, but not restored to life; his death follows immediately upon his recognition of Galahad and his final request. The voice turns the victory at the fortress into a stage in Galahad’s larger quest by directing him toward the Maimed King. The three companions then depart with Sir Percivale’s sister, and their journey continues into the waste forest.
## Justice and the [Grail Quest](entity:concept-recall-concept-grail-quest-7c3749e44fbe)
The episode holds two explanations of the knights’ actions in tension. The priest identifies the killings as an act of charity and recounts the brothers’ crimes against their sister, father, clergy, and chapels; the voice likewise calls them enemies of God. Yet Galahad refuses to translate that judgment into a personal right of vengeance. His reply to Sir Bors preserves a moral boundary even in a scene whose supernatural signs confirm that the fortress’s fall was foreseen and serves a divine purpose.
The brothers’ defeat also clears the way for Galahad’s next task, but the story does not treat victory as the end of his service. The voice links the rescue to the healing of the Maimed King, while the earl’s death and burial mark the cost and solemnity of the deliverance. The episode’s movement—from warning, to armed resistance, to explanation, recognition, and commission—places force within a larger Grail-quest pattern: the knights act, but the meaning and direction of their deeds are ultimately assigned by religious authority and revelation.
Event 128
Lancelot Fails to Enter the Grail Chamber
[Lancelot Fails to Enter the Grail Chamber](entity:event-recall-event-8749a417bdd6) is the decisive encounter in which [Sir Launcelot](entity:character-recall-character-sir-launcelot-c0ea01c62d3d) approaches the [Holy Grail](entity:object-recall-object-8fc3592652aa) but cannot attain full access to it. The chamber opens to reveal a sacred rite, yet a warning bars him; when he crosses the threshold to help the priest, he collapses and lies as if dead. His recovery lasts twenty-four days, which he understands as penance for twenty-four years of sin. The episode makes a sharp distinction between worldly prowess and spiritual worth: armour and courage cannot secure what faith and purity require.
## The approach to the chamber
After [Galahad](entity:character-recall-character-galahad-e8a04503b5e9) leaves the ship to pursue the adventures of the Holy Grail, the wind carries [Launcelot](entity:character-recall-character-launcelot-0b02a99ce6f7) across the sea for more than a month. He prays for news of the sacred vessel and eventually reaches a castle by a postern open to the sea. A voice directs him to enter, where he will see a great part of what he seeks. Two lions guard the way. Launcelot draws his sword, but a dwarf strikes his arm and makes him drop it; a voice rebukes him for trusting his armour more than his Maker. Launcelot accepts the reproach, thanks Christ for correcting him, puts away his sword, makes a cross on his forehead, and passes the lions unharmed.
Inside the castle, Launcelot finds the doors open until he reaches a closed chamber. He hears singing that seems not of the earthly world and recognizes that the Grail is within. He kneels and asks Christ, despite his former sins, to show him something of the object of his quest. The chamber door opens, and a great brightness fills the house. But the invitation to witness is not permission to enter: a voice warns him to flee and not cross the threshold, because he would regret doing so.
## The vision and the forbidden threshold
From outside the chamber, Launcelot sees a silver table and the sacred vessel covered in red samite. [Angels](entity:creature-recall-creature-angels-e0849f69f23c) attend it with a candle, a cross, and altar ornaments, while a priest appears to celebrate mass. Above the priest’s hands, Launcelot sees three figures; two place the youngest, by appearance, between the priest’s hands, and the priest raises it. The vision is presented through the forms of Christian worship, joining the Grail’s marvel to the sacrament of the mass rather than to an ordinary courtly adventure.
Launcelot believes the priest needs help and asks Christ not to count it as a sin if he enters to assist him. He then crosses the threshold despite the warning. As he approaches the silver table, a force strikes him so severely that he falls and loses the power to move, hear, or speak. Unseen hands carry him outside the chamber and leave him apparently dead. The sequence turns his familiar readiness to act into a spiritual failure: compassion prompts the crossing, but good intention does not remove the limit placed upon him.
## Recovery, penance, and the limit of achievement
The people in the castle find Launcelot alive the next morning, although he cannot stand or move. They carry him to a bed and keep him there. At the twenty-fifth day he opens his eyes, sorrowful that he has been awakened from a state in which he felt more at ease. He says he has seen marvels beyond what speech or thought can convey, but adds that he might have seen more had his son not been there before him. His vision is therefore substantial but expressly incomplete.
Launcelot has lain still for twenty-four days and nights. He interprets that duration as a corresponding penance for the twenty-four years during which he had been a sinner. He also recalls the hair he had worn for nearly a year and regrets having broken his promise to the hermit. The episode thus connects the Grail encounter to an ongoing practice of [repentance](entity:concept-recall-concept-4100212400b4): recovery does not erase his sense of sin, and physical restoration is accompanied by renewed attention to the vow he had failed to keep.
## The Quest’s verdict and the Grail’s meaning
Once Launcelot is well, those around him tell him that the Quest of the Holy Grail has been achieved in him, but that he will never see the Grail again beyond what he has already seen. He gives thanks for the mercy shown to him and says that what he has witnessed suffices. The verdict both recognizes an attainment and fixes its boundary: Launcelot is not excluded from every sight of the sacred vessel, but neither is his achievement the complete vision granted to the quest’s worthiest knights.
The episode’s religious framework is reinforced by the book’s account of the Grail tradition. The introductory discussion identifies the Grail with the dish of the Last Supper, the vessel in which [Joseph of Arimathea](entity:character-recall-character-joseph-of-arimathea-79b90306708c) received Christ’s blood, or the sacramental cup itself; in the story of the Dolorous Stroke, the blood brought to [Britain](entity:location-recall-location-01048caf1f48) by Joseph is also associated with the place where Galahad later heals [King Pellam](entity:character-recall-character-king-pellam-3f2bbc2daf06). At the Grail vision, the priest, altar, and sacred vessel make the central test one of spiritual fitness, not martial skill. Launcelot’s encounter therefore contrasts the knight’s celebrated prowess with the penitence and faith required for the Grail, while preserving the partial grace of having been allowed to see what he cannot fully attain.
Event 129
Galahad Is Crowned King at Sarras and Beholds the Grail
[Galahad Is Crowned King at Sarras and Beholds the Grail](entity:event-recall-event-28c9665c84f7) is the culminating episode of [Galahad](entity:character-recall-character-galahad-e8a04503b5e9)’s Grail quest. In [Sarras](entity:location-recall-location-sarras-7f588eb58475), imprisonment gives way to royal authority, and that authority becomes a brief passage toward the sacred vision he has long desired. Galahad rules for a year, beholds the Grail in a mass celebrated by [Joseph of Arimathea](entity:character-recall-character-joseph-of-arimathea-79b90306708c), receives communion, and dies; the holy vessel and spear then disappear from the earthly world.
## Arrival and Imprisonment
Galahad enters Sarras with [Percivale](entity:character-recall-character-percivale-67acd4cba5cb) and Bors, carrying the silver table associated with the Grail. At the city gate, Galahad calls upon a crippled old man to help bear it. The man, who says he has needed crutches for ten years, discovers that he can walk, and the three companions carry the table onward. Their arrival is marked by a healing before it is marked by conflict.
The companions bring Percivale’s sister ashore and bury her with the dignity of a king’s daughter. When [King Estorause](entity:character-recall-character-a9b0d0b00469) asks who they are and what they carry, they explain the truth of the Grail and the divine power associated with it. Estorause, described as a tyrant descended from pagans, responds by imprisoning them in a deep hole. The arrival that has revealed miraculous healing thus leads into confinement under a hostile ruler.
## The Grail and the Change of Rule
The imprisonment does not deprive the three knights of sustenance: the Lord sends them the Grail, through whose grace they remain nourished. Their dependence on the sacred vessel contrasts with Estorause’s worldly power. At the end of a year, Estorause falls sick and recognizes that he is near death. He summons the prisoners, asks their forgiveness for his treatment of them, and receives it before he dies.
With Estorause gone, the city’s people do not know whom to appoint as king. A voice directs them to choose the youngest of the three knights, promising that he will govern the people and their land well. The citizens make Galahad king by common assent. His elevation is therefore not presented as a conquest: it follows the former king’s death, the people’s uncertainty, and a divine instruction concerning the choice of ruler.
Galahad orders a chest of gold and precious stones made to cover the holy vessel on the silver table. Each morning, he and his companions come before it to pray. His kingship lasts a year, but its defining act is devotional stewardship: the royal setting shelters the Grail while the three knights continue their prayers.
## The Vision and Galahad’s Death
On the same day of the year on which Galahad had received the golden crown, he rises early with Percivale and Bors and goes to the palace. They see the holy vessel before them and a figure kneeling, appearing like a bishop and surrounded by angels. The figure rises and begins a mass of Our Lady. At the sacrament, he calls Galahad forward to see what he has desired. Galahad trembles as mortal flesh beholds spiritual things, then gives thanks that his long-held desire has been fulfilled and says that he would not wish to live longer if it pleased the Lord.
The celebrant offers the body of the Lord, which Galahad receives meekly. Asked whether he knows who is addressing him, Galahad says that he does not. The figure identifies himself as Joseph of Arimathea and explains that he has come to accompany Galahad because Galahad resembles him in having seen the Grail’s marvels and in having remained a clean maiden. The episode thus makes Galahad’s spiritual qualification explicit within the encounter itself, linking his vision to both his quest and his purity.
After the encounter, Galahad goes to Percivale and kisses him, commending him to God; he does the same with Bors. He asks Bors to greet his father, [Launcelot](entity:character-recall-character-launcelot-0b02a99ce6f7), and to remind him of the instability of the world. Galahad then kneels before the table to pray, and his soul departs to [Jesus Christ](entity:character-recall-character-jesus-christ-1861cf215964). A multitude of angels carries it heavenward. The two surviving companions also see a hand descend from heaven, take the vessel and the spear, and bear them upward. Thereafter, no one is said to have dared claim to have seen the Grail.
## Meaning in the Quest’s Conclusion
Sarras gathers the episode’s temporal and spiritual reversals into a single sequence: an imprisoned party is sustained by the Grail; a dying tyrant asks forgiveness; the city entrusts its rule to the youngest knight; and the newly crowned king leaves earthly life on the anniversary of his coronation. Galahad’s kingship is real but temporary, and the story places its lasting significance in the prayers, the vision, and the transfer of the sacred objects beyond human reach.
The Grail’s disappearance makes the vision a conclusion rather than a possession that the city or its new ruler can retain. Galahad sees what he desired, receives the sacrament, and dies; Percivale and Bors witness his departure but remain behind. His final message to Launcelot turns the episode outward from the achieved quest to the instability of worldly life. The Grail is no longer available to be seen, and the brief reign at Sarras gives way to the spiritual ending Galahad has sought.
Event 130
Galahad’s Ascension and the Grail’s Departure
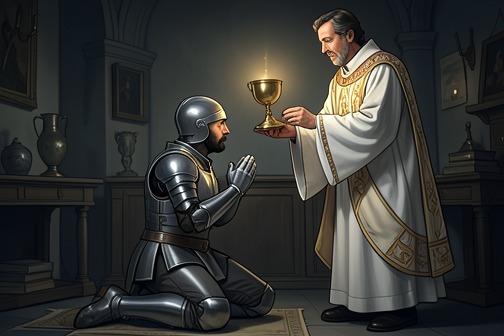
[Galahad’s Ascension and the Grail’s Departure](entity:event-recall-event-787fc5ea538e) is the concluding revelation of the Grail quest: [Galahad](entity:character-recall-character-galahad-e8a04503b5e9) receives the sacrament, accepts death as the fulfilment of his desire, and is borne to heaven, while the [Holy Grail](entity:object-recall-object-8fc3592652aa) and spear vanish from the earthly world. The paired departures turn the quest’s final achievement into both a spiritual culmination and a withdrawal of the sacred objects from human sight.
## The Sacred Vision
After Galahad had been crowned king in [Sarras](entity:location-recall-location-sarras-7f588eb58475), he and his companions came before the Grail. A figure in the likeness of a bishop, attended by angels, celebrated the Mass of Our Lady. At its sacrament, he called Galahad forward to see what he had desired for many days. Galahad trembled as mortal flesh confronted spiritual things, then gave thanks and said he would not wish to live longer if it pleased the Lord.
## [Joseph of Arimathea](entity:character-recall-character-joseph-of-arimathea-79b90306708c) and Galahad’s Fulfilment
The bishop identified himself as Joseph of Arimathea, sent to accompany Galahad. He explained the special fitness of this companionship through two likenesses: both had seen the marvels of the Grail, and both had been clean maidens. The episode thus identifies Galahad’s spiritual qualification not merely through his vision of the sacred vessel but through the purity that the narrative explicitly associates with Joseph.
Joseph offered the body of Christ, which Galahad received meekly. The sacrament completes the desire that had governed Galahad’s quest: the vision becomes an act of religious communion, and his response is not to seek further earthly reward but to give thanks and prepare to die.
## Death and Departure
Before his death, Galahad kissed [Percivale](entity:character-recall-character-percivale-67acd4cba5cb) and commended him to God, then did the same to [Sir Bors](entity:character-recall-character-sir-bors-eb41f6b6a451). He asked Sir Bors to greet his father, [Sir Launcelot](entity:character-recall-character-sir-launcelot-c0ea01c62d3d), and to remind him of the instability of the world. Having knelt before the table and prayed, Galahad’s soul departed to Christ. A multitude of angels carried it heavenward, in full view of his two companions.
The sacred objects depart in a separate but immediately connected miracle. Percivale and Sir Bors saw a hand descend from heaven; although they could not see the body to which it belonged, the hand took the Grail and the spear and carried them upward. The narrative ends the episode with a lasting consequence: thereafter, no one dared claim to have seen the Grail. The vision has been granted, but its earthly availability is over.
## Narrative Significance
The ending binds purity, sacrament, death, and the disappearance of sacred relics into a single culmination. Galahad’s achievement is confirmed through the vision and the communion he receives, while his death marks the limit of what the living can possess or witness. His final message to Sir Launcelot also carries the episode’s warning beyond the immediate scene: even the greatest worldly standing is unstable. The Grail’s departure makes that transience literal, withdrawing the object from ordinary human access as its most worthy quester passes from mortal life.
Event 131
Lancelot and Guinevere Resume Their Love Affair
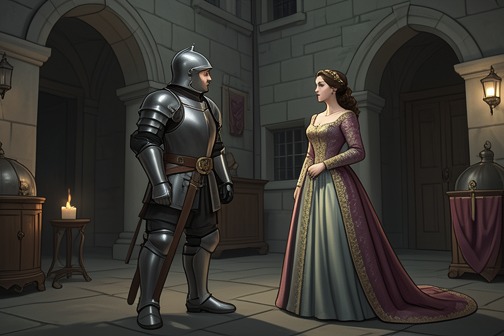
[Lancelot and Guinevere Resume Their Love Affair](entity:event-recall-event-b86020f49f25) is the renewed relationship between Lancelot and [Queen Guenever](entity:character-recall-character-queen-guenever-f27d6f31454b) after the surviving knights return from the [Holy Grail](entity:object-recall-object-8fc3592652aa) quest. The return brings joy to [King Arthur](entity:character-recall-character-king-arthur-2b97864f54aa)’s court, but Lancelot’s return to [Guinevere](entity:character-recall-character-guinevere-85c90c7da1e3) also reverses the spiritual commitment he had made during the quest and exposes their attachment to renewed scrutiny.
## The Return from the [Grail Quest](entity:concept-recall-concept-grail-quest-7c3749e44fbe)
Once the quest is fulfilled, the surviving knights come back to the [Round Table](entity:object-recall-object-round-table-04fef19b82fd). [King Arthur and Queen Guenever](entity:relation-recall-relation-king-arthur-and-quee-f97972152dd9) rejoice at their return, especially at the homecoming of Lancelot and [Sir Bors](entity:character-recall-character-sir-bors-eb41f6b6a451), who had been away for a long time. Against this public celebration, the account singles out Lancelot’s private inwardness: he resumes visiting Guinevere and forgets the promise and spiritual perfection he had undertaken during the quest.
## Renewed Attachment and Its Cost
The narrative presents the renewed relationship as more intense than before. Lancelot’s devotion to Guinevere had persisted inwardly even while he appeared devoted to God; the account says that, had his thoughts not remained fixed on her, he might have witnessed mysteries as great as those seen by his son, [Galahad](entity:character-recall-character-galahad-e8a04503b5e9), or by [Percivale](entity:character-recall-character-percivale-67acd4cba5cb) and Sir Bors. His return to her therefore marks not a new affection but the continuation of a bond that had compromised his spiritual attention throughout the quest.
The affair does not remain entirely private. Many at court speak of it, particularly [Sir Agravaine](entity:character-recall-character-280e9cb89980), who is described as outspoken. Lancelot nevertheless continues to undertake causes on behalf of ladies and damsels, appealing in those matters to the service of [Jesus Christ](entity:character-recall-character-jesus-christ-1861cf215964). His public service and private attachment coexist uneasily: he tries to stay away from Guinevere and reduce the talk surrounding them, even as the renewed relationship grows stronger.
## The Queen’s Complaint and Lancelot’s Explanation
Guinevere interprets Lancelot’s distance as a sign that his love is weakening. She points to his limited presence in her company and to his frequent absence from court on behalf of women seeking his aid, and tells him that she feels his affection beginning to slacken. Her complaint makes the central tension explicit: the discretion Lancelot considers protective feels to Guinevere like withdrawal.
Lancelot answers that his recent participation in the Grail quest cannot readily be put aside, and acknowledges that his private thoughts about returning to Guinevere prevented him from seeing the mysteries he might otherwise have beheld. He also explains that people at court are watching their relationship, naming [Agravaine](entity:character-recall-character-agravaine-eb42da8223f0) and [Sir Mordred](entity:character-recall-character-sir-mordred-f7abe8fecb31) among those he fears will make it a source of scandal. He says he is more concerned for Guinevere’s safety and reputation than for his own: he believes he might escape danger, whereas she would have to bear the consequences of public accusation. His increased service to other women, he explains, is intended to make the court believe that his attention lies there rather than in his relationship with the queen.
## Narrative Significance
The episode places spiritual aspiration, courtly service, and forbidden love in direct tension. The Grail quest has ended, but its demand for inward devotion remains the measure by which Lancelot understands his failure: he recognizes that his attachment to Guinevere limited what he could attain. Meanwhile, his attempt to conceal the relationship does not undo its force; it sharpens the difference between Guinevere’s desire for his presence and his fear of the consequences their intimacy may bring. The account thus presents renewed love not as uncomplicated reunion, but as a bond already shadowed by spiritual loss, courtly gossip, and the prospect of disgrace.
Event 132
Guinevere Exiles Lancelot
[Guinevere Exiles Lancelot](entity:event-recall-event-762ff815e21d) marks a decisive break in the relationship between [Queen Guenever](entity:character-recall-character-queen-guenever-f27d6f31454b) and [Sir Launcelot](entity:character-recall-character-sir-launcelot-c0ea01c62d3d): a conversation intended to explain his conduct ends with the queen forbidding him from court and fellowship. The episode converts private distrust into an enforced separation. Lancelot departs in grief, while [Guenever](entity:character-recall-character-112dfc46734b) conceals her own sorrow; Bors’s intervention turns the immediate crisis from exile from the realm into a period of retreat and uncertain reconciliation.
## Background: Love Under Watch
Before the expulsion, Lancelot explains that he has only recently returned from the quest for the [Holy Grail](entity:object-recall-object-8fc3592652aa). He says that he saw great mysteries through God’s mercy, not through his own merit, and that his private thoughts of returning to Guenever’s love had kept him from seeing as much as [Galahad](entity:character-recall-character-galahad-e8a04503b5e9), [Percivale](entity:character-recall-character-percivale-67acd4cba5cb), and Bors. His account joins spiritual failure to the persistence of their attachment: he has returned from a sacred quest, yet admits that his thoughts still turn toward the queen.
He also names the danger surrounding them. [Agravaine](entity:character-recall-character-agravaine-eb42da8223f0) and [Mordred](entity:character-recall-character-431d80a88894) are watching their relationship, and he fears the consequences more for Guenever than for himself. He warns that their boldness may bring her shame and slander, and explains that his increased service to damsels and maidens gives the court another account of his conduct: it may lead others to see him as devoted to that service, rather than to Guenever. His explanation is protective in its stated concern, but it also places their private bond at the centre of the danger he is trying to manage.
## The Queen’s Banishment
Guenever stands silent while Lancelot speaks. Once he has finished, she breaks into prolonged weeping, then accuses him of being false, of loving and keeping other ladies, and of scorning her. The scene turns not on a new disclosure of infidelity, but on Guenever’s interpretation of his words: his explanation about serving other women becomes, in her understanding, proof that he no longer loves her faithfully.
She makes that judgment an order. Guenever forbids Lancelot from appearing before her, discharges him from court, and denies him her fellowship on pain of death. The command is therefore more than a quarrel between lovers: the queen invokes her authority at court to make their separation immediate and binding. Lancelot leaves heavily distressed, scarcely able to bear his grief.
## Lancelot’s Retreat and Bors’s Counsel
Lancelot calls Bors, [Ector de Maris](entity:character-recall-character-ector-de-maris-ebbe170b5361), and [Lionel](entity:character-recall-character-5da35f9944b1) to tell them that Guenever has forbidden him from court. He says that he intends to leave for his own country. Bors advises against leaving the realm, reminding him of his renown as the world’s noblest knight and of the important matters still before him. Bors also counsels patience: women, he says, may act hastily and later regret it, and Guenever has been angry with Lancelot before and subsequently repented.
Lancelot accepts the alternative. Rather than depart the country, he agrees to ride to the hermitage near Windsor, where the hermit Sir Brasias lives, and remain there until he receives news. He tells Bors that he is reluctant to leave the realm, but fears that Guenever will never again be his lady. Even in retreat, his aim remains directed toward the relationship: he asks Bors to regain the queen’s love for him if he can. Bors promises to do what he can, making him an intermediary between the separated pair.
## Hidden Grief and Narrative Consequence
Lancelot leaves suddenly, and no one knows where he has gone except Bors. Guenever, for her part, shows no sorrow to Lancelot’s kin or anyone else. The narrator nevertheless reports that inwardly she suffers greatly, while outwardly she bears herself proudly, as though nothing has happened. Their separation thus has two public faces: Lancelot’s visible departure and Guenever’s composed silence. Neither face conveys the full private cost.
The next chapter moves from the banishment to a dinner hosted by the queen, where a knight is poisoned and [Sir Mador](entity:character-recall-character-sir-mador-8cbb68335e67) accuses her. That immediate transition places Guenever’s newly exposed vulnerability beside a new public threat, though the expulsion itself does not establish a connection between the banishment and the poisoning. Within the episode, the central reversal is already clear: Lancelot’s attempt to account for his conduct and protect the queen is received as betrayal, and his removal from court leaves Bors to carry the hope of renewed goodwill.
Event 133
Patrice’s Poisoning and Guinevere’s Trial
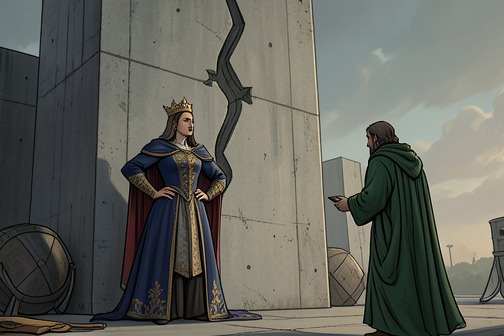
[Patrice’s Poisoning and Guinevere’s Trial](entity:event-recall-event-2a9ab8628b99) is a sequence of mistaken accusation and delayed clarification: a poisoning aimed at [Sir Gawaine](entity:character-recall-character-sir-gawaine-bf0b0cf3eb43) kills Sir Patrise instead, and the queen who hosted the dinner must answer for a death she did not cause. The episode tests the court’s bonds of loyalty against its rules for judging treason. Suspicion first leaves [Queen Guenever](entity:character-recall-character-queen-guenever-f27d6f31454b) isolated; only later does [Nimue](entity:character-recall-character-nimue-ff0b672503ec) expose Sir Pinel le Savage as the culprit, while the record on Patrise’s tomb preserves both the queen’s exoneration and [Sir Launcelot](entity:character-recall-character-sir-launcelot-c0ea01c62d3d)’s defense of her.
## The Dinner and the Poisoned Apples
Queen Guenever arranged a private dinner in [London](entity:location-recall-location-1bfd335cdd1b) for twenty-four [Knights of the Round Table](entity:character-recall-character-3f167931be46). She intended the gathering to show that she took joy in the company of the other knights as well as Sir Launcelot. Among the invited company were Sir Gawaine and his brothers, [Sir Agravaine](entity:character-recall-character-280e9cb89980), [Sir Gaheris](entity:character-recall-character-bef64136a8ef), [Sir Gareth](entity:character-recall-character-sir-gareth-eef7b23b7912), and [Sir Mordred](entity:character-recall-character-sir-mordred-f7abe8fecb31); [Sir Bors de Ganis](entity:character-recall-character-sir-bors-de-ganis-adca9ed6c2f4) and other knights were also present, including [Sir Mador](entity:character-recall-character-sir-mador-8cbb68335e67) de la Porte and Sir Patrise of [Ireland](entity:location-recall-location-ireland-3247a2c8bcbe).
The fatal plot arose from an older grievance. Sir Pinel le Savage was kin to [Sir Lamorak de Galis](entity:character-recall-character-sir-lamorak-de-gali-b664a5436e75), whom Sir Gawaine and his brothers had killed through [treachery](entity:concept-recall-concept-22ce6e5d8b9f). Pinel hated [Gawaine](entity:character-recall-character-gawaine-e52d508f7128) and poisoned apples intending to kill him. The queen had provided fruit especially for Gawaine, who customarily enjoyed fruit, particularly apples and pears. But the plan misfired: Patrise, Mador’s cousin, ate one of the poisoned apples and died. The intended target was not the victim, and the host’s provision of the food became the first reason suspicion settled on her.
Gawaine recognized the danger the death posed to [Guenever](entity:character-recall-character-112dfc46734b)’s reputation. He told her that the dinner had been made for him and that people who knew his habits could see he might have been the intended victim. The queen was taken aback, while the other knights, unable to identify what had happened, suspected her because she had arranged the feast. Mador made clear that Patrise’s death, as the loss of a noble kinsman, demanded revenge.
## Accusation and the Court’s Legal Bind
Mador publicly accused Guenever of Patrise’s death. In the custom described by the narrative, a shameful death could be called treason, and Mador pursued the charge as a matter for trial by combat. The accusation was not treated as settled fact: [Arthur](entity:character-recall-character-arthur-2e33b65bbe57) set a combat date fifteen days later, at the meadow beside [Westminster](entity:location-recall-location-westminster-797ba54e0a11), and said that if no knight came forward to fight for the queen, she would face the sentence of burning.
Arthur could not simply act as Guenever’s champion. Although he believed the deed had not come from her, he explained that he had to serve as a rightful judge and could not fight for his wife. His position exposes the conflict between personal loyalty and the demands of the court’s justice. He hoped a knight would defend her rather than let her suffer for a wrongful charge, but the twenty-four knights who had attended the dinner shared suspicion of the queen and would not speak in her defense.
Mador also insisted that Arthur’s kingship did not exempt him from the obligations of knighthood: the king, he argued, was sworn to that order just as other knights were. The episode thus frames the trial as a public test of both the queen’s standing and the court’s rules. Arthur grants Mador a day to make his case, but the threat to Guenever remains immediate so long as no champion accepts the challenge.
## The Missing Champion and [Launcelot](entity:character-recall-character-launcelot-0b02a99ce6f7)’s Defense
With the knights from the dinner unwilling to fight for her, the queen faced the prospect of standing alone. Arthur asked where Sir Launcelot was, remarking that if he were present he would bring the conflict to an end. Guenever did not know where he was; his brother and kinsmen believed he was outside the realm. Arthur recognized the force of his absence, describing Launcelot as the most worthy man a party could have on its side.
Arthur advised Guenever to ask [Sir Bors](entity:character-recall-character-sir-bors-eb41f6b6a451) to fight for her in Launcelot’s place, and the surrounding chapter headings record that Bors agreed on a condition and warned Launcelot. The account later records that Launcelot fought Mador for the queen and overcame him in open battle. Mador’s defeat supplied the combat’s immediate resolution, though it did not by itself identify who had poisoned the apples. The distinction matters: a champion could defend Guenever against the accusation under the court’s procedure, while the truth of the poisoning still required disclosure.
## Nimue’s Disclosure and the Record on Patrise’s Tomb
The truth became public when Nimue, the Damsel of the Lake, came to court. She declared that Guenever was innocent and named Pinel as the poisoner, explaining that he had meant to kill Gawaine in revenge for [Lamorak](entity:character-recall-character-lamorak-9d86b1c9a151). Pinel fled to his own country. The revelation overturned the initial suspicion: the queen had hosted the meal, but Pinel had supplied the poison and Patrise had died by mischance after eating an apple intended for Gawaine.
Patrise was buried in the church of Westminster, and an inscription on his tomb set out the chain of responsibility. It named Pinel as the man who poisoned the apples to kill Gawaine, noted that Patrise had eaten one by misfortune, and recorded Mador’s accusation against Guenever and Launcelot’s victory over Mador in her defense. The tomb therefore preserves two connected judgments: the combat established the outcome between champions, while the later disclosure identified the actual poisoner and cleared the queen.
The aftermath also repaired, though did not erase, the breach between Guenever and Mador. Mador repeatedly sought the queen’s favor, and through Launcelot’s intercession he was restored to it; she forgave him. The episode closes not with the accusation alone but with its reversal and its public record: a misdirected plot nearly brought punishment on an innocent host, while the court’s account distinguishes accusation, defense, and discovery of the truth.
Event 134
Lancelot Fights Mador for Guinevere
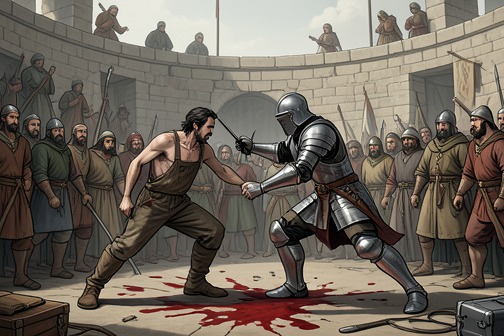
[Lancelot Fights Mador for Guinevere](entity:event-recall-event-b96afbd56d7b) is the combat that ends the treason accusation against [Queen Guenever](entity:character-recall-character-queen-guenever-f27d6f31454b) and reveals that the unknown knight who defends her is [Sir Launcelot](entity:character-recall-character-sir-launcelot-c0ea01c62d3d). The episode turns on a public trial by combat: the queen faces the prospect of condemnation, [Sir Bors](entity:character-recall-character-sir-bors-eb41f6b6a451) accepts the role of champion despite opposition from fellow knights, and [Launcelot](entity:character-recall-character-launcelot-0b02a99ce6f7) arrives at the last moment to take the fight himself. His victory releases [Guenever](entity:character-recall-character-112dfc46734b) from the charge, while the circumstances of his return make the defense an act of loyalty to both the queen and [King Arthur](entity:character-recall-character-king-arthur-2b97864f54aa).
## The accusation and the need for a champion
[Sir Mador](entity:character-recall-character-sir-mador-8cbb68335e67) de la Porte accuses Queen Guenever of treason in connection with the death of Sir Patrise. At first, no knight is willing to fight for her. The court’s hesitation leaves the queen exposed to a proceeding in which the accusation must be answered through combat rather than settled by royal favor alone.
Guenever asks Sir Bors to defend her. He initially objects that he had attended the dinner at which the poisoning occurred and fears that his participation will make others suspect him. He also reproaches the queen for having driven Sir Launcelot away, since Launcelot had been a source of honor and protection to her and to the knights. Guenever kneels and appeals to his mercy, insisting that she has not offended; King Arthur, finding her in this posture, asks Bors to act for her for Launcelot’s sake.
Bors agrees on a condition: he will be the queen’s champion unless a better knight comes forward. His promise places him at odds with many [Round Table](entity:object-recall-object-round-table-04fef19b82fd) companions, most of whom think the queen guilty and regard her as destructive to good knights. Bors answers that he has known her as a generous supporter of worthy knights, and argues that she had no ill will toward Patrise or the other dinner guests. He maintains that [treachery](entity:concept-recall-concept-22ce6e5d8b9f) occurred among them and that the accusation should be proved rather than accepted as truth.
## The trial by combat
On the appointed day, the court gathers in a meadow beside [Westminster](entity:location-recall-location-westminster-797ba54e0a11). Guenever is placed in the constable’s custody, and a stake is surrounded by a great fire in preparation for the sentence that would follow if Mador prevailed. The narrative presents this as a custom intended to apply judgment without favor or kinship, whether the accused is a king, a knight, a queen, or a poor lady. Mador swears that Guenever committed treason against his cousin Patrise and offers to prove the charge by combat; Bors answers that she is not guilty and will defend her with his hands.
As Mador calls for the queen’s champion, an armed knight rides out from a nearby wood on a white horse. He tells Bors that this combat belongs to him and asks him to withdraw. The stranger explains that he had promised Bors this would happen, and Bors accepts that the newcomer’s claim discharges him from his own promise. The delay has therefore been deliberate: Bors remains ready to serve, but his condition allows another knight to take the defense.
The stranger identifies himself to the king as the knight who has come to fight for the queen. He condemns the assembled Round Table knights for allowing so noble and courteous a queen to be publicly shamed, though none of them recognizes him except Bors. The anonymity gives the challenge a second uncertainty: the court must witness the defense before it knows who has undertaken it.
## Lancelot defeats Mador
Mador and the unknown knight charge one another with their spears. Mador’s spear breaks, and the force of the encounter brings his horse down. He quickly regains his footing, draws his sword, and calls for the other knight to fight on foot. They exchange blows for nearly an hour. Mador is described as strong and experienced in battle, but the stranger eventually knocks him to the ground.
Mador rises and wounds his opponent in the thigh. The stranger then knocks Mador down again and moves to remove his helmet. Mador yields and asks that his life be spared. His surrender alone is not enough: the victor requires him to release Guenever from the charge permanently and to ensure that no inscription on Patrise’s tomb says she consented to the treason. Mador agrees to both terms and renounces his accusation. The queen’s vindication thus takes a public form, addressing not only the immediate verdict but also the accusation’s possible survival in the memorial record.
## Revelation and the bonds of loyalty
After Mador is carried to his tent, the unknown knight goes to King Arthur. Guenever comes to [Arthur](entity:character-recall-character-arthur-2e33b65bbe57), and the two welcome one another with evident feeling. Arthur thanks the knight and asks him to remove his helmet; once the man takes it off to drink wine, the assembled knights recognize [Sir Launcelot du Lake](entity:character-recall-character-sir-launcelot-du-la-390bf6228175). The disguise has kept his identity concealed until the combat has established the result.
Lancelot explains that he owes his service to Arthur, who gave him the honor of knighthood, and to Guenever, who once preserved his honor when he lost his sword on the day he was made a knight. He recalls that she found the sword and returned it to him when he needed it. In gratitude, he had promised to be her knight in right or wrong. His explanation makes the defense more than a response to a legal challenge: it is also the repayment of an earlier act and the fulfillment of a personal pledge.
The queen weeps at the sight of Lancelot and is overcome with sorrow at the kindness he has shown her, especially in light of her own earlier unkindness to him. Arthur and Guenever thank him, and the knights of his kin and the Round Table welcome him. Mador receives medical care, and Lancelot’s wound is treated; the court then celebrates. The episode closes not with the accusation still in dispute but with its formal withdrawal, Lancelot’s identity restored to the court, and the personal ties among the king, queen, and champion brought into the open.
Event 135
The Winchester Tournament and Lancelot’s Wounding
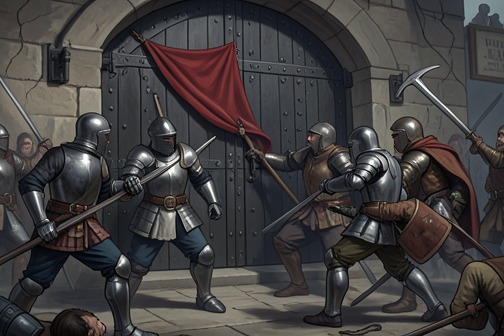
The [Winchester](entity:location-recall-location-winchester-704b3b26db1f) tournament becomes both a triumph and a near-disaster for [Sir Launcelot](entity:character-recall-character-sir-launcelot-c0ea01c62d3d). Entering secretly with [Sir Lavaine](entity:character-recall-character-sir-lavaine-d670420108da) and wearing a red sleeve as his token, he wins the prize by force of arms, yet his disguise turns fellow knights against him, and [Sir Bors](entity:character-recall-character-sir-bors-eb41f6b6a451) wounds him in the mêlée. [Launcelot](entity:character-recall-character-launcelot-0b02a99ce6f7) leaves before his identity is disclosed, choosing urgent care over public honour.
## Setting and Entry into the Tournament
[King Arthur](entity:character-recall-character-king-arthur-2b97864f54aa) and his company had remained at the tournament site for three days to await his knights. The gathering brought together rulers and noblemen in opposing parties, while the king watched from a high scaffold. The account identifies the place as [Camelot](entity:location-recall-location-camelot-352b4eac6f0e), then called Winchester, and says the combat began when trumpets sounded before the feast of the Assumption.
Sir Launcelot and Sir Lavaine travelled to the tournament with white shields. Sir Launcelot also carried the red sleeve given to him by [Elaine of Astolat](entity:character-recall-character-354facce49be), and wore it on his head when he entered the field. He and Sir Lavaine lodged secretly in Winchester through Lavaine’s arrangements, so that their presence and identities were not generally known. Once the king had departed, they rode out privately and waited in a small wood behind the party opposed to [Arthur](entity:character-recall-character-arthur-2e33b65bbe57).
## The Contest and the Disguise
The tournament’s sides were unevenly matched. [King Anguish of Ireland](entity:character-recall-character-king-anguish-of-ire-322b54eeb085) and the King of [Scotland](entity:location-recall-location-scotland-4e112aa71aa3) joined Arthur’s party, while the King of [Northgalis](entity:location-recall-location-northgalis-aaee6aef58cf), the [King with the Hundred Knights](entity:character-recall-character-king-with-the-hundr-225bebe60e00), the King of [Northumberland](entity:location-recall-location-northumberland-1d87d0a03a77), and [Sir Galahalt](entity:character-recall-character-sir-galahalt-9433929df1dc) opposed it. The narrative describes Arthur’s side as having the world’s noblest knights and its opponents as too weak to withstand them.
As fighting spread across the field, Sir Launcelot watched the opposing company press Arthur’s men. He then entered with Sir Lavaine, saying that they could drive those pursuers back. Launcelot unhorsed [Sir Brandiles](entity:character-recall-character-sir-brandiles-e9a5dfae5cac), Sir Sagramor, Sir Dodinas, [Sir Kay](entity:character-recall-character-sir-kay-b93c82975d98), and [Sir Griflet](entity:character-recall-character-sir-griflet-fdaf3a21a7c4) with one spear. Taking another, he brought down [Sir Agravaine](entity:character-recall-character-280e9cb89980), [Sir Gaheris](entity:character-recall-character-bef64136a8ef), [Sir Mordred](entity:character-recall-character-sir-mordred-f7abe8fecb31), and [Sir Meliot de Logres](entity:character-recall-character-sir-meliot-de-logre-2d587448fe0b). He then drew his sword and unhorsed [Sir Safere](entity:character-recall-character-sir-safere-edb9203bc4db), [Sir Epinogris](entity:character-recall-character-sir-epinogris-afa033a6eebc), and Sir Galleron. Sir Lavaine also fought beside him, bringing down Sir Lucan and [Sir Bedivere](entity:character-recall-character-sir-bedivere-18c089fc04bc), among others.
King Arthur recognized that the unknown knight’s manner of riding and striking resembled Sir Launcelot’s, and [Sir Gawaine](entity:character-recall-character-sir-gawaine-bf0b0cf3eb43) suspected the same. The red sleeve, however, gave [Gawaine](entity:character-recall-character-gawaine-e52d508f7128) reason to doubt, since he had never known Launcelot to wear a lady’s token in a tournament. Arthur declined to name the knight, saying he would be recognized before he left. The disguise therefore concealed Launcelot even as his exceptional performance made his identity a subject of speculation.
## The Wound and the Cost of Victory
The contest’s danger sharpened when Sir Bors, [Sir Ector de Maris](entity:character-recall-character-3847e8e21d1c), and [Sir Lionel](entity:character-recall-character-cc33a893fb46), accompanied by knights of their kin, entered the field. Not knowing the identity of the red-sleeved knight, they meant to challenge him. The three struck Launcelot together and brought his horse down. In the encounter Sir Bors’s spear pierced Launcelot’s shield and wounded his side; the broken spearhead remained there.
Sir Lavaine helped Launcelot back onto a horse, and Launcelot continued fighting despite his wound. He brought Sir Bors, [Sir Ector](entity:character-recall-character-sir-ector-1a6b9e06011a), and Sir Lionel down, as well as several of their companions. When he had the chance to kill his three kinsmen, however, he recognized their faces and could not bring himself to do so. The account then says that he and Sir Lavaine continued in the press, where Launcelot brought down more than thirty knights, most of them of the [Round Table](entity:object-recall-object-round-table-04fef19b82fd), and Lavaine ten.
At the close of the fighting, the heralds awarded the prize to the knight with the white shield and red sleeve. The King with the Hundred Knights, the King of Northgalis, the King of Northumberland, and Sir Galahalt praised his service and asked him to receive the honour. Launcelot answered that he had paid dearly for any thanks he had earned; he wanted rest, not the prize or dominion over the world. He rode away before the king could disclose who he was.
## The Hermitage and Aftermath
Once he was out of sight of the field, Launcelot asked Sir Lavaine to remove the broken spear shaft from his side. Lavaine feared that doing so might put him in mortal danger, but Launcelot insisted. After it was removed, Launcelot lost consciousness. He revived and directed Lavaine to a nearby hermitage, where Sir Baudwin of Brittany lived. Launcelot described Baudwin as a former noble knight and landholder who had chosen voluntary poverty, and as a skilled surgeon and healer.
Sir Lavaine brought the wounded knight to the hermitage, reporting only that he had fought marvellously against Arthur’s party and won the prize; he did not know his name. Sir Baudwin, who had once belonged to the Round Table, agreed to help. The tournament thus ends not with Launcelot’s public recognition but with his withdrawal for treatment: his prowess earns the prize, while secrecy, divided loyalties, and the wound incurred among his own kin make that honour unusable in the moment.
Event 136
Elaine of Astolat Dies of Unrequited Love
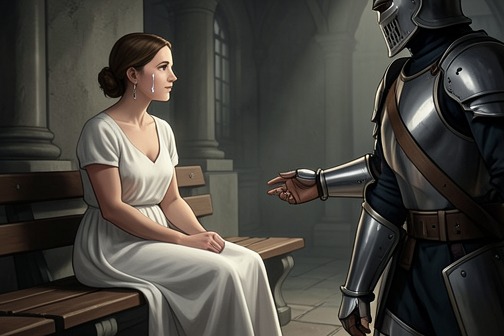
[Elaine of Astolat Dies of Unrequited Love](entity:event-recall-event-7a4a83b80cc8) is the episode in which Elaine’s attachment to [Sir Launcelot](entity:character-recall-character-sir-launcelot-c0ea01c62d3d) ends in her death and is disclosed to [King Arthur](entity:character-recall-character-king-arthur-2b97864f54aa)’s court through a carefully arranged river journey and a letter. [Launcelot](entity:character-recall-character-launcelot-0b02a99ce6f7) refuses to marry her or become her lover, insisting that love cannot be compelled; Elaine rejects the support he offers and dies after ten days of grief. Her final arrangements turn private heartbreak into a public appeal for remembrance, prayer, and burial.
## Departure and refusal
As Sir Launcelot prepares to leave, Elaine asks him to take her as his wife. He answers that he has never intended to marry. She then asks whether he will be her lover, but he refuses that as well, explaining that accepting her love in that way would wrong her father and brother, who had treated him generously. His refusal is not presented as indifference: he says he is troubled by her distress and offers support for her future instead.
Launcelot proposes to provide Elaine and her heirs with a thousand pounds a year if she will set her heart on a worthy knight willing to marry her. He also offers to remain her knight. Elaine will accept neither provision nor substitute relationship: she says that unless he agrees to marriage or love, her good days are over. When he holds to his refusal, she swoons and is carried to her chamber. Her father, Sir Bernard, tells Launcelot that he fears his daughter will die for love of him; Launcelot replies that he cannot change his answer and maintains that he never encouraged her with promises or offers of affection.
## Elaine’s last days
After Launcelot departs, Elaine grieves day and night. She neither sleeps nor eats nor drinks, and her sorrow continues for ten days until she grows so weak that she is near death. She confesses and receives the sacrament, but continues to speak of Launcelot. Her spiritual father urges her to abandon those thoughts; she answers that she is an earthly woman and cannot simply cease loving him.
Elaine declares that Launcelot is the only man she has ever loved, and that she has remained a pure maiden. She asks God for mercy and hopes that the suffering she has endured may count toward the forgiveness of her sins. Her words hold devotion and distress together: she recognizes the religious demand to turn away from her attachment, yet gives an account of that attachment as something she could not withstand. The episode records her explanation without suggesting that Launcelot had promised her a relationship.
## The letter and the river journey
Before dying, Elaine asks her father and brother, Sir Tirre, to write a letter from her dictation. She gives precise instructions for what is to follow her death: while her body is still warm, the letter is to be bound in her right hand; she is to be placed on a richly furnished bed with her finest clothes and carried in a covered black-samite barge. The barge is to travel along the [Thames](entity:location-recall-location-143f23c5f9dc) with one trusted man to steer it.
Her father agrees to carry out her wishes. Elaine dies, and her body, bed, and clothes are taken to the river. The boatman steers the barge toward [Westminster](entity:location-recall-location-westminster-797ba54e0a11) and rows back and forth for a long while before anyone notices it. The deliberate arrangement gives the journey a clear destination: Elaine’s letter is to bring her story before the court, and to Launcelot, rather than leaving her death within the household that witnessed her decline.
## Discovery at court
[King Arthur and Queen Guenever](entity:relation-recall-relation-king-arthur-and-quee-f97972152dd9) see the black barge on the Thames from a window and wonder what it signifies. [Arthur](entity:character-recall-character-arthur-2e33b65bbe57) sends [Sir Kay](entity:character-recall-character-sir-kay-b93c82975d98), [Sir Brandiles](entity:character-recall-character-sir-brandiles-e9a5dfae5cac), and [Sir Agravaine](entity:character-recall-character-280e9cb89980) to investigate. They find Elaine lying on a rich bed and a poor man sitting at the end of the barge, silent. When Arthur and the queen go aboard, they see Elaine covered with costly cloth of gold, and [Guenever](entity:character-recall-character-112dfc46734b) notices the letter in her right hand.
Arthur has the letter read publicly before the assembled knights. In it, Elaine identifies herself as the fair maiden of [Astolat](entity:location-recall-location-astolat-df4673cf7b2b) and describes herself as Launcelot’s lover. She asks the ladies to hear her complaint, asks that people pray for her soul and that she at least be buried, and requests Launcelot’s mass-penny. She also states that she died a clean maiden. The letter supplies what the silent boatman does not: Elaine’s identity, her account of her love, and her last requests. Arthur, Guenever, and the knights weep when it is read, and Launcelot is summoned.
## Launcelot’s response and the episode’s significance
Launcelot says that he is deeply grieved by Elaine’s death and denies that he caused it willingly. He acknowledges that she was fair and good and that he was indebted to her family’s kindness, but says that her love for him was beyond measure. In his account, she would accept no answer except marriage or a love relationship, while he had refused both. He repeats that he offered financial provision and the freedom to marry a knight she herself might choose.
Arthur and the other knights accept the principle behind Launcelot’s answer: love cannot be forced. The episode nevertheless leaves the cost of that principle visible. Launcelot’s refusal is consistent with his stated unwillingness to marry and with his insistence on free affection, but the gifts he offers cannot answer Elaine’s particular desire. Her letter makes her the author of the final account of her own attachment, while the court’s response turns that intimate loss into collective mourning. The barge, the letter in her hand, and the public reading carry her from private sorrow into the shared memory of Arthur’s court.
Event 137
Death of Elaine of Astolat
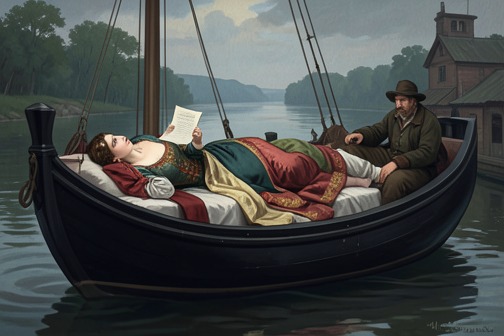
The [Death of Elaine of Astolat](entity:event-recall-event-8d20e3576792) is revealed not through an account of her final moments but through a letter discovered beside her body in a barge on the [Thames](entity:location-recall-location-143f23c5f9dc). Its message names [Sir Launcelot](entity:character-recall-character-sir-launcelot-c0ea01c62d3d) as the object of her love and asks him to see that she is buried and remembered in prayer. The scene turns private, unreturned love into a matter witnessed by [King Arthur](entity:character-recall-character-king-arthur-2b97864f54aa)’s court, while Sir Launcelot’s response distinguishes kindness from an obligation to love.
## The Barge and the Letter
[King Arthur and Queen Guenever](entity:relation-recall-relation-king-arthur-and-quee-f97972152dd9) notice a black barge on the Thames and wonder what its arrival signifies. [Arthur](entity:character-recall-character-arthur-2e33b65bbe57) sends [Sir Kay](entity:character-recall-character-sir-kay-b93c82975d98), [Sir Brandiles](entity:character-recall-character-sir-brandiles-e9a5dfae5cac), and [Agravaine](entity:character-recall-character-agravaine-eb42da8223f0) to investigate. They find a fair corpse on a rich bed, with a silent poor man at the barge’s end; when Arthur and [Guenever](entity:character-recall-character-112dfc46734b) go aboard, the body is covered in rich cloth and a letter rests in the dead woman’s hand.
Back in his chamber, Arthur has the letter opened and read before the gathered knights. The writer identifies herself as the Fair Maiden of [Astolat](entity:location-recall-location-astolat-df4673cf7b2b) and addresses Sir Launcelot as the knight for whose love death has set them at odds. She asks the ladies to mourn with her, requests prayers for her soul, and asks that she be buried and given her mass-penny. She also declares that she died a clean maiden, calling on God as witness. The letter supplies the identity and circumstances the silent attendant had withheld, making the dead woman’s own written account the scene’s disclosure.
## [Launcelot](entity:character-recall-character-launcelot-0b02a99ce6f7)’s Explanation
Sir Launcelot is summoned, and Arthur has the letter read to him. Launcelot says he grieves for the woman and denies that he willingly caused her death. He acknowledges that she was fair and good and that he was indebted to her kindness, but explains that she loved him beyond measure and would accept no answer other than marriage or his love. He had refused both, while offering her an annual payment of a thousand pounds and proposing that she marry a knight she could love.
Launcelot’s account places a limit on what gratitude and gentleness can require: he says he does not wish to be constrained to love, because love must arise from the heart. Arthur and the assembled knights affirm this principle, observing that love loses itself when bound. The exchange does not erase the sorrow of Elaine’s death; instead, it sets her unreturned devotion beside Launcelot’s insistence that affection cannot be granted as a debt.
## Mourning and Burial
The letter moves the court to tears. Arthur directs Launcelot to see that Elaine receives an honorable burial, and Launcelot agrees. The next morning she is buried richly; he offers her mass-penny, and the [Round Table](entity:object-recall-object-round-table-04fef19b82fd) knights present join him in the offering. The attendant then departs with the barge. Elaine’s written request is thus answered through the public rites she asked for, and her death receives recognition from the court even though her love was not returned.
Afterward, [Queen Guenever](entity:character-recall-character-queen-guenever-f27d6f31454b) asks Launcelot’s forgiveness for having been angry with him without cause. Launcelot replies that this is not the first time she has been displeased with him unjustly, but says he must endure it. The episode therefore closes not with a resolution of the court’s tensions but with a brief, uneasy reconciliation, before the narrative turns to the winter’s hunting, hawking, jousts, and tournaments.
Event 138
Candlemas tournament
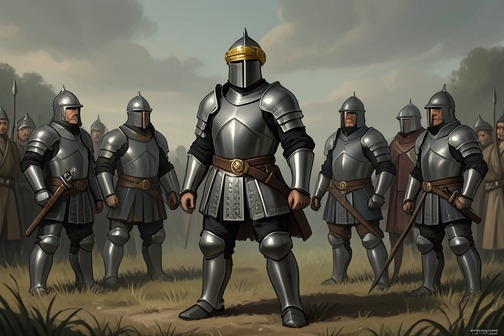
The [Candlemas tournament](entity:event-recall-event-e3a78fad1020) is a major contest held beside [Westminster](entity:location-recall-location-westminster-797ba54e0a11), where [King Arthur](entity:character-recall-character-king-arthur-2b97864f54aa)’s party faces four kings and a powerful duke. Its central reversal comes when the disguised [Sir Launcelot](entity:character-recall-character-sir-launcelot-c0ea01c62d3d) enters the field and overwhelms his opponents, including [Arthur](entity:character-recall-character-arthur-2e33b65bbe57)’s own knights. [Sir Gareth](entity:character-recall-character-sir-gareth-eef7b23b7912) then covertly supports the man to whom he owes his knighthood. Once the contest is halted, Arthur recognizes [Launcelot](entity:character-recall-character-launcelot-0b02a99ce6f7), praises [Gareth](entity:character-recall-character-e1d13addfd5f)’s choice, and joins his former opponents in a feast that affirms fellowship as well as prowess.
## Causes and Participants
The tournament follows a [Christmas](entity:time-recall-time-christmas-a573265d0167) season of daily jousts for a diamond. [Sir Lavaine](entity:character-recall-character-sir-lavaine-d670420108da) wins particular praise, and the knights consider him worthy of a place at the [Round Table](entity:object-recall-object-round-table-04fef19b82fd) at the next [Pentecost](entity:time-recall-time-16e2becf2ca1). After Christmas, Arthur and his knights arrange a larger tournament. The king of [Northgalis](entity:location-recall-location-northgalis-aaee6aef58cf) chooses [King Anguish of Ireland](entity:character-recall-character-king-anguish-of-ire-322b54eeb085), the [King with the Hundred Knights](entity:character-recall-character-king-with-the-hundr-225bebe60e00), the king of [Northumberland](entity:location-recall-location-northumberland-1d87d0a03a77), and [Sir Galahalt](entity:character-recall-character-sir-galahalt-9433929df1dc) the haut prince for his side; these four kings and the duke are to oppose Arthur’s party. The contest is announced for [Candlemas](entity:time-recall-time-candlemas-0f707536d9d8) beside Westminster.
[Queen Guenever](entity:character-recall-character-queen-guenever-f27d6f31454b) asks Launcelot to ride in the tournament wearing a gold sleeve on his helmet, so that his kinsmen will recognize him and his deeds will be spoken of. She also asks him to alert his relatives that he will wear it. Launcelot agrees, but he leaves secretly with Lavaine to rest before the contest at the hermitage of [Sir Brastias](entity:character-recall-character-sir-brastias-6ef5fc39087c) in the forest of Windsor. Arthur’s party and the four kings’ party therefore prepare for a public contest whose most consequential participant is not initially identified to the wider field.
## The Contest and Launcelot’s Return
The opening encounters go against Arthur’s side: the king of Northgalis unhorses the king of Scots, the king of [Ireland](entity:location-recall-location-ireland-3247a2c8bcbe) unhorses [King Uriens](entity:character-recall-character-king-uriens-fceb3b0edcbd), the king of Northumberland defeats [King Howel of Brittany](entity:character-recall-character-king-howel-of-britt-d5916518df61), and Sir Galahalt unhorses Chalance of Clarance. Arthur answers by unhorsing the King with the Hundred Knights and three more knights. [Sir Gawaine](entity:character-recall-character-sir-gawaine-bf0b0cf3eb43), [Sir Gaheris](entity:character-recall-character-bef64136a8ef), [Sir Agravaine](entity:character-recall-character-280e9cb89980), and [Sir Mordred](entity:character-recall-character-sir-mordred-f7abe8fecb31) also enter the fighting, while Launcelot’s kin, Sir Gareth, [Sir Palamides](entity:character-recall-character-sir-palamides-07dff0dd5cb8), and other Round Table knights join the contest. The four kings and the duke are pressed hard, though [Galahalt](entity:character-recall-character-galahalt-9d0aecbbd0c3)’s prowess keeps Arthur’s knights occupied.
Launcelot then rides into the field with Lavaine. [Sir Bors](entity:character-recall-character-sir-bors-eb41f6b6a451) recognizes the gold sleeve and warns the others that the rider is Launcelot; he identifies Lavaine as his companion. Launcelot unhorses [Gawaine](entity:character-recall-character-gawaine-e52d508f7128), [Agravaine](entity:character-recall-character-agravaine-eb42da8223f0), [Gaheris](entity:character-recall-character-e643b62e350f), and [Mordred](entity:character-recall-character-431d80a88894), and then defeats [Palamides](entity:character-recall-character-palamides-9a6f200e4d74) as well. He continues taking fresh spears and unhorses thirty knights, most of them members of the Round Table. His kin keep to other parts of the field rather than joining him, while Arthur grows angry at the damage Launcelot is doing to his own side.
Arthur gathers nine knights, including Gawaine, Mordred, [Kay](entity:character-recall-character-kay-2946c1889f8a), Griflet, Lucan, [Bedivere](entity:character-recall-character-bedivere-2d8fd88b781e), Palamides, and Safere, to confront Launcelot and Lavaine. Gareth recognizes the danger to the knight who made him a knight and decides to help him, but does so in disguise. He borrows a green shield bearing a maiden from a wounded Welsh knight, then warns Launcelot that Arthur and the nine knights are approaching. Gareth proposes that Launcelot face Gawaine, that he face Palamides, and that Lavaine meet Arthur. In the ensuing encounters, Launcelot unhorses Gawaine and several other knights; Gareth defeats Palamides, Kay, Safere, and Griflet; and Lavaine brings Arthur down with him before later unhorsing Lucan and Bedivere.
## Recognition and Aftermath
The contest continues until near nightfall, with Arthur’s side repeatedly returning to the field. Gawaine identifies the gold-sleeved rider as Launcelot and realizes that the knight with the green shield is Gareth in disguise. He counsels Arthur to end the contest rather than continue against three formidable knights with an overwhelming number of opponents; persisting, he argues, would bring shame rather than honor. Arthur accepts the advice and has the parties called to lodge.
Arthur then asks that the gold-sleeved knight remain so that he can speak with him. He rides to the four kings and the duke, invites them to supper, and, once the knights have removed their armor, recognizes Launcelot, Lavaine, and Gareth. The tournament’s prizes and reported totals make the result public: heralds say Launcelot unhorsed fifty knights, Gareth thirty-five, and Lavaine twenty-four. Launcelot also explains that the huntress in Windsor Forest had wounded him with an arrow in the thigh, a detail that gives context to his preparation and appearance during the tournament.
Arthur initially reproaches Gareth for leaving his own fellowship to assist Launcelot. Gareth answers that Launcelot had made him a knight and that, seeing him hard pressed by so many, he judged it honorable to help. Arthur accepts this explanation, declares that Gareth has acted honorably, and says he will love and trust him more. The king frames the choice as a measure of knightly character: a worthy knight should not stand by while another worthy knight is put to shame or danger. The evening closes with a feast and revels for the kings and duke, converting a contest that divided the field into a renewed gathering of its participants.
## Significance
The tournament tests two forms of allegiance against each other: membership in Arthur’s company and gratitude to a particular knight. Gareth does not treat his fellowship with the Round Table as a reason to abandon Launcelot; he understands his debt to the man who made him a knight as an obligation that must be honored in action. Arthur’s approval reconciles that personal loyalty with the wider court, making the episode an explicit statement about how honor operates when a knight’s immediate companions become his opponents.
Launcelot’s disguise first makes his identity a question of recognition, then turns the tournament into a demonstration whose scale is confirmed by the heralds’ totals. Yet the ending gives the event a social resolution rather than leaving victory as a simple defeat of Arthur’s party: Arthur recognizes his companions, welcomes the opposing leaders to supper, and publicly praises Gareth’s conduct. The episode thus joins martial reputation to generosity, trust, and fellowship.
Event 139
Meliagrance’s Abduction of Guinevere
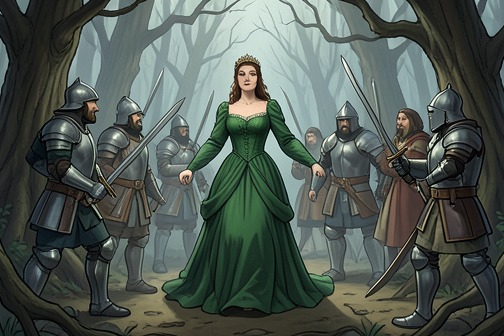
[Meliagrance’s Abduction of Guinevere](entity:event-recall-event-c545ca776fae) is a calculated seizure of the queen at a moment when she and her companions are vulnerable: Meliagrance emerges from a wood with 160 armed men and takes [Guinevere](entity:character-recall-character-guinevere-85c90c7da1e3) after her ten [Knights of the Round Table](entity:character-recall-character-3f167931be46) have been badly wounded. His avowed love does not soften the act; it is the motive he offers for exploiting an advantage. Guinevere’s resistance and the knights’ stand make the episode a test of honour under force, while her decision to go with Meliagrance rests on a promise that the wounded men will be spared and kept beside her.
## The Ambush and Its Motive
The attack follows a day of Maying. Guinevere and her knights have decorated themselves with herbs, moss, and flowers when Meliagrance comes out of a wood with 160 well-armed men, apparently prepared for a formal battle. He orders the queen and her party to stop, declaring that they will have to remain whether they wish it or not. The contrast is stark: a festive outing ends in a military confrontation, and the queen’s party is caught without the arms and readiness of a force assembled to fight.
Guinevere challenges Meliagrance as a traitor and calls on him to consider both his status as a king’s son and his place among the Knights of the Round Table. By acting against the queen he dishonours not only her and himself, she argues, but the chivalric standing that the king’s knighthood should represent. She makes clear that she would rather die than be dishonoured. Meliagrance answers that he has loved her for many years and has never before found her at such an advantage. His confession makes the imbalance central to the scene: the language of love is joined to an act of capture made possible by force and circumstance.
## The Knights’ Stand and the Queen’s Bargain
The ten knights tell Meliagrance that he risks his own honour and their lives, but they refuse to abandon Guinevere. Although unarmed, they draw their swords and meet the attackers’ spears; they strike the spears aside before the clash turns to sword fighting. The resistance is brave but costly. [Sir Kay](entity:character-recall-character-sir-kay-b93c82975d98), Sir Sagramor, [Sir Agravaine](entity:character-recall-character-280e9cb89980), Sir Dodinas, Sir Ladinas, and Sir Ozanna are struck down with serious wounds. [Sir Brandiles](entity:character-recall-character-sir-brandiles-e9a5dfae5cac), Sir Persant, Sir Ironside, and [Sir Pelleas](entity:character-recall-character-sir-pelleas-36e20bf735cb) continue fighting and are badly hurt. Before the ten are finally brought down, they kill forty of Meliagrance’s men.
Seeing her companions wounded and facing eventual defeat, Guinevere intervenes. She asks Meliagrance not to kill them and offers to go with him on the condition that he spares them further harm and has them brought wherever he takes her. Her insistence is not a surrender of concern for them: she refuses to be separated from the knights and says she would rather die than go without them. Meliagrance agrees that they may be taken to his own castle with her, provided she submits to his direction and rides with him. The seizure thus ends in a coerced bargain whose immediate safeguard is the queen’s continued presence with her companions.
The knights accept the queen’s decision and stop fighting. Sir Pelleas declares that he values neither life nor death in this crisis; the account also singles out the force of his blows, saying that no armour could withstand them. Their response keeps the focus on loyalty even as their position collapses: they cannot prevent the abduction, but they will not make their own escape or safety the price of abandoning Guinevere.
## Consequences and Narrative Role
The abduction transfers Guinevere and the wounded knights into Meliagrance’s custody, but the episode does not treat his professed love as a legitimate claim. His declaration is set against Guinevere’s explicit refusal to be dishonoured and her insistence that her companions be protected. The conflict is therefore not simply between a lover and the object of his affection; it is between Meliagrance’s unilateral use of force and the queen’s effort to preserve the safety and fellowship of her party in a situation she cannot control.
The next chapter turns to [Sir Launcelot](entity:character-recall-character-sir-launcelot-c0ea01c62d3d) receiving news that the queen has been taken and to Meliagrance laying an ambush for him. The attack on Guinevere consequently opens a new stage of the conflict: her capture draws [Launcelot](entity:character-recall-character-launcelot-0b02a99ce6f7) into the danger, while the earlier fight has left her ten defenders wounded and dependent on Meliagrance’s promise. The episode makes honour visible in action—first in the knights’ refusal to desert the queen, then in her choice to negotiate for their lives—while exposing the gap between the [Round Table](entity:object-recall-object-round-table-04fef19b82fd)’s ideals and the power Meliagrance uses against them.
Event 140
Lancelot Rescues Guinevere by Cart
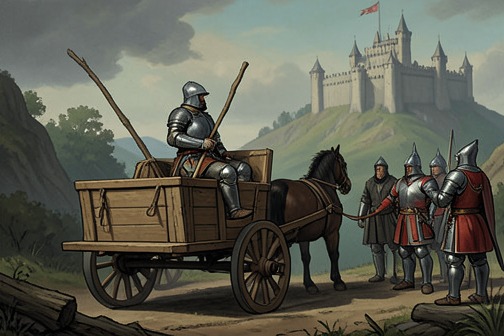
[Lancelot Rescues Guinevere by Cart](entity:event-recall-event-eceaf411cc51) turns a rescue into a test of loyalty, reputation, and restraint. Summoned by [Guinevere](entity:character-recall-character-guinevere-85c90c7da1e3) while she is held at Sir Meliagrance’s castle, [Sir Launcelot](entity:character-recall-character-sir-launcelot-c0ea01c62d3d) presses on after an ambush deprives him of his horse and leaves him unable to reach his opponent on foot. He enters the castle in a woodcutter’s cart, a humiliating-looking vehicle that becomes the sign of his fidelity. His arrival gives Meliagrance cause to fear him, but Guinevere chooses reconciliation rather than further violence; the event ends with Lancelot’s rescue recognized and his cart episode remembered in a lasting epithet.
## Guinevere’s Appeal and the Ambush
Guinevere is being taken to Meliagrance’s castle with her wounded knights after ordering the fighting to stop. Meliagrance fears that [Launcelot](entity:character-recall-character-launcelot-0b02a99ce6f7) will learn what has happened, and Guinevere acts on that fear: she secretly sends a chamber page with her ring and a request that Launcelot come to see her and rescue her from dishonour. The ring carries her appeal to him at [Westminster](entity:location-recall-location-westminster-797ba54e0a11), where he understands the message as a demand for action and hurriedly arms himself.
Meliagrance recognizes that the page is carrying a warning and arranges to hinder the rescue. In a narrow way through a wood, thirty archers are instructed to wait for Launcelot on a white horse and shoot the horse, while avoiding a direct fight with him. The specific order reveals both the calculated nature of the ambush and Meliagrance’s reluctance to meet Launcelot in combat. At the castle, Meliagrance keeps Guinevere and her companions together; he suspects that she has alerted Launcelot and anticipates his approach.
## The Cart and the Rescue
Launcelot follows the route taken by Guinevere’s party until the archers bar his way. He refuses their demand to turn back. They shoot his horse, and the ditches and hedges prevent him from engaging them on foot. With his armour and weapons burdensome and the road obstructed, he is left without the ordinary means of a mounted knight’s advance. His predicament makes the rescue a question not of whether he will continue, but of how.
A cart comes by to collect wood. Its driver refuses Launcelot’s request to ride in it because he is bound for Meliagrance’s service. Launcelot strikes the driver, who falls dead; the second carter, afraid of the same outcome, agrees to take him to Meliagrance’s gate. The episode does not present the journey as a smooth or courtly passage: Launcelot reaches the castle in the vehicle of the very household he is challenging, while his wounded horse follows behind. The reversal is immediate. A cart that might ordinarily mark disgrace becomes the means by which he keeps faith with Guinevere and reaches her captor.
Guinevere watches from a bay window with her ladies as the armed knight approaches in the cart. At first a lady interprets the sight as a sign that he is being taken to execution. Guinevere recognizes him by his shield and rebukes that comparison: the apparent shame of the vehicle does not alter the worth of the knight who has come for her. Her response makes the scene’s contrast explicit. Public appearance suggests humiliation; to Guinevere, the cart proves that a trustworthy friend has come despite the cost to his reputation.
## Meliagrance’s Submission and Guinevere’s Decision
At the gate, Launcelot calls Meliagrance a traitor and demands that he come out to fight. He also forces his way past the porter, making clear that his arrival is not merely symbolic: he has reached the castle and is prepared to confront its lord. But Meliagrance does not accept the challenge. Hearing Launcelot, he runs to Guinevere, kneels, and places himself in her hands, promising to make amends as she directs.
Guinevere accepts his submission and chooses an end to the conflict. She says that peace is better than war and that avoiding further public scandal better serves her honour. When Launcelot is still waiting angrily in the courtyard, she asks him to come in peace because Meliagrance has put the matter under her authority and has repented of what has happened. Launcelot answers that Meliagrance has acted shamefully and cowardly, but yields because Guinevere has agreed to the settlement. His response shows the limits he places on his own anger: though he insists that he would have fought, he does not override her decision.
Guinevere takes Launcelot by the bare hand and leads him toward her chamber. He asks first about the ten knights who were wounded, and she shows them to him. The men rejoice at his coming; Launcelot grieves over their injuries, and they speak together about the ambush and his forced journey in the cart. Though the wounded knights would have liked revenge, they restrain themselves because of Guinevere. Her decision thus determines not only whether Launcelot fights Meliagrance but whether the injured companions continue the conflict.
## The Cart’s Aftermath and the Episode’s Meaning
The narrator reports that Launcelot was called Le Chevalier du Chariot for many days afterward and went on to perform many deeds and adventures. The name preserves the event’s central contradiction: a vehicle associated in the scene with apparent disgrace becomes the emblem of a rescue that demonstrates steadfastness. The cart does not make Launcelot’s approach effortless or erase the violence of the ambush; instead, the contrast between the obstacle and his persistence gives the episode its memorable form.
The resolution rests on two distinct acts of loyalty. Launcelot continues despite losing his horse and being forced into a humiliating means of travel; Guinevere, once he arrives, acknowledges his devotion but uses her authority to prevent the rescue from becoming a battle. Meliagrance’s submission ends the immediate confrontation, and the wounded knights accept the queen’s choice over their desire for revenge. The episode therefore links honour not only to a knight’s willingness to face danger, but also to the restraint that follows when the person he has come to defend chooses peace.
Event 141
Meliagrance Accuses Guinevere and Duels Lancelot
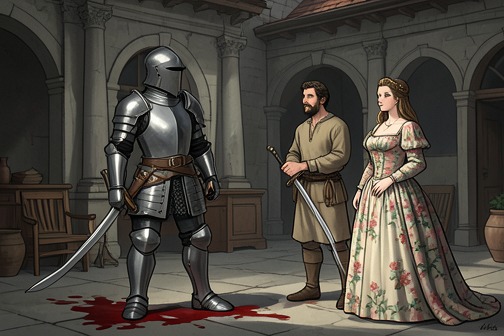
[Meliagrance Accuses Guinevere and Duels Lancelot](entity:event-recall-event-ae7dfd04e07f) is an episode in which an accusation against [Queen Guenever](entity:character-recall-character-queen-guenever-f27d6f31454b) becomes a test of knightly justice and personal loyalty. Meliagrance uses evidence he interprets as proof of the queen’s treason, then attempts to prevent her champion from appearing at trial by combat. [Sir Launcelot](entity:character-recall-character-sir-launcelot-c0ea01c62d3d)’s return exposes that [treachery](entity:concept-recall-concept-22ce6e5d8b9f), and the duel ends with Meliagrance dead after [Launcelot](entity:character-recall-character-launcelot-0b02a99ce6f7) first grants him the chance to yield and then accepts his renewed challenge.
## The accusation and its evidence
The dispute begins after Sir Launcelot has secretly entered the queen’s chamber through a window. He has pulled iron bars from the stonework to reach her, and one of the bars has injured his hand. Before leaving, he puts the window back as well as he can; [Sir Lavaine](entity:character-recall-character-sir-lavaine-d670420108da) tends the wound and covers it with a glove so that it will not be noticed. The next morning, Meliagrance finds blood in the chamber and takes it as evidence that one of the wounded knights has been there. He accuses [Guenever](entity:character-recall-character-112dfc46734b) of betraying [King Arthur](entity:character-recall-character-king-arthur-2b97864f54aa), while she denies the charge. The ten wounded knights also reject Meliagrance’s claim, offering to prove him wrong when they have recovered.
The blood gives Meliagrance an apparent advantage, but the text also exposes his own bad faith. He is glad to find the queen in a vulnerable position because he wants to conceal his treason. When Launcelot arrives and hears the accusation, he rebukes Meliagrance for acting dishonorably toward the queen. Meliagrance insists that he will prove the charge by combat; Launcelot answers that the wounded knights were not in the queen’s chamber and agrees to defend that statement with his own hands. They exchange gloves as tokens of the challenge and set the fight for eight days later in the field beside [Westminster](entity:location-recall-location-westminster-797ba54e0a11).
## A champion kept from the field
Meliagrance asks Launcelot not to use treachery while they await the combat. Launcelot says he has never practiced treason or kept company with those who do. That declaration gains bitter force when Meliagrance invites him to inspect the castle and Launcelot, trusting him, follows from chamber to chamber. A concealed trap gives way beneath Launcelot, dropping him more than ten fathoms into a cave full of straw. Meliagrance leaves him there and arranges for Sir Lavaine’s horse to be put aside, encouraging the court to believe that Launcelot has simply ridden away.
Launcelot remains imprisoned and in pain. Each day a lady brings him food and drink and asks him to love her; he refuses. On the day set for combat, she tells him that he cannot escape without her help and warns that the queen will be burned if he does not appear. Launcelot answers that, if he cannot attend, people who know him will understand that he is sick, dead, or imprisoned, and that another knight who loves him may take up his cause. He will not alter his refusal even when the lady presents a direct bargain: a kiss in exchange for his release, his armor, and a horse. He consents to the kiss, saying that it costs him no honor, and she gives him his armor and a choice among twelve coursers. He selects a white one, has it saddled with the best war saddle, and rides to keep the appointed day.
## The trial and Launcelot’s return
As Launcelot is making his way to Westminster, Meliagrance presses King Arthur to deliver justice and bring Launcelot forward. The queen has been brought to a fire for execution because her champion is thought absent. Sir Lavaine argues that Launcelot would not have failed his duty if he were alive and free, and asks permission to fight in his place. [Arthur](entity:character-recall-character-arthur-2e33b65bbe57) grants it, saying he believes the charge false and suspects that treachery has been done to Launcelot. Just as the heralds are about to announce the combat, Launcelot arrives at full speed.
Before the king and the court, Launcelot recounts what Meliagrance has done to him. Arthur, the queen, and the assembled lords learn that the champion’s absence was caused by a trap, not desertion. The queen is brought back and seated beside the king, in the secure position of having her champion present. The contest can now proceed openly, with Meliagrance’s attempt to manipulate the process exposed.
## Combat, surrender, and judgment
Launcelot first unhorses Meliagrance with a spear. They then fight on foot, and Launcelot knocks him down with a blow to the helmet. Meliagrance yields and asks Launcelot, as a fellow of the [Round Table](entity:object-recall-object-round-table-04fef19b82fd), to spare him and leave the decision over his life to the king. Launcelot hesitates. The queen signals that she would have Meliagrance killed, but Launcelot tells him to rise and continue rather than accept a surrender he does not trust.
Launcelot offers to fight at a disadvantage: he will leave his head and left side unarmored and have his left arm bound behind him. Meliagrance accepts the offer, and King Arthur confirms that Launcelot must keep his word. The field’s attendants remove Launcelot’s helmet and armor from the left side and bind his arm. Launcelot evades Meliagrance’s attack, deflects it with his sword, and strikes him again. Meliagrance falls, and the fight is over. At the Round Table knights’ request, the king permits his burial, with the account recording who killed him and why. Arthur and Guenever afterward show Launcelot more favor than before.
## Justice, loyalty, and treachery
The episode places the formal promise of combat beside the conduct that threatens to corrupt it. The exchanged gloves, agreed date, public field, and royal oversight establish a recognizable procedure for settling the accusation. Yet Meliagrance secretly imprisons the very champion who has accepted the challenge, then uses the resulting absence to press for the queen’s execution. Launcelot’s return restores the contest’s public terms, while his account before the court makes the deception part of the judgment.
Launcelot’s choices complicate a straightforward story of vengeance. Though he knows Guenever wants Meliagrance dead, he initially offers him a chance to surrender; even when Meliagrance accepts a fight that favors Launcelot, the outcome follows the terms Launcelot himself proposed. The king, rather than private anger alone, authorizes the final disposition by allowing Meliagrance’s burial and recording the cause of his death. The queen’s defense thus ends not only in the defeat of her accuser but in a public recognition of the contrast between Launcelot’s pledged conduct and Meliagrance’s treachery.
Event 142
Healing of Sir Urre
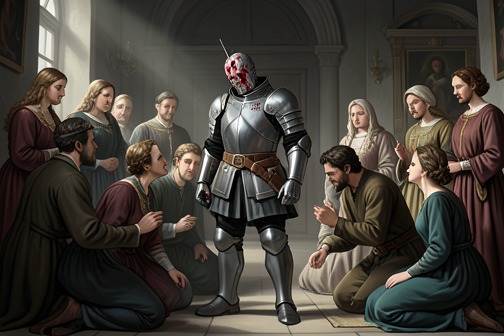
The [Healing of Sir Urre](entity:event-recall-event-db421849ba41) is the episode in which Lancelot heals a Hungarian knight whose wounds have resisted treatment for seven years. At [Arthur](entity:character-recall-character-arthur-2e33b65bbe57)’s court in [Carlisle](entity:location-recall-location-633c98fd4569), kings and knights fail one after another before Lancelot, moved by humility rather than confidence in his own prowess, searches the wounds and heals them. The episode makes the court’s greatest knight an instrument of a miracle, while its long procession of failed attempts measures the limits of earthly rank and skill.
## [Sir Urre](entity:character-recall-character-sir-urre-945cba93a153)’s Wounds and the Search for a Healer
Sir Urre is described as an adventurous knight from [Hungary](entity:location-recall-location-79524dcb2a7f), one who sought deeds of honour wherever he heard of them. At a great tournament in [Spain](entity:location-recall-location-0fe76f866976), he encountered Sir Alphegus, an earl’s son. Their rivalry brought them into combat, and Sir Urre killed Alphegus. Before he died, however, Alphegus inflicted seven wounds on Urre: three on his head and four on his body and left hand.
Alphegus’s mother, a powerful sorceress, used enchantment to ensure that the wounds would never heal. They alternately festered and bled, and her condition for their cure was that the best knight in the world must search them. Urre’s mother placed him in a horse-litter, accompanied him with his sister [Felelolie](entity:character-recall-character-662e43dc0c3d) and a page, and spent seven years carrying him through Christian lands in search of someone who could relieve him. The journey’s length gives the episode its measure of expectation: the promised healer has not been found anywhere they have travelled.
## Arrival at Arthur’s Court
The search brings Urre’s family to [England](entity:location-recall-location-england-b153c1f368ea) near the feast of [Pentecost](entity:time-recall-time-16e2becf2ca1), when Arthur’s court is at Carlisle. Urre’s mother explains publicly why she has brought him, recounting the wounds, the enchantment, and the condition attached to their healing. Arthur welcomes her and promises that her son will be healed if any Christian can accomplish it. He proposes to try first, and summons the kings, dukes, earls, and knights of the [Round Table](entity:object-recall-object-round-table-04fef19b82fd) to the meadow.
Arthur presents his own attempt as an example to encourage the assembled nobles, not as a claim that he is himself the greatest knight. At the time, 110 Round Table knights are present, while forty are away. Urre is taken from the litter and laid upon the ground, with a gold cushion placed for him to kneel upon. Arthur asks him to bear the handling gently; Urre submits himself to God and to the king’s command.
## The Court’s Test of Prowess
Arthur searches Urre’s wounds first, but some begin to bleed again. After him, a succession of kings and celebrated knights tries and fails. Among them are [King Clariance](entity:character-recall-character-king-clariance-4287465c5fd8) of [Northumberland](entity:location-recall-location-northumberland-1d87d0a03a77), the [King with the Hundred Knights](entity:character-recall-character-king-with-the-hundr-225bebe60e00), [King Uriens](entity:character-recall-character-king-uriens-fceb3b0edcbd), [King Anguish of Ireland](entity:character-recall-character-king-anguish-of-ire-322b54eeb085), [King Nentres](entity:character-recall-character-king-nentres-57447b4691a4), [King Carados of Scotland](entity:character-recall-character-king-carados-of-sco-a92e2601829d), and the Duke [Galahalt](entity:character-recall-character-galahalt-9d0aecbbd0c3). [Gawaine](entity:character-recall-character-gawaine-e52d508f7128) appears with three sons—Gingalin, Florence, and Lovel—and they too cannot heal Urre. [Agravaine](entity:character-recall-character-agravaine-eb42da8223f0), [Gaheris](entity:character-recall-character-e643b62e350f), [Mordred](entity:character-recall-character-431d80a88894), and [Gareth](entity:character-recall-character-e1d13addfd5f) also fail.
The attempt extends across the fellowship rather than stopping with its most prominent members. Lancelot’s kin are there, including [Lionel](entity:character-recall-character-5da35f9944b1), [Ector de Maris](entity:character-recall-character-ector-de-maris-ebbe170b5361), [Bors de Ganis](entity:character-recall-character-bors-de-ganis-ddb8dfd4b858), [Blamor de Ganis](entity:character-recall-character-blamor-de-ganis-289d0ded1722), and [Bleoberis de Ganis](entity:character-recall-character-bleoberis-de-ganis-e719c3f7a38f), but Lancelot himself is absent, away on adventure. Many other Round Table knights follow, among them Sagramor, Dodinas, Dinadan, [Kay](entity:character-recall-character-kay-2946c1889f8a), and [Uwaine](entity:character-recall-character-uwaine-6468cffc7b73) les Avoutres. The narrative names further knights and finally describes all 110 present as having searched Urre’s wounds at Arthur’s command. The long roll-call makes the failure collective: neither kingship, fame, kinship to Lancelot, nor the fellowship’s accumulated martial standing can satisfy the enchantment’s test.
## Lancelot Heals Urre
When Lancelot is seen riding toward the gathering, Arthur asks the others to keep silent until he arrives. Urre’s sister runs to tell her brother that a knight has come toward whom her heart strongly inclines; Urre answers that he feels the same confidence and hopes now to be healed. Their expectation is sharply contrasted with the attempts already made, but Lancelot himself refuses to treat the moment as proof of his superiority.
Arthur orders him to do as the others have done. Lancelot protests that, after so many kings and knights have failed, he has no right to presume that he can succeed where they could not. Arthur answers that the request is not a contest in presumption: Lancelot is being asked to bear fellowship with the Round Table, and if he cannot heal Urre, Arthur believes no knight in the land can. Urre then asks Lancelot to heal him for God’s sake and says that, since Lancelot arrived, the wounds have troubled him less. Lancelot replies that he wishes he could help, but feels shame at being asked to accomplish so great a deed.
Kneeling beside Urre, Lancelot raises his hands and looks east. In a private prayer, he asks the Trinity to preserve his honour and grant the power to heal, insisting that the power must come through divine virtue and grace, not from himself. He examines the three wounds on Urre’s head; they bleed a little, then heal. He searches the three wounds on Urre’s body, which likewise close, and finally the wound in his hand, which also heals. The sequence fulfils the enchantment’s condition through Lancelot’s touch, but the scene locates the source of the cure in God rather than in the knight’s independent skill.
## Public Thanksgiving and the Episode’s Meaning
Arthur and the assembled kings and knights kneel and give thanks to God and the Virgin Mary. Lancelot weeps, while Arthur arranges for priests and clerks to escort the healed Urre into Carlisle with singing and praise. The king then provides Urre with rich clothing. Asked how he feels, Urre says he has never felt so strong; when Arthur asks whether he would joust and perform deeds of arms, Urre answers that he would soon be ready if he had the equipment required.
The ending returns the healed man to the chivalric world from which his wounds had excluded him. Yet the cure does not conclude with a boast or a declaration of Lancelot’s personal supremacy. The court’s collective failure, Lancelot’s reluctance to claim the deed, his prayer, and the communal thanksgiving frame the healing as grace received through a knight who understands himself as its instrument. The episode therefore tests the Round Table’s ideal of fellowship as well as its members’ prowess: Arthur commands Lancelot to participate not for personal glory, but because he belongs to the company.
Event 143
Lancelot Kills Agravaine and the Other Knights
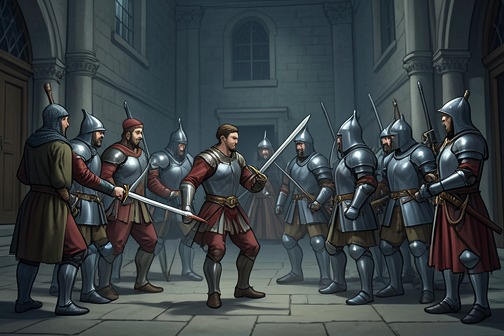
[Lancelot Kills Agravaine and the Other Knights](entity:event-recall-event-d6f6f9d707f6) is the decisive break between Lancelot’s secret relationship with [Queen Guenever](entity:character-recall-character-queen-guenever-f27d6f31454b) and the public authority of [King Arthur](entity:character-recall-character-king-arthur-2b97864f54aa)’s court. Discovered in the queen’s chamber by [Agravaine](entity:character-recall-character-agravaine-eb42da8223f0) and [Mordred](entity:character-recall-character-431d80a88894) with twelve armed knights, Lancelot makes one attempt to have the charge heard before the king; when the group rejects that offer and presses the attack, he kills Agravaine and the twelve knights, wounds Mordred, and leaves. The confrontation turns an accusation into open violence and makes the threatened collapse of the lovers’ private world a political crisis.
## Discovery and the threat
Lancelot has gone to the queen’s chamber carrying his sword beneath his arm and wearing his mantle. Agravaine and Mordred arrive with twelve knights of the [Round Table](entity:object-recall-object-round-table-04fef19b82fd), all armed, and publicly denounce him as a traitor. Their cries are loud enough for the court to hear: the discovery is not contained within the chamber, but announced as an accusation before the wider household.
[Guenever](entity:character-recall-character-112dfc46734b) understands the danger at once. She has no armour, shield, sword, or spear to give Lancelot, and believes that he cannot withstand so many armed knights. She fears that he will be killed and that she herself will be burned. Her response makes the immediate stakes plain: survival, punishment, and the end of the relationship are bound together in the scene.
Lancelot asks whether there is armour in the chamber, then laments that he may be killed for lack of it. Before the attack begins, he embraces and kisses Guenever, asks her to pray for his soul if he dies, and urges her to go with [Sir Bors](entity:character-recall-character-sir-bors-eb41f6b6a451) and the other members of his kin, who he believes will protect and support her. Guenever replies that she will not live beyond his death, but will accept her own death meekly for Christ’s sake. Their exchange turns the impending fight into a separation: each speaks as though the other may soon be lost.
## The attempt to answer the charge
At the door, Lancelot does not attack immediately. He wraps his mantle around his arm and asks the knights to stop their shouting and let him open the door. When they claim that they will preserve his life until he comes before King Arthur, he opens it only far enough for one man to enter at a time. The narrow opening briefly gives him control over the confrontation, but also makes clear that the armed party has come to take him by force.
[Sir Colgrevance](entity:character-recall-character-sir-colgrevance-a1912b07414d) of [Gore](entity:location-recall-location-gore-b6ce2dde700e) enters first and strikes at Lancelot. Lancelot kills him, draws him inside, and, with Guenever and her ladies helping, puts on Colgrevance’s armour. Now better protected, he addresses Agravaine and Mordred directly. He offers to appear before the assembled court the next day and answer as a knight, promising to prove by arms that he came to the queen for no wrongful purpose. His proposal recognizes the accusation as one that could be publicly tried; he seeks a hearing before the king rather than accepting a private assault as judgment.
Agravaine and Mordred reject the offer. They say that, with King Arthur’s authority, they may either spare Lancelot or kill him, and insist that they will take him regardless. Lancelot asks whether no other grace is possible. Their refusal closes the route to an immediate hearing and forces the encounter back into the chamber as a fight.
## The killing and escape
Lancelot opens the door fully and attacks the armed group. He kills Agravaine at the outset and soon kills the other twelve knights. He wounds Mordred, who escapes. These are the central, distinct results of the fight: the accusers are largely killed, their surviving leader carries the news out of the chamber, and Lancelot remains alive but has used lethal force against fellow knights of the Round Table.
After the fighting, Lancelot returns to Guenever. He tells her that their love has come to an end because King Arthur will now be his enemy. He offers to take her away and protect her from further danger, but Guenever advises him not to do so yet: since he has already caused so much harm, she thinks it is better for him to hold back unless he sees that she is to be put to death the following day. Lancelot agrees to wait, promises that he will rescue her while he lives, and leaves her for his lodging. Before parting, they kiss and exchange rings, gestures that preserve their attachment even as the scene announces its rupture.
## Consequences and narrative significance
The clash changes the status of the affair. Until discovery, Lancelot and Guenever’s relationship has been presented as a private bond; now Lancelot’s attempt to defend himself has left dead knights, a wounded survivor, and a direct breach with King Arthur. Lancelot himself names the consequence: [Arthur](entity:character-recall-character-arthur-2e33b65bbe57) will be his foe. The fight therefore does not settle the charge of treason through a hearing; it makes the accusation a force within the court and turns the lovers’ danger into a conflict over loyalty and royal authority.
The episode also places chivalric procedure beside the limits of force. Lancelot offers to answer publicly before the king, but the armed party refuses that course, while he responds to the assault with lethal violence. His effort to claim a knight’s hearing and his escape by killing his opponents remain inseparable. The result is neither reconciliation nor a verdict: the queen stays behind, Lancelot withdraws to his lodging, and the exchange of rings marks a bond that survives the scene even as the court’s political order closes against him.
Event 144
Lancelot Rescues Guinevere from the Pyre
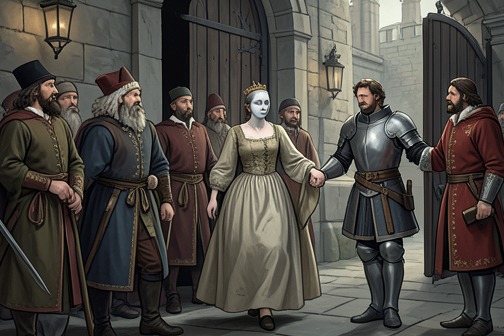
The rescue of Queen [Guinevere](entity:character-recall-character-guinevere-85c90c7da1e3) from the pyre is a decisive rupture in [King Arthur](entity:character-recall-character-king-arthur-2b97864f54aa)’s court. [Sir Launcelot](entity:character-recall-character-sir-launcelot-c0ea01c62d3d) saves the queen from execution and takes her to [Joyous Gard](entity:location-recall-location-joyous-gard-c7d2751b6533), but the rescue leaves [Sir Gareth](entity:character-recall-character-sir-gareth-eef7b23b7912) and [Sir Gaheris](entity:character-recall-character-bef64136a8ef) dead, though they had come unarmed and unwillingly. King Arthur mourns the lost fellowship; [Sir Gawaine](entity:character-recall-character-sir-gawaine-bf0b0cf3eb43), who recognizes the rescue as a knightly act, cannot accept that Sir Launcelot killed his brothers. The act of protection thus becomes the cause of a wider war.
## The Queen’s Judgment
King Arthur orders Sir Gawaine to prepare, with Sir Gaheris and Sir Gareth, to bring the queen to the place of execution. Sir Gawaine refuses to take part in her death, saying that he cannot bear to see so noble a queen meet a shameful end. He also warns that his younger brothers will be reluctant to attend, though they may feel unable to refuse a direct command from the king. They agree to go only under that command, insisting that they will come peaceably and without armor.
As Guinevere is led outside [Carlisle](entity:location-recall-location-633c98fd4569), she is left in a smock and receives her confessor so that she may confess. Lords and ladies grieve, but few are willing to bear arms in support of the sentence. Sir Launcelot has sent an observer to learn when the queen is brought to execution. Seeing her prepared for death, the observer sends word to him. The rescue is therefore planned around the moment the sentence is about to be carried out, rather than being a chance encounter.
## The Rescue at the Pyre
Sir Launcelot and his men ride to the execution site. Those who stand against them are killed, and the account emphasizes how few can withstand him amid the rush. Among the dead are many notable knights, including [Sir Tor](entity:character-recall-character-sir-tor-0a4084725d5c), [Sir Aglovale](entity:character-recall-character-sir-aglovale-14dad0a7b62e), [Sir Griflet](entity:character-recall-character-sir-griflet-fdaf3a21a7c4), [Sir Brandiles](entity:character-recall-character-sir-brandiles-e9a5dfae5cac), [Sir Segwarides](entity:character-recall-character-sir-segwarides-e18b7239f604), Sir [Priamus](entity:character-recall-character-priamus-274784e9c63f), and [Sir Damas](entity:character-recall-character-sir-damas-0564355302e1). The rescue succeeds, but it is not bloodless: resistance to the queen’s removal turns the site of judgment into a battlefield.
In the press, Sir Launcelot also strikes down Sir Gareth and Sir Gaheris, not recognizing them in the tumult. They have come without armor and do not fight against him. The narrative underlines the tragic accident: the two brothers are found dead among the thickest of the crowd, and Sir Launcelot has not seen whom he struck. Their deaths are the unforeseen consequence that changes the meaning of the rescue for the people closest to them.
Once the queen has escaped, Sir Launcelot goes directly to her, has a gown and kirtle put over her, seats her behind him, and urges her to be of good cheer. Guinevere is glad to have escaped death and thanks God and Sir Launcelot. He takes her to Joyous Gard, where he keeps her, and knights and lords begin to gather to his side. News that [King Arthur and Sir Launcelot](entity:relation-recall-relation-king-arthur-and-sir-e98e18d75fb4) are at odds brings sorrow to many, making clear that the rescue has become a public division within the realm.
## [Arthur](entity:character-recall-character-arthur-2e33b65bbe57)’s Grief and the Cost of Rescue
When King Arthur hears that the queen has been taken away and his knights have been killed, he swoons from grief. He laments the loss of the fellowship that had held together under a Christian king, and says that in two days he has lost forty knights as well as Sir Launcelot and his kindred. He is especially stricken by the deaths of his nephews. The queen’s escape does not console him: he says he grieves more for the loss of his good knights than for the loss of his wife, because another queen could be found but such a company of knights could not be assembled again.
Arthur understands that the deaths of Sir Gareth and Sir Gaheris will carry consequences beyond the immediate rescue. He fears that once Sir Gawaine learns what happened, [Gawaine](entity:character-recall-character-gawaine-e52d508f7128) will not rest until he has destroyed Sir Launcelot’s kin and Sir Launcelot himself, or until Sir Launcelot destroys him. Arthur attributes the larger disaster in part to [Sir Agravaine](entity:character-recall-character-280e9cb89980) and [Sir Mordred](entity:character-recall-character-sir-mordred-f7abe8fecb31), whose hostility toward Sir Launcelot, he says, has caused this sorrow. His lament joins personal bereavement to the political fracture of the [Round Table](entity:object-recall-object-round-table-04fef19b82fd).
## Gawaine’s Conflicted Response
Sir Gawaine first hears that Sir Launcelot has taken the queen and killed knights, and responds by defending the rescue as proper knightly conduct. Guinevere, he observes, would have been burned for Sir Launcelot’s sake; had Gawaine himself stood in the same position, he says, he would have acted likewise. His judgment separates the rescue from the deaths that accompany it: he accepts the act of saving the queen before learning that his brothers are among the dead.
When told that Sir Gareth and Sir Gaheris have been killed, Sir Gawaine is devastated, especially by the news of Sir Gareth’s death. Yet he initially refuses to believe Sir Launcelot did it. He recalls that Sir Gareth loved Sir Launcelot more than any earthly man, including Gawaine and the king, and believes [Gareth](entity:character-recall-character-e1d13addfd5f) would even have joined Sir Launcelot against the others had Sir Launcelot asked him. The report that Sir Launcelot killed the brothers is repeated, but Gawaine’s affection and disbelief remain central to the moment: the rescue has created a conflict between his recognition of a knightly duty and his grief for his family.
## A Rescue That Divides the Fellowship
The episode turns rescue into an irreversible political and personal crisis. Sir Launcelot protects the queen from execution, but the violence of the intervention kills many knights and, by mischance, two unarmed men who were not opposing him. King Arthur sees the loss of fellowship as the greater wound; Sir Gawaine sees the rescue as right, then confronts the unbearable claim that its rescuer killed his brothers. Their differing responses show how the same event can be defended as loyalty to the queen and mourned as the beginning of a war among former companions.
Event 145
Siege of Joyous Gard
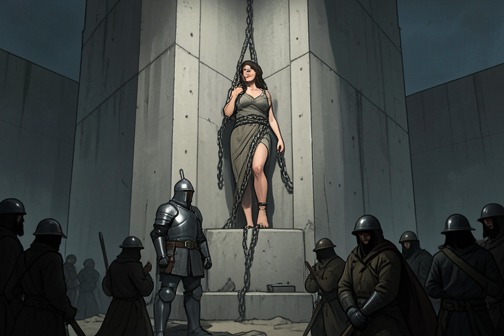
The [Siege of Joyous Gard](entity:event-recall-event-f4f449b03615) is the moment when [King Arthur](entity:character-recall-character-king-arthur-2b97864f54aa)’s claim to recover [Queen Guenever](entity:character-recall-character-queen-guenever-f27d6f31454b) and [Sir Gawaine](entity:character-recall-character-sir-gawaine-bf0b0cf3eb43)’s demand for vengeance against [Sir Launcelot](entity:character-recall-character-sir-launcelot-c0ea01c62d3d) converge in an armed conflict between former allies. [Launcelot](entity:character-recall-character-launcelot-0b02a99ce6f7) holds the queen at his strong castle, but does not want to fight the king who made him a knight; the siege nevertheless hardens the breach, and his own men eventually force the confrontation he has tried to avoid.
## Causes and Stakes
The immediate cause is the report that Sir Launcelot has taken Queen Guenever from King Arthur. The dispute is also bound to the deaths of [Sir Gareth](entity:character-recall-character-sir-gareth-eef7b23b7912) and [Sir Gaheris](entity:character-recall-character-bef64136a8ef), whom Launcelot killed in the press without recognizing them. King Arthur’s sorrow over the deaths and Sir Gawaine’s grief become a demand for retaliation: [Gawaine](entity:character-recall-character-gawaine-e52d508f7128) promises that he will pursue Launcelot through seven kingdoms unless one kills the other. Although [Arthur](entity:character-recall-character-arthur-2e33b65bbe57)’s stated purpose is to recover the queen, Gawaine’s vow makes reconciliation increasingly difficult.
The conflict therefore sets several loyalties against one another. Arthur is both king and Launcelot’s former lord; Gawaine is Arthur’s nephew and [Gareth](entity:character-recall-character-e1d13addfd5f)’s brother; Launcelot is bound to the king by gratitude and to his own followers by their service. The queen’s presence at [Joyous Gard](entity:location-recall-location-joyous-gard-c7d2751b6533) gives the siege its political and personal pretext, while the deaths of Arthur’s kinsmen make the quarrel a matter of vengeance as well as royal authority.
## The Siege of Joyous Gard
Arthur sends writs throughout [England](entity:location-recall-location-england-b153c1f368ea) summoning his knights, and a great host assembles. He tells them that Launcelot has taken the queen. Launcelot, meanwhile, gathers knights who hold with him, some for his own sake and others for the queen’s. Both parties prepare for war, but Launcelot declines to meet Arthur’s larger force in the open field. He withdraws into Joyous Gard with provisions and as many noblemen as the castle and town can support.
Arthur and Gawaine lay siege to both the town and the castle. For fifteen weeks Launcelot neither rides out nor allows his knights or the townspeople to leave. His restraint is not a settlement: it leaves the armed confrontation in place while keeping the parties separated by the walls. The scale of Arthur’s host and the strength of Launcelot’s position make Joyous Gard the center of a war between the king and a knight who still speaks of him as his lord.
## The Exchange Across the Walls
During harvest, Launcelot speaks from the walls to Arthur and Gawaine. He argues that the siege will bring them no honor and warns that he could end it quickly if he and his knights came out. Arthur challenges him to meet in the field, but Launcelot refuses to fight the king who made him a knight. Arthur answers that he is now Launcelot’s mortal enemy, accusing him of killing noblemen of his blood, dishonoring the queen, and taking her by force.
Launcelot acknowledges that he killed Arthur’s knights and says that he deeply regrets it, but explains that he fought to save his own life. He rejects the charge that he has been a traitor to Arthur and maintains that [Guenever](entity:character-recall-character-112dfc46734b) is true to the king. The exchange lays bare the difference between the men’s positions: Arthur treats the deaths and the queen’s removal as injuries that require redress, while Launcelot distinguishes the unavoidable fighting from [treachery](entity:concept-recall-concept-22ce6e5d8b9f) against his lord. Their words do not resolve the quarrel; Gawaine’s hostility blocks the possibility of the accord Arthur might otherwise have accepted.
## From Containment to Battle
[Sir Bors](entity:character-recall-character-sir-bors-eb41f6b6a451), [Sir Ector de Maris](entity:character-recall-character-3847e8e21d1c), and [Sir Lionel](entity:character-recall-character-cc33a893fb46), joined by [Sir Palamides](entity:character-recall-character-sir-palamides-07dff0dd5cb8), [Sir Lavaine](entity:character-recall-character-sir-lavaine-d670420108da), and other kinsmen and companions, rebuke Launcelot for remaining inside while Gawaine insults him. They urge him to fight for his life and right, insisting that Gawaine will not permit peace with Arthur. Launcelot is still reluctant. He asks Arthur and Gawaine not to enter the field, but Gawaine insists that the king’s quarrel is Arthur’s to fight and Gareth’s death is his own. Launcelot then says that they will regret it when he is forced to battle them.
The next morning both parties prepare. Gawaine arranges for knights to surround and overwhelm Launcelot, while Arthur takes the field with three great hosts. Launcelot’s fellowship issues through three gates in ordered formations: Sir Lionel leads the first division, Launcelot the middle, and Sir Bors the third. Even as he brings his men out to fight, Launcelot charges them to spare King Arthur and Sir Gawaine. That order preserves a boundary within the conflict: he will defend himself and his right, but does not want his followers to kill the king or the man whose vengeance has helped bring the war about.
## Consequence and Narrative Significance
The siege changes the quarrel from a contest of accusations into sustained military action. Launcelot’s refusal to attack Arthur cannot prevent battle once his followers decide that continued confinement will neither defend his honor nor secure an accord. At the same time, his instruction to spare Arthur and Gawaine makes the fight an expression of divided allegiance rather than a simple rejection of the king.
Joyous Gard thus stages the fracture of a fellowship through competing obligations: Arthur’s claim as king, Gawaine’s blood-feud, Launcelot’s defense of his position, and the loyalty of the knights who gather around each side. The exchange across the walls briefly makes the moral arguments audible, but the mobilized hosts give those arguments a military form. The siege’s defining tension is that Launcelot resists fighting the king even as the actions of both camps make war harder to avoid.
Event 146
Lancelot–Gawain Duels
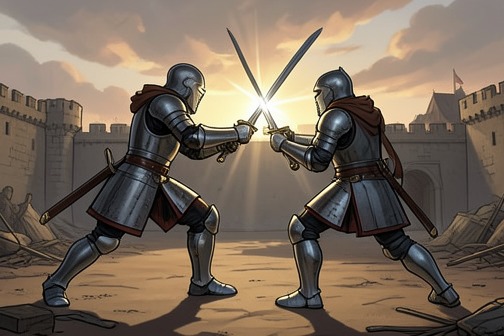
[Lancelot–Gawain Duels](entity:event-recall-event-a9694a3888d7) are the repeated combats between Lancelot and Gawain during the siege of [Benwick](entity:location-recall-location-benwick-a525eaffc9df), a personal conflict unfolding within the wider war between Lancelot and [King Arthur](entity:character-recall-character-king-arthur-2b97864f54aa). Each contest is shaped by Gawain’s time-limited increase in strength: Lancelot must endure the morning’s unequal struggle, but when the advantage passes at noon he overcomes Gawain and refuses to finish him while he is wounded. Their encounters turn battlefield honour into a test of restraint, and make visible the personal cost of a war that [Arthur](entity:character-recall-character-arthur-2e33b65bbe57) regrets even as it continues.
## Causes and Circumstances
The duels take place after Lancelot and his followers have become opposed to Arthur’s party. The conflict has reached Benwick, where Arthur’s forces maintain a siege and Lancelot’s supporters defend the city. Though Lancelot’s side has the security of its walls, the two armies face one another outside, and the contest between their champions makes the larger political rupture intimate: Arthur’s nephew Gawain confronts the knight who had once served Arthur’s court.
Gawain’s advantage is not simply an ordinary difference of strength. An holy man has given him a gift by which his might grows during the three hours before noon, increasing to three times its ordinary force. Arthur alone knows this secret, and has ordered that battles fought before him begin at the hour of underne so that Gawain might benefit. The rule turns the time of day into a concealed factor in combat: those watching see Gawain’s extraordinary power, but do not understand why Lancelot appears to suffer so much merely to withstand it.
## The First Encounter
In their first described battle, the knights ride at one another with full force and strike their shields. Their horses cannot bear the impact and fall, so both men dismount, raise their shields, and continue on foot. They exchange repeated blows, while Gawain’s strength continues to rise through the morning. Lancelot endures the pressure, protecting himself and moving to avoid the full force of the attack; his perseverance is less a refusal to fight than a way of surviving until the terms of the contest change.
Once noon has passed and Gawain’s strength has returned to its ordinary level, Lancelot tells him that he has endured enough and now will take his own turn. Lancelot strikes Gawain’s helmet and knocks him down. Yet when Gawain calls on him to return and kill him, Lancelot will not strike a fallen knight. He withdraws instead. The decision gives the outcome a moral distinction: Lancelot has won the contest, but will not turn victory into the killing of a helpless opponent.
Lancelot then addresses Arthur and says that the king will gain no honour at the walls. He adds that if he brought out his knights, many men would die, and asks Arthur to remember their former kindness. His words connect the duel to the siege’s broader stakes: he continues to oppose Arthur’s forces, but presents restraint and past fellowship as reasons not to escalate the conflict further.
## The Renewed Challenge
The truce between the two camps does not end the hostility. Arthur grieves for Gawain’s injury and for the war between himself and Lancelot, and his sorrow becomes so great that he falls ill. Gawain remains in his tents for about three weeks while physicians treat him. As soon as he is able to ride, he arms himself, goes to the chief gate of Benwick, and publicly challenges Lancelot, calling him a traitor and demanding that he answer the accusation in combat.
Lancelot first objects to Gawain’s language, reminding him that he knows Gawain’s strength and that Gawain cannot easily harm him. But when Gawain insists, Lancelot agrees to fight. The armies gather in formation to watch, while both sides are ordered to stand still and leave the outcome to the two knights. The arrangement gives the encounter the character of a public trial of reputation as well as a personal battle: Gawain has called Lancelot a traitor, and the assembled forces witness their dispute being answered through arms.
## The Second Duel and Its Outcome
The knights charge on horseback. Gawain’s spear breaks against Lancelot, while Lancelot’s blow lifts Gawain’s horse’s feet and brings horse and rider down. Both then dismount and resume the fight with swords. As in the earlier encounter, Gawain’s strength increases during the three hours before noon. Lancelot holds back, uses his shield, and moves to blunt Gawain’s attacks rather than meeting his growing power with full force. Gawain presses him hard, and those watching marvel that Lancelot can withstand him, unaware of the advantage he is enduring.
When the three hours have elapsed, Lancelot tells Gawain that he has proved twice over what a dangerous and powerful knight he is; now, Lancelot says, it is his turn to act. He redoubles his blows and strikes Gawain on the helmet, at the site of his earlier wound, leaving him in a swoon. But when Gawain revives and continues to call him a traitor, Lancelot refuses to strike again. He will fight Gawain while he stands on his feet, he says in effect, but will not attack a wounded man who cannot stand. Lancelot leaves, while Gawain vows that, once recovered, he will fight again and will not stop until one of them is slain.
## Significance Within the Siege
The duels set Gawain’s extraordinary but temporary force against Lancelot’s endurance and control. Their repeated structure makes the decisive change of fortune depend on the same threshold: before noon, Lancelot defends; after noon, he gains the advantage. Yet the crucial distinction is not simply who can strike hardest. Lancelot’s repeated refusal to harm Gawain when he is down limits the violence even as Gawain’s anger keeps the feud alive.
The encounters also show a conflict that has outgrown its original bonds. Arthur laments that the war ever began, recognizes that Lancelot has repeatedly spared him and his kin, and is deeply distressed by Gawain’s suffering. Nevertheless, Gawain returns to challenge Lancelot as soon as he can ride, and the duel ends not in reconciliation but in another promise to fight. The final interruption comes through news from [England](entity:location-recall-location-england-b153c1f368ea), which causes Arthur and his host to leave the siege. The immediate contest is therefore suspended by a larger turn in the kingdom’s affairs; Gawain’s determination and the hostility between the former allies remain unresolved.
Event 147
The Pope Mediates and Guinevere Is Returned to Arthur
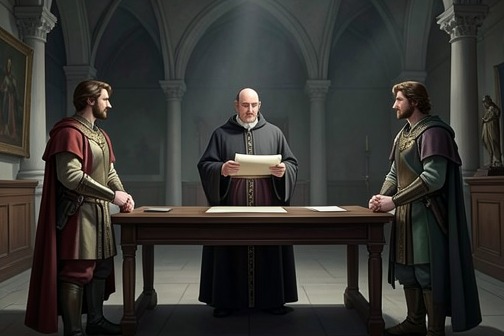
[The Pope Mediates and Guinevere Is Returned to Arthur](entity:event-recall-event-fc227ec4ce90) is the negotiated settlement in which papal authority secures [Queen Guenever](entity:character-recall-character-queen-guenever-f27d6f31454b)’s return to [King Arthur](entity:character-recall-character-king-arthur-2b97864f54aa) while [Sir Launcelot](entity:character-recall-character-sir-launcelot-c0ea01c62d3d) receives assurances that he can come and go safely. The queen is restored, but the settlement does not heal the rupture: [Sir Gawaine](entity:character-recall-character-sir-gawaine-bf0b0cf3eb43) rejects peace with [Launcelot](entity:character-recall-character-launcelot-0b02a99ce6f7), and Launcelot is ordered to leave the country within fifteen days.
## Causes and Papal Intervention
The conflict had grown into open war between [Arthur](entity:character-recall-character-arthur-2e33b65bbe57)’s party and Launcelot’s, with casualties on both sides. Launcelot had held the queen away from Arthur after rescuing her from the danger of execution. When news of the war reached the Pope, he acted to stop it: a bishop was sent with papal bulls commanding Arthur to take [Guenever](entity:character-recall-character-112dfc46734b) back and make peace with Launcelot. The Pope’s order carried the threat of an interdict against all [England](entity:location-recall-location-england-b153c1f368ea), making the settlement a matter of religious and political authority as well as a family and chivalric dispute.
At [Carlisle](entity:location-recall-location-633c98fd4569), Arthur received the bishop’s documents. He was willing to reconcile with Launcelot, but Sir Gawaine opposed any accord with him; [Gawaine](entity:character-recall-character-gawaine-e52d508f7128) would consent to the queen’s return. The bishop secured Arthur’s great seal and a written assurance that Launcelot would be allowed to come and go safely, and that neither Arthur nor anyone else would reproach Guenever for what had happened before. These terms addressed the immediate risk to both queen and knight, while leaving Gawaine’s grievance unresolved.
## Launcelot Accepts the Terms
The bishop carried the Pope’s message to [Joyous Gard](entity:location-recall-location-joyous-gard-c7d2751b6533) and explained the danger of keeping Guenever from her husband. Launcelot replied that he had never intended to withhold the queen from Arthur. He said that he had taken her away because she would otherwise have died on his account, and welcomed the Pope’s intervention as a means of restoring her peace. He agreed to return her on condition that the safe-conduct and protection be honored; he trusted Arthur’s own sealed promise.
Launcelot then set a date: eight days later, he would bring the queen to the king himself. He promised that he would fear no one except Arthur and Gawaine, adding that his deference to Gawaine was for Arthur’s sake. This distinction anticipates the limits of the accord. Launcelot accepts the king’s authority and the Pope’s command, but the personal hostility between the two knights remains in force.
## The Queen’s Return to Carlisle
The return was staged as a public procession bearing the emblems of peace. Launcelot brought one hundred knights dressed in green velvet, each carrying an olive branch. Guenever was accompanied by twenty-four gentlewomen. Twelve richly equipped horses followed, each bearing a young gentleman; Launcelot and the queen wore cloth of gold. The olive branches made the procession’s purpose visible as it traveled from Joyous Gard through Carlisle and into the castle.
Launcelot dismounted, led Guenever to Arthur’s seat, and knelt with her before the king. The assembled knights and lords wept, but Arthur remained silent. Launcelot rose and addressed him, presenting the queen as returned in obedience to the Pope’s command and Arthur’s own. He offered to defend her truth against any accuser except the king, and argued that false reports had caused the breach. He recalled that Arthur had formerly been pleased when he fought on the queen’s behalf, and cited his rescue of her from the danger of being burned as a continuation of that service.
## An Accord Without Reconciliation
Launcelot also answered the charge of [treachery](entity:concept-recall-concept-22ce6e5d8b9f) by invoking his long service to Arthur and his repeated rescues of the king and Gawaine in battles and tournaments. His defense presents the dispute not simply as a private quarrel but as a crisis in the bonds of service: he claims that his actions toward the queen arose from loyalty and protection, even as Arthur sees them as injury to his kingship.
Gawaine nevertheless declared that he and Launcelot would never be reconciled. He accused Launcelot of killing three of his brothers, including [Gareth](entity:character-recall-character-e1d13addfd5f), and rejected Launcelot’s proposal to travel barefoot from [Sandwich](entity:location-recall-location-e7b49b3e89a3) to Carlisle, founding and supporting religious houses at intervals to pray for Gareth and [Gaheris](entity:character-recall-character-e643b62e350f). Launcelot offered this as a lasting act of penance and a better alternative, in his view, to more war; Gawaine answered that he would never forgive the deaths, especially Gareth’s.
The Pope’s order therefore secured Guenever’s return and a temporary guarantee of Launcelot’s safety, not a restoration of fellowship. Gawaine said Arthur could accept Launcelot’s terms only at the cost of losing Gawaine’s service, and gave Launcelot fifteen days to leave the land. The encounter ends with the queen back beside Arthur, the king moved by the scene, and the central political division still intact: papal authority can impose a pause, but it cannot compel personal forgiveness or reunite the fractured court.
Event 148
Lancelot Leaves Arthur’s Court
[Lancelot Leaves Arthur’s Court](entity:event-recall-event-cc4c3afb2f11) marks the break between Lancelot and [King Arthur](entity:character-recall-character-king-arthur-2b97864f54aa)’s fellowship: after [Sir Gawaine](entity:character-recall-character-sir-gawaine-bf0b0cf3eb43) rejects his offer of reconciliation over the deaths of [Sir Gareth](entity:character-recall-character-sir-gareth-eef7b23b7912) and [Sir Gaheris](entity:character-recall-character-bef64136a8ef), Lancelot is ordered to leave, and he sails from [Britain](entity:location-recall-location-01048caf1f48) with a hundred loyal knights. His departure is at once a personal banishment and a political fracture. The court loses a knight who says he had helped quiet rebellions, while the [Round Table](entity:object-recall-object-round-table-04fef19b82fd)’s division leaves the realm exposed to the trouble he fears [Sir Mordred](entity:character-recall-character-sir-mordred-f7abe8fecb31) will bring.
## Causes and Terms of the Departure
The immediate confrontation turns on the deaths of Sir Gareth and Sir Gaheris. Lancelot denies that he killed either brother intentionally, explaining that they were unarmed on the day they died. He offers to travel barefoot and in his shirt from [Sandwich](entity:location-recall-location-e7b49b3e89a3) to [Carlisle](entity:location-recall-location-633c98fd4569), founding a religious house at every ten-mile interval and providing each with a full community and sufficient means of support. He presents this lifelong undertaking as a holier response than war, but Sir Gawaine refuses to forgive him, especially for Sir Gareth’s death. He says that if King Arthur reconciles with Lancelot, he himself will withdraw his service from the king.
A papal command temporarily constrains the dispute. Sir Gawaine explains that the pope has directed King Arthur to take back [Queen Guenever](entity:character-recall-character-queen-guenever-f27d6f31454b) and make peace with Lancelot for the present; Lancelot is therefore to be allowed safe passage. That agreement does not restore his place at court. Sir Gawaine limits his stay in the land to fifteen days and threatens to fight him after he has departed if they meet again. The settlement is thus a reprieve, not a reconciliation: royal consent and papal authority hold open a route out, while [Gawaine](entity:character-recall-character-gawaine-e52d508f7128) keeps the grievance alive.
## Farewell at Court
Lancelot leaves amid a court divided between grief and hostility. He tells King Arthur that he regrets being banished from the realm he loved and where he had gained much of his honour. He recalls the instability of fortune, comparing his fall from high standing with the reversals of celebrated figures in old chronicles. His account is not simply a lament for lost status: he also says that the Round Table’s honour had grown through him and his kin, a claim that makes the cost of his exclusion visible to those assembled.
Before leaving, Lancelot addresses Queen Guenever in the hearing of the king and the court. He asks her to pray for him and to send word if false accusations or danger beset her; if a knight’s combat can deliver her, he promises to come to her aid. He kisses her, then brings her to King Arthur and publicly challenges anyone present to say that she is untrue to the king. The gesture both affirms his loyalty to her and underscores the conflict that has made his position untenable. His public farewell does not settle the accusation or the political rupture; it leaves those tensions exposed before the whole court.
## From [Joyous Gard](entity:location-recall-location-joyous-gard-c7d2751b6533) to Exile
As Lancelot rides out of Carlisle, those gathered—kings and nobles, knights, ladies, and gentlewomen—weep at his departure, with Sir Gawaine the stated exception. Lancelot returns to Joyous Gard, but thereafter calls it the [Dolorous Gard](entity:location-recall-location-dolorous-gard-3359fc62f847), giving his former stronghold a name that carries the sorrow of exile. There he asks his fellowship what they intend to do. They answer together that they will follow his choice, whether he remains in the country or leaves it. They say that, having shared his distress, they will share his fortunes elsewhere, and that many of them would no longer be welcome at court for having taken his side.
Lancelot offers to divide his livelihood and lands freely among the knights, keeping only what is sufficient for his own person. He promises that his estates will sustain them as they had sustained knights before. Their response makes the departure more than the loss of one courtier: the fellowship says that peace will give way to strife and debate because the Round Table is broken. They credit the fellowship’s nobility with having upheld King Arthur and kept his realm at rest, and they attribute much of that strength to Lancelot.
## The Crossing and Its Political Consequences
Lancelot doubts that the stability of the realm rested on him alone, but says that he had done his duty and had quieted rebellions. He fears that Sir Mordred, whom he describes as envious and intent on causing trouble, will soon disturb the kingdom. The narrative makes that warning a forward-looking consequence of the departure: the cohesion that Lancelot believes he helped preserve is already failing, and his removal leaves the court more vulnerable to conflict.
A hundred knights leave with Lancelot, having vowed not to forsake him in adversity or prosperity. They settle their expenses, sail from [Cardiff](entity:location-recall-location-3c79e72aefef), and cross to [Benwick](entity:location-recall-location-benwick-a525eaffc9df), a place also called Bayonne or Beaume in the account. Lancelot’s exile does not make him powerless. He and his kin are lords over lands in [France](entity:location-recall-location-france-f5cafc8a8ad4), which he secures by furnishing and strengthening towns and castles. He then convenes a parliament and distributes crowns and titles among his followers: [Sir Lionel](entity:character-recall-character-cc33a893fb46) becomes king of France, [Sir Bors](entity:character-recall-character-sir-bors-eb41f6b6a451) receives the lands of [King Claudas](entity:character-recall-character-king-claudas-5f9dc514d95a), and [Sir Ector de Maris](entity:character-recall-character-3847e8e21d1c) becomes king of Benwick and of [Guienne](entity:location-recall-location-a38b1edef021), as well as prince over them. Lancelot also advances other companions to ducal and comital rank. The departure therefore transfers his fellowship from [Arthur](entity:character-recall-character-arthur-2e33b65bbe57)’s court into a separate political order, while the Round Table’s fracture signals the coming instability of the kingdom he has left.
Event 149
Mordred Usurps the Throne and Attempts to Marry Guinevere
[Mordred](entity:character-recall-character-431d80a88894)’s usurpation and attempt to marry [Queen Guenever](entity:character-recall-character-queen-guenever-f27d6f31454b) transform a fabricated report of [King Arthur](entity:character-recall-character-king-arthur-2b97864f54aa)’s death into a struggle over [England](entity:location-recall-location-england-b153c1f368ea)’s crown, the queen’s autonomy, and the loyalties of the realm. Mordred makes a Parliament choose him king and has himself crowned at [Canterbury](entity:location-recall-location-canterbury-d9d154d6633e); [Guenever](entity:character-recall-character-112dfc46734b), faced with his proposed marriage, feigns agreement long enough to reach [London](entity:location-recall-location-1bfd335cdd1b) and take refuge in the Tower. The episode ends not in reconciliation but in a kingdom divided: Mordred gathers an army at [Dover](entity:location-recall-location-dover-bee6bc10504b) to oppose [Arthur](entity:character-recall-character-arthur-2e33b65bbe57)’s return, and most of England supports the usurper.
## The Claim to the Crown
Mordred assumes rule while Arthur is away and circulates letters falsely claiming that Arthur has been killed in battle with [Sir Launcelot](entity:character-recall-character-sir-launcelot-c0ea01c62d3d). Using this invented news to make his advance appear legitimate, he summons a Parliament and has the assembled lords choose him king. He is crowned at Canterbury, where he holds a feast for fifteen days, before moving to [Winchester](entity:location-recall-location-winchester-704b3b26db1f). The succession is presented not as a lawful transfer but as a seizure enabled by deception and by the political gathering Mordred controls.
The contrast with Arthur’s accession sharpens the usurpation’s significance. When [Uther Pendragon](entity:character-recall-character-uther-pendragon-76932b817c39), on his deathbed, publicly blesses Arthur and names him as successor, the realm nevertheless enters a prolonged crisis: powerful lords strengthen themselves, and many hope to become king. Arthur’s later authority is confirmed when he alone draws the sword from the stone before the lords and commons; the people acclaim him, and he swears to rule with justice. Mordred, by contrast, secures a crown through false news and a Parliament’s vote. The episode places a formal act of election beside the concealment that makes it possible, exposing how political procedure can be turned to the service of a false claim.
## Guenever’s Escape and Resistance
At Winchester, Mordred takes Queen Guenever and openly declares that he will marry her, although she is his uncle’s wife and, as the bishop of Canterbury stresses, his father’s wife. Guenever is distressed, but conceals her resistance: she speaks courteously, appears to consent, and asks leave to go to London to obtain what is needed for the wedding. Mordred trusts her performance and lets her go. Her apparent compliance is a calculated means of escape, not acceptance of the marriage.
Once in London, Guenever takes the Tower and quickly fills it with provisions and men. Her refuge becomes a defended position from which she can refuse Mordred’s demand. When he learns that she has outmaneuvered him, he lays siege to the Tower, orders repeated assaults, and uses engines and guns against it. None of this persuades Guenever to place herself in his hands again. The episode thus gives her resistance a material and political form: she secures a stronghold, prepares to hold it, and denies the would-be king the marriage through which he seeks to consolidate his power.
## The Bishop’s Rebuke and Mordred’s Defiance
The bishop of Canterbury directly challenges Mordred’s intended marriage as an offence against both God and knighthood. He invokes the kinship at stake—Arthur is Mordred’s uncle, and Mordred is Arthur’s son—and warns that a man cannot properly marry his father’s wife. When Mordred refuses to abandon the plan, the bishop threatens to curse him with the established ecclesiastical rites. Mordred answers with defiance and threatens the bishop in turn; the bishop carries out the curse and flees when Mordred seeks him.
The bishop’s flight does not end his opposition. He goes near [Glastonbury](entity:location-recall-location-glastonbury-f90d3ed88e43), lives there in poverty and prayer as a hermit priest, and understands that a destructive war is approaching. His departure gives the conflict a religious as well as political dimension: an ecclesiastical authority publicly condemns Mordred’s conduct, while Mordred treats that judgment as an obstacle to be resisted by force. Guenever, meanwhile, continues to reject the marriage, communicating through letters and messengers that she would rather die than marry him.
## A Realm Divided
Mordred’s claim gathers support beyond the immediate circle of the court. When Arthur’s return becomes known, Mordred issues writs to the barony, and many people rally to him. The account attributes this shift partly to a public view of Arthur’s rule as bringing only war and strife, while Mordred is associated with joy and bliss. It also notes that people whom Arthur had raised from poverty and endowed with lands fail to speak well of him. The narrative condemns this fickleness, portraying the population as more pleased by Mordred than by the king who had sustained the fellowship of knights and distributed lands to those deprived of them.
That commentary makes the usurpation more than a contest between two claimants. Arthur’s earlier rule had depended on alliances, service, the restoration of wrongfully taken lands, and a sworn code for the [Round Table](entity:object-recall-object-round-table-04fef19b82fd); even so, gratitude and loyalty prove unstable when opinion turns against him. Mordred exploits that instability, and the text says that most of England holds with him. He then moves with a great host to Dover, where he expects Arthur to land and intends to drive him from his lands. The manoeuvre carries the attempted marriage and the false succession into open conflict: Guenever holds out in the Tower, the bishop has withdrawn, and the realm’s divided allegiance prepares the ground for the final war.
Event 150
The Battle of Dover and the Death of Gawain
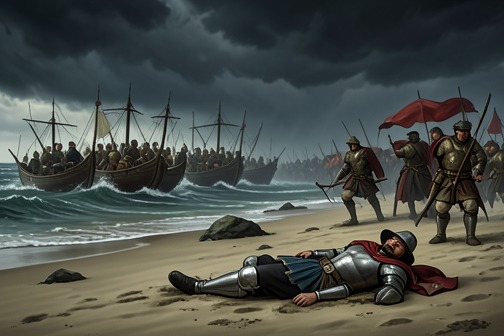
[The Battle of Dover and the Death of Gawain](entity:event-recall-event-6c10fac38c48) joins a contested landing with a death that exposes the cost of [Arthur](entity:character-recall-character-arthur-2e33b65bbe57)’s estrangement from Lancelot. Arthur’s forces drive [Mordred](entity:character-recall-character-431d80a88894) from [Dover](entity:location-recall-location-dover-bee6bc10504b), but the victory brings no uncomplicated relief: Gawain is found gravely ill from an old wound, admits that his own haste and refusal to reconcile helped bring on the war, and dies after asking that Lancelot be summoned to defend Arthur.
## The Return to Dover
After receiving news that brought him back to [Britain](entity:location-recall-location-01048caf1f48), Arthur arrived at Dover with a great fleet of ships, galleys, and carracks. Mordred was waiting with his host to prevent the landing. The conflict therefore opened at the shore, with Mordred trying to bar Arthur from the land over which Arthur had been king.
The fighting involved both noble knights and barons on each side. Arthur led the landing with such resolve that Mordred’s force could not keep him from coming ashore; Arthur’s knights followed, and they pushed Mordred and his men back into flight. Once the battle was over, Arthur ordered that the dead be buried. The victory restored Arthur’s immediate foothold at Dover, but the discovery that followed shifted the scene from military action to grief.
## Gawain’s Last Words
Gawain was found in a large boat, gravely weakened. When Arthur learned of his condition, he went to him, held him, and repeatedly fainted from sorrow. Arthur named Gawain his sister’s son and the man he had loved most, and spoke of losing his joy and trust: he had placed them in Gawain and Lancelot, and now felt he had lost both.
Gawain told Arthur that his death had come, and connected it to the old wound Lancelot had given him. He did not present that wound as proof of Lancelot’s guilt. Instead, he said that his own hastiness and wilfulness had brought him to this end, and that Lancelot’s absence from Arthur’s side had helped make the war possible. Gawain acknowledged that Lancelot and his kin had previously held Arthur’s enemies in check; he had refused to make peace with Lancelot, and now understood that refusal as part of the cause of the disaster.
## The Letter to Lancelot
As death approached, Gawain asked for paper, pen, and ink so he could write to Lancelot himself. In the letter, he called Lancelot the flower of noble knights and explained that, on the tenth of [May](entity:time-recall-time-may-1281a8b8ee63), he had been struck again in the old wound received in battle before [Benwick](entity:location-recall-location-benwick-a525eaffc9df). He insisted that his death came from his own pursuit of it, not from Lancelot’s wrongdoing, and asked Lancelot to visit his tomb and pray for his soul.
The letter also appealed to their former affection as a reason for immediate action. Gawain urged Lancelot to cross the sea without delay and rescue Arthur, whom he described as beset by the traitor Mordred. He reported that Mordred had had himself crowned king and would have married [Queen Guenever](entity:character-recall-character-queen-guenever-f27d6f31454b) if she had not taken refuge in the [Tower of London](entity:location-recall-location-10653ca72454). Gawain’s account of Dover was correspondingly double-edged: Arthur’s side had put Mordred to flight, but Gawain had been struck in the battle and was now writing only hours before his death. The letter turns a private apology into a last appeal for the restoration of a broken alliance.
## Death and Consequences
After writing, Gawain wept, and Arthur wept with him; both fainted. When they recovered, Arthur arranged for Gawain to receive the sacrament. Gawain again asked the king to send for Lancelot and to cherish him above the other knights. At noon, Gawain died. Arthur had him buried in a chapel inside [Dover Castle](entity:location-recall-location-51720a669390), where the account says that his skull and the wound given by Lancelot could still be seen.
The loss did not end the campaign. Arthur was told that Mordred had formed another battle line at [Barham Down](entity:location-recall-location-61baff37e042). The next day Arthur rode to meet him, and the two sides fought with many dead on both sides. Arthur’s party eventually prevailed, and Mordred and his followers fled toward [Canterbury](entity:location-recall-location-canterbury-d9d154d6633e). In this sequence, the landing secures a battlefield success, while Gawain’s confession reveals the deeper failure: Arthur’s cause has lost a loyal kinsman, and the knight whose return Gawain pleads for is also the person with whom Gawain had refused to reconcile.
Event 151
Arthur and Mordred’s Battle on Salisbury Plain
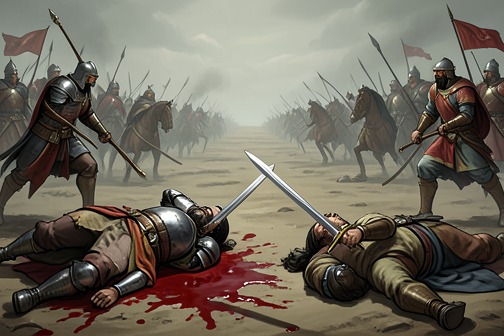
[Arthur and Mordred’s Battle on Salisbury Plain](entity:event-recall-event-bbd70468978f) brings the struggle between king and usurper to its fatal conclusion. A proposed truce briefly seems to avert the fighting, but an accidental sword-drawing turns mistrust into open battle. By nightfall, the armies have been devastated; [Arthur](entity:character-recall-character-arthur-2e33b65bbe57) kills [Mordred](entity:character-recall-character-431d80a88894), but Mordred’s final blow leaves Arthur mortally wounded.
## Background and the Attempted Truce
After Mordred’s revolt, Arthur gathered forces and moved toward [Salisbury](entity:location-recall-location-salisbury-6189e0490d55). The king’s followers and Mordred’s supporters included many of the kingdom’s knights, and the conflict divided former allies. Arthur assigned a day for the armies to meet on a plain near Salisbury, not far from the sea. The prospect of revenge against Mordred pleased him, though the approaching encounter carried danger for both sides.
On the night before the appointed battle, Arthur dreamed that he sat on a richly dressed chair fixed to a wheel above a deep, black water filled with threatening creatures. The wheel turned, and he fell among them. In a further vision, [Gawaine](entity:character-recall-character-gawaine-e52d508f7128) appeared with women for whom he had fought while alive. He warned Arthur that fighting the next day would bring the deaths of the king and many others, and urged him to seek a month’s delay until [Launcelot](entity:character-recall-character-launcelot-0b02a99ce6f7) could arrive with his knights.
Arthur sent [Sir Lucan the Butler](entity:character-recall-character-sir-lucan-the-butle-f0e4ffbedcf3), [Sir Bedivere](entity:character-recall-character-sir-bedivere-18c089fc04bc), and two bishops to negotiate. They offered Mordred lands and goods in exchange for a delay. Mordred accepted terms that granted him [Cornwall](entity:location-recall-location-cornwall-5562c2fa740e) and Kent during Arthur’s lifetime, with all [England](entity:location-recall-location-england-b153c1f368ea) to pass to him afterward. The agreement offered a way to postpone combat, but neither side trusted the other: Arthur instructed his host to attack if it saw a sword drawn, and Mordred gave his forces a corresponding warning.
## The Truce Breaks
Arthur and Mordred met between their hosts, each accompanied by fourteen people. They reached an accord and drank wine together. Then an adder emerged from a small heath bush and stung a knight. The knight drew his sword to kill it; the gesture was enough for both armies to believe that the truce had failed. Trumpets and horns sounded, and the hosts charged.
The battle lasted through the day. Arthur repeatedly rode through Mordred’s forces and fought with resolve, while Mordred also placed himself in great peril. The narration presents the fighting as a catastrophe extending far beyond the two leaders: by night, one hundred thousand lay dead on the plain. That figure makes the cost of the collapse of trust stark, as a minor accident triggers the destruction the negotiations had sought to defer.
## Arthur and Mordred Meet
When Arthur surveyed the field, only two of his knights remained alive beside him: Lucan and [Bedivere](entity:character-recall-character-bedivere-2d8fd88b781e), both badly wounded. Mordred, too, was left alone among the dead. Lucan urged Arthur not to pursue him, recalling the warning in Arthur’s dream and arguing that the king had already won the field. If Arthur stopped, he might survive the day and take revenge later.
Arthur refused to leave Mordred alive. He took his spear and charged. Arthur struck Mordred beneath the shield, piercing his body; Mordred then drove himself farther onto the spear so that he could reach Arthur. With his sword, he struck Arthur on the side of the head, wounding him mortally. Mordred fell dead, and Arthur collapsed, repeatedly losing consciousness. Lucan and Bedivere lifted him and supported him to a small chapel near the sea.
## Consequences and Narrative Significance
The battle destroys the possibility of a political settlement as well as the forces that might have sustained either ruler. Mordred’s death does not amount to an uncomplicated victory: Arthur has been mortally wounded, nearly all the knights are dead, and the surviving men are too injured to restore order. The battle’s decisive reversal lies in the contrast between the negotiated agreement and its immediate collapse, and between Arthur’s victory over Mordred and the fatal cost of achieving it.
Even the aftermath offers no calm ending to the fighting. From the chapel, Arthur sends Lucan to learn why people are shouting. Lucan finds robbers among the dead, stripping valuables from fallen knights and killing those who still live in order to take their armor and possessions. The scene extends the battle’s disorder beyond the armies themselves: with the king dying and the field unguarded, violence gives way to plunder. The fatal encounter on Salisbury Plain thus marks not simply the end of a battle, but the destruction of the fellowship and authority that might have contained its consequences.
Event 152
Arthur’s Departure by Boat for Avalon
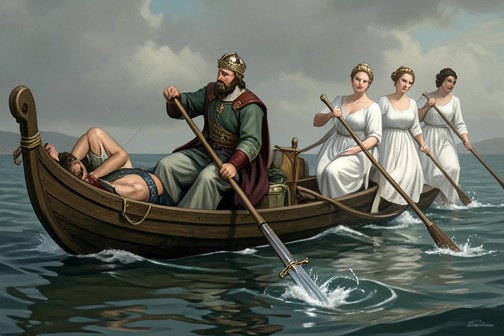
[Arthur’s Departure by Boat for Avalon](entity:event-recall-event-35f2220ef713) marks the boundary between the king’s final departure from the battlefield and the unresolved account of his death. As [Arthur](entity:character-recall-character-arthur-2e33b65bbe57) lies gravely wounded, [Bedivere](entity:character-recall-character-bedivere-2d8fd88b781e) carries out his last command to return [Excalibur](entity:object-recall-object-excalibur-a2b72b99cb6d) to the water. An arm reaches from the waves to receive the sword, and three queens and other ladies bear Arthur away in a barge. He says he is going to [Avalon](entity:location-recall-location-avalon-0ecf63ad9cb3) to be healed; the narrative later reports his burial but refuses certainty about the body’s identity, leaving the king’s ending suspended between death and possible return.
## Causes and Circumstances
The departure follows the battle in which Arthur has been mortally wounded. Sir Lucan, himself gravely wounded, reports that robbers are stripping the fallen knights of valuables and killing those who are still alive. He advises taking Arthur to a town. Arthur, however, says that he cannot stand and that his head is troubling him. He recalls that he had been against [Sir Launcelot](entity:character-recall-character-sir-launcelot-c0ea01c62d3d) and regrets it, connecting his present death to a conflict that [Sir Gawaine](entity:character-recall-character-sir-gawaine-bf0b0cf3eb43) had warned of in a dream. His last movements therefore take place amid battlefield danger, personal loss, and the recognition that the remaining loyal companions cannot restore his former power.
When Sir Lucan and [Sir Bedivere](entity:character-recall-character-sir-bedivere-18c089fc04bc) try to lift him, Lucan collapses and dies. Arthur sees the death of his companion as a grievous loss: Lucan had tried to help the king, who needed help even more than he did. Bedivere also mourns his brother. Arthur stops him, saying that mourning cannot change what is happening and that, had he himself lived, Lucan’s death would have grieved him evermore. With his remaining strength directed toward a final task, Arthur gives Bedivere Excalibur and orders him to throw it into the water, then return and report what he sees.
## The Return of Excalibur
Bedivere first disobeys. Looking at the sword’s precious stones, he thinks that casting it away can bring no good and only loss. He hides it beneath a tree, returns to Arthur, and falsely reports that he has thrown it into the water and seen only waves and wind. Arthur recognizes that the account is untrue and sends him back, urging him not to spare the sword. The delay matters: Bedivere’s attachment to the valuable weapon initially competes with obedience to the dying king.
On his second attempt, Bedivere again hides Excalibur and returns with another false report, describing only the movement of the water and its waves. Arthur accuses him of betraying him for the sword’s riches. He warns that the delay has put his life in greater danger and sends Bedivere back once more. This time Bedivere throws Excalibur as far into the water as he can. An arm and hand rise above the surface, catch the sword, brandish it three times, and disappear with it beneath the water. The final gesture makes the sword’s removal more than a simple loss of royal property: the narrative presents it as a mysterious reception beyond Bedivere’s control.
## The Queens’ Barge and Arthur’s Farewell
After Bedivere reports what he has seen, Arthur asks to be helped to the water, fearing that he has waited too long. A small barge is waiting close to the bank. It carries many ladies, all wearing black hoods and weeping, with a queen among them. Three queens receive Arthur and lay him in one of their laps. One addresses him as her brother and asks why he has stayed away so long, while referring to the wound in his head. The scene shifts the king from the exposed battlefield into the care of the women who have come for him.
As the barge moves away, Bedivere cries out that Arthur is leaving him among his enemies. Arthur tells him to take comfort and do the best he can, but says that there is no trust to be placed in him. He identifies the destination as the vale of Avilion, where he will seek healing for his grievous wound; if Bedivere never hears from him again, Arthur asks him to pray for his soul. The farewell thus offers neither a clear promise of recovery nor an unambiguous announcement of death. Arthur departs under the stated purpose of healing, while leaving open the possibility that Bedivere will never know more.
## Burial and the Limits of the Record
Bedivere watches until the barge disappears, then weeps, enters the forest, and travels through the night. In the morning he finds a chapel and hermitage. The hermit tells him that ladies arrived at midnight with a dead body, asked him to bury it, and offered a hundred tapers and a hundred besants. Bedivere identifies the body as Arthur’s, swoons, and asks to remain with the hermit for the rest of his life, fasting and praying for his lord. He puts on poor clothes and serves the hermit in a life of fasting and prayer. The departure therefore has consequences not only for the king but for the surviving knight, whose response is withdrawal into religious devotion.
The narrator carefully qualifies the burial account. Arthur is said to have been carried away in a ship by three queens: [Morgan le Fay](entity:character-recall-character-morgan-le-fay-5476b1a672cb), the Queen of [Northgalis](entity:location-recall-location-northgalis-aaee6aef58cf), and the Queen of the Waste Lands. [Nimue](entity:character-recall-character-nimue-ff0b672503ec), identified as the chief [Lady of the Lake](entity:character-recall-character-lady-of-the-lake-afb8b77d3497), is also aboard. The narrator adds that Nimue had married [Sir Pelleas](entity:character-recall-character-sir-pelleas-36e20bf735cb) and had protected him from danger, so he lived with her in great rest to the end of his days. Yet the account concludes that no authorized book supplies anything further about Arthur and that the certainty of his death has not been heard. Even the hermit, who buried the body, did not know for certain that it was Arthur’s. The narrative attributes the tale to Sir Bedivere, a knight of the [Round Table](entity:object-recall-object-round-table-04fef19b82fd), while preserving uncertainty within the account itself.
## Narrative Significance
The scene gathers the story’s final uncertainties into a sequence of concrete acts: the king entrusts his sword to Bedivere, Bedivere fails twice to obey, the water claims Excalibur, and the ladies carry Arthur away. The weapon’s disappearance and the king’s departure are linked, but neither produces a fully explained resolution. The narrative gives Arthur a destination and a purpose—Avalon and healing—then places that claim beside Bedivere’s report of a burial and the narrator’s explicit reservation about whether the buried body was truly the king.
That tension makes the departure both an ending and a withholding of final certainty. Arthur leaves the world Bedivere knows, while the sword passes into the water and the surviving knight remains behind among enemies. The account does not establish that Arthur returns from Avalon, nor does it establish with certainty that he died in the body the hermit buried. Instead, it ends with a testimony attributed to Bedivere and with the limits of what the books can verify, sustaining the possibility of Arthur’s continued existence without turning it into a confirmed outcome.
Event 153
Guinevere’s Life at Amesbury Abbey
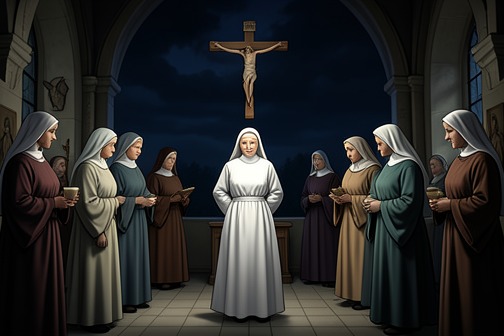
[Guinevere’s Life at Amesbury Abbey](entity:event-recall-event-624426534b65) is the queen’s withdrawal from the ruined Arthurian court after she learns that [King Arthur](entity:character-recall-character-king-arthur-2b97864f54aa), [Sir Mordred](entity:character-recall-character-sir-mordred-f7abe8fecb31), and the surviving noble knights have been killed. At [Amesbury](entity:location-recall-location-54cceba39f5d) she becomes a nun, accepts a life of penitence, and ultimately serves as abbess and ruler of the community. Her ending turns royal status away from courtly power and toward prayer, charity, and self-discipline.
## The news of [Arthur](entity:character-recall-character-arthur-2e33b65bbe57)’s death
The account introduces [Guinevere](entity:character-recall-character-guinevere-85c90c7da1e3)’s retirement in the aftermath of the final catastrophe: she understands that King Arthur has been slain and that the noble knights, Sir Mordred, and the rest have also perished. The text gives no further account here of her immediate response to each death; it makes the news of the kingdom’s destruction the decisive circumstance behind her departure from court.
## Withdrawal to Amesbury
Guinevere slips away with five ladies and goes to Amesbury. There she has herself made a nun, exchanging the position of queen for a religious vocation. Her withdrawal is presented not as a return to political life elsewhere but as a deliberate separation from the court and its lost world.
## Penance and religious rule
At the convent Guinevere wears white and black and undertakes severe penance. Her life is marked by fasting, prayers, and almsgiving; the account says that no one could make her merry and that people marvelled at how virtuous a change she had undergone. She is not only a member of the religious community: she becomes its abbess and ruler, retaining a form of authority while directing it toward convent life.
## Ending and narrative significance
The narrator leaves Guinevere at Amesbury before turning to [Sir Launcelot du Lake](entity:character-recall-character-sir-launcelot-du-la-390bf6228175). Her story’s final movement is thus from queenly rule to religious governance, and from the fellowship of Arthur’s court to a life of prayer and penitence. The account closes on a lasting, disciplined transformation rather than a reconciliation with the world that has ended.
Event 154
Lancelot Returns to England to Mourn Gawain
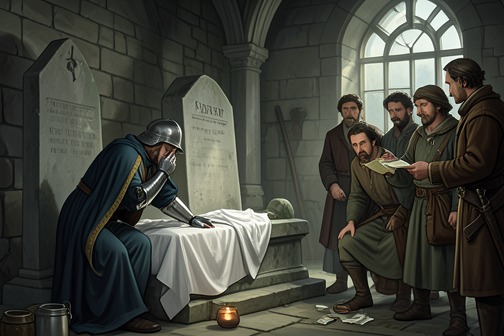
[Lancelot Returns to England to Mourn Gawain](entity:event-recall-event-cdb729b41038) is a late episode of mourning and belated allegiance: after learning that [King Arthur](entity:character-recall-character-king-arthur-2b97864f54aa) and Gawain have fallen, Lancelot crosses to [England](entity:location-recall-location-england-b153c1f368ea), grieves at Gawain’s tomb in [Dover](entity:location-recall-location-dover-bee6bc10504b), and gives alms in his memory. His return cannot undo the realm’s collapse or repair his own history with the dead knights; instead, the journey makes loyalty visible through lament, prayer, and public acts of remembrance.
## News from England and the decision to return
In his country, Lancelot hears that [Mordred](entity:character-recall-character-431d80a88894) has been crowned king in England and made war against [Arthur](entity:character-recall-character-arthur-2e33b65bbe57), his own father. He is also told that Mordred has besieged the [Tower of London](entity:location-recall-location-10653ca72454) because [Queen Guenever](entity:character-recall-character-queen-guenever-f27d6f31454b) refused to marry him. The account presents these reports as part of a single political catastrophe: usurpation, war against the rightful king, and an assault on the queen’s refuge. Lancelot’s anger is directed at Mordred, whom he calls a traitor in his complaint to his kinsmen, and at the shame he believes Mordred has brought upon Arthur.
The news is bound to a letter from Gawain, sent before Gawain’s death. Lancelot recalls its sorrowful words as something that will never leave his heart. He mourns Gawain as a noble knight, but his grief is not separate from regret: Lancelot says that he had earlier slain [Gaheris](entity:character-recall-character-e643b62e350f) and [Gareth](entity:character-recall-character-e1d13addfd5f), Gawain’s brothers and his own friends, and laments that he never had the chance to kill Mordred. The episode therefore sets his wish for vengeance beside a painful awareness of the deaths he himself caused.
Bors counsels him to leave off lamenting long enough to act: first to avenge Gawain’s death, then to avenge Arthur and [Guenever](entity:character-recall-character-112dfc46734b). Lancelot thanks Bors for his loyalty, and they prepare ships and galleys for the passage. The decision to return is thus framed both as a response to Gawain’s appeal and as a renewed commitment to Arthur’s cause and Guenever’s safety, though the outcome will show how little remains to be avenged by force.
## The crossing and the news at Dover
Lancelot sails to England with his host and lands at Dover with seven kings. The company is described as so numerous that it is terrible to behold, a measure of the resources still gathered around him. Yet military strength cannot alter the news he receives on arrival. Asking the people of Dover what has become of Arthur, he learns that the king is dead and that Mordred and a hundred thousand others died in one day. He is told that Mordred first fought Arthur at his landing and that Gawain was killed there; on the following day, at [Barham Down](entity:location-recall-location-61baff37e042), Arthur defeated Mordred.
The sequence makes Lancelot’s return emphatically late. He has crossed with kings and an imposing host, but the decisive battles have already taken place. The report leaves him with no opportunity to join Arthur or Gawain in the field. His response is to ask for Gawain’s tomb, redirecting the strength of his arrival from warfare to remembrance.
## Gawain’s tomb and public mourning
At the tomb in [Dover Castle](entity:location-recall-location-51720a669390), Lancelot kneels, weeps, and prays for Gawain’s soul. That night he holds a dole for anyone who comes: each man and woman receives food and drink, and twelve pence. Wearing a mourning gown, Lancelot distributes the money with his own hand and asks those present to pray for Gawain. The hospitality is not a passing detail but the public form his grief takes: remembrance is offered to the town as material generosity as well as private sorrow.
On the following morning, the priests and clerks who can be gathered in the country sing a Requiem Mass. Lancelot makes the first offering, one hundred pounds; each of the seven kings gives forty pounds, and a thousand knights each offer one pound. The offerings continue from morning until night. Lancelot then remains for two nights at the tomb in prayer and weeping. The measured gifts, the long service, and the vigil give the mourning a communal scale, joining Lancelot’s personal loss to that of the kings and knights who have come with him.
## Too late to restore what has fallen
On the third day Lancelot addresses the assembled kings, dukes, earls, barons, and knights. He thanks them for coming but says they have arrived too late, and that this lateness will grieve him for the rest of his life. Against the impulse to treat the campaign as a continuing military undertaking, he acknowledges that no one can rebel against death. The army’s arrival has not restored Arthur, prevented Gawain’s death, or reversed Mordred’s defeat and death; the remaining purpose of the journey is personal and penitential in tone.
Lancelot announces that he will ride in search of Guenever, having heard that she suffers greatly and has fled to the west country. He orders the others to wait; if he has not returned within fifteen days, they are to take their ships and depart for their own country. The episode thus closes not with a renewed battle but with a further search, as Lancelot leaves the company that crossed with him to seek the queen. His return to England has become a passage from belated military intention to acts of mourning and a final attempt to attend to those still living.
Event 155
Arthur’s Death and Departure by Boat
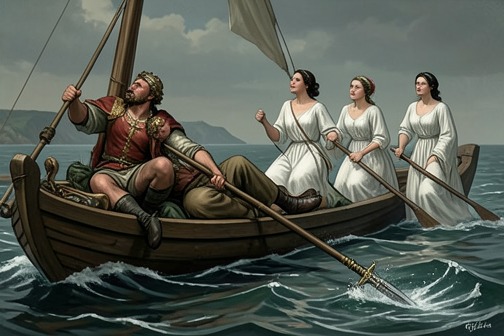
[Arthur](entity:character-recall-character-arthur-2e33b65bbe57)’s death and departure by boat mark the end of his rule and the passage of his story into legend. The account links the king’s final fate to the deaths of [Mordred](entity:character-recall-character-431d80a88894) and the fellowship of knights, then leaves his departure in the keeping of three queens who receive him in a barge. The loss is measured not only in the king’s disappearance but in the ruined political and chivalric world that his death leaves behind.
## Causes and Background
The ending belongs to a catastrophe whose human cost is made explicit by [Queen Guenever](entity:character-recall-character-queen-guenever-f27d6f31454b) when [Sir Launcelot](entity:character-recall-character-sir-launcelot-c0ea01c62d3d) finds her at [Almesbury](entity:location-recall-location-almesbury-fac1d8a7e075). She says that her relationship with [Launcelot](entity:character-recall-character-launcelot-0b02a99ce6f7) brought about the war and the death of her noble lord, Arthur. She interprets the destruction as the consequence of their love and asks Launcelot to leave her, return to his own realm, and keep it from further war and ruin. Her account makes the king’s death part of a larger collapse: private attachment has become inseparable from public conflict, and the losses extend across the kingdom’s fellowship of knights.
The narrative also frames the catastrophe through the failure of the ideals that once governed the [Round Table](entity:object-recall-object-round-table-04fef19b82fd). Arthur had charged its knights to avoid outrage and murder, flee treason, show mercy, and succour women and gentlewomen; they swore to uphold these obligations at [Pentecost](entity:time-recall-time-16e2becf2ca1) each year. His later judgment of [Sir Damas](entity:character-recall-character-sir-damas-0564355302e1) likewise shows him using royal authority to restrain the mistreatment of errant knights and free twenty prisoners. Against those stated standards, [Guenever](entity:character-recall-character-112dfc46734b)’s acknowledgment of the war’s consequences gives the ending the force of a broken covenant, not simply a change of ruler.
## The King’s Death and Departure
The surviving narrative index records that Arthur kills [Sir Mordred](entity:character-recall-character-sir-mordred-f7abe8fecb31) and is then received by three queens in a barge. These brief notices establish the decisive sequence: the king’s final encounter with his enemy ends in Mordred’s death, but Arthur does not return to ordinary rule. The queens’ arrival marks the transition from the battlefield’s political world to an unresolved departure by water.
The evidence does not describe the circumstances of Arthur’s death in detail, nor does it identify the three queens by name in this account. Its restraint leaves the boat as the defining image of the event: Arthur is taken from the world of his court and kingdom, while the narrative records reception and departure rather than a settled account of his final destination.
## Consequences and Aftermath
Guenever’s later meeting with Launcelot gives the king’s death an intimate and political aftermath. She refuses renewed companionship, asks him to turn away from her, and urges him to prevent further war in his own realm. Launcelot answers that he will not marry another woman and says he will follow her into a life devoted to religious discipline. Their separation is presented as a response to the ruin associated with their relationship, though it cannot restore the king or the knights already lost.
After Guenever dies, Launcelot explains that his grief is for the king and queen laid together, and for his own pride and failure, which he believes helped bring them low. He describes the pair as unmatched among living Christians and says that remembering their kindness alongside his own unkindness overwhelms him. The scene does not retell Arthur’s departure, but it clarifies its enduring consequence: the king’s death remains bound to the collapse of the court, the loss of its foremost knights, and the penitential lives of those who survive.
## Narrative Significance
The account holds two endings in tension. Mordred’s death is recorded as a definite result of the final conflict, while Arthur’s reception by the queens in a barge leaves the king’s own passage unresolved. That contrast makes the episode both a political ending and an open legend: Arthur’s reign has ended in catastrophe, yet his departure is represented as a crossing rather than an ordinary conclusion.
The later printed history of Le Morte Darthur also cautions against treating every version of the ending as identical. Caxton’s first edition was printed at [Westminster](entity:location-recall-location-westminster-797ba54e0a11) in [1485](entity:time-recall-time-1485-adada6eeb263), while later editions introduced changes; the 1634 edition, for example, remodelled the preface, divided the work into three parts, modernised its language, and made extensive additions and variations. Southey’s 1817 edition claimed exact reproduction of Caxton but supplied seventeen missing pages from later material without identifying them as substitutions, and those passages were long mistaken for Caxton’s text. Dr. H. Oskar Sommer’s 1889–1891 edition set out the Althorp copy alongside collations, helping distinguish the original text from later editorial interventions. The king’s final fate thus reaches readers through a textual history in which the ending’s wording and framing require attention to the edition being read.
Event 156
The Final Dissolution of the Round Table
[The Final Dissolution of the Round Table](entity:event-recall-event-47e12b8aff03) marks the end of the fellowship that had bound [King Arthur](entity:character-recall-character-king-arthur-2b97864f54aa)’s knights together. Following [Sir Launcelot](entity:character-recall-character-sir-launcelot-c0ea01c62d3d)’s death, the survivors do not re-form around the new king: they depart for their own countries or, in the account Malory identifies as authoritative, journey to the Holy Land. The ending turns the [Round Table](entity:object-recall-object-round-table-04fef19b82fd) from a living company into a memory of shared service, dispersed across separate lives and deaths.
## The Fellowship Comes to an End
The book’s closing account connects the fellowship’s dissolution directly to Sir Launcelot’s death. His corpse is kept on a loft for fifteen days and then buried with great devotion. The mourners subsequently remain together with the bishop of [Canterbury](entity:location-recall-location-canterbury-d9d154d6633e) at his hermitage for more than a month. This interval of mourning briefly holds the survivors together, but it does not restore the company: the narrative’s next political act is the choosing of a new king, while the knights’ paths lead away from [England](entity:location-recall-location-england-b153c1f368ea).
An index to the book describes the fellowship as “broken for ever.” That phrase conveys the finality of the ending: the Round Table’s former unity cannot simply be resumed after the deaths and departures of its members. The book closes not with a new gathering but with an account of what becomes of those who remain.
## [Constantine](entity:character-recall-character-constantine-fc56b501aa73) and the Dispersal of the Knights
[Sir Constantine](entity:character-recall-character-sir-constantine-2c509db77cf0), son of Sir [Cador](entity:character-recall-character-cador-b793b350c147), is chosen king of England after Sir Launcelot’s burial and the period of mourning. The narrative presents him as a noble knight who rules the realm honorably. He summons the bishop of Canterbury, who is restored to his bishopric and leaves the hermitage. [Sir Bedivere](entity:character-recall-character-sir-bedivere-18c089fc04bc), by contrast, remains there as a hermit until the end of his life.
The surviving knights do not become Constantine’s companions. [Sir Bors de Ganis](entity:character-recall-character-sir-bors-de-ganis-adca9ed6c2f4), [Sir Ector de Maris](entity:character-recall-character-3847e8e21d1c), Sir Gahalantine, Sir Galihud, Sir Galihodin, Sir Blamor, [Sir Bleoberis](entity:character-recall-character-sir-bleoberis-4991a2970156), Sir Williars le Valiant, and Sir Clarrus of Cleremont return to their own countries. Constantine would have had them stay with him, but they will not remain in the realm. Their dispersal is therefore not simply a change of royal leadership: it is the withdrawal of the fellowship’s remaining members from the political community they had once served together.
## The Holy Land and the Final Account
The text acknowledges conflicting accounts of the knights’ last journey. Some English books, it says, maintain that they never left England after Sir Launcelot’s death, but Malory dismisses this as the favor of their makers. He instead follows the French book, described as authoritative, which says that [Sir Bors](entity:character-recall-character-sir-bors-eb41f6b6a451), [Sir Ector](entity:character-recall-character-sir-ector-1a6b9e06011a), Sir Blamor, and Sir Bleoberis went to the Holy Land after settling their lands, in accordance with Sir Launcelot’s command before his death.
There, the four knights fight against the misbelievers or Turks and die on [Good Friday](entity:time-recall-time-33baa90f237c) for God’s sake. Their end redirects the fellowship’s martial service beyond England and gives its last surviving members a religious destination. The narrative thus closes the Round Table’s history through paired departures: some knights return to their countries, while four undertake a final campaign in the Holy Land and die together in the service of their faith.
Event 157
Lancelot Becomes a Monk
[Sir Launcelot](entity:character-recall-character-sir-launcelot-c0ea01c62d3d)’s entry into religious life turns his separation from [Queen Guenever](entity:character-recall-character-queen-guenever-f27d6f31454b) into a sustained course of [repentance](entity:concept-recall-concept-4100212400b4): he asks a bishop to hear his confession, takes the habit, and devotes himself to prayer and fasting. His withdrawal also reshapes the lives of fellow knights, as [Sir Bors](entity:character-recall-character-sir-bors-eb41f6b6a451) and others follow his example and share a long period of penance.
## Causes and Parting
[Launcelot](entity:character-recall-character-launcelot-0b02a99ce6f7)’s decision follows a final meeting with [Guenever](entity:character-recall-character-112dfc46734b). He promises that he will devote the rest of his life to penance and prayer if a hermit will receive him, and asks the queen for a last kiss. She refuses, telling him instead to abstain from their former conduct. Their farewell is marked by grief; after the ladies carry Guenever to her chamber, Launcelot rides through the forest, weeping, for the rest of the day and night.
## Confession and Religious Life
At a hermitage and chapel between two cliffs, Launcelot hears mass celebrated by the Bishop of [Canterbury](entity:location-recall-location-canterbury-d9d154d6633e). [Sir Bedivere](entity:character-recall-character-sir-bedivere-18c089fc04bc) is there as well. After [Bedivere](entity:character-recall-character-bedivere-2d8fd88b781e) recounts what has happened, Launcelot, overcome with sorrow, asks the bishop to hear his confession and absolve him. He then asks to become the bishop’s brother. The bishop accepts him and clothes him in the religious habit; Launcelot serves God thereafter with prayer and fasting.
## A Community of Penance
Sir Bors later finds Launcelot at the same chapel while searching for him. Seeing Launcelot in religious clothing, Bors asks the bishop to receive him into the same habit, and he too takes up prayer and fasting. Within half a year, seven more knights arrive and remain there, choosing the same way of life rather than departing. Launcelot’s example thus changes a personal act of repentance into a shared discipline.
## Duration and Meaning
The knights persist in severe penance for six years. Launcelot then takes priestly orders and sings mass for a year; the other knights read, assist with the mass, ring the bells, and perform the community’s bodily services. They relinquish concern for worldly wealth and accept hardship, following the example of the once-celebrated knight, who grows lean through abstinence. The episode recasts Launcelot’s renown: his final model for his companions is not prowess in arms, but sustained prayer, fasting, and religious service.
Event 158
Lancelot’s Death and Funeral
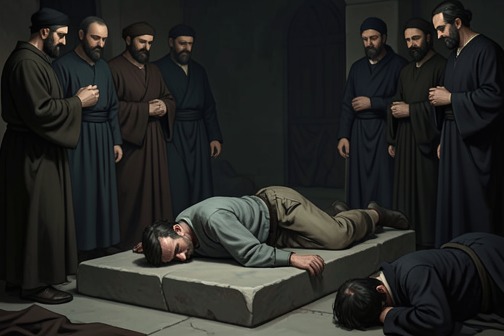
[Lancelot’s Death and Funeral](entity:event-recall-event-825baf688be1) bring the knight’s penitential life to its close: his public fame gives way to prayer, grief, and a final insistence on keeping his vow to be buried at [Joyous Gard](entity:location-recall-location-joyous-gard-c7d2751b6533). The account joins a death witnessed by companions to a vision of heavenly ascent, then turns that private ending into a communal rite. Lancelot’s body is carried for fifteen days to the castle he had chosen, and the funeral becomes the occasion on which his brother [Sir Ector de Maris](entity:character-recall-character-3847e8e21d1c), after seven years of searching, finally finds him.
## Final decline and penitential vigil
After his companions’ return, Lancelot eats little and drinks little. He grows steadily weaker, and the narrative measures the change in his body by saying he becomes a cubit shorter, so that people can no longer recognize him. His prayer continues day and night, interrupted only by broken sleep. Through this decline he lies face down on the tomb of [Arthur](entity:character-recall-character-arthur-2e33b65bbe57) and [Guenever](entity:character-recall-character-112dfc46734b), a posture that makes his grief inseparable from the place where the dead king and queen rest.
The bishop, [Sir Bors](entity:character-recall-character-sir-bors-eb41f6b6a451), and the other companions try to comfort him, but their efforts do not alter his course. Six weeks later Lancelot falls sick in bed and sends for the hermit bishop and his faithful companions. He asks for the rites due to a Christian. They initially treat his condition as a temporary heaviness of the blood and expect him to improve by the next day, but Lancelot says that his body is destined for the earth and insists that he has received a warning. The scene marks a final change in how his companions understand his illness: what they take for a passing weakness, he treats as notice of death.
## The vow of burial at Joyous Gard
After receiving the Christian rites, Lancelot asks his companions to carry his body to Joyous Gard. He explains the request by recalling an earlier vow that he would be buried there and says that he regrets breaking it. His choice makes the destination more than a resting place: it is the fulfilment of a promise he regards as binding even at the end of his life.
The account preserves uncertainty over the castle’s location rather than resolving it. Lancelot’s companions are told that some identify Joyous Gard with Anwick and others with Bamborow; the narrative proceeds with the burial without settling the dispute. This unresolved place-name accompanies a precise personal obligation: Lancelot does not ask to be taken to a site established beyond doubt, but to the castle attached to his vow.
## Death and the bishop’s vision
During the night, while the companions are sleeping in one chamber, the bishop falls into a great laugh. The noise wakes the others. Asked what is wrong, he says that he had never been so merry or at ease: Lancelot had appeared to him with more angels than he had ever seen together in one day, and he had seen them carry Lancelot into heaven as its gates opened to receive him.
Sir Bors answers that the bishop may have been troubled by a dream and suggests that Lancelot is in no danger. The companions go to Lancelot’s bed and find him dead, lying as though he had smiled. The difference between the bishop’s vision and Bors’s doubt gives the death two immediate interpretations: the vision offers a promise of heavenly welcome, while the discovery supplies the companions with the fact of loss. The narration does not leave the death at the level of either uncertainty or private revelation; it confirms it through the body found by those who had remained beside him.
## Funeral journey and the brother’s arrival
On the following morning, the bishop celebrates a Requiem Mass. He and nine knights place Lancelot on the same horse bier that had carried Guenever before her burial, linking his funeral procession to the queen’s. They set out together for Joyous Gard, keeping a hundred torches burning around him as they travel. The journey takes fifteen days. At the castle they lay his body in the choir and sing psalms and prayers over him.
His face remains uncovered so that people may look upon him, in keeping with the custom described for men of worship before burial. This public viewing gives the funeral a formal, communal character: the companions’ private mourning takes place alongside the customary display of a knight’s body. As the service proceeds, Sir Ector de Maris arrives. He has searched [England](entity:location-recall-location-england-b153c1f368ea), [Scotland](entity:location-recall-location-scotland-4e112aa71aa3), and [Wales](entity:location-recall-location-6d9a7b286e78) for seven years to find his brother, but reaches Joyous Gard only after Lancelot’s death. The funeral thus closes not with a reunion in life but with the completion of a long search at the grave.
Event 159
Constantine Succeeds Arthur as King
[Constantine Succeeds Arthur as King](entity:event-recall-event-03eb23746c3c) is the closing political succession in Le Morte Darthur: after [Sir Launcelot](entity:character-recall-character-sir-launcelot-c0ea01c62d3d)’s death, [Constantine](entity:character-recall-character-constantine-fc56b501aa73), Sir [Cador](entity:character-recall-character-cador-b793b350c147)’s son, is chosen to rule [England](entity:location-recall-location-england-b153c1f368ea). The change of king restores a named ruler to the realm, but it does not restore the fellowship that had sustained [Arthur](entity:character-recall-character-arthur-2e33b65bbe57)’s reign; the surviving knights depart, and the book closes on the dissolution of their company.
## The Succession
The succession follows Sir Launcelot’s death and burial. His body is kept on a loft for fifteen days before it is buried with great devotion. Those gathered then spend more than a month with the bishop of [Canterbury](entity:location-recall-location-canterbury-d9d154d6633e) at his hermitage. Only after this interval does the narrative turn to the choice of a new king: Constantine, identified as Sir Cador’s son and a noble knight, is selected to rule England.
The account offers no contest for the crown or detailed procedure of selection. Instead, Constantine’s accession is presented as a settlement following mourning and retreat. The narrative marks his character through praise of his nobility and through the judgment that he rules the realm honorably.
## A Kingdom After Arthur
Constantine’s reign begins in the shadow of a broken political order. The book’s earlier account of Arthur’s death describes England as exposed to disorder and struggle over power: after [Uther Pendragon](entity:character-recall-character-uther-pendragon-76932b817c39) dies, powerful lords strengthen themselves, and many aspire to be king. Arthur’s own accession is framed differently. At [Pentecost](entity:time-recall-time-16e2becf2ca1), he alone draws the sword before the lords and commons; they acclaim him, he forgives those who had delayed him, and he is crowned after swearing to rule with justice.
That earlier model makes the ending’s brevity significant. Constantine is chosen and praised as a ruler, but the closing passage does not describe a public sign of divine approval, a coronation, or a renewed political settlement on the scale of Arthur’s. Its emphasis falls instead on what remains after the old king’s fellowship has ended.
## The Survivors and the End of the Fellowship
The bishop of Canterbury is restored to his bishopric by Constantine after the new king learns where he is. [Sir Bedivere](entity:character-recall-character-sir-bedivere-18c089fc04bc), by contrast, remains at the hermitage for the rest of his life. The surviving knights do not gather around the new ruler: Constantine would have kept them with him, but they refuse to stay in England and return to their own lands.
The account distinguishes versions of their fate. Some English books say that the knights never left England after Sir Launcelot’s death, but the narrator rejects that as a later favor of makers. The French book, described as authoritative in this passage, says that [Sir Bors](entity:character-recall-character-sir-bors-eb41f6b6a451), [Sir Ector de Maris](entity:character-recall-character-3847e8e21d1c), Sir Blamor, and [Sir Bleoberis](entity:character-recall-character-sir-bleoberis-4991a2970156) went to the Holy Land after establishing their lands. There, as Sir Launcelot had instructed them before his death, they fought the Turks and died on [Good Friday](entity:time-recall-time-33baa90f237c).
## Meaning of Constantine’s Accession
Constantine’s succession supplies England with a noble and honorable king, yet the closing movement refuses to equate political continuity with the survival of Arthur’s world. The bishop resumes his office and the kingdom has a ruler, while [Bedivere](entity:character-recall-character-bedivere-2d8fd88b781e) chooses lifelong religious retreat and the other named knights disperse. The [Round Table](entity:object-recall-object-round-table-04fef19b82fd), once described as numbering one hundred and forty when its members were together, is no longer a living company. Constantine inherits the realm, but not the fellowship whose loss gives the succession its final, elegiac force.
Event 160
Bors and Three Other Knights Travel to the Holy Land
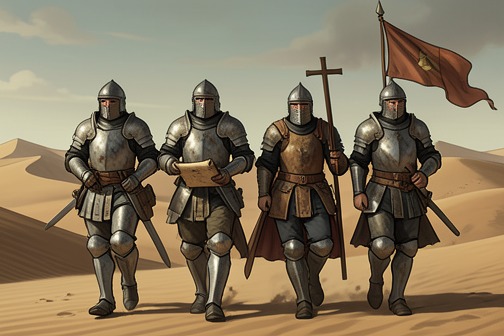
The journey of [Sir Bors](entity:character-recall-character-sir-bors-eb41f6b6a451), [Sir Ector](entity:character-recall-character-sir-ector-1a6b9e06011a), Sir Blamor, and [Sir Bleoberis](entity:character-recall-character-sir-bleoberis-4991a2970156) to the Holy Land is the final outward movement of four surviving knights after the collapse of [King Arthur](entity:character-recall-character-king-arthur-2b97864f54aa)’s fellowship. [Launcelot](entity:character-recall-character-launcelot-0b02a99ce6f7) had commanded them to go before his death; after his burial, they establish their lands, depart for the place where [Jesus Christ](entity:character-recall-character-jesus-christ-1861cf215964) lived and died, fight the Turks, and die on [Good Friday](entity:time-recall-time-33baa90f237c). The episode turns the [Round Table](entity:object-recall-object-round-table-04fef19b82fd)’s remnant from the world of Arthurian arms toward a final, explicitly Christian destination.
## Launcelot’s Last Command
The journey is linked directly to Launcelot’s death. Malory reports that Launcelot had ordered the four knights to go to the Holy Land before he passed out of the world. Their departure is therefore not simply a later expedition: it carries out the instruction of their dead companion and gives his final authority a continuing effect beyond the fellowship’s dissolution.
The knights first establish their lands, then set out for the Holy Land, described as the place where Jesus Christ was both living and dead. The sequence gives their departure a practical as well as devotional character: they make arrangements for their worldly holdings before leaving the realm. Malory offers no further account of how those arrangements were made or of the journey itself.
## The Journey and Its End
The account of the pilgrimage is compressed into a few decisive facts. Sir Bors, Sir Ector, Sir Blamor, and Sir Bleoberis go to the Holy Land and fight many battles against the Turks. Their martial activity thus continues, but its setting and stated religious purpose distinguish this final campaign from the adventures of the Round Table in [Britain](entity:location-recall-location-01048caf1f48).
All four die there on Good Friday, for God’s sake. The date and cause of their deaths bring the episode to a firm close: the last expedition ends not in a return to [Arthur](entity:character-recall-character-arthur-2e33b65bbe57)’s realm, but in the deaths of its participants in the Holy Land. Malory does not describe the battles individually or identify a particular encounter as the cause of their deaths.
## Place in the Ending of the Book
Malory sets this account amid conflicting reports about what happened to the knights after Launcelot’s death. Some English books, he says, claim that they never left [England](entity:location-recall-location-england-b153c1f368ea); he rejects that version as the favour of makers and treats the French book as authoritative for their pilgrimage. The brief contrast makes the journey part of the book’s closing effort to distinguish competing traditions about the survivors’ fate.
The episode also completes the wider ending’s movement away from the once-united Round Table. The knights do not remain with King [Constantine](entity:character-recall-character-constantine-fc56b501aa73), who would have kept them at his court, but depart for their own countries before undertaking the pilgrimage. Their final destination and deaths on Good Friday give the surviving fellowship a religious close, while the book itself concludes with the end of Arthur and his noble knights.