the opening, in November
A Secluded Household
Modde Ruxin, 17 years old, lives with her elderly father, Austin Ruxin, at Nor House. Her father's loneliness and austerity shape the household. Modde deeply loves him, but she also respects him greatly and is afraid to speak freely. Dr. Blairly
early in Maud’s account, before the governess arrives
The Cabinet Key
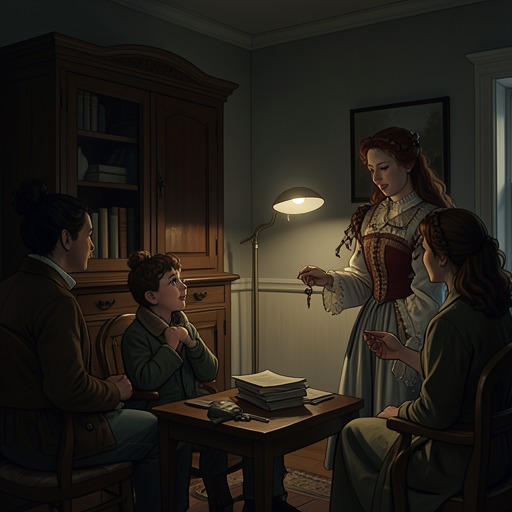
Austin took Mod to the walnut cabinet in the study and had her remember the peculiar key. He told her to keep it a secret, but if Dr. visited when he was not there, she must give him the key. Austin's unusual insistence suggested that there was an important document inside
some years before the main crisis
Silas in the Portrait
Mod was fascinated by her uncle Silas Rusk. The striking portrait of Norland was at the center of this fascination. Austin said Silas was talented but had flaws and had been wronged, and hinted that Mod would one day understand how others had hurt him. The portrait and Austin's subtle
shortly after Austin gives Maud the key
Madame Arrives at Knowl
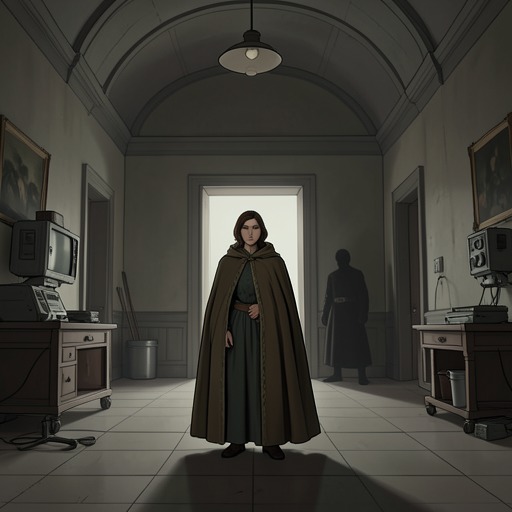
Madame de La Rugie came to Norland to be Miss Mod's governess. She was imposing, affected in her manner, and her moods were capricious, which frightened Miss Mod; yet she appeared pious and was quite respectable in front of the local clergy. Madame de La
during Madame’s first months at Knowl
The Church Scarsdale Excursion
Madame de la Ruyer took Mod to the remote site of the Scarsdale church, teasing her fears of death and ghosts. She sharply questioned Austin's condition and will; Mod refused to reveal what she knew, and she wounded Mod's fingers. Mod's hesitation and Madame de la R
during the Church Scarsdale excursion
Madame Meets Dud
Mod waited outside the church cemetery when Madame de la Ruyer secretly met with Dudley. Dudley wanted to see Mod, still hesitating whether he wanted to marry. Madame de la Ruyer urged him to look at this girl, describing her appearance as if arranging a deal. Mod did not hear
some time after the Church Scarsdale encounter
The Warren Attack
Madame de la Ruyer met with Mod in the wild rabbit forest of Nor House. Three men came towards them. One of them subdued Mod, and the others tried to drag them both into a waiting carriage. Mod's scream attracted the gamekeeper; after beating one of them senseless
during Lady Knollys’s first visit to Knowl
Lady Knollys Recognizes Madame
Monica Norris, the aunt of Austin, came to Norland with her nephew, [Captain Oakley](entity:character-recall-character-captain-oakley-32cea8fbb3dd). She soon became close to Mod, and noticed that she was afraid of Madame de La Rugie. When she discovered that the governess was hiding under the bedclothes pretending to be sick
the night before Monica leaves Knowl
A Warning Against Madame
After Monica and Austin argued with Madame de La Ruyere, she told Mod that the family teacher might be her enemy. She advised Mod to keep secrets and stay alert, but Austin rejected Monica's suspicions and refused to dismiss Madame de La Ruyere. Mod therefore felt both afraid and isolated
weeks after Monica’s departure
The Desk Intrusion
Mo De woke up in Austin's study and saw Madame de la Rugie sneaking in with a fake key to open his locked desk and checking his documents. She was too scared to stop her, and only told her father what she had seen in the morning. Austin asked Madame de la Rugie
immediately after Madame is dismissed
Madame’s Threat at Departure
Before leaving Norland, Lady de la Rugie found Mod in the garden alone and accused her of having caused her to be fired. She threatened that she would never forget Mod wherever she went, and hinted that someday she would take revenge for the supposed injuries she had suffered
after Madame’s dismissal
Austin Reveals the Family Ordeal
Austin told Maud that Silas's reputation is still seriously tarnished, and he hoped Maud would help restore the family's honor. He said a trial was coming, which might require courage, but he would not reveal the details, and asked Maud not to mention it to Monica. M
a few days after Bryerly’s return to Knowl
Austin’s Sudden Death
After a normal night, Austin suddenly collapsed and died from a ruptured aortic aneurysm when he reached for a book. Mod heard the sound of falling and the servant's exclamation, but only entered the house when they forced open the door
within days of Austin’s death
Bryerly Opens the Cabinet
A few days after Austin's death, Dr. Blair came at night to Norland Manor to visit Austin's body; the next day, he asked Moders for the key to the oak cabinet. He explained that Austin had left the will in the cabinet, and then called upon the parish priest
immediately after the will is read
The Guardianship Dispute
Monica and Dr. Blair warned Maud that leaving her to be cared for by Silas might put her in danger; if she dies before reaching adulthood, it might also reignite suspicions. They proposed to seek a change in the arrangement, with Monica as the guardian
the day after Bryerly visits Bartram-Haugh
Silas Refuses to Relinquish Maud
Bryerly reports that Silas refuses to give up the guardianship, arguing that abandoning it would look like a confession of unworthiness. Monica remains opposed, but Maud accepts that Silas has made his decision and prepares to leave [Knowl](entity:location-recall-location-knowl-6f6d14e71d42).
The response confirms that Maud’s stay at Bartram will go ahead despite the warnings. Her belief that the arrangement can redeem Silas’s reputation becomes a moral commitment as well as a legal fact.
on the eve of Maud’s departure from Knowl
The Story of Tom Charke
Monica recounts the scandal that ruined Silas’s standing: the gambler [Tom Charke](entity:character-recall-character-tom-charke-d53b2e32c3a8) was found with his throat cut in a locked room at [Bartram-Haugh](entity:location-recall-location-bartram-haugh-a068d44589d8) after spending the night playing cards with Silas. The initial inquiry treated the death as suicide, but later letters alleged that Silas owed Charke a large gambling debt and had taken his money.
Silas answered the accusations with a forceful public defense, but the county ostracized him. Monica cannot decide what to believe about his character, leaving Maud more determined than ever to see him vindicated.
the following morning
Maud Leaves Knowl
Maud leaves [Knowl](entity:location-recall-location-knowl-6f6d14e71d42) by carriage with [Mary Quince](entity:character-recall-character-mary-quince-d2677b118752) and travels across the countryside toward [Derbyshire](entity:location-recall-location-derbyshire-0e05d3d43c13). The journey gives her a last view of the family mausoleum and, after a final look back at the house, releases the grief she had held in during her farewells.
At a gypsy camp, Maud buys a brass pin said to protect its wearer from harm. The small talisman reflects her fear and eagerness for reassurance as she approaches the unknown household of her guardian.
the evening of the journey
Arrival at Bartram-Haugh
Maud reaches the neglected but grand [Bartram-Haugh](entity:location-recall-location-bartram-haugh-a068d44589d8) after a long mountain crossing. Her cousin Millicent welcomes her boisterously, while the shabby servants and sparse furnishing make the great house feel both imposing and deserted.
Silas receives Maud with polished courtesy and speaks of liberty, exercise, and religious devotion. His spectral appearance and the contrast between his refinement and Milly’s neglected upbringing leave Maud fascinated but uncertain.
the first days at Bartram-Haugh
Milly and the Windmill Wood
Maud and Milly explore the neglected grounds and meet [Meg Hawkes](entity:character-recall-character-meg-hawkes-c85968844f83), who refuses them passage through a locked gate in the [Windmill Wood](entity:location-recall-location-windmill-wood-38d0deb53e71). Milly wants to force the way, but Maud persuades her to take another route.
The encounter reveals that the estate’s workers enforce restrictions even against the landlord’s family. Maud begins to see that the freedom Silas praises is more theory than practice.
during Maud’s first weeks at Bartram-Haugh
The Room of Charke’s Death
While exploring an upper passage, Maud and Milly find a neglected chamber looking onto an enclosed courtyard. Maud recognizes the stripped panelling and believes this is where [Tom Charke](entity:character-recall-character-tom-charke-d53b2e32c3a8) died; Milly imagines the blood still on the floor.
Old [Wyat](entity:character-recall-character-wyat-b5e6130fa1a4) arrives angrily and orders them out, denying that the room is Charke’s. Her urgency makes the room feel less like an abandoned relic than a secret the household still guards.
during the winter at Bartram-Haugh
Milly’s Turquoise Ring
After a quarrel with Maud, Milly returns in tears, apologizes, and offers her a small [turquoise ring](entity:object-recall-object-cb25495571a0). Maud puts it on, and the gesture restores their friendship.
The ring becomes a lasting keepsake of the companionship that makes Bartram bearable. Their bond also gives Maud a first responsibility beyond her own survival: helping Milly gain the education and confidence her father has neglected to provide.
a few months into Maud’s stay
A Midnight Visitor
Maud sees a carriage arrive at [Bartram-Haugh](entity:location-recall-location-bartram-haugh-a068d44589d8) after two in the morning and notices a cloaked visitor enter the house. Milly and [Wyat](entity:character-recall-character-wyat-b5e6130fa1a4) deny that anyone has come, and Silas later rebukes Milly for speaking of the carriage.
The unexplained arrival deepens the sense that the household conducts secret business at night. Maud cannot identify the visitor, but the incident foreshadows Dudley’s concealed movements and the conspiracy against her.
during the winter after the late-night carriage
Silas’s Opium Crisis
Silas suffers a prolonged collapse that the household calls one of his spells. A doctor says he has taken too much opium and orders Maud and Milly to keep watch while he lies almost corpse-like in bed.
During Maud’s vigil, Silas unexpectedly rises and silently watches her from behind before quoting a biblical phrase. The eerie awakening strengthens her fear of his strange states and blurs the boundary between illness, performance, and supernatural dread.
after Silas’s opium crisis
Maud Cares for Meg
Maud and Milly find Meg gravely ill and poorly cared for. Maud arranges for a nurse and comforts the girl, despite Meg’s father, [Dickon Hawkes](entity:character-recall-character-dickon-hawkes-7779006eef38), showing little concern for her suffering.
When Meg recovers, she tells Maud that she rejected their earlier kindness but now feels devoted to her. The gratitude establishes a bond that later turns Meg into Maud’s most courageous ally.
during Monica’s visit to Bartram-Haugh
Monica and Silas Make a Truce
Monica visits [Bartram-Haugh](entity:location-recall-location-bartram-haugh-a068d44589d8) and meets Silas after a long estrangement. Their conversation exposes old grievances, including Silas’s anger that Monica and society abandoned him, and Monica’s suspicion that he may again pursue litigation against her.
They agree to a truce, though their barbed exchanges show that the reconciliation is fragile. Monica sees the neglected state of Bartram and privately renews her concern for Maud and Milly.
during the winter visit to Elverston
The Timber Dispute
At [Elverston](entity:location-recall-location-elverston-b4b7a1770ca5), Monica tells Maud and Milly that Silas has been cutting timber and burning charcoal in the [Windmill Wood](entity:location-recall-location-windmill-wood-38d0deb53e71). She says [Doctor Bryerly](entity:character-recall-character-doctor-bryerly-6a1c60003118) is investigating whether these acts constitute waste of the estate.
The news gives substance to Bryerly’s concern about Silas’s use of Maud’s property. Maud resists accusing her uncle, while the damaged woodland becomes another visible sign of his financial desperation and disregard for the trust.
after Maud and Milly return from Elverston
Dudley Returns
[Dudley Ruthyn](entity:character-recall-character-dudley-ruthyn-482943504918) comes back to [Bartram-Haugh](entity:location-recall-location-bartram-haugh-a068d44589d8) and is introduced to Maud as her cousin. She recognizes him as one of the men who accosted her at [Church Scarsdale](entity:location-recall-location-church-scarsdale-a5b03cb586ef) and the [Knowl](entity:location-recall-location-knowl-6f6d14e71d42) warren, but he confidently denies ever having seen her.
Silas insists that Dudley is truthful and admirable, forcing Maud to doubt her memory. The encounter makes the threat feel personal: the young man who has already helped endanger her is now inside the household.
during Maud and Milly’s visit to Elverston
Dudley Attacks Oakley
[Captain Oakley](entity:character-recall-character-captain-oakley-32cea8fbb3dd) visits Bartram’s grounds and speaks with Maud. Dudley confronts him, accuses him of pursuing Maud, and beats him severely when Oakley strikes first with his riding switch.
The brutal fight destroys Maud’s remaining romantic ideal of Oakley and confirms Dudley’s physical danger. It also reveals that Silas is willing to let his son use violence to police Maud’s relationships.
shortly after the fight
Bryerly Confronts Silas
[Doctor Bryerly](entity:character-recall-character-doctor-bryerly-6a1c60003118) returns to [Bartram-Haugh](entity:location-recall-location-bartram-haugh-a068d44589d8) and confronts Silas about cutting and selling timber from Maud’s estate. Silas rejects the accusation, bars Bryerly from the house, and claims the right to manage the property as its tenant.
Bryerly offers Maud help, but Silas prevents them from speaking privately. The dismissal removes her most active protector and leaves Silas with greater control over her information and movements.
within a week of Bryerly’s dismissal
Silas Bars Elverston
Silas questions Maud about Monica’s criticism of him and learns that Monica has spoken disparagingly in her presence. He writes to refuse an invitation for Maud and Milly to visit [Elverston](entity:location-recall-location-elverston-b4b7a1770ca5), accusing Monica of undermining his authority.
Maud grieves over the new isolation and appeals to Monica to reconcile with Silas. The refusal turns Bartram’s seclusion into a deliberate instrument of control rather than an accidental feature of country life.
after the Elverston visit
Dudley Proposes to Maud
Dudley corners Maud and proposes marriage, presenting himself as devoted despite his debts and coarse conduct. Maud rejects him angrily and tells Silas that the proposal was an insult.
Silas treats the matter as a romantic misunderstanding and asks Maud to reconsider for two weeks. His response turns her refusal into a sustained ordeal, as he uses her compassion and his apparent frailty to wear down her resistance.
during Maud’s vigil after Dudley’s departure
Madame Appears at Silas’s Bedside
While Maud and Milly sit near Silas during another illness, Maud sees what she believes is Madame’s face watching from the doorway. The apparition vanishes, leaving Maud in terror and convinced that the room is haunted.
A doctor dismisses the experience as hysteria, but the sight intensifies Maud’s fear of Madame and the uncanny atmosphere of Bartram. The novel keeps open whether the vision arose from exhaustion or from the hidden presence of danger.
after Silas’s campaign for Dudley’s marriage fails
Milly Is Sent to France
Silas announces that Milly will be sent to a French boarding school, promising Maud that they will reunite within three months. Maud and Milly grieve over the separation but take comfort in the promise that Maud may soon join her.
Milly’s departure deprives Maud of her closest companion and leaves her more exposed to Silas’s household. It also prepares the way for Silas to move Maud without the protection of a peer in age or affection.
after Milly leaves Bartram-Haugh
Sarah Matilda Reveals Her Marriage
[Sarah Matilda Mangles](entity:character-recall-character-sarah-matilda-mangl-883f8b887fef) arrives at [Bartram-Haugh](entity:location-recall-location-bartram-haugh-a068d44589d8) with a newspaper notice proving that she is Dudley’s wife. Dudley admits the marriage, which had been concealed from Silas and from Maud.
Silas is furious and drives the newlyweds from the house. Maud feels relieved that Dudley’s proposal is no longer a prospect, while Silas loses the last hope he had attached to his son as heir and source of family vindication.
the night after Sarah Matilda’s arrival
Maud Offers Silas Money
Seeing Silas devastated by Dudley’s departure, Maud offers him twenty thousand pounds to relieve his debts. Silas refuses, claiming that accepting the money would expose him to accusations of exploiting his young ward.
His refusal deepens Maud’s admiration for his apparent self-denial. In reality, his financial crisis becomes the pretext for the increasingly urgent plans to isolate and remove her.
the following day
Dudley Offers an Escape
Dudley tells Maud that he is leaving England with Sarah Matilda and offers to take her out of Bartram in exchange for a written promise of twenty thousand pounds. Maud refuses, recognizing the proposal as another attempt to profit from her fortune.
She immediately tells Silas what Dudley has said, fearing he may distort the encounter. Silas presents himself as relieved by her honesty and says he intends to send her to Monica, but the exchange leaves Maud with an uneasy sense of hidden purpose.
several days later
Madame Returns to Bartram
While exploring the disused upper rooms, Maud unexpectedly finds [Madame de la Rougierre](entity:character-recall-character-madame-de-la-rougie-263247bd6a76) hiding in a remote chamber. Madame claims that Silas has arranged for her to accompany Maud to [France](entity:location-recall-location-france-f5cafc8a8ad4) and insists that her earlier burglary was motivated by concern for Maud.
Maud confronts her and reports the discovery to Silas, but he dismisses the accusation and orders Madame to resume teaching her. The betrayal confirms that Madame has regained access to Maud and that Silas will protect her rather than his ward.
during the days after Madame’s return
The Locked Estate
Maud and [Mary Quince](entity:character-recall-character-mary-quince-d2677b118752) find the estate gate locked and are refused permission to leave without Silas’s order. In the [Windmill Wood](entity:location-recall-location-windmill-wood-38d0deb53e71) they discover [Dickon Hawkes](entity:character-recall-character-dickon-hawkes-7779006eef38) concealed in the windmill, and Maud recognizes a foot as Dudley’s before he can be seen.
Meg secretly confirms that Dudley never sailed on the [Seamew](entity:object-recall-object-b196ef25bbe9) and has been meeting her father. She believes the men are planning something against Maud and warns that the estate’s gates and dogs make escape impossible without help.
the day after discovering Dudley’s return
Maud Writes for Help
Meg arranges for Maud to meet [Tom Brice](entity:character-recall-character-tom-brice-6ba316c59332) at [Chestnut Hollow](entity:location-recall-location-chestnut-hollow-835e8dbabeae). Maud gives him money and a sealed appeal to Monica, begging for rescue and revealing her fear that Dudley has returned and that Madame is again in the house.
Tom hesitates, worried that Silas will discover the letter, but accepts it. Maud returns to Bartram with no certainty that her appeal will reach Monica, while the plotters remain unaware—at least for the moment—of the attempt.
later that day
The Appeal Is Intercepted
Madame brings Maud a cheerful letter from Monica announcing that she hopes to visit Bartram soon and that Silas may place Maud in her care. The letter briefly restores Maud’s hope, but Silas later discovers Maud’s own appeal and confronts her with it.
He accuses her of hypocrisy and bribing a servant, then leaves her distressed and physically overwhelmed. The intercepted letter gives Silas proof that Maud has sought help and allows him to tighten his control before Monica can reach her.
the Sunday after Silas finds the appeal
Monica’s Visit Is Thwarted
Monica arrives at Bartram with [Lord Ilbury](entity:character-recall-character-lord-ilbury-742db53f449e) and [Lady Mary Carysbroke](entity:character-recall-character-lady-mary-carysbrok-234d2f5343dc), hoping to see Maud. Silas falsely tells her that Maud has gone driving to [Elverston](entity:location-recall-location-elverston-b4b7a1770ca5), while Madame keeps Maud locked in her room and conceals the visitors from her.
Maud recognizes Monica’s carriage and screams from the window, but Madame restrains her until it has driven away. The failed rescue confirms that Silas and Madame are coordinating their deception and that Maud cannot rely on ordinary permission to reach her cousin.
several days after Monica’s visit
The Journey to Dover
Madame tells Maud that Silas’s financial affairs have reached a crisis and that she must leave for [France](entity:location-recall-location-france-f5cafc8a8ad4) at once. Silas dictates a letter to Monica describing Maud’s departure and insists that she conceal her destination and suspend correspondence.
Maud leaves [Mary Quince](entity:character-recall-character-mary-quince-d2677b118752) behind, believing she is bound for France and Milly. The abrupt separation from her faithful maid and the tight control over communication make the journey feel less like travel than the beginning of confinement.
the night of the supposed crossing
The False Dover Hotel
After a tiring train journey, Maud sleeps in the carriage and wakes at a deserted building Madame calls a hotel. She discovers that the room looks onto the enclosed courtyard at [Bartram-Haugh](entity:location-recall-location-bartram-haugh-a068d44589d8) and realizes she has been brought back to the estate instead of to [Dover](entity:location-recall-location-dover-bee6bc10504b).
Madame laughs at Maud’s shock, locks her in, and claims that circumstances changed Silas’s plans. The deception transforms Bartram from a lonely home into a prison whose barred windows and hidden passages suggest a planned attack.
the morning after Maud is returned to Bartram
Meg’s Final Warning
Meg slips into Maud’s locked room and warns her not to eat or drink anything there, offering coarse bread and clean water instead. She says Dudley and Dickon are planning to make away with Maud and promises to seek help from Monica after dark.
Meg tells Maud not to attempt escape alone, because the gates are guarded and the danger is immediate. Her warning clarifies the conspiracy while leaving Maud trapped, exhausted, and dependent on a rescue that may not come in time.
later that day
Madame’s Bargain Fails
Madame asks whether Maud would reward someone who risked herself to take her to Monica. Maud turns the question back on her, asking whether she is implying that Silas cannot be trusted and whether she intends to help her escape.
Before Madame answers plainly, a letter from Silas orders her to take the half-past-eight train to [Dover](entity:location-recall-location-dover-bee6bc10504b). The underlined destination alarms Maud, and Madame’s response makes clear that the journey has been shaped by a secret plan she does not fully control.
late that night
The Murder in Maud’s Room
Maud is left in a room in the upper part of Bartram while Madame drinks spiced claret and falls asleep. In the dark, Dudley enters through a concealed window, carrying a modified hammer, and attacks Madame in her bed.
Silas joins Dudley after the killing and urges him to remove the body and leave with the luggage. Their exchange reveals that the murder is part of a plot tied to Maud’s disappearance and that Silas is not merely a negligent guardian but an accomplice.
minutes after the murder
Maud Escapes with Tom
As Dudley and Silas begin moving Madame’s luggage, Maud slips from the room and navigates the dark galleries. She encounters Dickon returning with a lantern, then reaches an open exterior door where [Tom Brice](entity:character-recall-character-tom-brice-6ba316c59332) is waiting to drive the conspirators away.
Tom recognizes Maud, changes sides, and places her in the carriage, telling her that the men will not hurt her. His unexpected decision turns Meg’s dangerous plan into a real escape and carries Maud beyond Bartram’s walls.
during the flight toward Elverston
Meg Joins the Escape
On the road to [Elverston](entity:location-recall-location-elverston-b4b7a1770ca5), Tom hears Meg calling and stops the carriage. Meg climbs in with a broken arm, having escaped after Dickon struck and locked her up for trying to reach Monica.
Maud’s rescue now depends on the loyalty of the two young people who have risked themselves for her. Together they continue toward Elverston, while Tom watches for pursuit and Maud prays that they will reach safety.
the same night
Rescue at Elverston
Tom drives Maud and Meg to [Elverston](entity:location-recall-location-elverston-b4b7a1770ca5), where Maud reaches Monica and collapses into her arms. The household shelters them, and Maud is finally separated from the conspirators who controlled her at Bartram.
Monica’s arrival had been deliberately delayed by Silas’s lies, but the appeal and Meg’s courage ultimately bring her to safety. The escape ends the immediate threat while leaving the murder and the fate of the conspirators unresolved.
the morning after Maud’s escape
Silas Dies
Silas is found dead at [Bartram-Haugh](entity:location-recall-location-bartram-haugh-a068d44589d8), apparently after taking an excessive dose of laudanum. The household reports that he had expected to leave with Dudley, but his death prevents him from facing the consequences of the plot.
Whether his death was deliberate or accidental remains uncertain. His outward religious language and his final criminal choices leave Maud unable to determine how much of his faith had ever been sincere.
about a year after the murder
The Hidden Body Is Found
After Dickon is arrested for an earlier crime, he discloses where Madame’s body was buried. Investigators uncover her remains in the inner courtyard at [Bartram-Haugh](entity:location-recall-location-bartram-haugh-a068d44589d8), confirming the murder that Maud witnessed.
Maud is spared the witness-box and the need to expose her own escape in public. The discovery nevertheless makes the violence at Bartram an established crime rather than a private nightmare.
after Maud has reached safety
Charke’s Murder Is Explained
[Doctor Bryerly](entity:character-recall-character-doctor-bryerly-6a1c60003118) examines the room in which [Tom Charke](entity:character-recall-character-tom-charke-d53b2e32c3a8) died and discovers that its window had concealed hinges. The secret opening could have allowed someone to enter or leave while the door and window appeared secured from within.
The discovery solves the locked-room puzzle that had fueled the scandal against Silas. It does not undo his later crimes, but it shows that the old accusation had rested on a genuine mystery rather than conclusive proof of guilt.
the months and years after the escape
Aftermath and New Lives
Maud helps Milly and her husband build a new life, supports Meg and Tom as they emigrate, and later entrusts the [Derbyshire](entity:location-recall-location-derbyshire-0e05d3d43c13) estates to [Doctor Bryerly](entity:character-recall-character-doctor-bryerly-6a1c60003118). She marries [Lord Ilbury](entity:character-recall-character-lord-ilbury-742db53f449e) and becomes a mother, though memories of Bartram remain painful.
Dudley is reported to have surfaced under another name in Australia, while Dickon’s eventual confession brings the hidden murder into the open. Maud’s closing reflection joins survival to grief, gratitude, and the hope that earthly suffering may carry spiritual meaning.